

Learn how to increase virtual memory

When the Linux disk is first partitioned, we will divide it into a swap partition. This partition serves as a piece of virtual memory and is responsible for expanding memory. However, at work, we will encounter situations where the virtual memory is not enough. At this time, we cannot re-partition the disk. We can only expand our virtual memory by adding a swap file. The following editor will bring you a tutorial on how to expand virtual memory. Let’s go and see it together!


1. Check the size of existing swap space
If you want to check the size of your existing virtual memory, you can use the command ‘free -m’
[root@chenfancentos ~]# free -m
total used free shared buffers cached
Mem: 988 164 823 0 26 48
-/ buffers/cache: 90 898
Swap: 1999 0 1999
Choose the appropriate expansion size based on the size of the existing swap space.
2. Create a suitable swapfile
We can often use the "dd" command to create a file, and use "if" to specify the source. Basically, we will not write anything else except "/dev/zero", and /dev/zero is unique to UNIX systems. of a file. "of" specifies the target file, "bs" defines the block size, and "count" defines the number of blocks. The size of these two parameters determines the size of the target file.
[root@chenfancentos ~]# dd if=/dev/zero of=/tmp/swapfile bs=300M count=1
Recorded the reading of 1 0
Recorded the writing of 1 0
314572800 bytes (315 MB) copied, 13.9027 seconds, 22.6 MB/second
[root@chenfancentos ~]# du -h /tmp/swapfile
300M /tmp/swapfile
You can see that a newly generated swapfile file is 300M in size.
3. Format the swapfile just created
[root@chenfancentos ~]# mkswap -f /tmp/swapfile
Setting up swapspace version 1, size = 307196 KiB
no label, UUID=c4e2a8b1-fa09-41ab-bcbf-63c273ed9598
You can see the UUID information after formatting
4. Implement automatic mounting of swap files at boot
We add the entry /tmp/swapfile swap swap defaults 0 0 to /etc/fstab to achieve automatic mounting at boot.
[root@chenfancentos ~]# cat /etc/fstab
# /etc/fstab
# Created by anaconda on Sat Apr 2 19:37:01 2016
## Accessible filesystems, by reference, are maintained under '/dev/disk'
# See man pages fstab(5), findfs(8), mount(8) and/or blkid(8) for more info
#UUID=301b2f9f-91d3-47dd-8a43-d377cba1cd5c / ext4 defaults 1 1
UUID=812455f9-a63f-4b09-9336-05e3ada6f9a7 /boot ext4 defaults 1 2
UUID=416480d0-662c-406c-a328-b4c2f370577b swap swap defaults 0 0
tmpfs /dev/shm tmpfs defaults 0 0
devpts /dev/pts devpts gid=5,mode=620 0 0
sysfs /sys sysfs defaults 0 0
proc /proc proc defaults 0 0
/tmp/swapfile swap swap defaults 0 0
In this way, even if it is restarted later, it can be automatically mounted.
5. Enable swapfile and check the virtual memory size
[root@chenfancentos ~]# swapon /tmp/swapfile
[root@chenfancentos ~]# free -m
total used free shared buffers cached
Mem: 988 136 852 0 10 50
-/ buffers/cache: 74 913
Swap: 2299 0 2299
You can be excited to see that compared to the initial virtual memory, it has now increased by 300M. Isn't it a little exciting?
The above is the detailed content of Learn how to increase virtual memory. For more information, please follow other related articles on the PHP Chinese website!

Hot AI Tools

Undresser.AI Undress
AI-powered app for creating realistic nude photos

AI Clothes Remover
Online AI tool for removing clothes from photos.

Undress AI Tool
Undress images for free

Clothoff.io
AI clothes remover

Video Face Swap
Swap faces in any video effortlessly with our completely free AI face swap tool!

Hot Article
Hot Tools

Notepad++7.3.1
Easy-to-use and free code editor

SublimeText3 Chinese version
Chinese version, very easy to use

Zend Studio 13.0.1
Powerful PHP integrated development environment

Dreamweaver CS6
Visual web development tools

SublimeText3 Mac version
God-level code editing software (SublimeText3)
Hot Topics
 1392
1392
 52
52

 How to adjust virtual memory in win11 system? Win11 system virtual memory setting guide
Jan 29, 2024 pm 06:45 PM
How to adjust virtual memory in win11 system? Win11 system virtual memory setting guide
Jan 29, 2024 pm 06:45 PM
Virtual memory is a technology that can make up for the lack of software memory and provide a better user experience. However, some users may not know how to set virtual memory after upgrading to Windows 11 system. In order to solve this problem, the editor of this site provides you with the latest setting method. If you need to know the complete steps, please visit this site for details. How to set virtual memory in win11 1. First, press the win button on the keyboard, click to find and enter the setting page. 3. Then, find the advanced system setting options in the relevant links. 5. In the page after the jump, find the virtual memory and click the change button.
 An effective method to solve the problem of insufficient virtual memory in Red Dead Redemption 2 in Windows 10
Dec 31, 2023 pm 04:29 PM
An effective method to solve the problem of insufficient virtual memory in Red Dead Redemption 2 in Windows 10
Dec 31, 2023 pm 04:29 PM
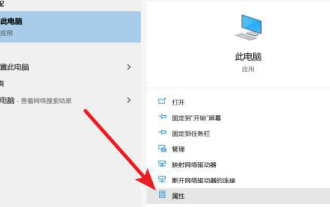
The biggest problem that many friends encounter when playing Red Dead Redemption 2 is the prompt that virtual memory is insufficient. So how to solve this problem? Today I have brought you a solution to take a look at. What to do if there is insufficient virtual memory in Red Dead Redemption 2 on Windows 10: 1. Right-click this computer and click "Properties". 2. Click "Advanced System Settings" on the left. 3. Then click "Advanced" and then "Settings". 4. Click "Advanced" in Performance and select "Change" under Virtual Memory. 5. Cancel the √ in front of "Automatically manage paging file size for all drives", click "Custom size", enter the value, and click Set.
 What is the appropriate virtual memory setting?
Feb 23, 2024 pm 03:34 PM
What is the appropriate virtual memory setting?
Feb 23, 2024 pm 03:34 PM
Depends on the size of physical memory. Specific suggestions: 1. According to Microsoft’s recommendations, virtual memory should be set to 1.5-3 times the physical memory capacity; 2. If the physical memory is 2G, the virtual memory should be set to 3G=3072MB; if the physical memory is 4G, then the virtual memory The memory should be set to 6G=6144MB; 3. It is usually recommended to set the virtual memory to 1.5 to 2 times the total computer memory; 4. It is generally similar to the physical memory.
 From start to finish: How to use php extension cURL to make HTTP requests
Jul 29, 2023 pm 05:07 PM
From start to finish: How to use php extension cURL to make HTTP requests
Jul 29, 2023 pm 05:07 PM
From start to finish: How to use php extension cURL for HTTP requests Introduction: In web development, it is often necessary to communicate with third-party APIs or other remote servers. Using cURL to make HTTP requests is a common and powerful way. This article will introduce how to use PHP to extend cURL to perform HTTP requests, and provide some practical code examples. 1. Preparation First, make sure that php has the cURL extension installed. You can execute php-m|grepcurl on the command line to check
 Virtual memory allocation: Is 16g a suitable setting?
Feb 19, 2024 pm 07:42 PM
Virtual memory allocation: Is 16g a suitable setting?
Feb 19, 2024 pm 07:42 PM
What is the appropriate setting for 16G virtual memory? Virtual memory is a technology in computer systems that can improve the operating efficiency of the system by using part of the hard disk space as an expansion of memory. For the operating system, virtual memory is a very important resource. It can be used to store temporarily unnecessary data, thereby freeing up physical memory for use by other programs. So, for a computer with 16G of physical memory, how to set the size of virtual memory? The size of virtual memory is automatically managed by the operating system, but we can also manually
 Extensions and third-party modules for PHP functions
Apr 13, 2024 pm 02:12 PM
Extensions and third-party modules for PHP functions
Apr 13, 2024 pm 02:12 PM
To extend PHP function functionality, you can use extensions and third-party modules. Extensions provide additional functions and classes that can be installed and enabled through the pecl package manager. Third-party modules provide specific functionality and can be installed through the Composer package manager. Practical examples include using extensions to parse complex JSON data and using modules to validate data.
 What are the appropriate Win10 virtual memory settings?
Jan 15, 2024 am 08:03 AM
What are the appropriate Win10 virtual memory settings?
Jan 15, 2024 am 08:03 AM
In fact, the so-called virtual memory is actually a large special area carved out for it on the hard disk, which is used by the Windows system as memory. How can you set the ideal virtual memory size? What is the appropriate virtual memory setting for win10? Answer: The most appropriate virtual memory setting for win10 is 1.5 times the physical memory. This is only a reference value. The specific setting method depends on the actual situation. The minimum setting range is 1-1.5 times the physical memory, and the maximum is no more than 2-2.5 times the physical memory. For the specific setting method, click the link on the right to view details. content. (Win10 virtual memory setting method) Which drive is best to set win10 virtual memory on? Answer: Win10 virtual memory is best set on C drive. because
 How to optimize Win11 virtual memory settings? The best way to configure virtual memory in Win11
Jan 30, 2024 pm 05:54 PM
How to optimize Win11 virtual memory settings? The best way to configure virtual memory in Win11
Jan 30, 2024 pm 05:54 PM
If you are often troubled by insufficient system memory, you can try to solve the problem by setting up virtual memory. Virtual memory can alleviate computer lagging to a certain extent. However, for users who are not familiar with the Win11 system, it may not be clear how to set up virtual memory. Below I will share with you how to set up virtual memory in Win11 system. What is the appropriate virtual memory setting for win11? 1. If the computer memory is less than 4GB, you can usually set the virtual memory between 2-4GB. According to theory, virtual memory can be set to 1.5 times the physical memory, but in actual use it can be flexibly adjusted as needed, and there is no fixed numerical requirement. You can even set virtual memory to match physical memory
