Share 2 simple ways to downgrade iPadOS 16!
If your iPad wants to downgrade back to the more stable iPadOS15/16 official version after upgrading to the iPadOS16 beta version or the latest official version, you can try the following two methods to downgrade.

Method 1: Use Finder or iTunes to downgrade iPadOS16
You can choose to download the iPadOS15/16 system firmware package (.ipsw format) in advance, or use Mac after entering recovery mode Finder on Windows or iTunes on Windows automatically downloads the firmware package.
Depending on different devices, you can choose the following methods to enter recovery mode:
- iPad models with Face ID: Press the Volume Up button and quickly release it. Press and release the volume down button quickly. Press and hold the top button until the device starts to reboot. Continue to hold the top button until the device enters recovery mode.
- iPad, iPhone 6s or earlier, and iPod touch (6th generation) or earlier with Home button: Press and hold the Home button and the top (or side) button at the same time. Keep holding both buttons until you see the recovery mode screen.

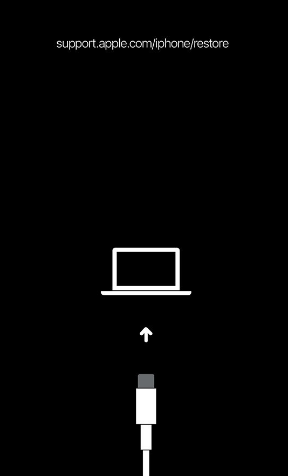
Next, Finder or iTunes will automatically detect that your device is in recovery mode and ask you if you want to restore or update the device. This is a common operation and you can choose the option that works for you based on your needs.

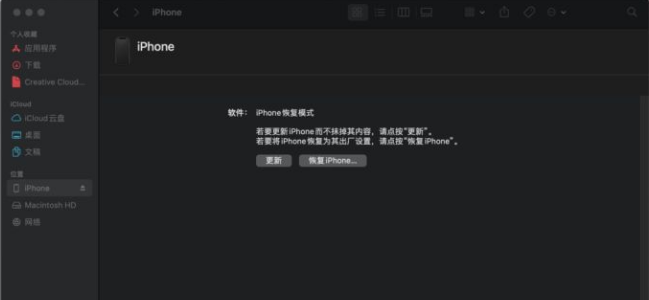
If you have downloaded an .ipsw file and want to use it to restore your device, you can hold down the option key (or Shift key on Windows) and click " Restore option. Next, select the .ipsw file you downloaded earlier to restore. If you haven't downloaded the .ipsw file yet, just click on the "Recover" option. Please note that during the recovery process, your phone data will be wiped and the system will be restored to the latest stable version.
The disadvantage of this method is that using this method will cause the device to be downgraded and all data will be erased. In addition, some Apple fans reported that they may still encounter white screen problems after using this method.
Method 2: Use third-party professional tools to downgrade with one click
It is recommended to use the iOS downgrade function of Apple Device Repair Tool to downgrade iPadOS 16 to iPadOS 15. This tool provides a standard downgrade mode that can preserve data during the downgrade process and avoid problems such as white apples. In addition, it also supports repairing 150 common bugs in iPadOS systems, and the operation is very simple, and the downgrade can be completed with just one click.
Operation Guide:
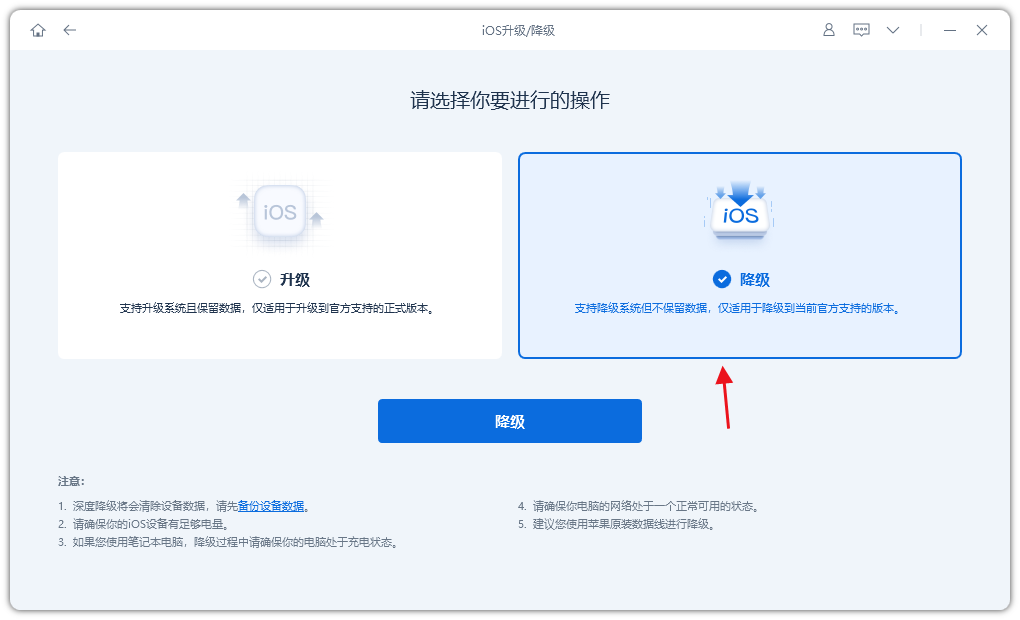
The first step is to launch the Apple device repair tool and connect the device to the computer using a data cable. Then, click on the "ios downgrade" option. During the repair process, you will see two repair modes to choose from. If you want to keep the downgrade, select the standard downgrade mode.

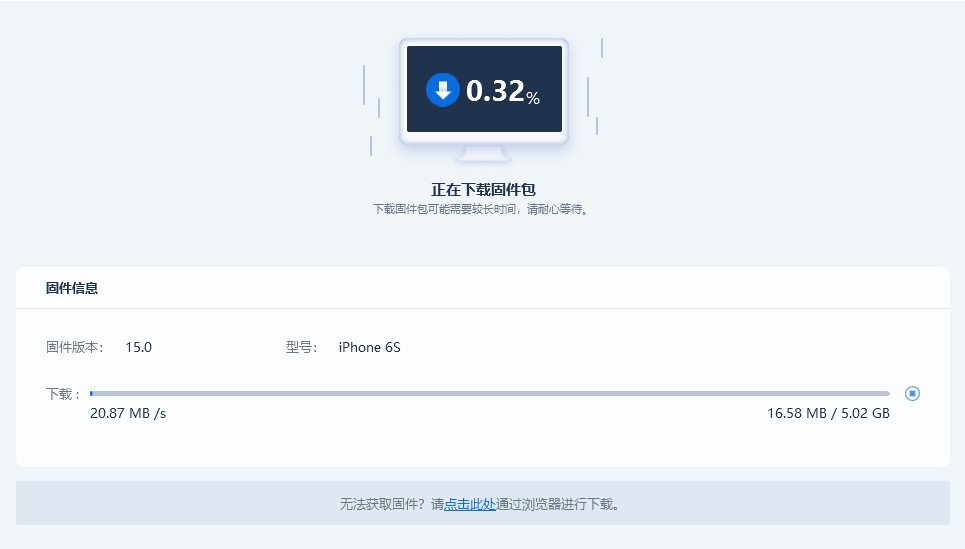
The second step is to click the "Standard Downgrade" button and wait for the software to recognize the device. Once the device is successfully recognized, click the "Download Firmware" button. After the download is successful, you can start the downgrade operation.


Complete downgrading the iPad system is a relatively simple process and takes about 10 minutes. Before downgrading, make sure not to disconnect the data cable and wait patiently for the system downgrade to complete. Once the "Downgrade Completed" prompt is displayed, you can successfully downgrade the iPad system back to iPadOS15. Please note that a stable network connection must be maintained during the operation to ensure a smooth completion of the downgrade.
The above is the detailed content of Share 2 simple ways to downgrade iPadOS 16!. For more information, please follow other related articles on the PHP Chinese website!

Hot AI Tools

Undresser.AI Undress
AI-powered app for creating realistic nude photos

AI Clothes Remover
Online AI tool for removing clothes from photos.

Undress AI Tool
Undress images for free

Clothoff.io
AI clothes remover

AI Hentai Generator
Generate AI Hentai for free.

Hot Article

Hot Tools

Notepad++7.3.1
Easy-to-use and free code editor

SublimeText3 Chinese version
Chinese version, very easy to use

Zend Studio 13.0.1
Powerful PHP integrated development environment

Dreamweaver CS6
Visual web development tools

SublimeText3 Mac version
God-level code editing software (SublimeText3)

Hot Topics


Sometimes Windows11 doesn't recognize iPod. It's frustrating when you can't upload your favorite music or videos. Like the iPhone and iPad, Apple made the iPod compatible with Windows 11. However, sometimes, you encounter problems when connecting your iPod to your PC or laptop. This issue can be caused by several reasons, such as connection errors. So, first, let's see what exactly causes Windows to not recognize iPod. What causes Windows 11 not to recognize iPod? There are many reasons why Windows cannot detect your iPod. For example, a damaged cable is

Some users need to connect their Apple iPad with Windows 11 PC to transfer files. However, Windows 11 does not always recognize the iPad when some users connect it with their PC. When the iPad is not recognized, it will not appear in the iTunes software. One user's MS Forum post said: When I plug my new iPad Pro 9.7 into any USB port on my desktop PC, it is not recognized. I have other Apple devices and all of them are recognized. I installed the latest iTunes software on my laptop and it recognizes my iPad Pro! When App

Many users who have been using iTunes for a while are now reporting that it no longer opens in Windows 11. Some people encountered this issue after updating, while others suddenly appeared. This makes it difficult to determine the specific issue causing the error. But whatever the cause, there are plenty of ways to help you fix it easily. So, without further ado, let’s see what you should do if iTunes won’t open in Windows 11. What should I do if iTunes won't open in Windows 11? 1. Restart the iTunes application and press Ctrl+Shift+Esc to start the Task Manager, find the iTunes process, select it, and then click

We often connect our iPhone to our computer, usually to transfer photos or, in some cases, to troubleshoot errors. But what do you do if Windows 11 doesn’t recognize your iPhone? The inability to connect the two devices is a major hurdle for users and you will find several forums on the web where users complain about the same. One common factor in all these forums is that you won't find reliable and effective troubleshooting methods anywhere. That’s why we’ve created this tutorial to help you understand why Windows 11 isn’t recognizing your iPhone and walk you through fixing the problem. Why doesn't Windows 11 recognize my iPhone?

Many iPhone/iPad/iPod users have reported encountering issues with their devices not being recognized or detected after connecting to a Windows 11 PC. In this case, even though the device is physically connected to your system via a Lightning cable, Windows will not detect it. Once you encounter this issue, you will not be able to transfer any files from your device to your system or your device may not charge as well. Furthermore, some users have mentioned that their Apple devices are not visible in the iTunes app on Windows PC. If you are such an iPhone/iPad/iPod user, your device encounters this issue on Windows 11

iTunes Backup Location on Windows 11 Before getting into the method of deleting iTunes backup, it is very important to know the exact location where these backup files are stored on Windows 11 PC. It turns out that the default location of your backup folder depends on how iTunes was originally installed on your PC. If you installed iTunes using Microsoft Store If you installed iTunes from Microsoft Store, the backup folder will be located on your PC at the following address: C:\Users\%userprofile%\Apple\MobileSync\Backu

iPhone users always have to use Windows/Mac systems to back up data by transferring files because iPhone storage is not consumable. While performing this task, the issue of iPhone not showing up on Windows Explorer on the system arises. This issue prevents users from accessing files or any content on iPhone on their Windows system. The potential cause of this issue could be one of the following reasons. Faulty USB cable or USB port on your computer Outdated Apple iPhone software not able to control the iTunes folder on your system Internal technical issues on your iPhone No Apple device USB driver After listing all the possible causes, we took a deep look at them

Create new text files in folders on Mac using Automator Automator is a powerful application that allows you to write scripts and automate. In this case, we will create an Automator Quick Action that can be run from anywhere in the Finder to create a new text file in the current folder location. So with a little setup, you can easily access the ability to create new text files anytime, anywhere. Open the Automator app on your Mac and select Create a new "Quick Action" Use the search function and search for "AppleScript" then double click or will run AppleScri
