When many users use WPS documents for typesetting, they may need to add document gutter to meet the printing format requirements. Below I will briefly explain how to do it. First, open the WPS document and enter the document page for the desired layout. Then, click the "Page Layout" tab at the top of the page and click "Gutter" in the "Page Setup" section. In the pop-up window, you can set the style and position of the gutter. You can choose different line types and colors, or adjust the position of the lines to suit different needs
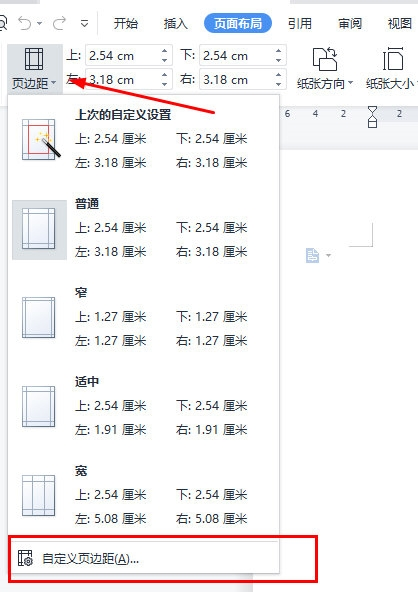
After using WPS Office to open the document, we need to click " Page Layout" and "Margins". Next, select "Custom margins" from the margin drop-down option. This will allow further settings to be made.

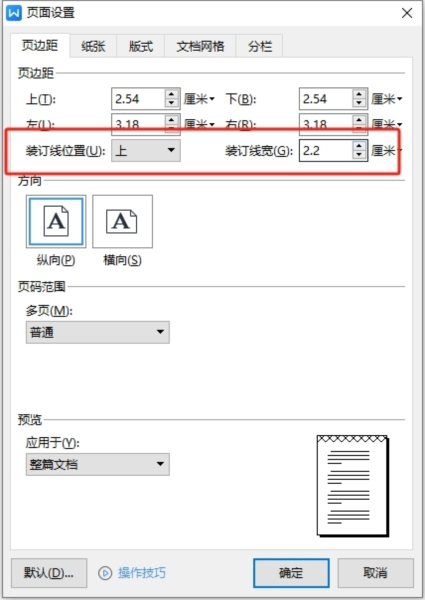
In the pop-up box, select "Margins", set the "Gutter Position", here select "Top".
Set the "Gutter Width" as needed, and click the "Print Browse" icon on the upper left to view the printing effect.

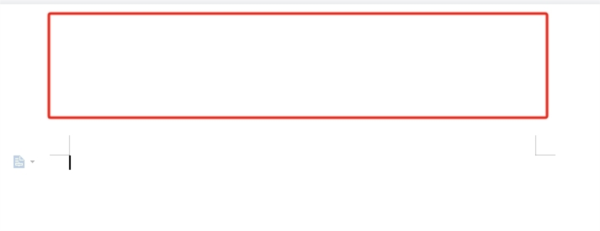
As shown in the figure, after setting the binding line, when the document is printed, a binding area will be left above.

The above is the detailed content of How to set the gutter for WPS text in just a few steps. For more information, please follow other related articles on the PHP Chinese website!
 How to turn off win10 upgrade prompt
 The difference between lightweight application servers and cloud servers
 CMD close port command
 The difference between external screen and internal screen broken
 How to jump with parameters in vue.js
 Cell sum
 How to intercept harassing calls
 virtual digital currency


