 System Tutorial
 LINUX
LINUX
 How to solve the black screen problem after booting VMware virtual machine Ubuntu
How to solve the black screen problem after booting VMware virtual machine Ubuntu
How to solve the black screen after booting VMware virtual machine Ubuntu? Many friends don’t know it yet. The editor below has compiled and shared with you how to deal with the black screen after the virtual machine Ubuntu is turned on. Let’s take a look!
Method/step sharing:
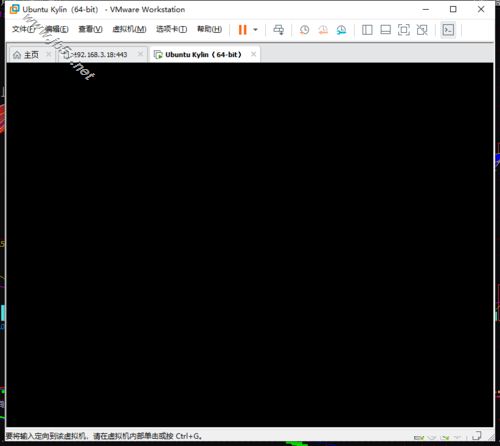
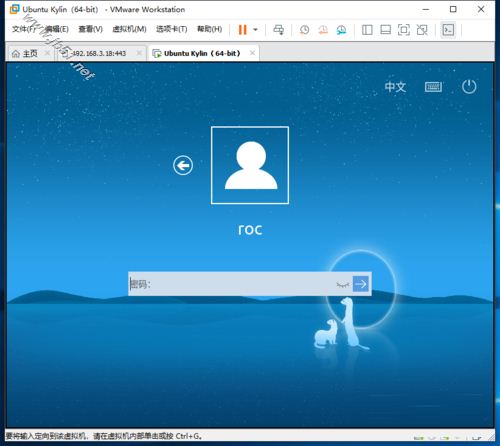
1. After installing the relevant VMtools of Ubuntu, the following black screen appears and you cannot enter the system. The relevant processing methods are shared below.
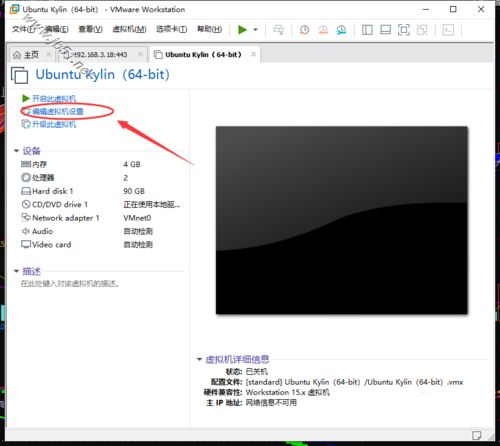
2. First check the graphics card settings of the ubuntu virtual machine. First shut down the Ubuntu virtual machine, and click [Edit Virtual Machine Settings] in the shutdown state to open the settings interface of the Ubuntu virtual machine.
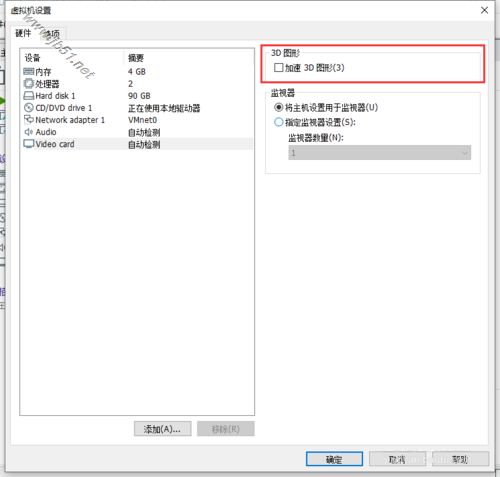
3. In the virtual machine's settings interface, select [video card] under hardware. There is a 3D graphics setting on the right. Remove the check mark in front of [Accelerate 3D Graphics]. As shown below:
4. Next, you need to reset the winsock directory to the default setting state. The communication method between the virtual machine and the host is through socket. It may be that a certain program injects a DLL through LSP, resulting in incomplete recycling. Affect virtual operation. Therefore, a residual cleanup reset of these injected DLLs is required.
Click the Windows Start menu and run the CMD command window as an administrator.
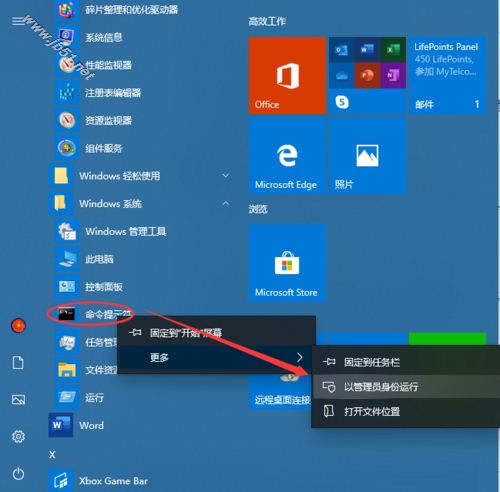
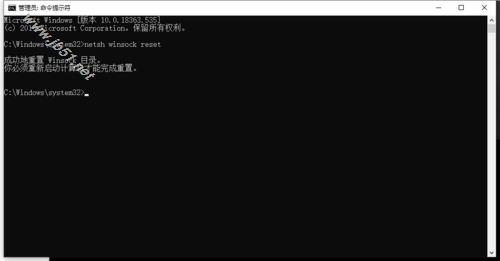
5. In the CMD command window, run the following command: netsh winsock reset
Complete the directory reset of winsock, and then restart the computer.
6. After restarting the computer, restart the Ubuntu system of the VMware virtual machine and you can enter the system normally.
The above is the detailed content of How to solve the black screen problem after booting VMware virtual machine Ubuntu. For more information, please follow other related articles on the PHP Chinese website!

Hot AI Tools

Undresser.AI Undress
AI-powered app for creating realistic nude photos

AI Clothes Remover
Online AI tool for removing clothes from photos.

Undress AI Tool
Undress images for free

Clothoff.io
AI clothes remover

Video Face Swap
Swap faces in any video effortlessly with our completely free AI face swap tool!

Hot Article

Hot Tools

Notepad++7.3.1
Easy-to-use and free code editor

SublimeText3 Chinese version
Chinese version, very easy to use

Zend Studio 13.0.1
Powerful PHP integrated development environment

Dreamweaver CS6
Visual web development tools

SublimeText3 Mac version
God-level code editing software (SublimeText3)

Hot Topics
 1387
1387
 52
52
 How To Easily Configure Flatpak Apps Permissions With Flatseal
Mar 22, 2025 am 09:21 AM
Flatpak application permission management tool: Flatseal User Guide Flatpak is a tool designed to simplify Linux software distribution and use. It safely encapsulates applications in a virtual sandbox, allowing users to run applications without root permissions without affecting system security. Because Flatpak applications are located in this sandbox environment, they must request permissions to access other parts of the operating system, hardware devices (such as Bluetooth, network, etc.) and sockets (such as pulseaudio, ssh-auth, cups, etc.). This guide will guide you on how to easily configure Flatpak with Flatseal on Linux
 How To List Or Check All Installed Linux Kernels From Commandline
Mar 23, 2025 am 10:43 AM
Linux Kernel is the core component of a GNU/Linux operating system. Developed by Linus Torvalds in 1991, it is a free, open-source, monolithic, modular, and multitasking Unix-like kernel. In Linux, it is possible to install multiple kernels on a sing
 Yt-dlp Commands: The Complete Tutorial For Beginners (2025)
Mar 21, 2025 am 11:00 AM
Have you ever wanted to save your favorite videos from the internet? Whether it's a funny cat video or a tutorial you want to watch later, Yt-dlp is here to help! In this comprehensive yt-dlp tutorial, we will explain what yt-dlp is, how to install i
 How To Type Indian Rupee Symbol In Ubuntu Linux
Mar 22, 2025 am 10:39 AM
This brief guide explains how to type Indian Rupee symbol in Linux operating systems. The other day, I wanted to type "Indian Rupee Symbol (₹)" in a word document. My keyboard has a rupee symbol on it, but I don't know how to type it. After
 What is the Linux best used for?
Apr 03, 2025 am 12:11 AM
Linux is best used as server management, embedded systems and desktop environments. 1) In server management, Linux is used to host websites, databases, and applications, providing stability and reliability. 2) In embedded systems, Linux is widely used in smart home and automotive electronic systems because of its flexibility and stability. 3) In the desktop environment, Linux provides rich applications and efficient performance.
 How To Enable Bucklespring Keyboard Sound In Linux
Mar 22, 2025 am 09:07 AM
Experience the satisfying click of a vintage IBM Model M keyboard, even without owning one! This tutorial shows you how to enable the authentic sound of a bucklespring keyboard on your Linux system using the Bucklespring utility. Table of Contents -
 Linux Kernel 6.14 RC6 Released
Mar 24, 2025 am 10:21 AM
Linus Torvalds has released Linux Kernel 6.14 Release Candidate 6 (RC6), reporting no significant issues and keeping the release on track. The most notable change in this update addresses an AMD microcode signing issue, while the rest of the updates
 LocalSend - The Open-Source Airdrop Alternative For Secure File Sharing
Mar 24, 2025 am 09:20 AM
If you're familiar with AirDrop, you know it's a popular feature developed by Apple Inc. that enables seamless file transfer between supported Macintosh computers and iOS devices using Wi-Fi and Bluetooth. However, if you're using Linux and missing o


