
The win7 system is a system that everyone says well after using it. Recently, some friends have been asking how to create a desktop through a broadband connection in Windows 7? Today, the editor will bring you the win7 broadband connection creation settings to take a look at.
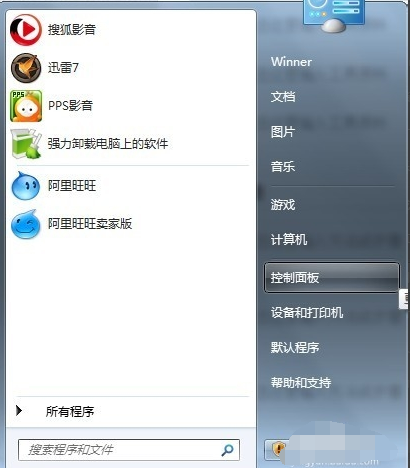
1. Click Start, Control Panel.
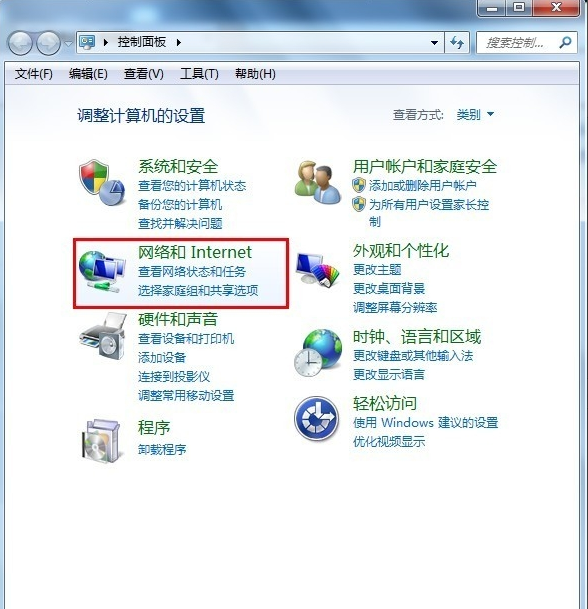
2. After opening the control panel, select "Network and Internet".
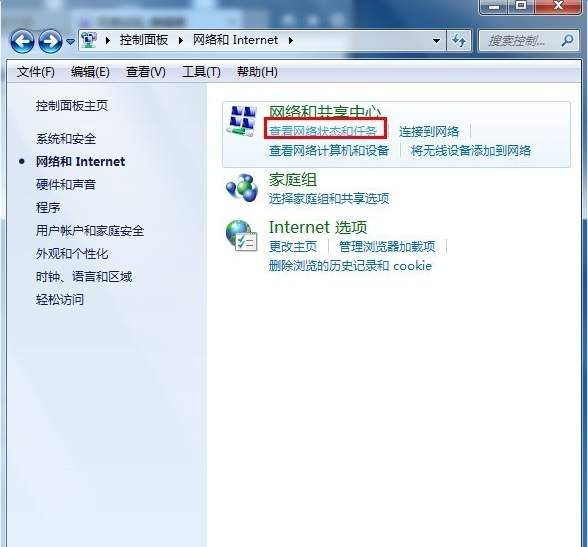
3. Select "View network status and tasks".
4. Select "Set up a new connection or network".
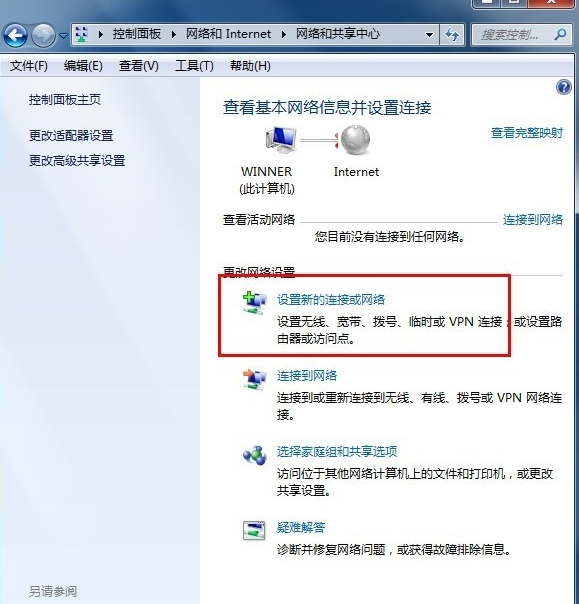
5. Set up the connection or network, select the first one and go to the next step.
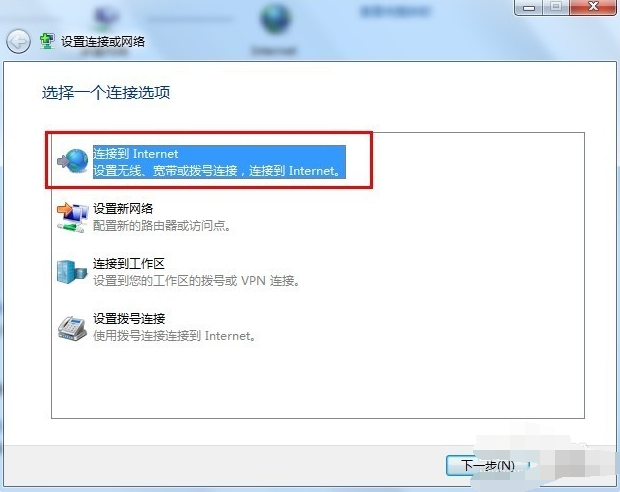
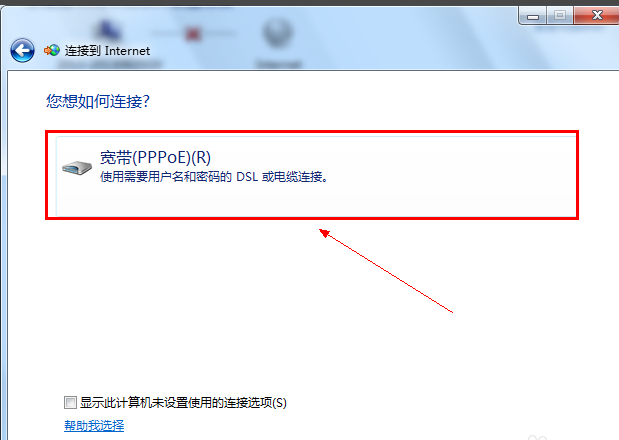
6. After the next step, the method of connecting to the network will be displayed. Click
7. Enter the telecom operator Username and password given. It is recommended to check the box so that you do not need to re-enter the password the next time you connect.
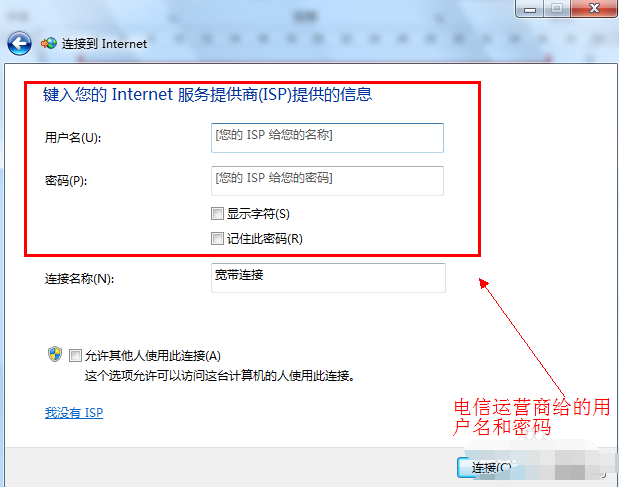
8. Click Next to connect to the network. After the new broadband connection is successfully created, a broadband connection
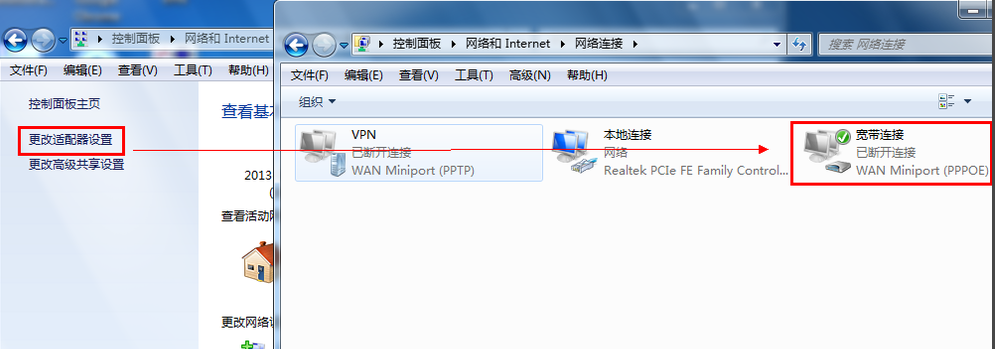
will be displayed. 9. For convenience, you can create a shortcut for the broadband connection on the desktop.
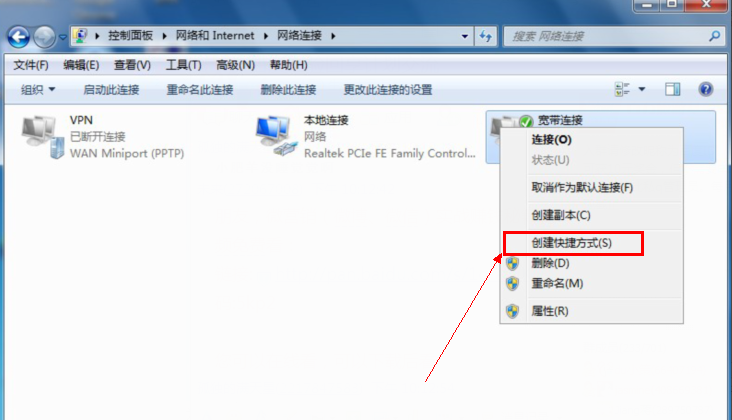
(1) Right-click the broadband connection as shown in the figure and select Create shortcut.
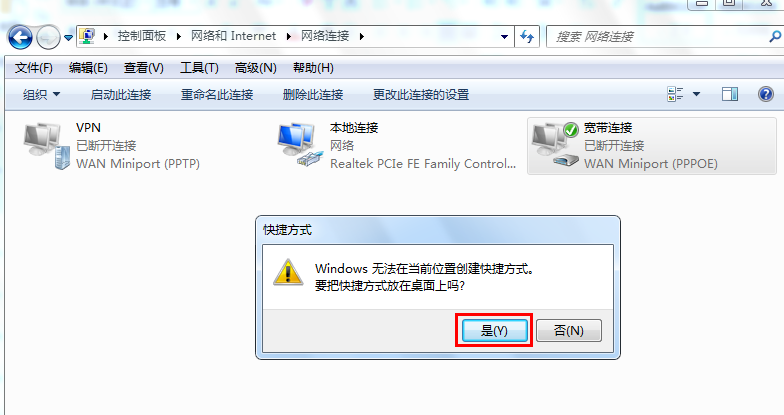
(2) Click to confirm the shortcut creation operation.
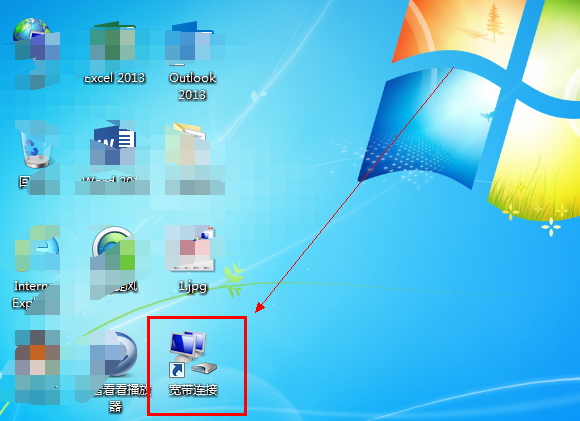
(3) Return to the desktop and you will see the broadband connection appear on the desktop.
(The above are all the operations on how to create a desktop with win7 broadband connection brought by the editor! If it helps your problem, please continue to pay attention to us on this site. Will bring you more high-quality content)
The above is the detailed content of How to create a Win7 desktop broadband connection. For more information, please follow other related articles on the PHP Chinese website!
 Android desktop software recommendations
 How to solve the problem of black screen after turning on the computer and unable to enter the desktop
 How to modify the text on the picture
 Introduction to commonly used Windows registry commands
 What does Jingdong plus mean?
 svg to jpg
 The meaning of today's headline display volume
 How to cancel automatic renewal of Taobao Money Saving Card
 How to open a digital currency account


