 System Tutorial
 LINUX
LINUX
 CentOS7 installation tutorial: Install Linux system in vmware virtual machine
CentOS7 installation tutorial: Install Linux system in vmware virtual machine
1. Download of CentOS
CentOS is a free version and it is recommended to download it directly from the official website.
https://www.centos.org/download/
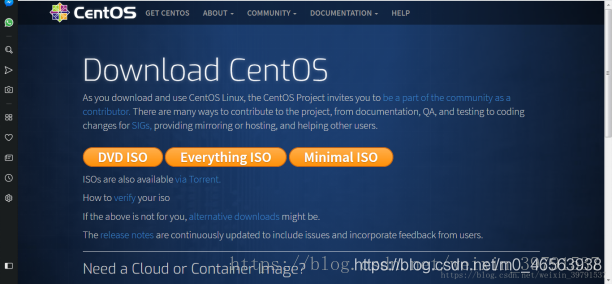
DVD ISO: Ordinary CD complete installation version image, which can be installed offline to the computer hard drive , including a large number of commonly used software, generally choose this image type.
Everything ISO: Contains the contents of the complete installation version, supplements it, and integrates all software.
Minimal ISO: This version is a simplified version of the image, which can install a basic CentOS system and contains the minimum installation package required for a bootable system.
2. Linux installation tutorial
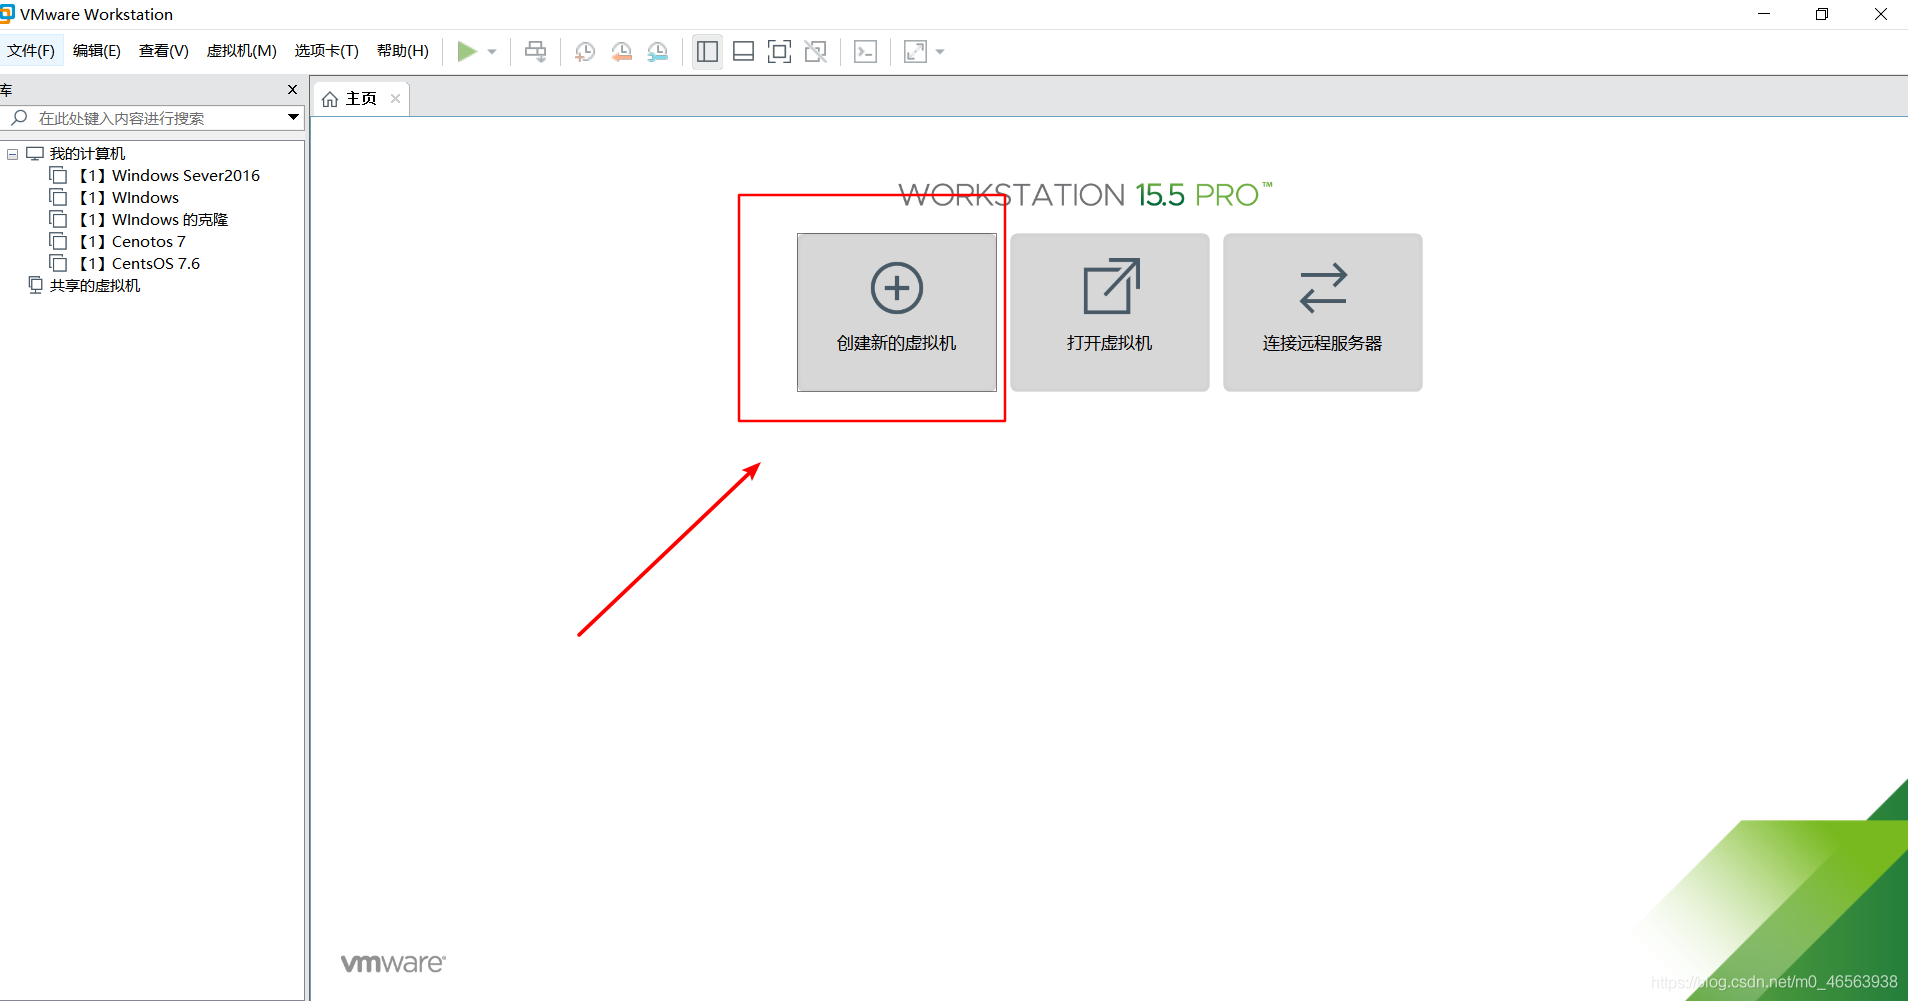
First we open VM15.5, and then click to create a new virtual machine.
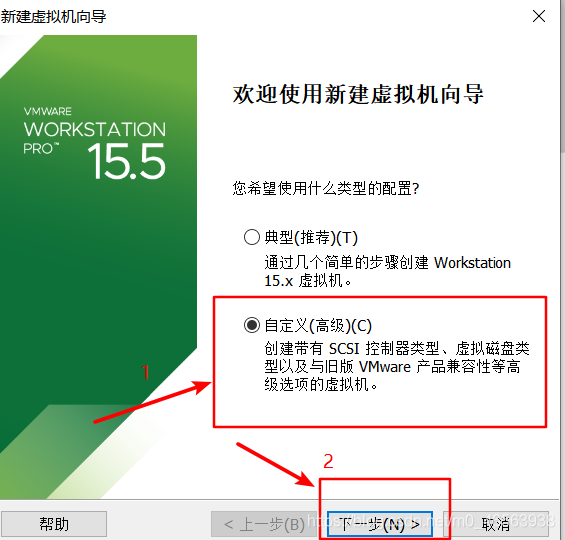
In the pop-up "Welcome" window, click the "Next" button to enter the next step
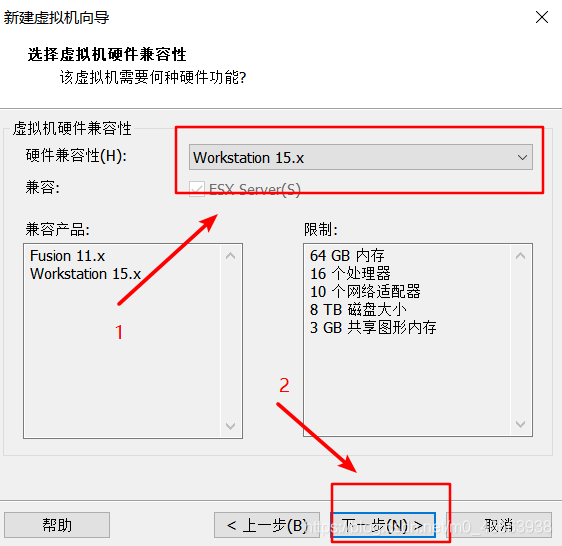
Software Compatibility Select the default, and then select the next step
Here select install later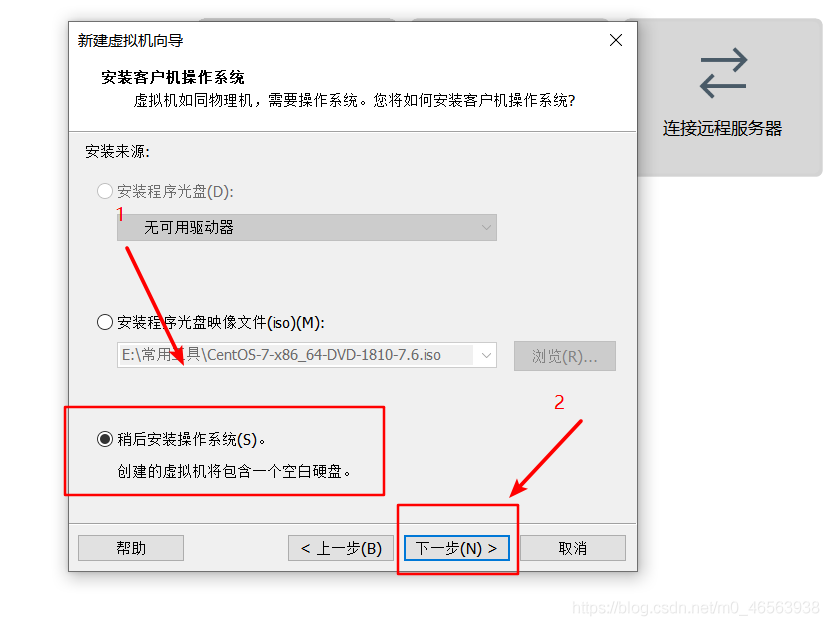
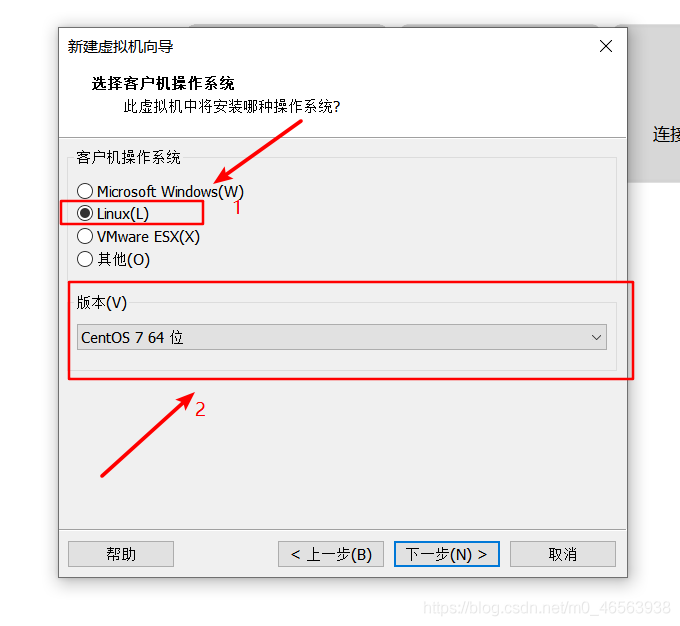
Then we select Linux and find it in the drop-down box CentOS 7 64-bit
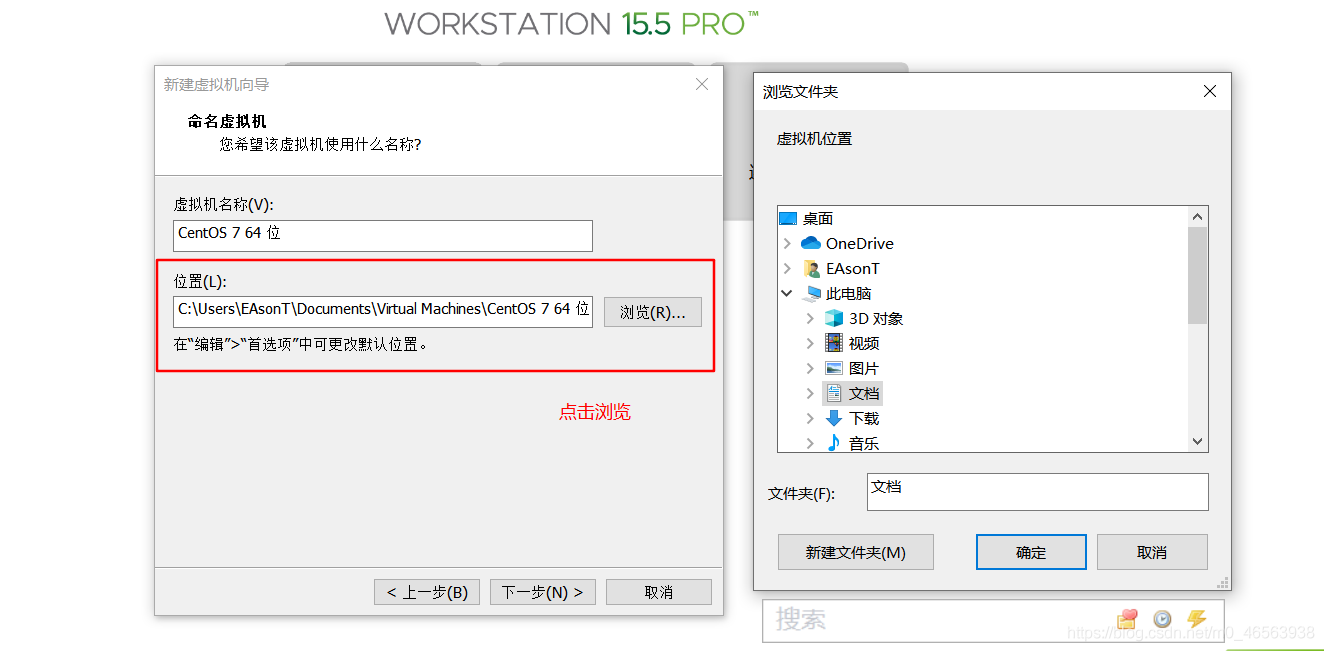
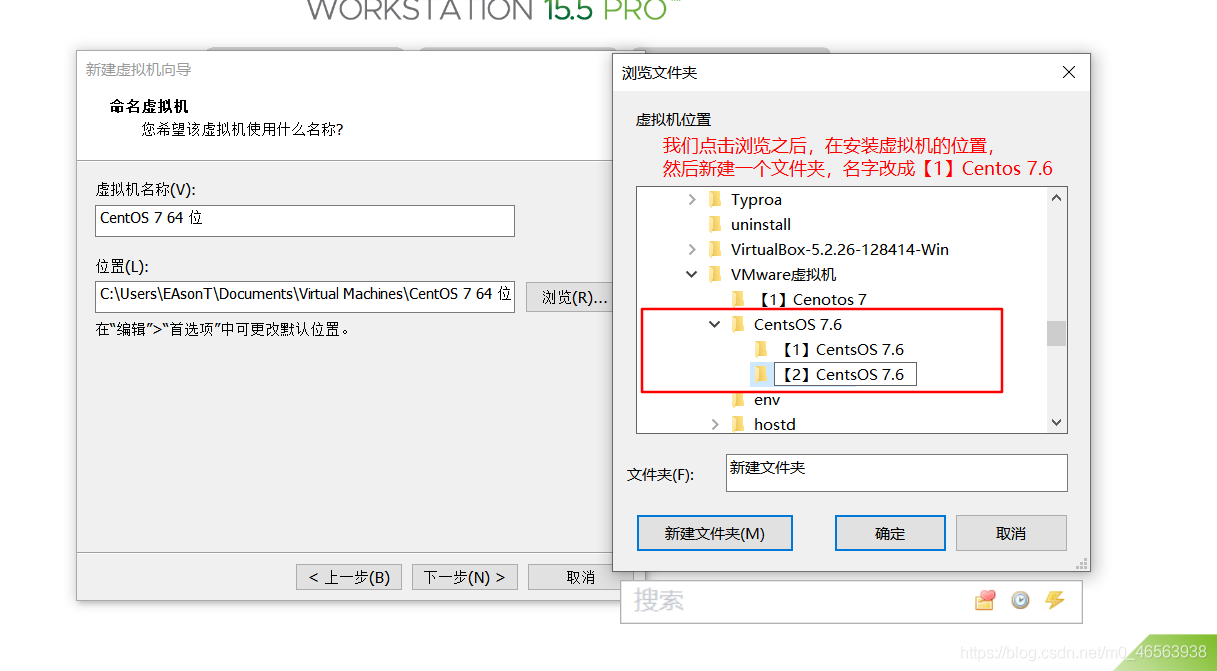
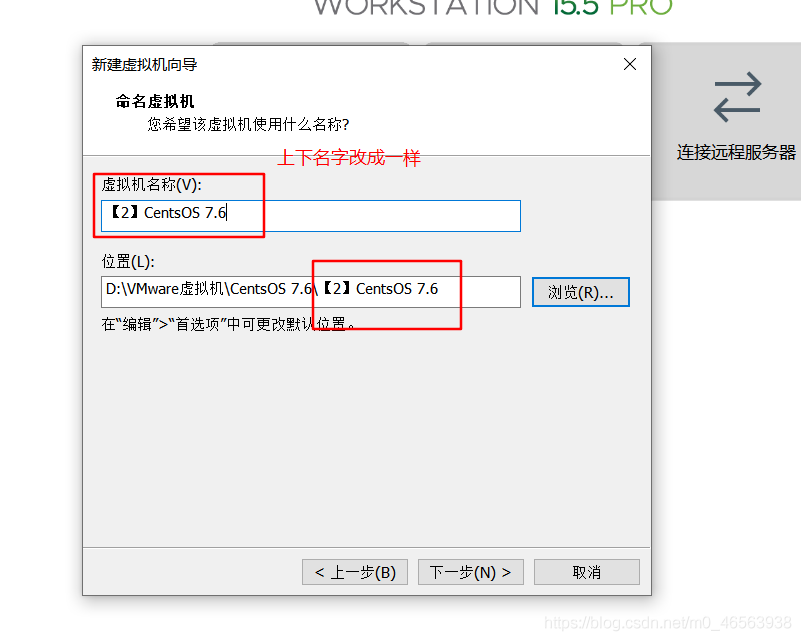
We choose to browse, then create a CentOS folder where the virtual machine is installed, and create a folder in this folder to store this system. Then the name of the virtual machine must be the same as the name of the location below. See my screenshots for details.
The number of processors here is changed to 2
Cores per processor Change the quantity to 2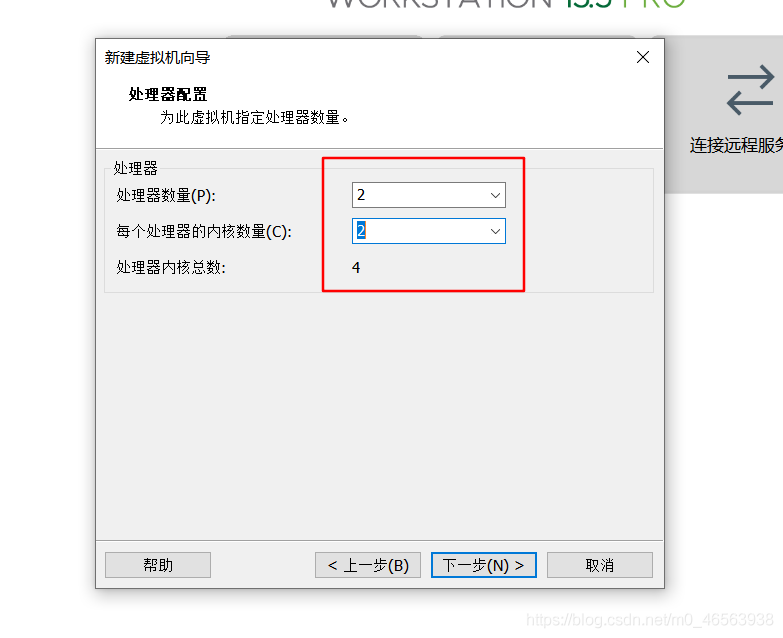
Here you can choose the memory of the virtual machine according to the memory of your real machine. Generally 4G is enough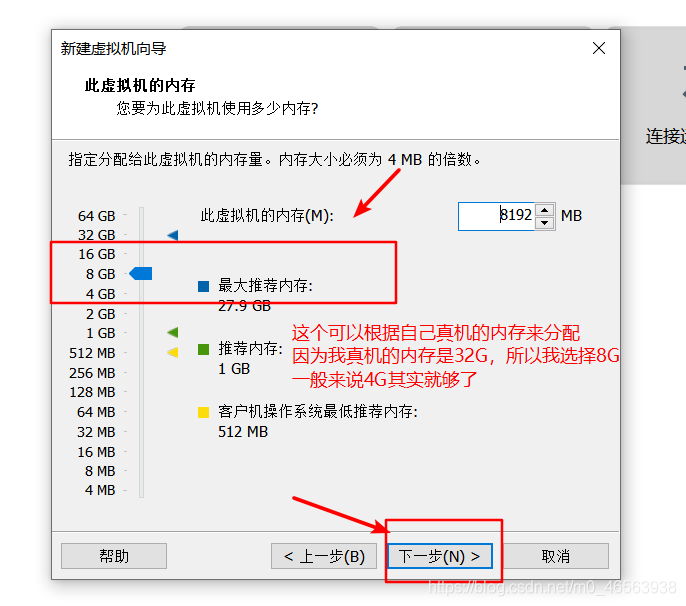
Here we use Network Address Translation (NET)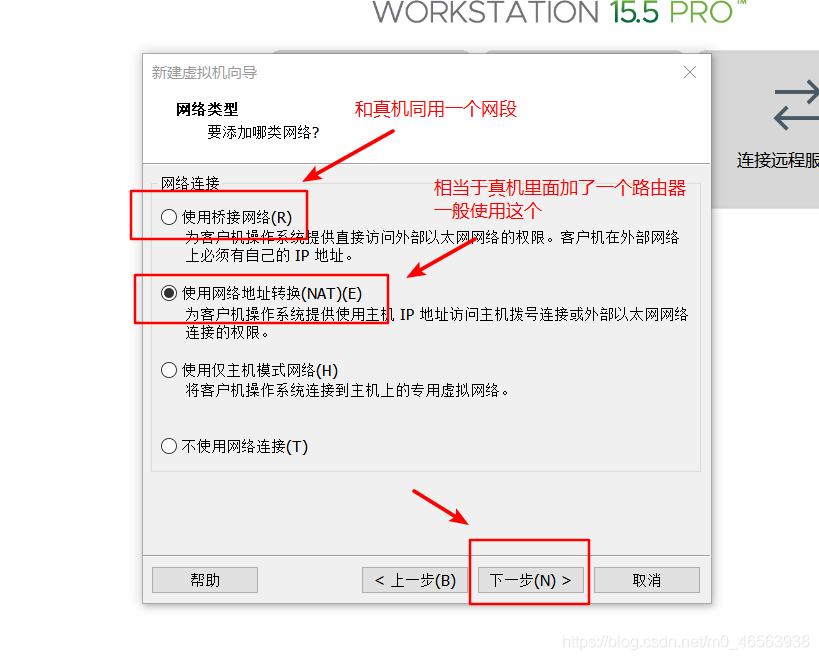
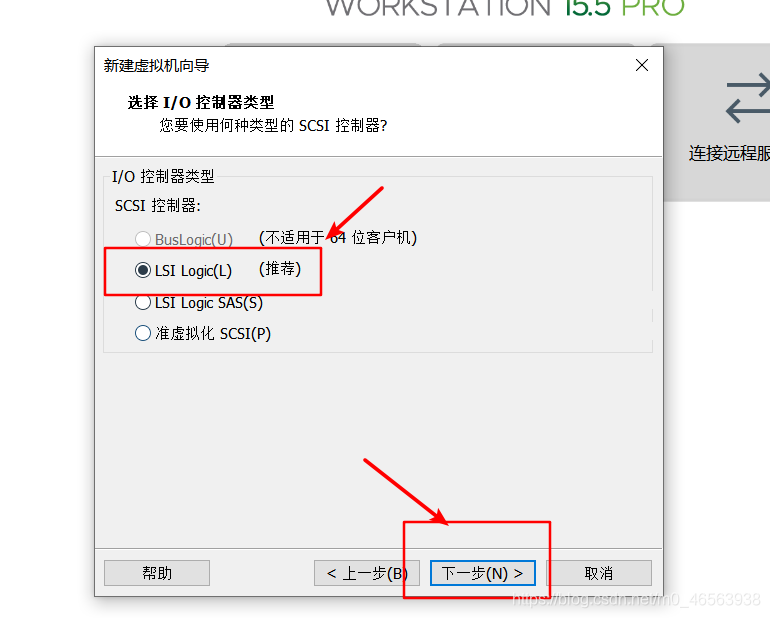
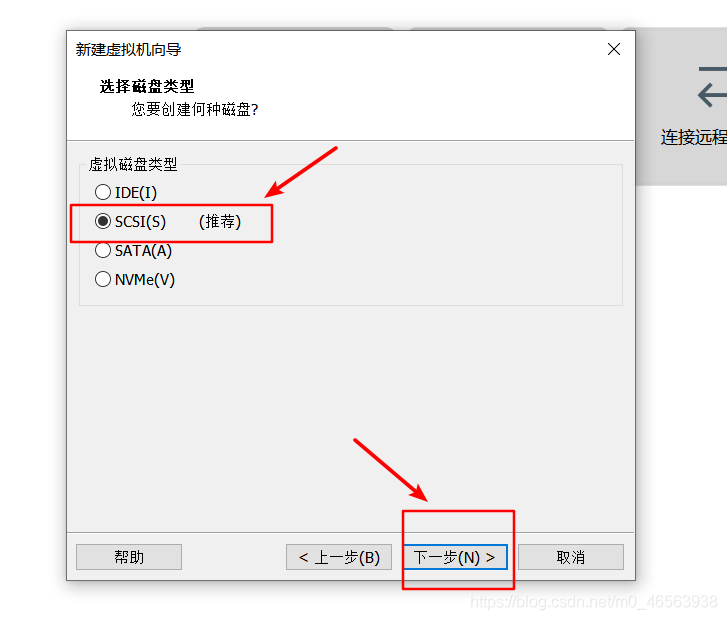
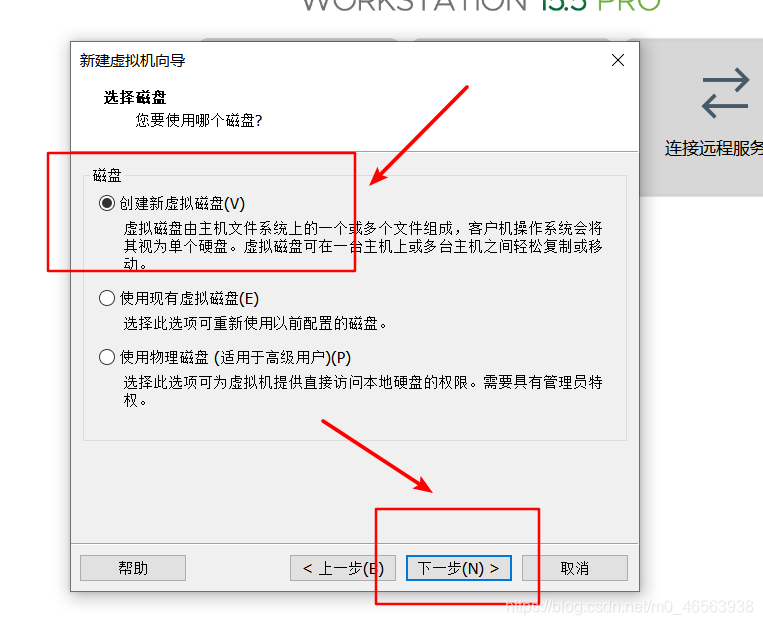
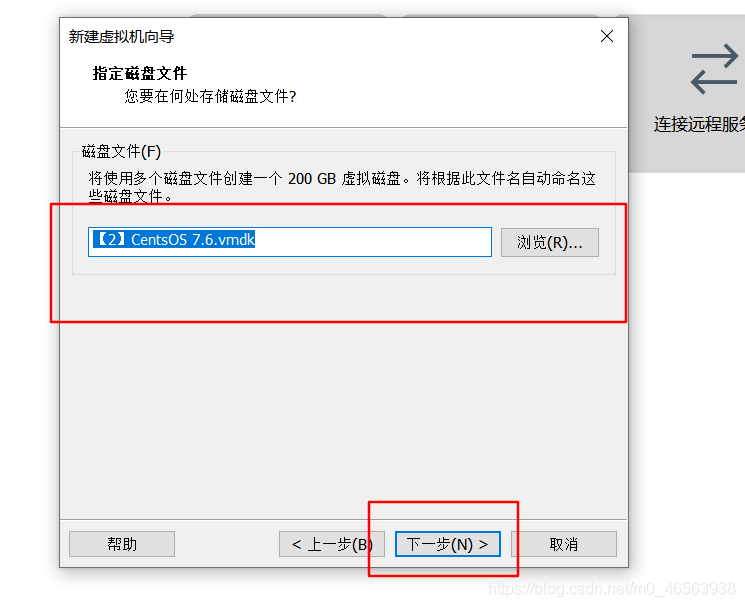
Here we allocate 200G memory, not immediately divide 200G from our own real machine; this 200G is just a maximum range 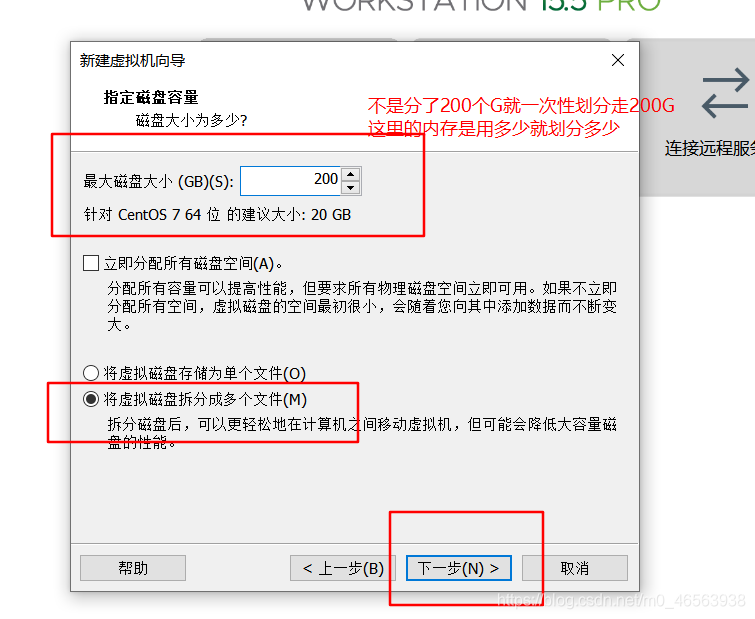
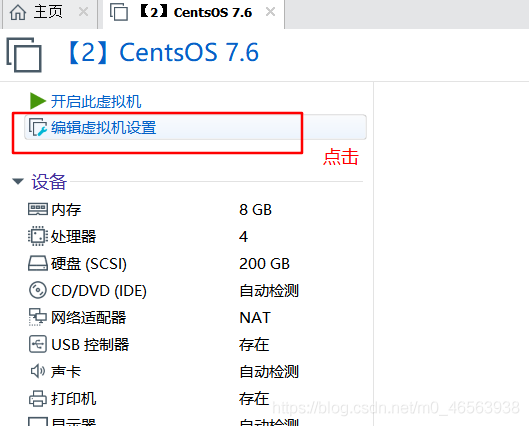
Here we turn on virtualization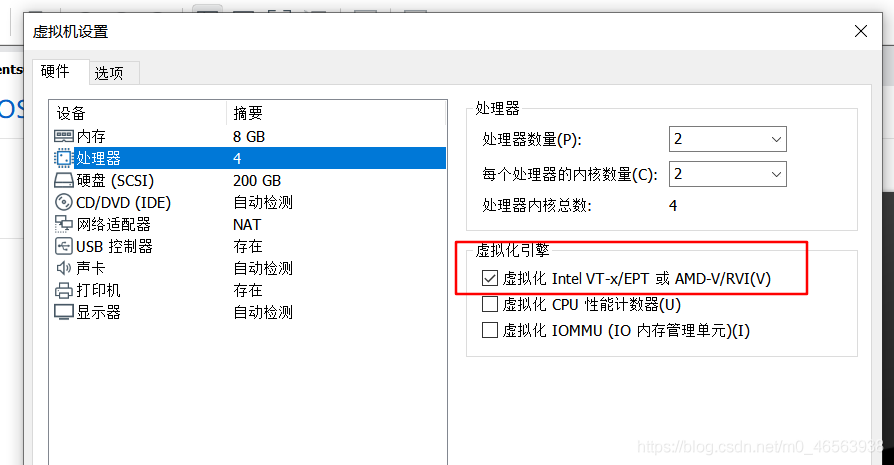
and then We choose the image file of CentOS 7 that has been downloaded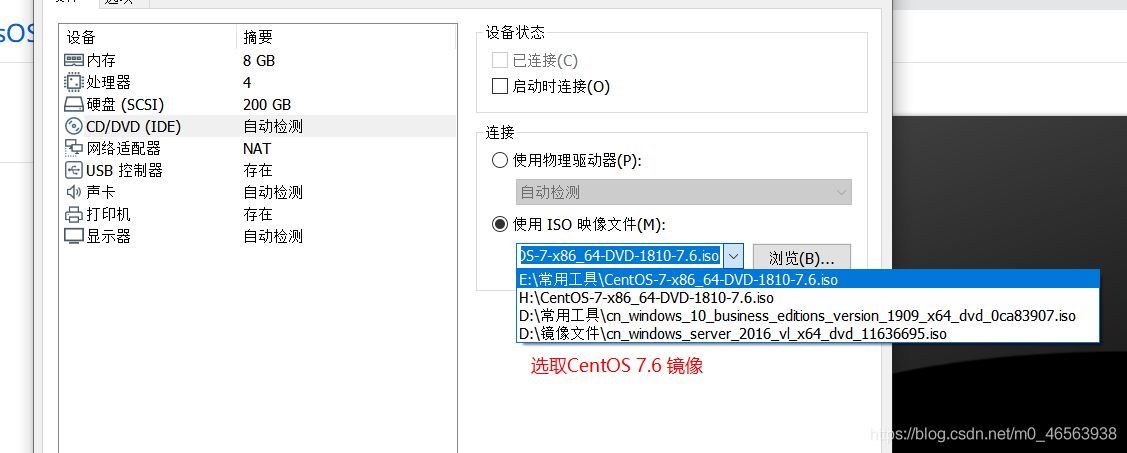
The sound card and printer here can be removed if they are not needed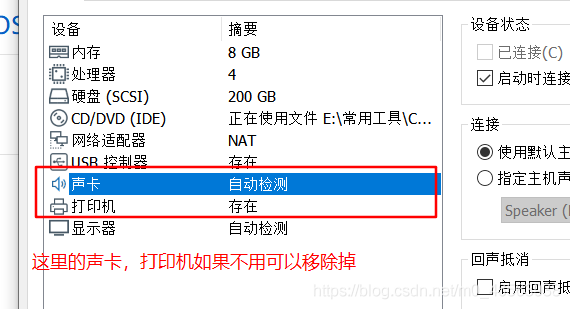
After setting up, click to start this virtual machine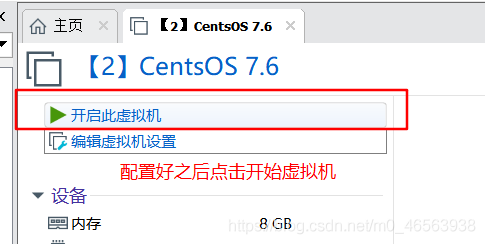
Here we select the first one, and then press Enter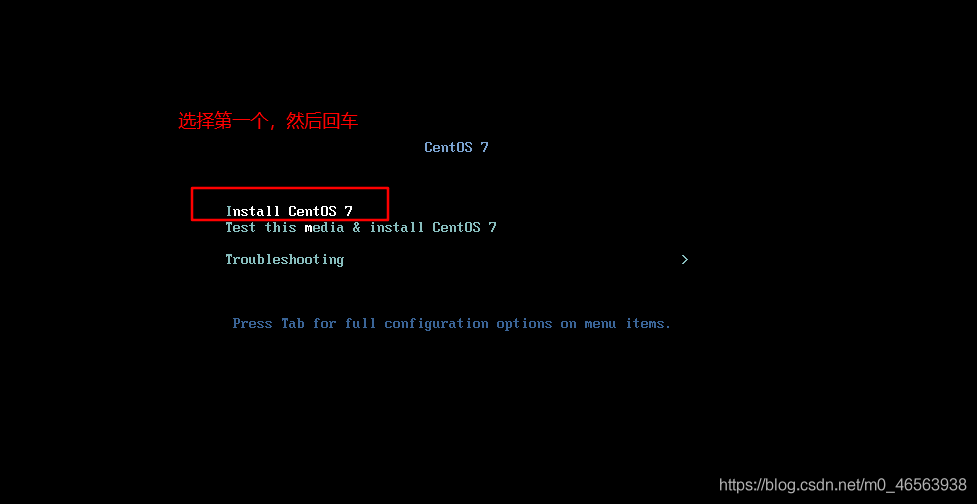
Select Chinese, and then click Step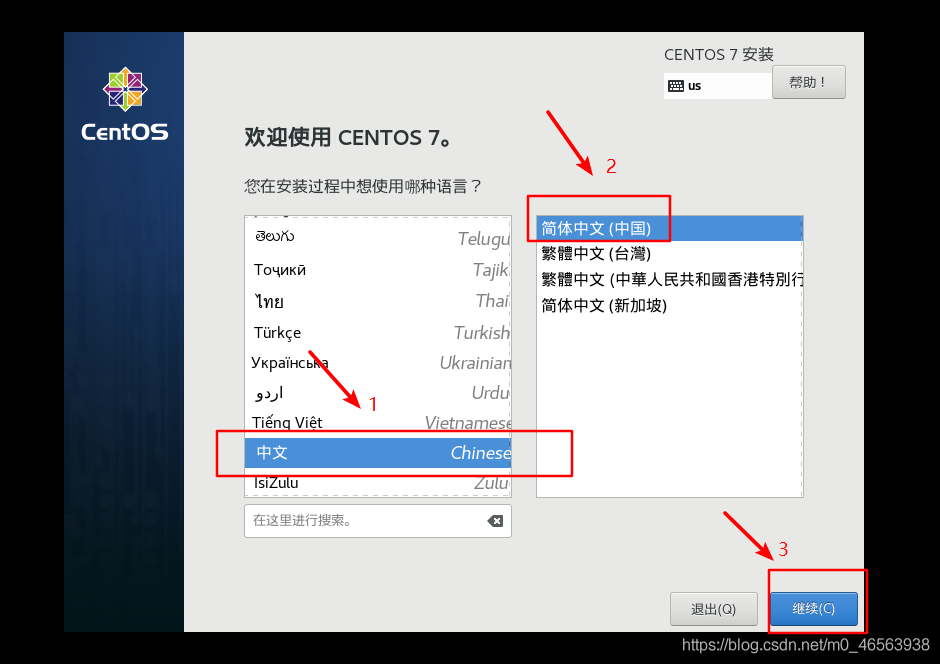
Click on the software selection and select according to my picture. We use visualization. After setting up, click Finish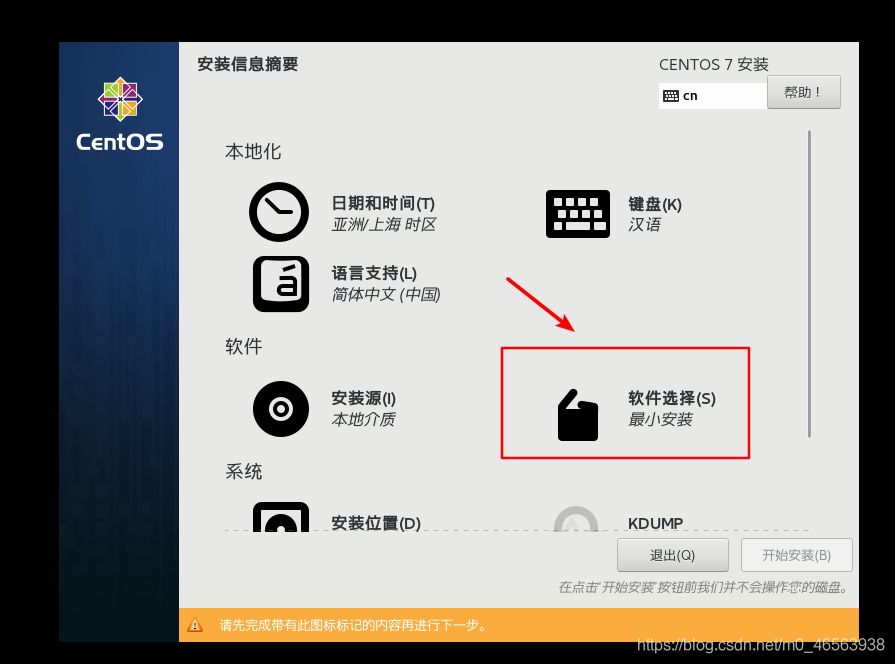
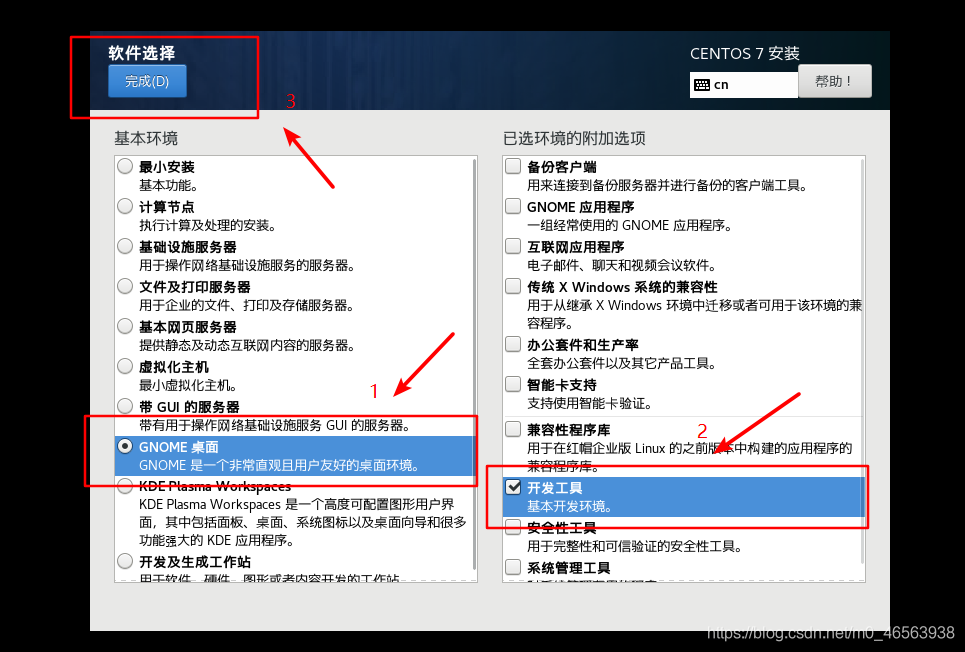
Choose the installation location or follow my pictures. After setting up, click Finish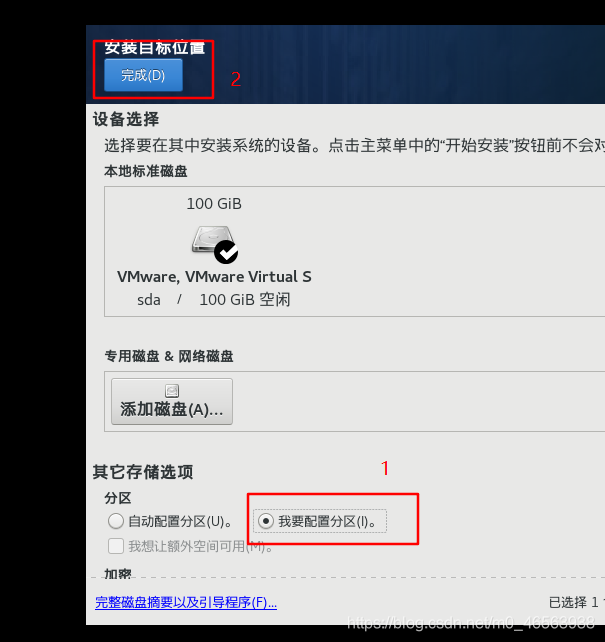
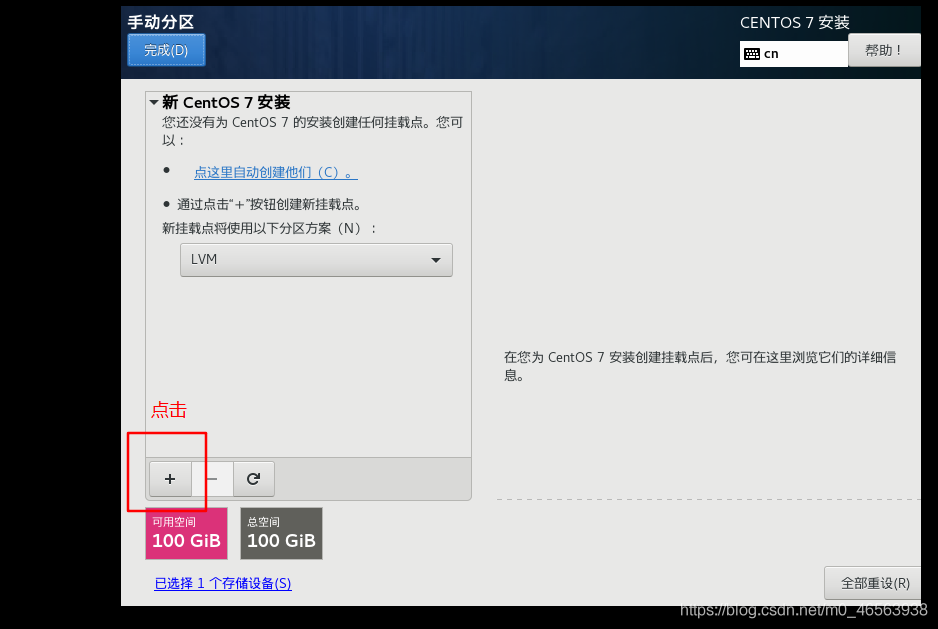
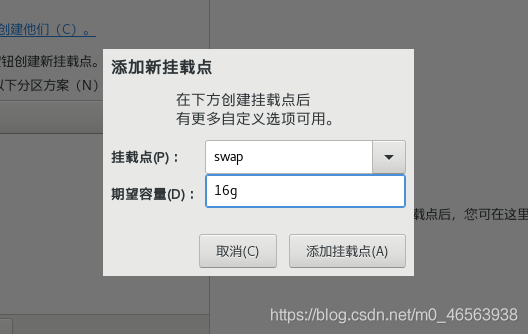
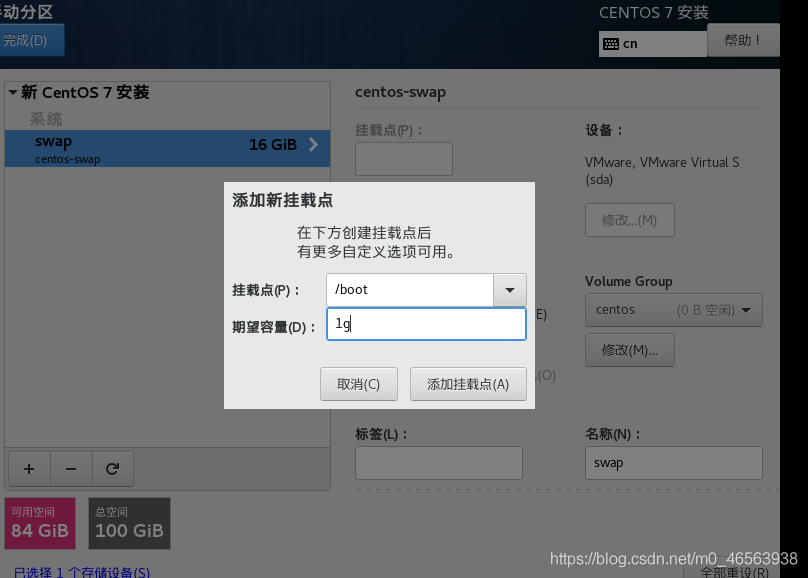
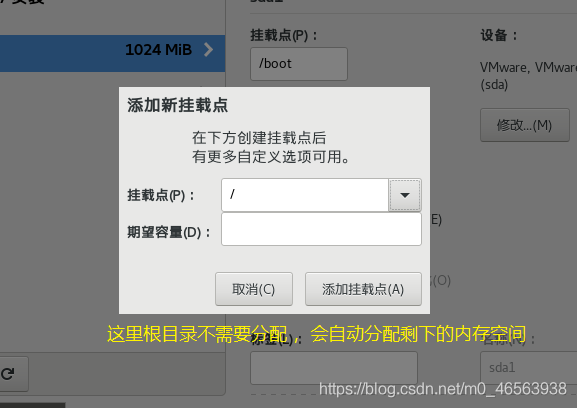
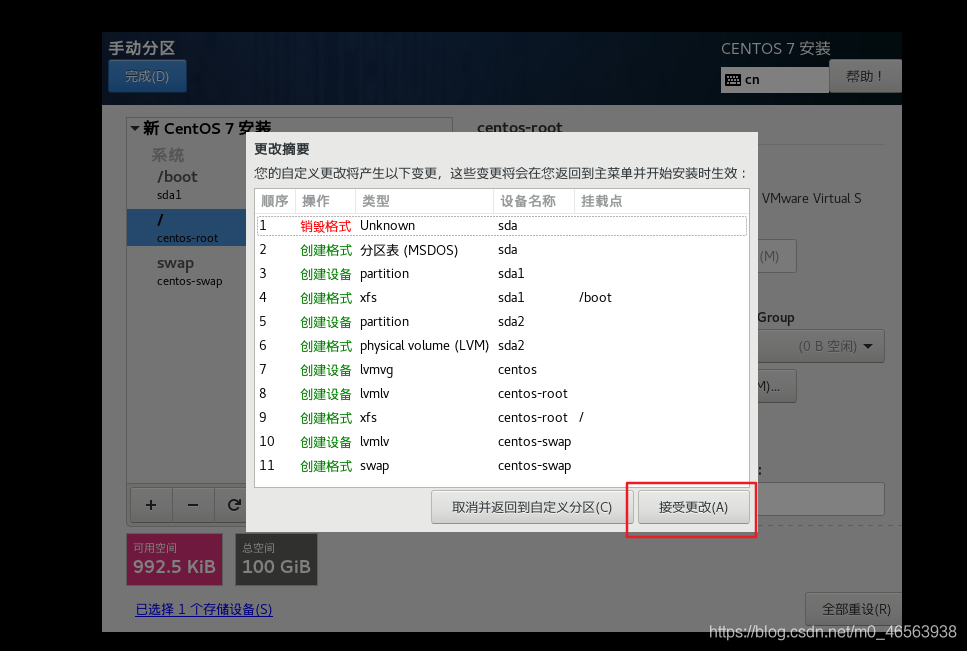
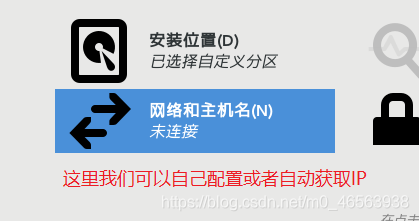
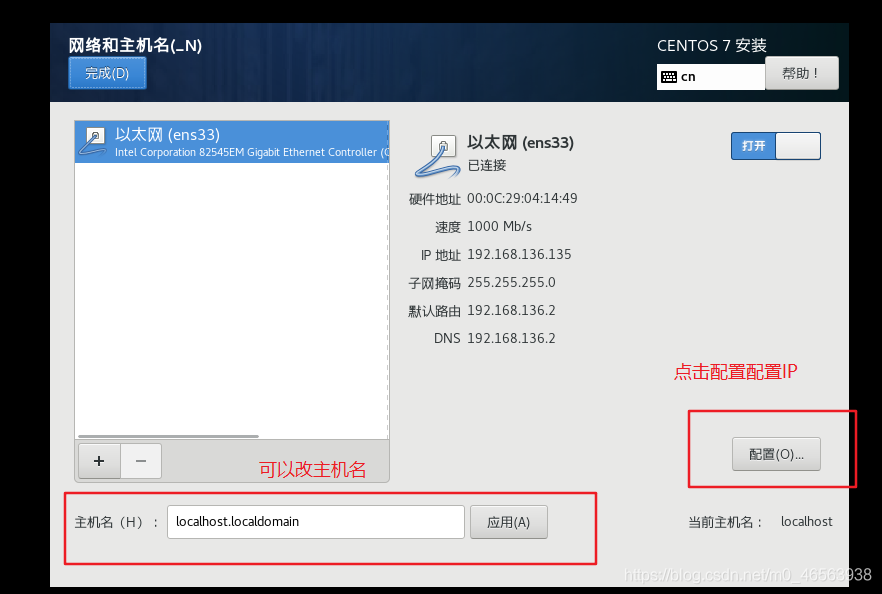
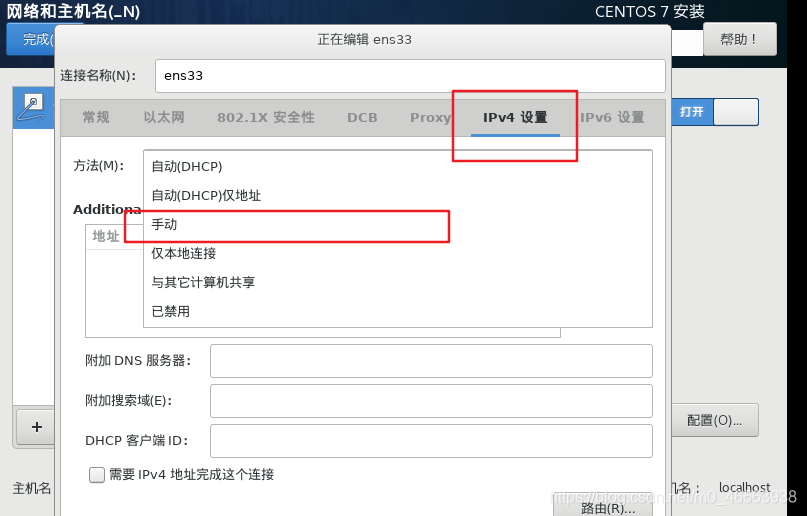
If you want to write, I recommend writing 8.8.8.8, 114.114.114.114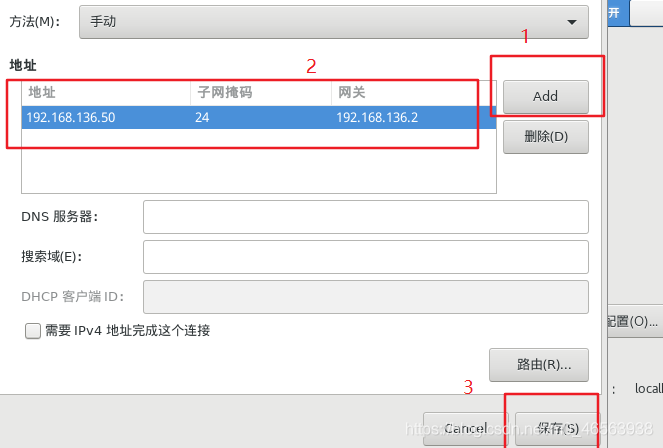
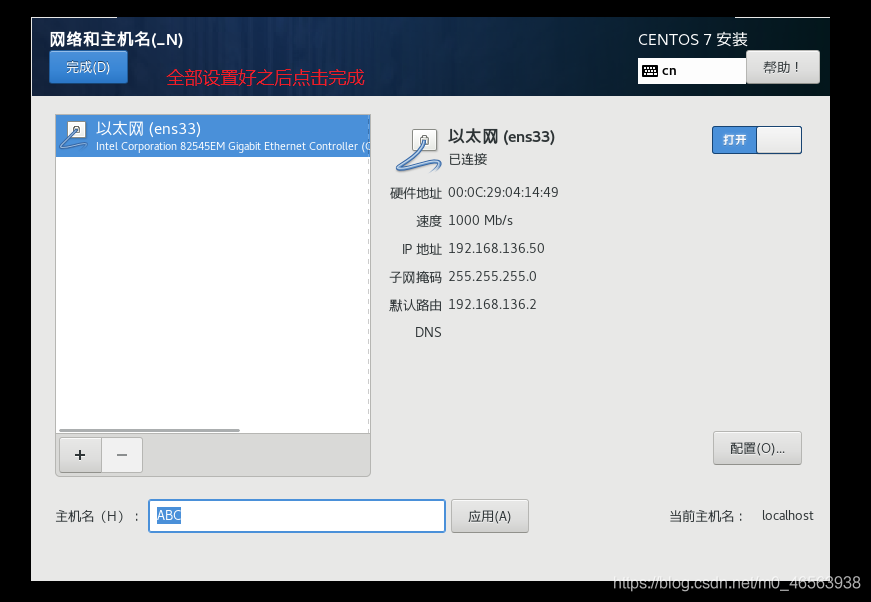
 ## and then all After setting up, click Start Installation in the lower right corner
Then here we have the ROOT password and set it when creating a user

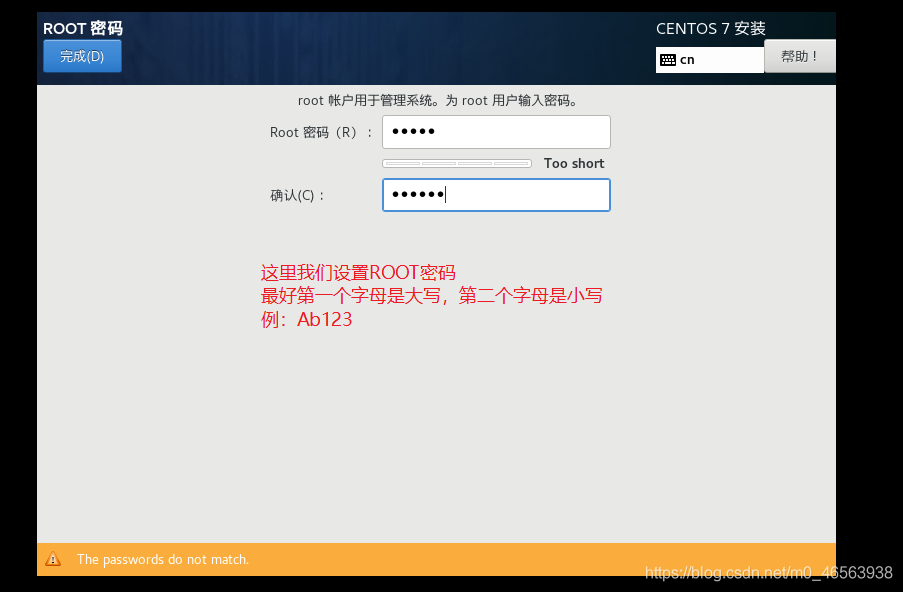
##After setting up, wait for the system installation to be completed, click Restart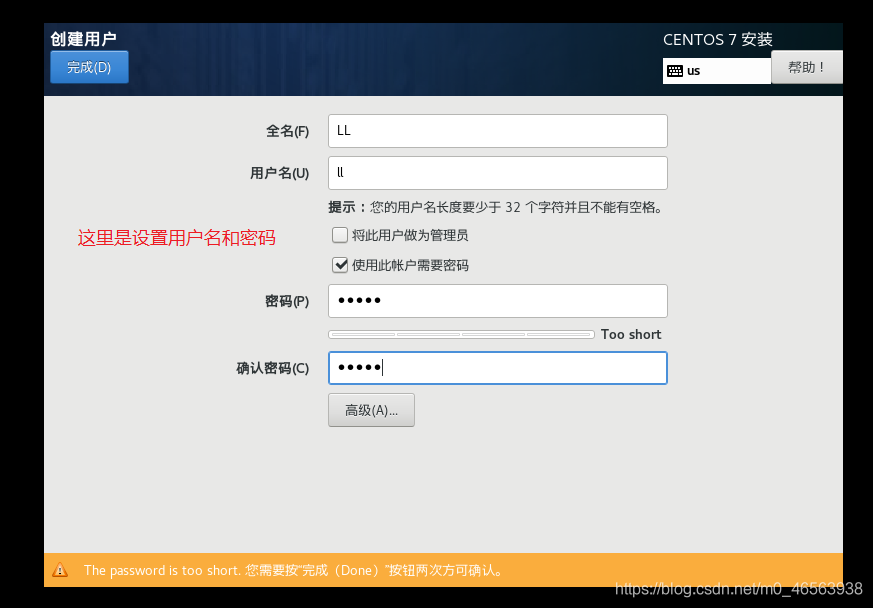
After the installation is completed, this interface will appear, we click on the 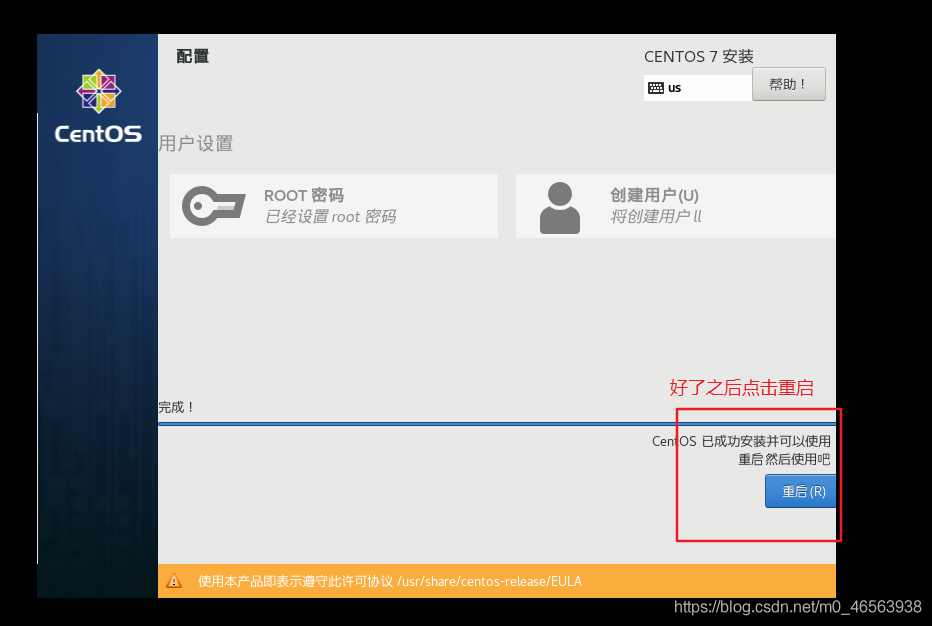 # selected in the red box
##Then click I agree, then click Finish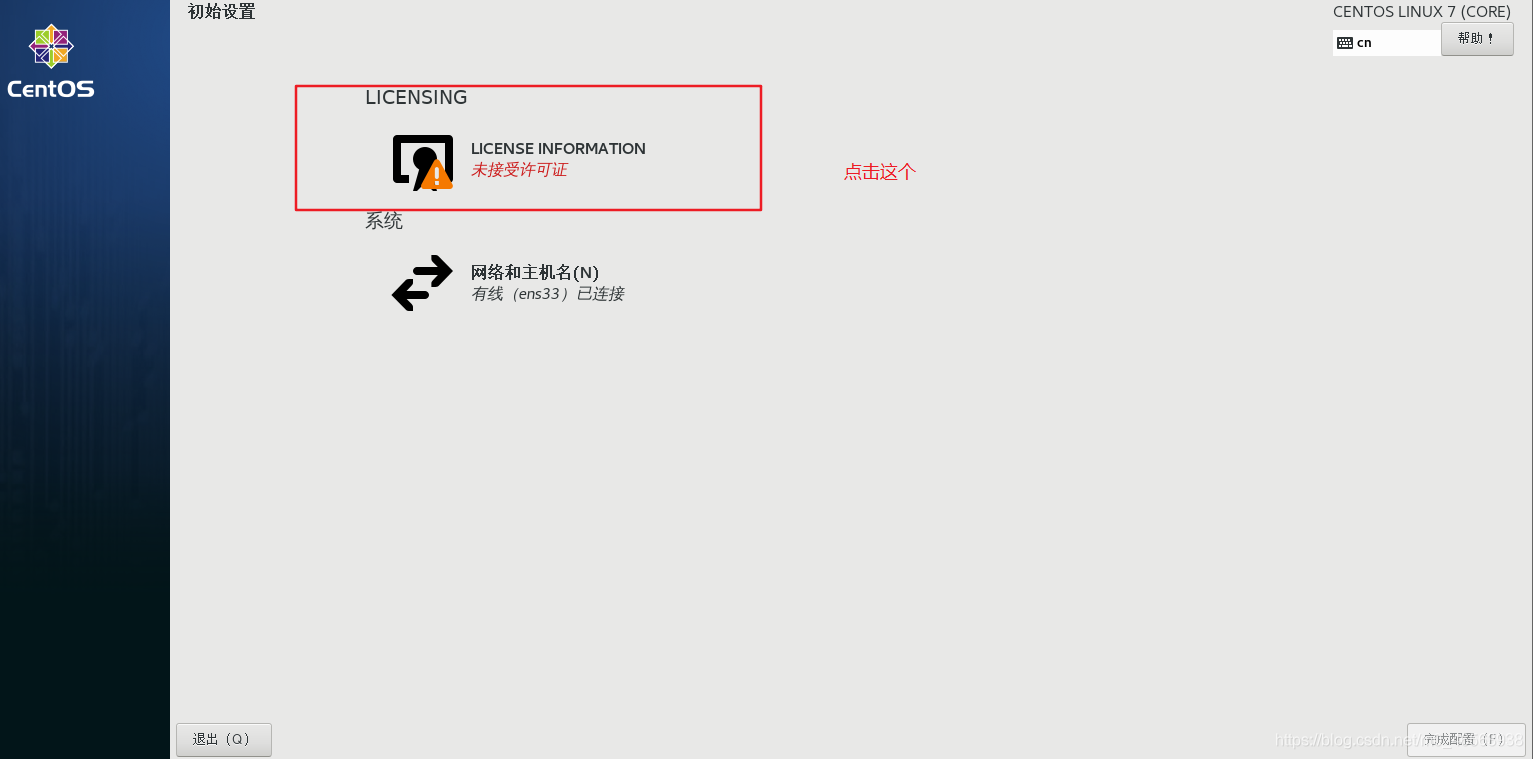
Then click to complete the configuration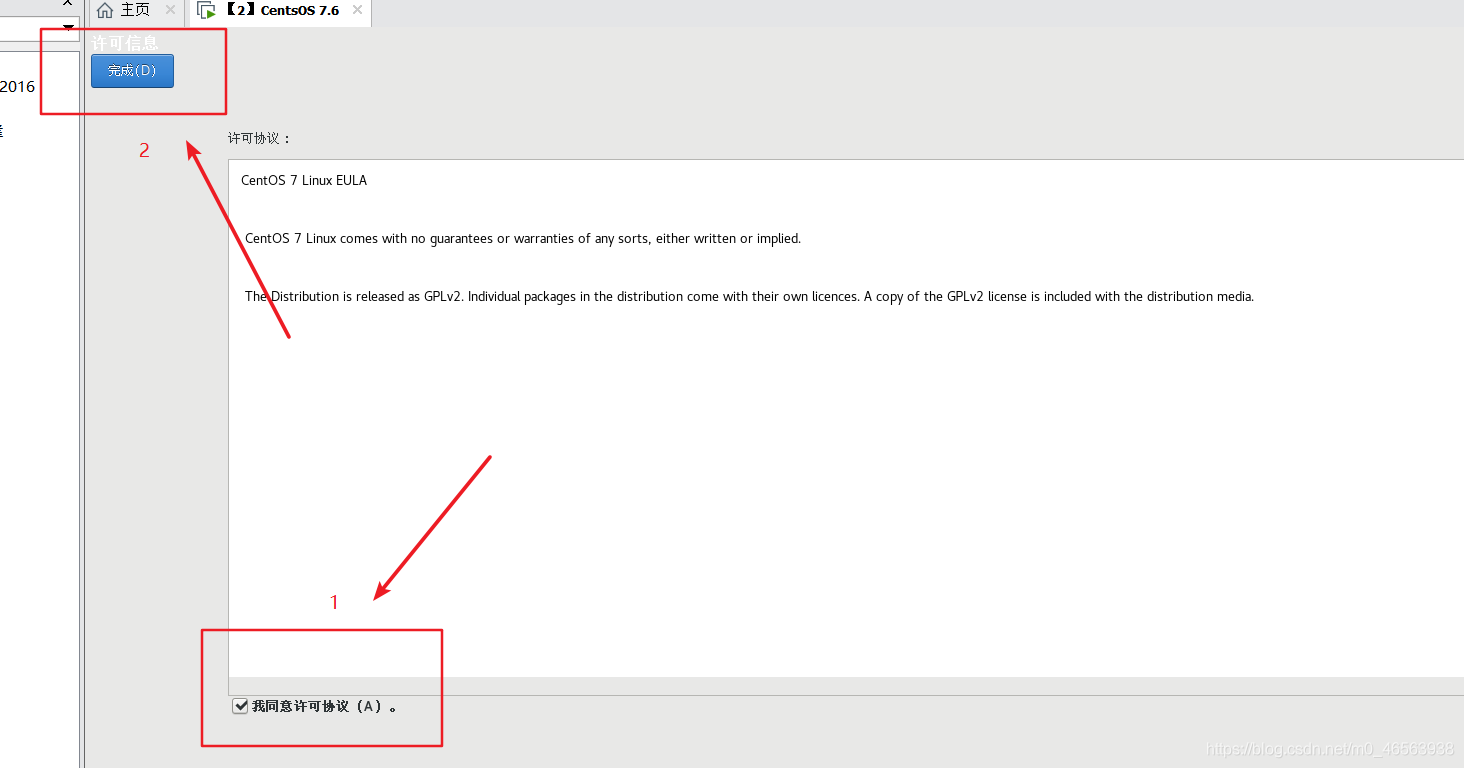
Wait for a while The user login interface will appear
We can see that these three words are not listed. We click this to choose to log in as an administrator. 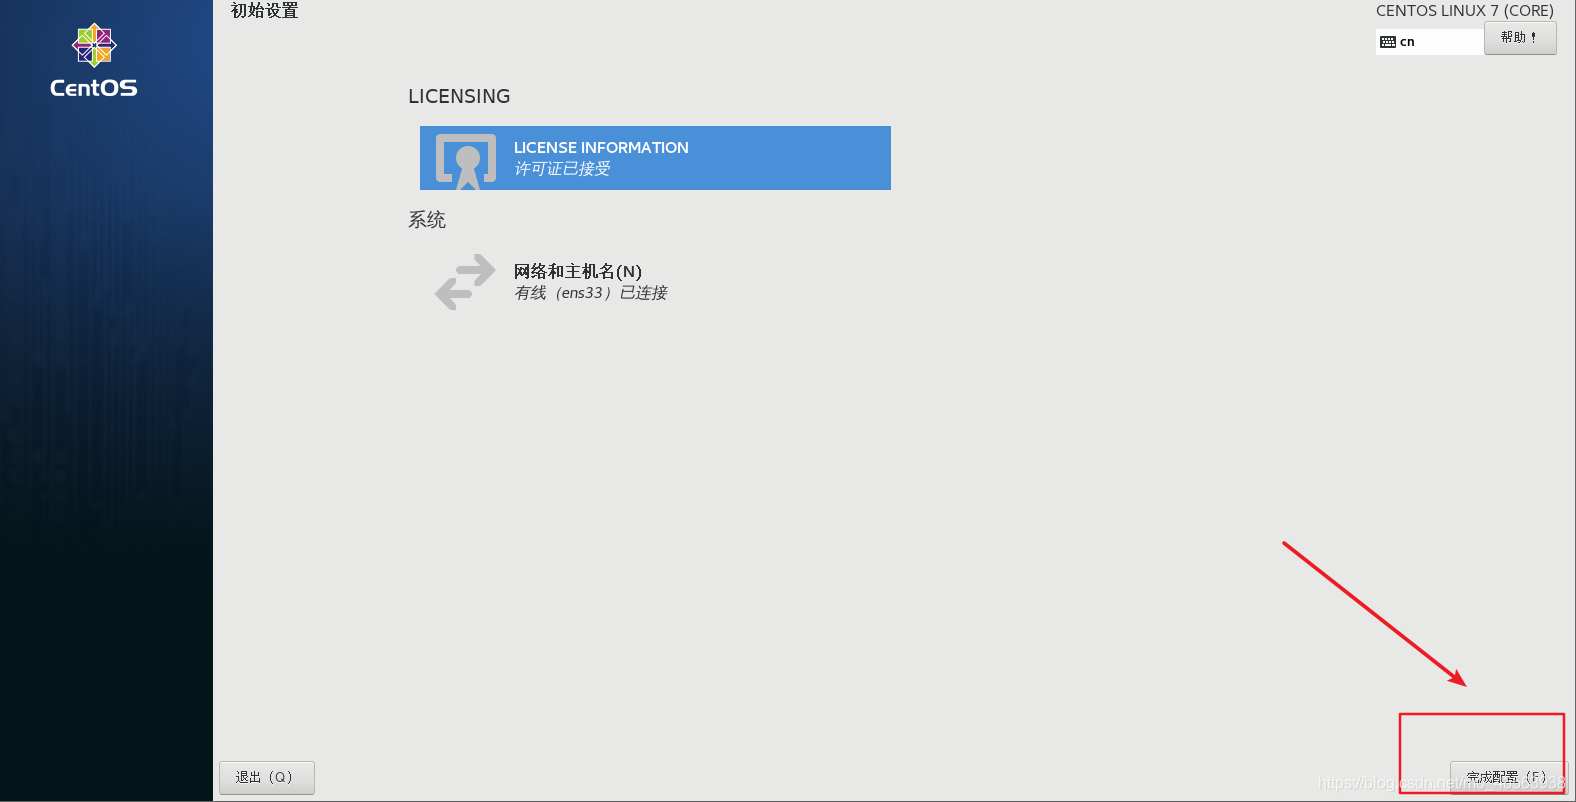 If the user logs in, enter the password we just set
Account: root
Password: Also the password we just set
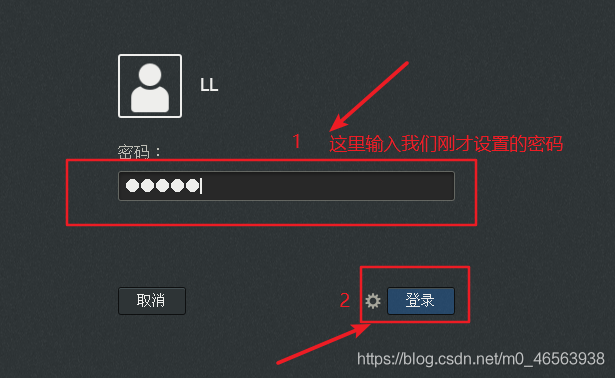
After filling in, click login, the following interface will appear, we select Chinese, and then in the next selection box, we just click forward
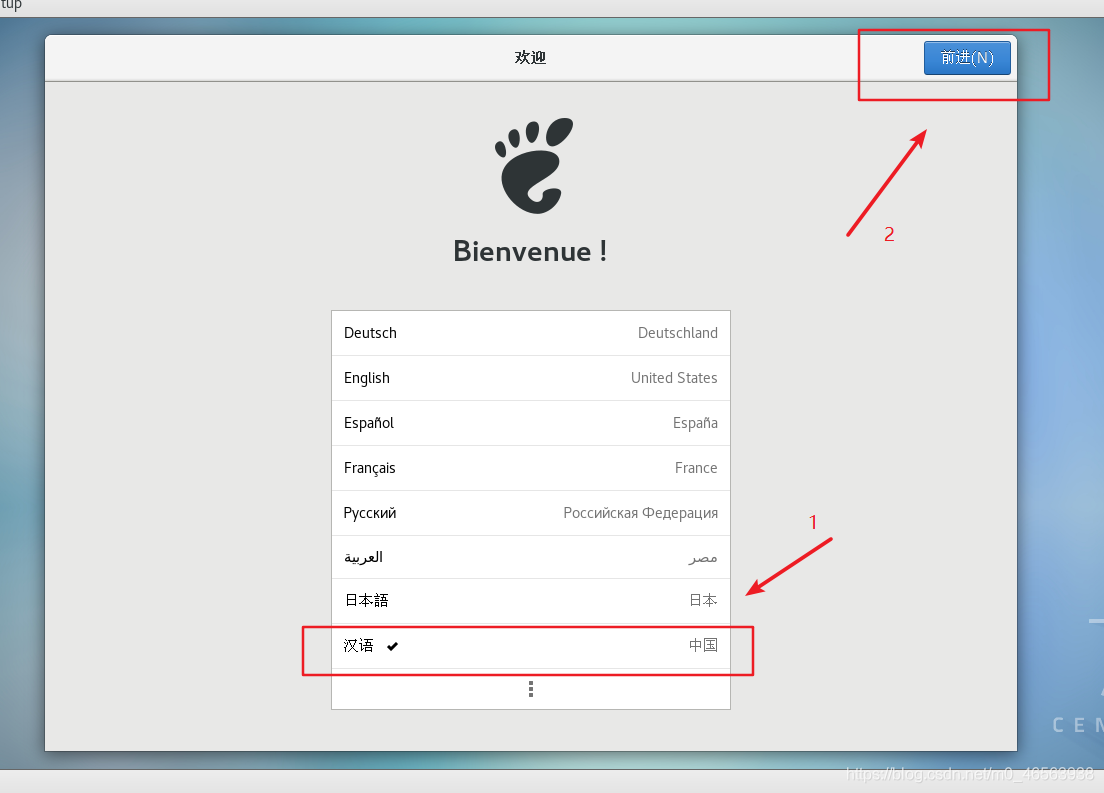
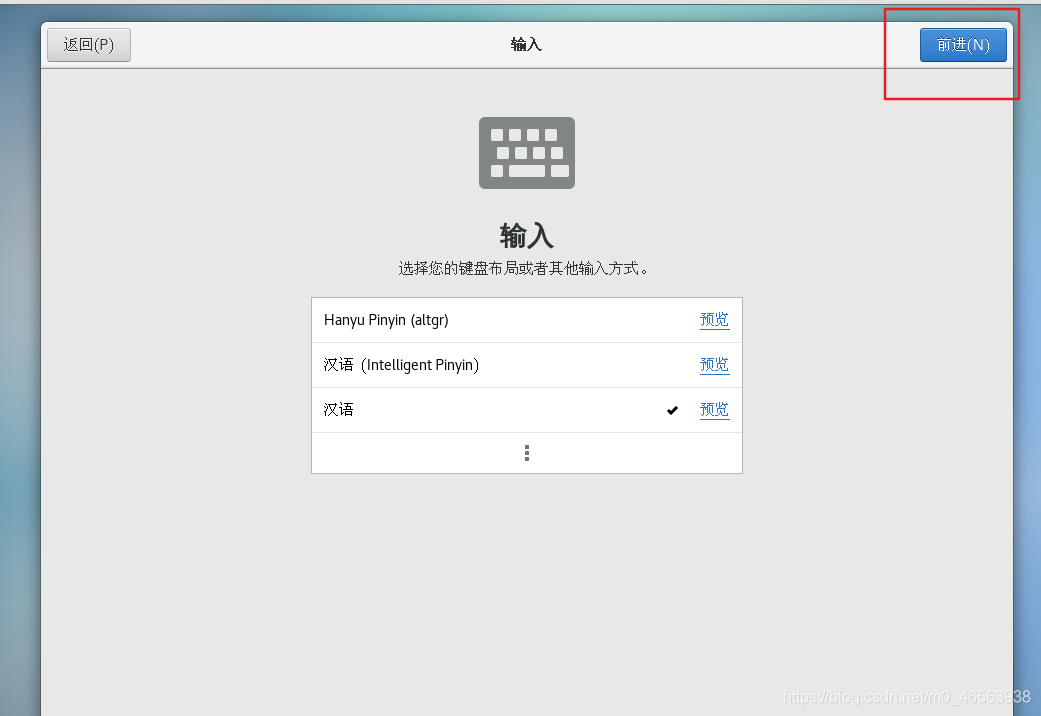

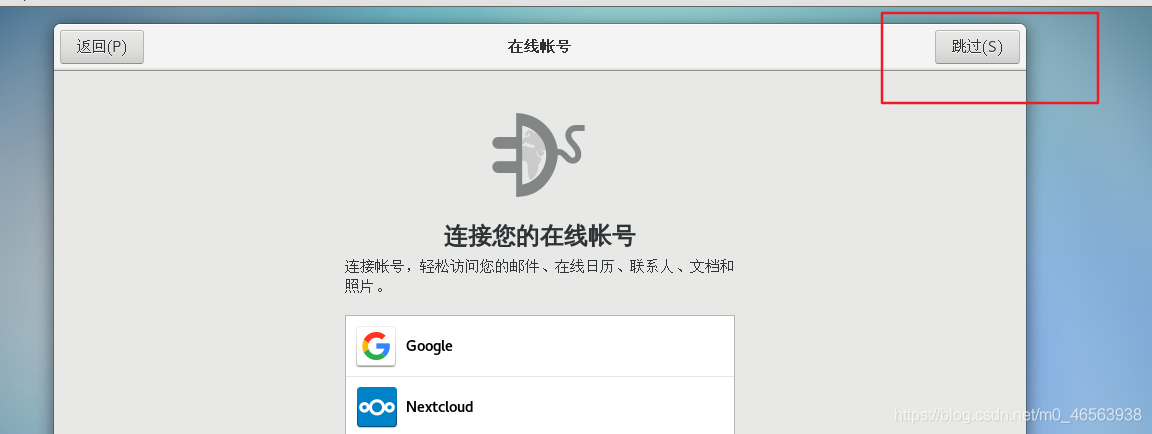
Friends who have made it this far, congratulations on completing the installation of CentOS 7.6. This is the Linux operating system we have added to use!
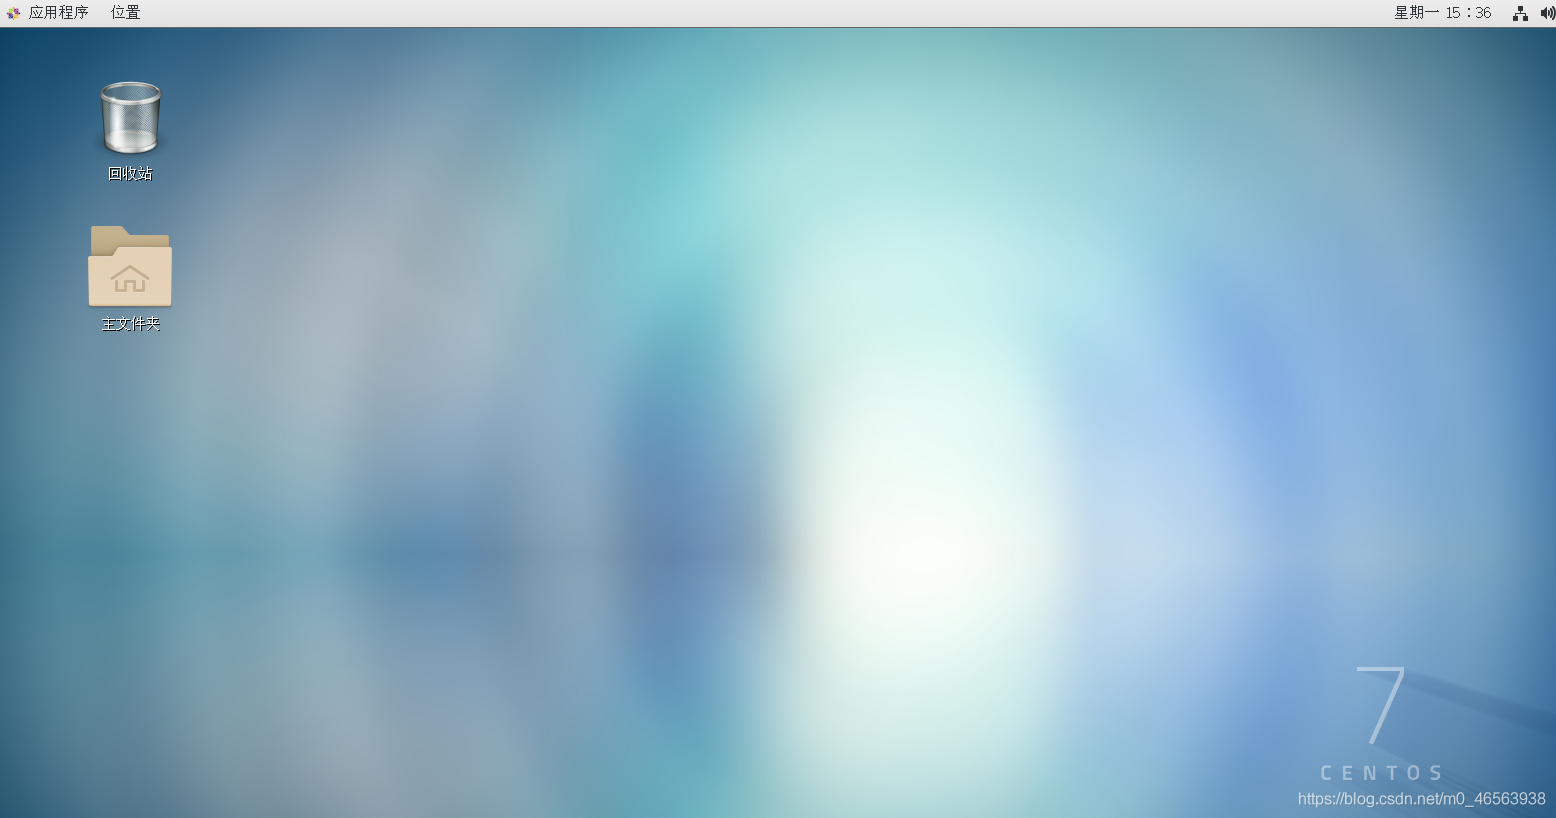
Right-click in our interface, click to open the terminal, and you can type commands in it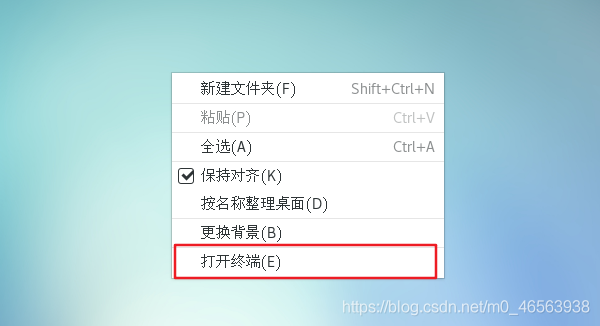
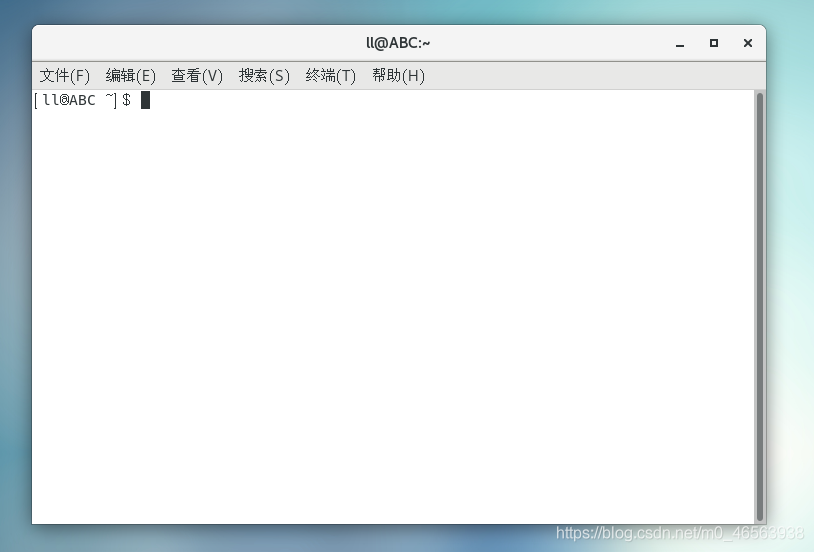
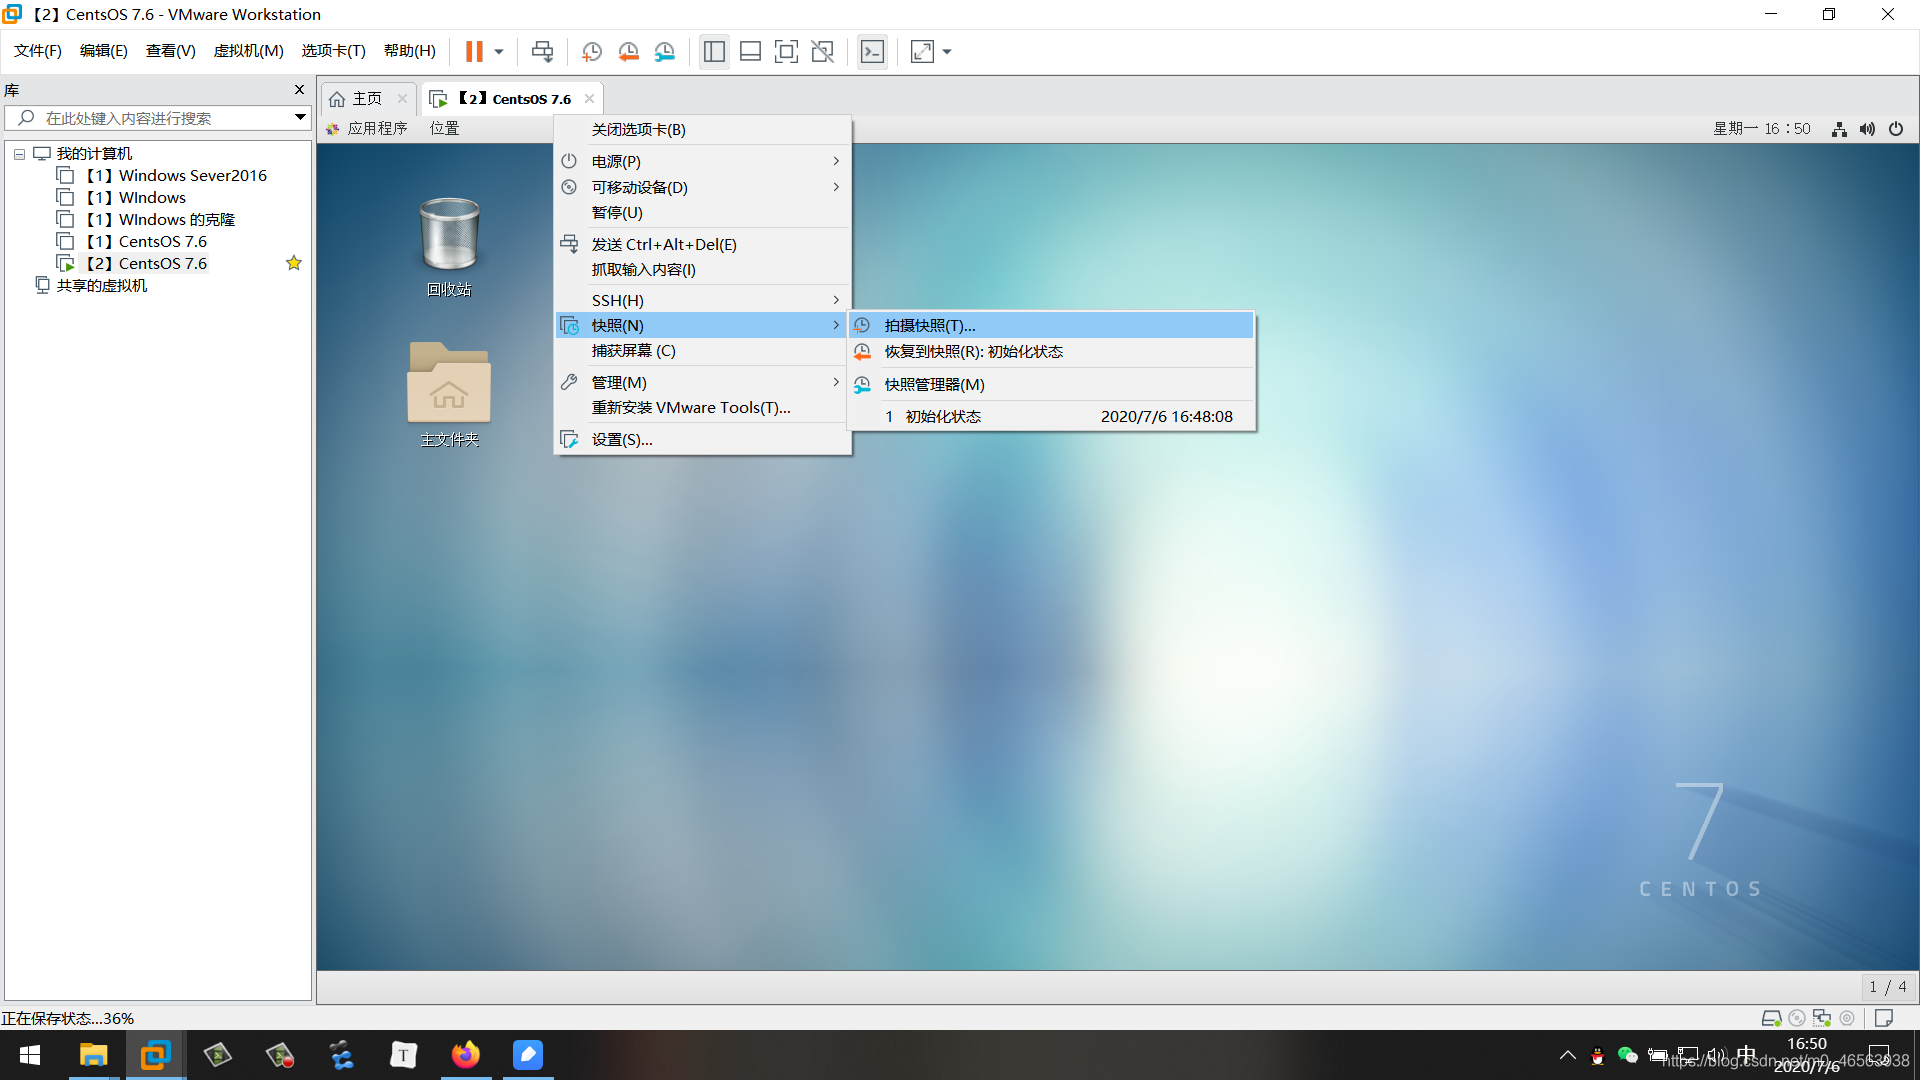
Let’s talk about snapshot teaching again. Right-click on the area selected by the red box, place the mouse on the Snapshot option, and then click Take Snapshot.
Let me explain the snapshot here. For example: Everyone has been to the Internet cafe. No matter what software we download on the computer in the Internet cafe, when we restart the computer again, the software we downloaded The software will disappear. This is the same as the principle of snapshots. No matter what software we download on the virtual machine or accidentally crashes the system, we can click restore snapshot to return the virtual machine to the state when the snapshot was taken.
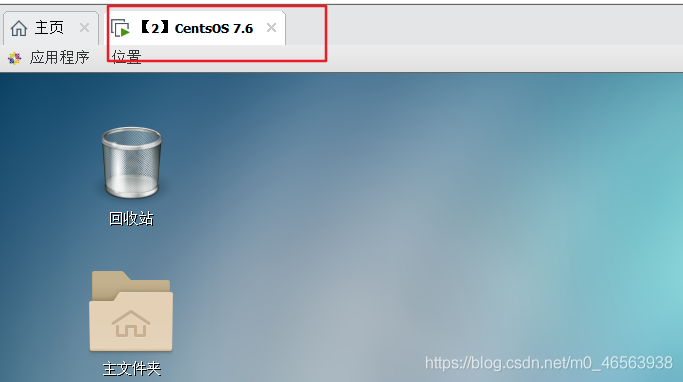
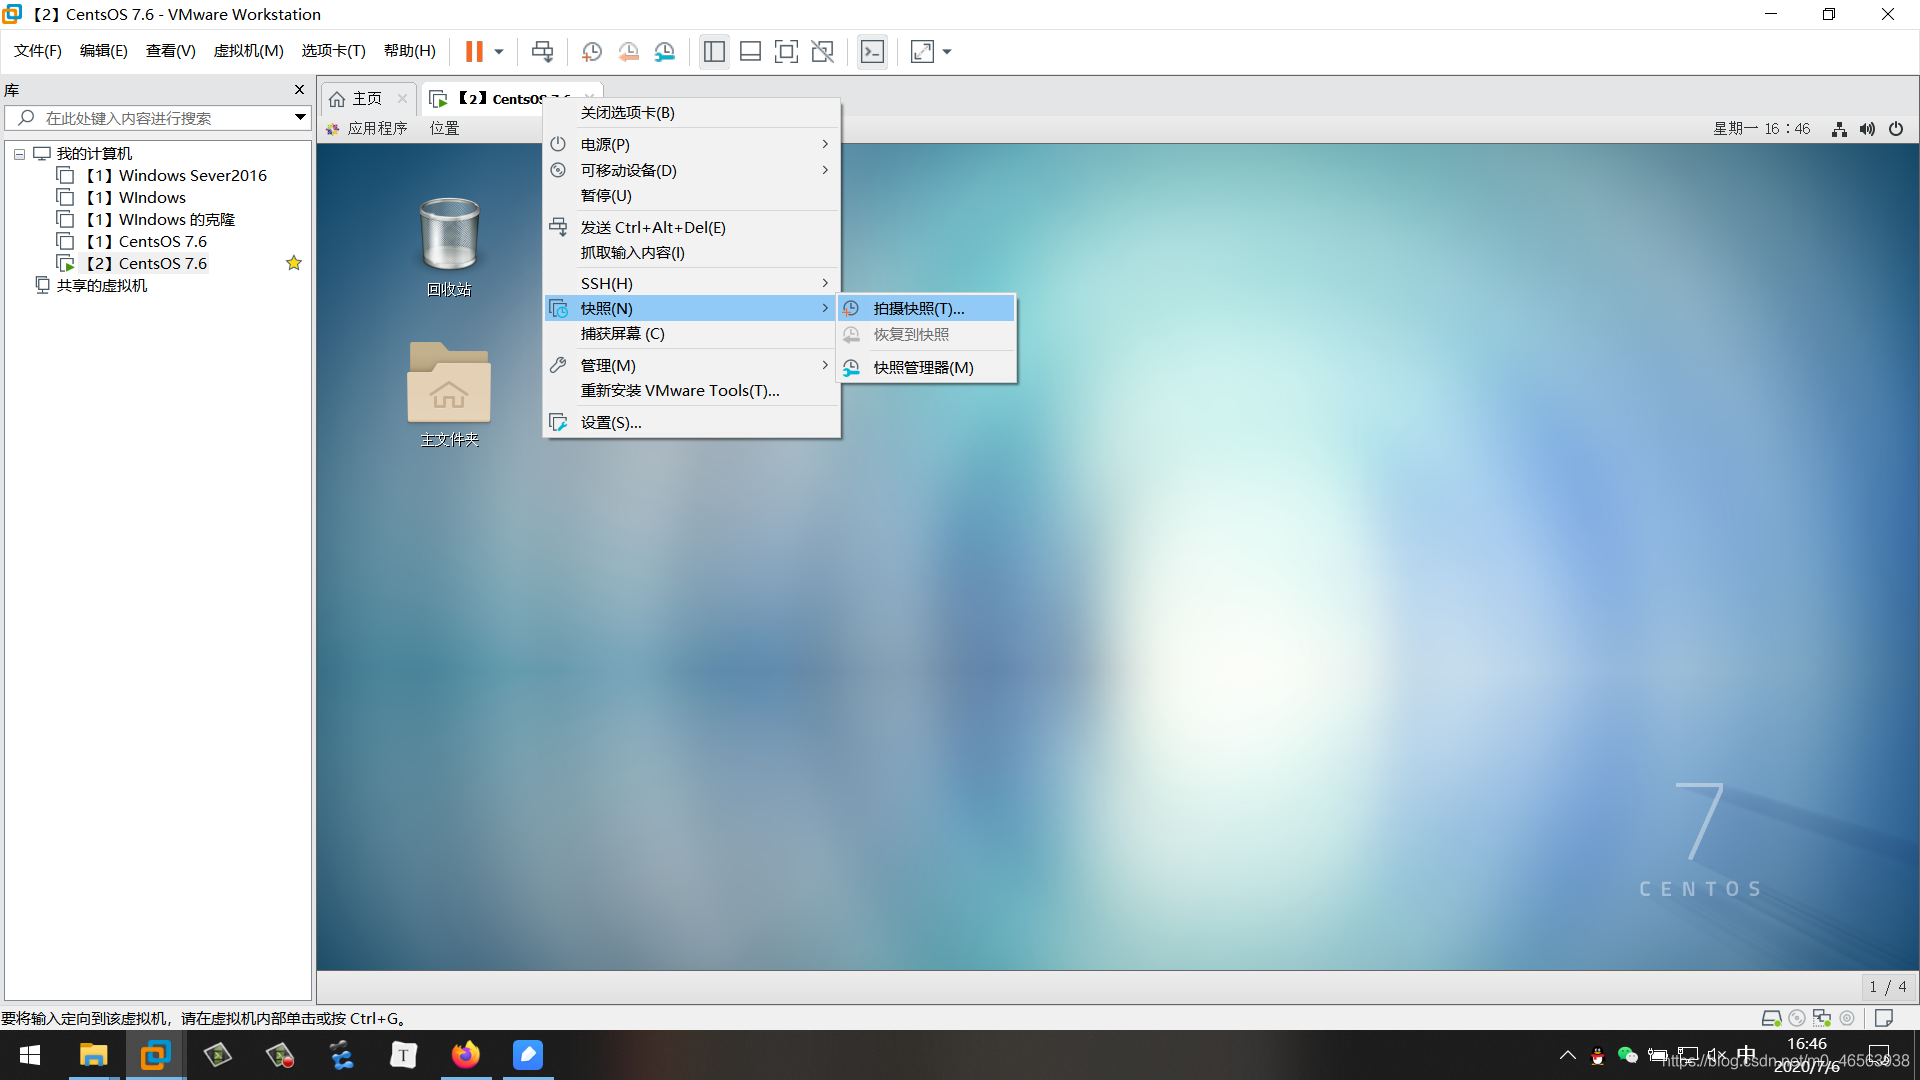
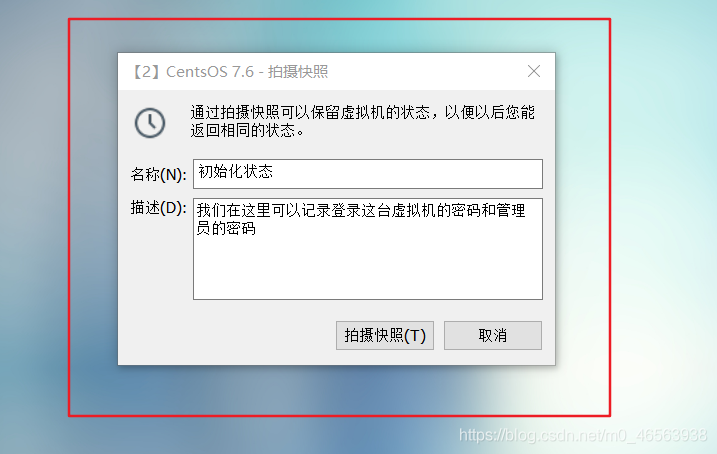
Click the snapshot manager to view the snapshots that have been taken
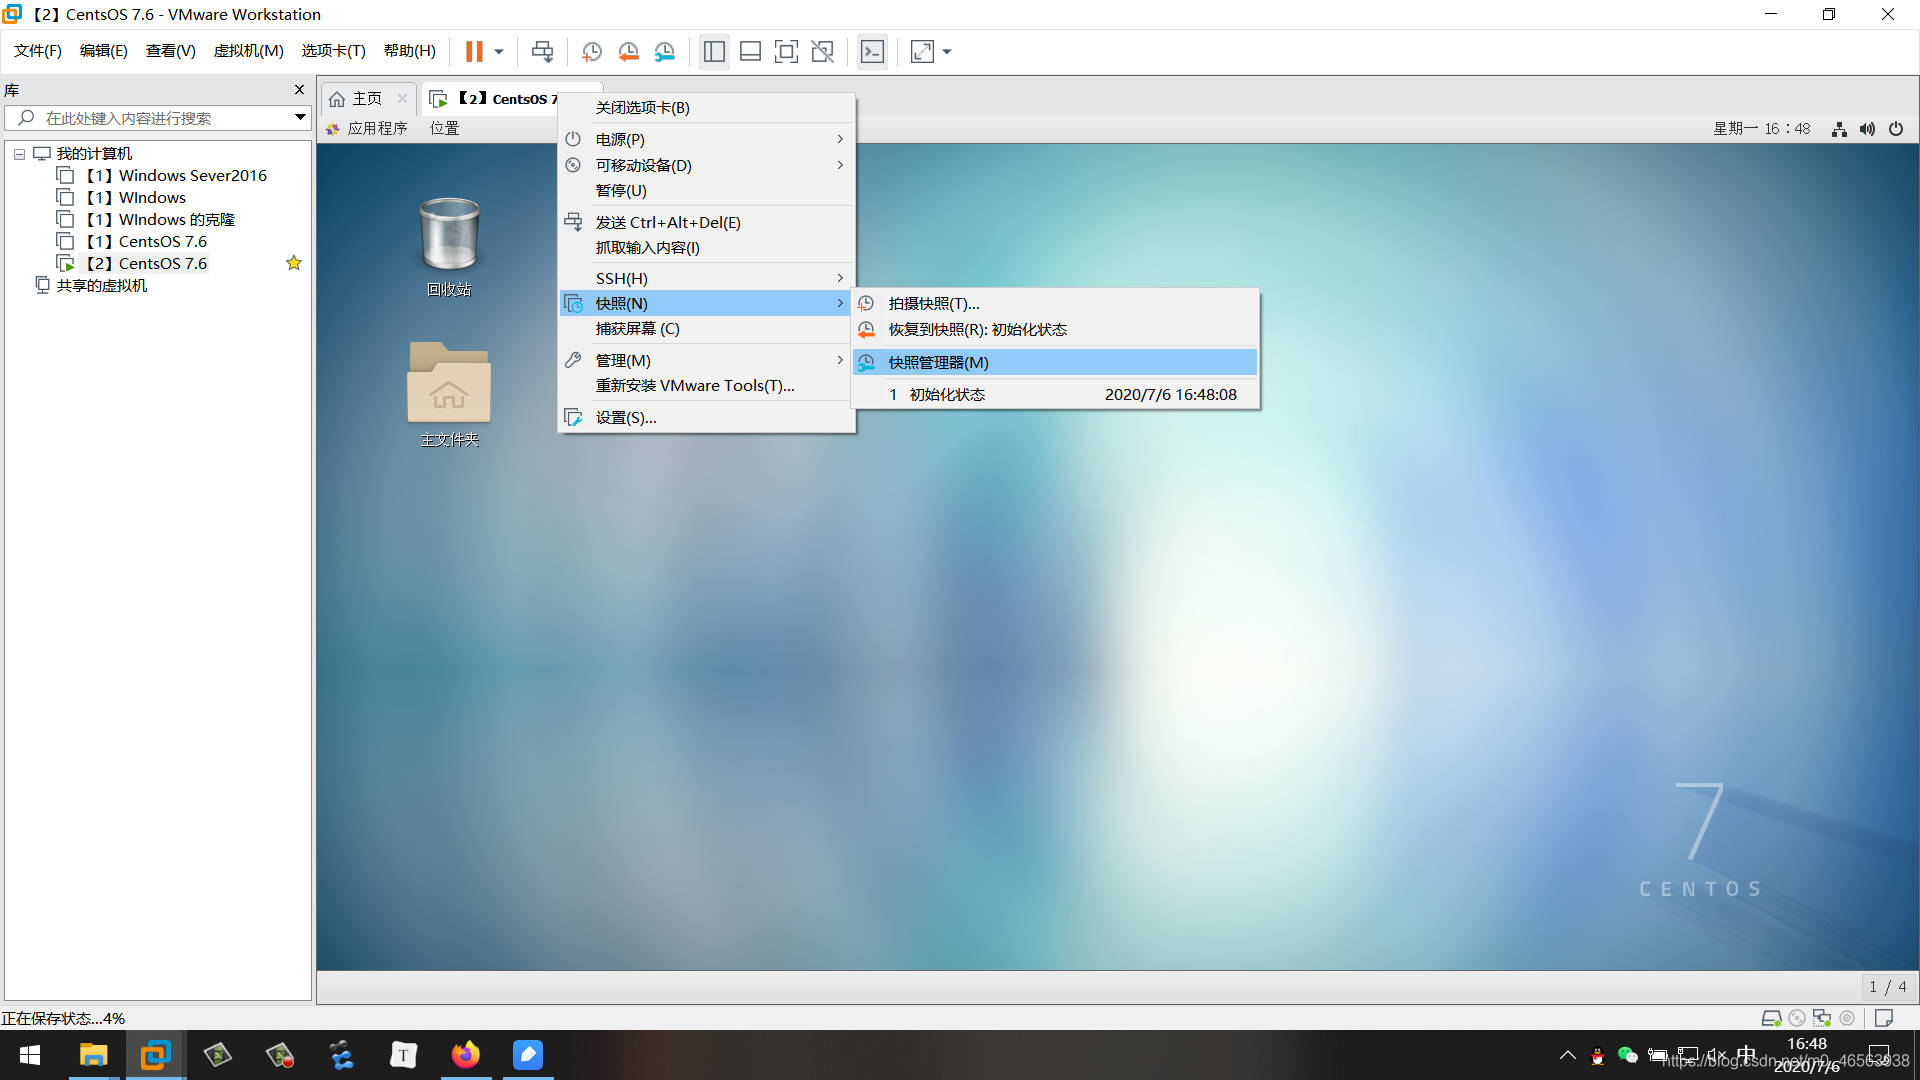
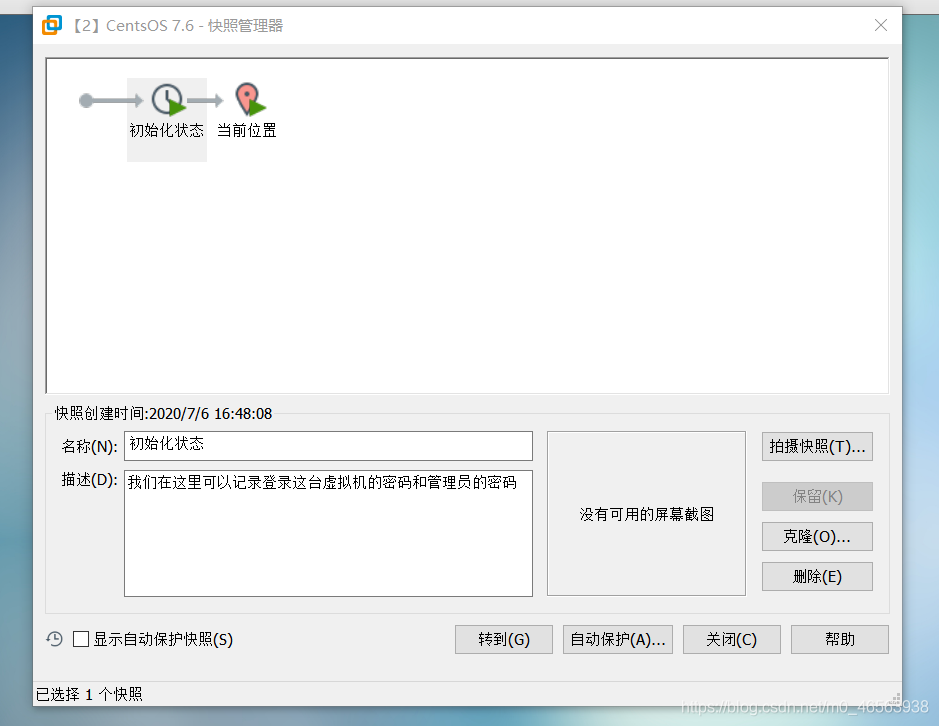
Then we click Restore Snapshot to restore the state of the snapshot taken at that time
3. Realize the connection between the virtual machine and SecureCRT
3.1. We click on this small triangle, and then click the button in the lower left corner to open the settings window
3.2. Then we Find the network in the settings window, and then click the red box button on the right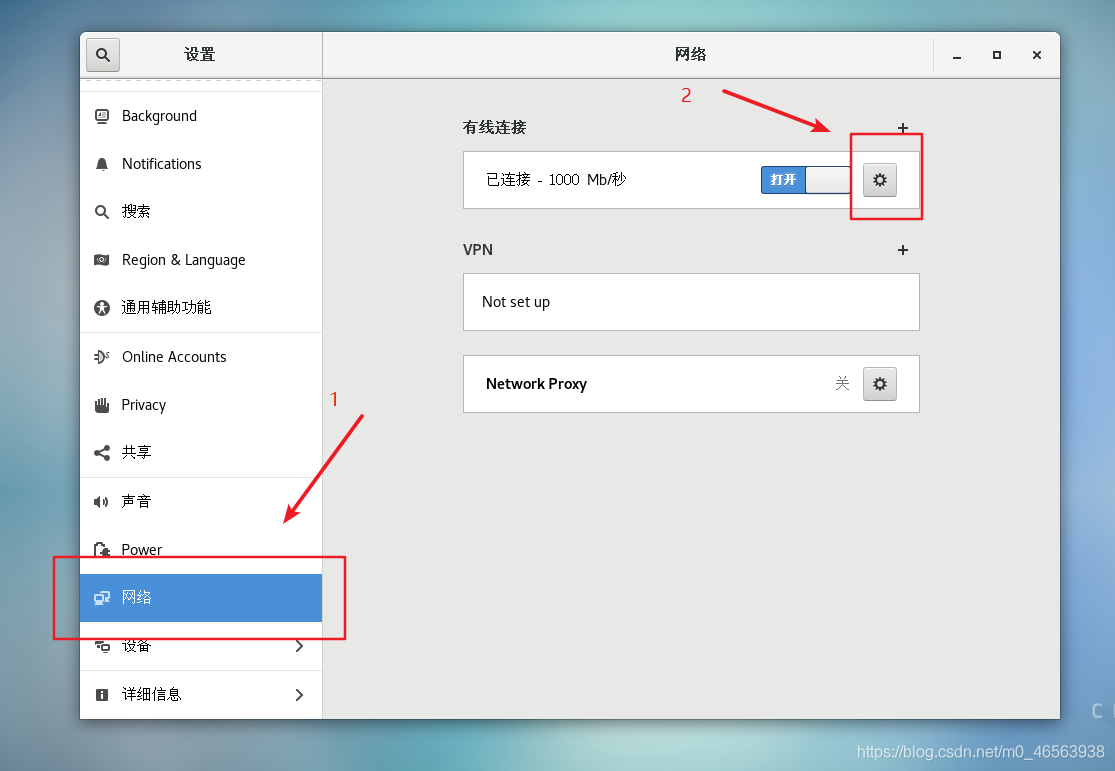
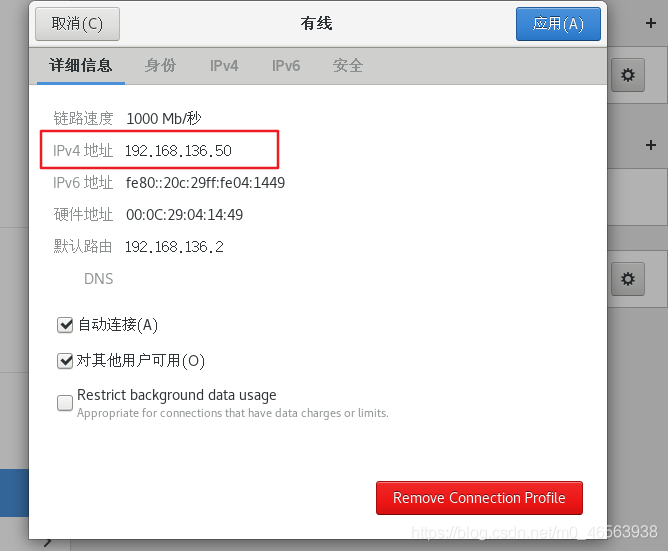
3.3. Check the IP address of our virtual machine
3.4, then click the lightning button
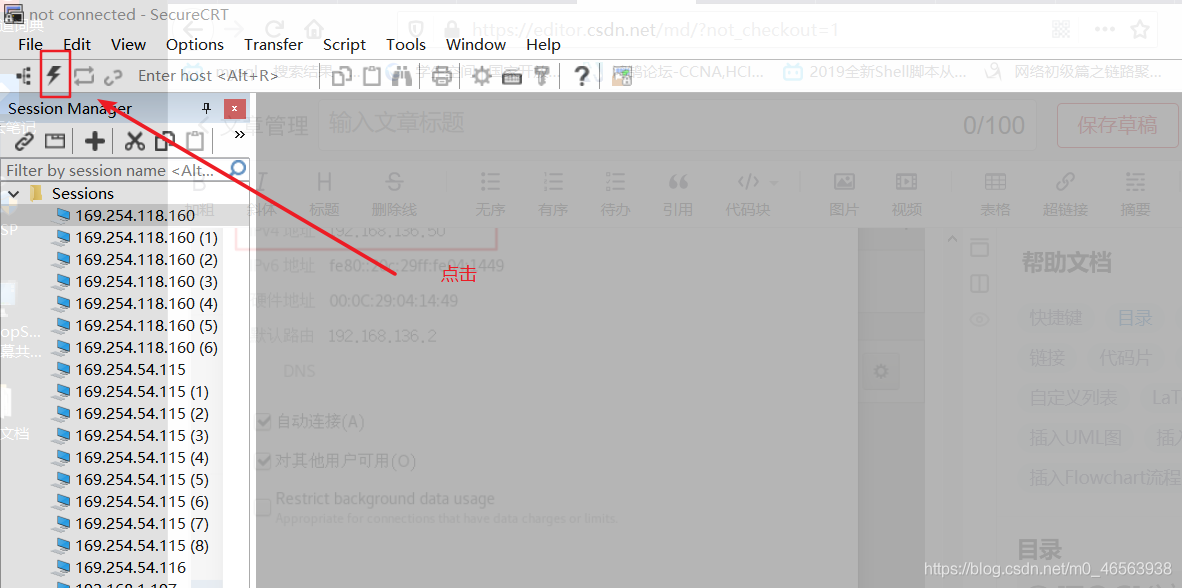
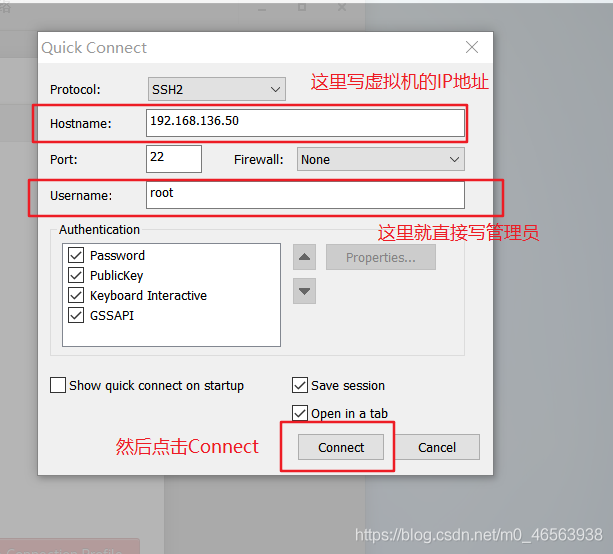
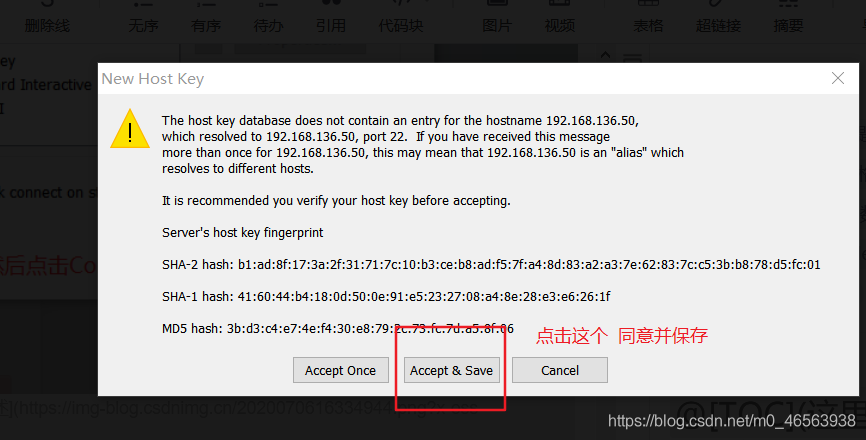
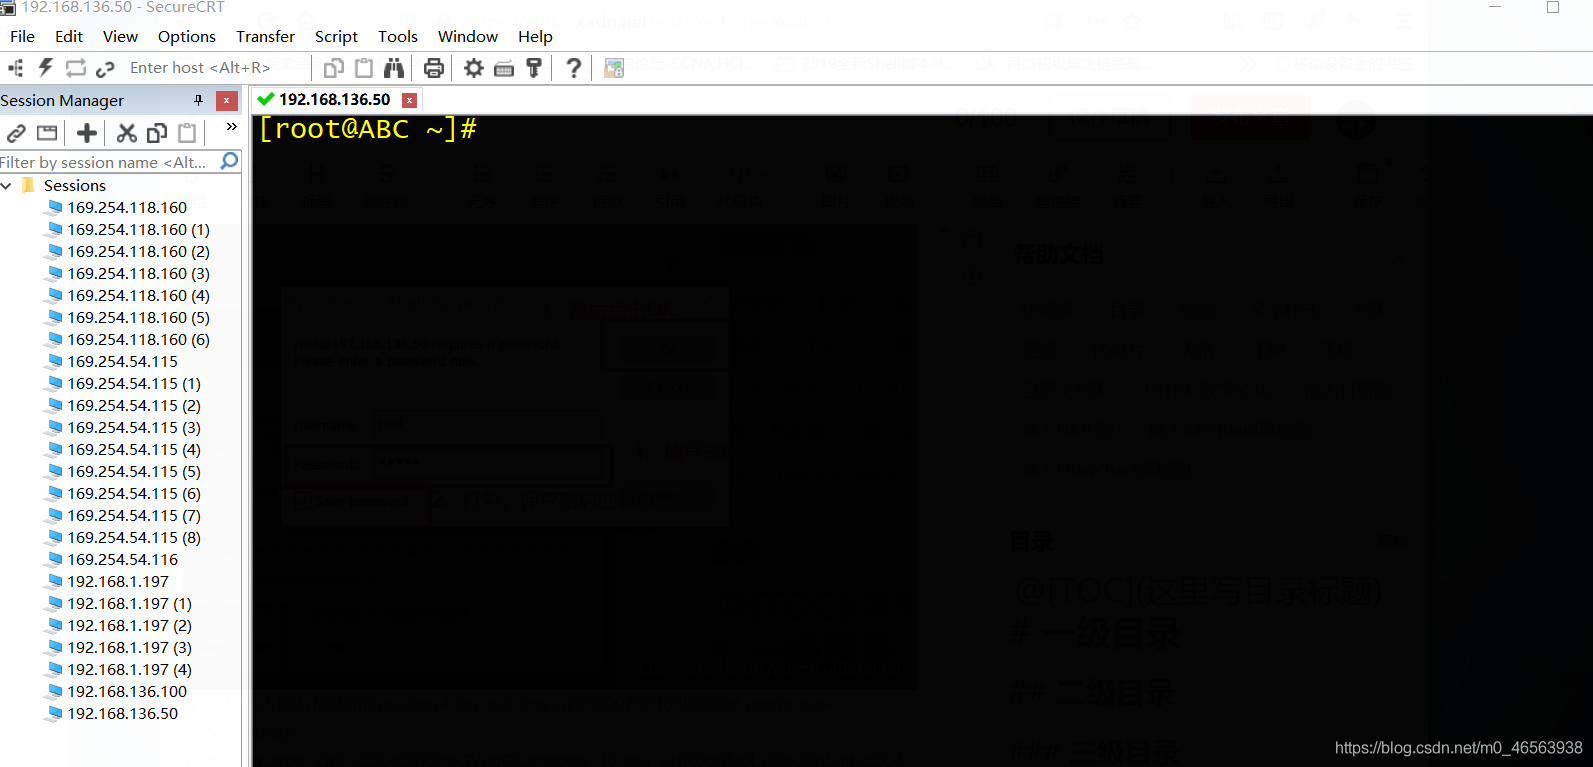
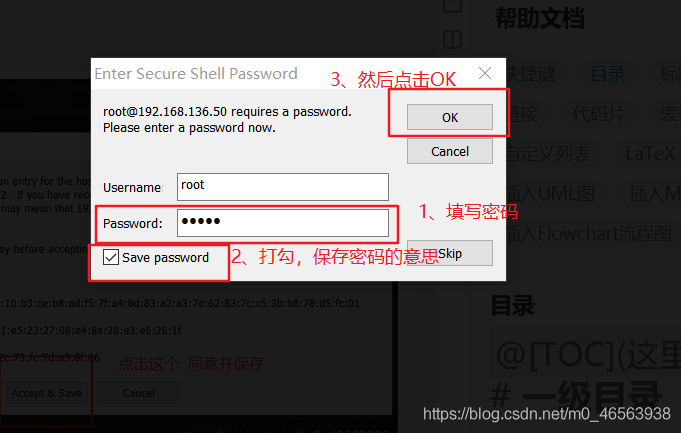 ##3.8. When we see this interface, it means that our virtual machine and SecureCRT have been successfully connected! ! !
 The most detailed CentOS installation tutorial on the entire network! ! !
The above is the detailed content of CentOS7 installation tutorial: Install Linux system in vmware virtual machine. For more information, please follow other related articles on the PHP Chinese website!

Hot AI Tools

Undresser.AI Undress
AI-powered app for creating realistic nude photos

AI Clothes Remover
Online AI tool for removing clothes from photos.

Undress AI Tool
Undress images for free

Clothoff.io
AI clothes remover

Video Face Swap
Swap faces in any video effortlessly with our completely free AI face swap tool!

Hot Article

Hot Tools

Notepad++7.3.1
Easy-to-use and free code editor

SublimeText3 Chinese version
Chinese version, very easy to use

Zend Studio 13.0.1
Powerful PHP integrated development environment

Dreamweaver CS6
Visual web development tools

SublimeText3 Mac version
God-level code editing software (SublimeText3)

Hot Topics
 What computer configuration is required for vscode
Apr 15, 2025 pm 09:48 PM
VS Code system requirements: Operating system: Windows 10 and above, macOS 10.12 and above, Linux distribution processor: minimum 1.6 GHz, recommended 2.0 GHz and above memory: minimum 512 MB, recommended 4 GB and above storage space: minimum 250 MB, recommended 1 GB and above other requirements: stable network connection, Xorg/Wayland (Linux)
 vscode cannot install extension
Apr 15, 2025 pm 07:18 PM
The reasons for the installation of VS Code extensions may be: network instability, insufficient permissions, system compatibility issues, VS Code version is too old, antivirus software or firewall interference. By checking network connections, permissions, log files, updating VS Code, disabling security software, and restarting VS Code or computers, you can gradually troubleshoot and resolve issues.
 How to run java code in notepad
Apr 16, 2025 pm 07:39 PM
Although Notepad cannot run Java code directly, it can be achieved by using other tools: using the command line compiler (javac) to generate a bytecode file (filename.class). Use the Java interpreter (java) to interpret bytecode, execute the code, and output the result.
 What is vscode What is vscode for?
Apr 15, 2025 pm 06:45 PM
VS Code is the full name Visual Studio Code, which is a free and open source cross-platform code editor and development environment developed by Microsoft. It supports a wide range of programming languages and provides syntax highlighting, code automatic completion, code snippets and smart prompts to improve development efficiency. Through a rich extension ecosystem, users can add extensions to specific needs and languages, such as debuggers, code formatting tools, and Git integrations. VS Code also includes an intuitive debugger that helps quickly find and resolve bugs in your code.
 Can vscode be used for mac
Apr 15, 2025 pm 07:36 PM
VS Code is available on Mac. It has powerful extensions, Git integration, terminal and debugger, and also offers a wealth of setup options. However, for particularly large projects or highly professional development, VS Code may have performance or functional limitations.
 How to use VSCode
Apr 15, 2025 pm 11:21 PM
Visual Studio Code (VSCode) is a cross-platform, open source and free code editor developed by Microsoft. It is known for its lightweight, scalability and support for a wide range of programming languages. To install VSCode, please visit the official website to download and run the installer. When using VSCode, you can create new projects, edit code, debug code, navigate projects, expand VSCode, and manage settings. VSCode is available for Windows, macOS, and Linux, supports multiple programming languages and provides various extensions through Marketplace. Its advantages include lightweight, scalability, extensive language support, rich features and version
 What is the main purpose of Linux?
Apr 16, 2025 am 12:19 AM
The main uses of Linux include: 1. Server operating system, 2. Embedded system, 3. Desktop operating system, 4. Development and testing environment. Linux excels in these areas, providing stability, security and efficient development tools.
 How to check the warehouse address of git
Apr 17, 2025 pm 01:54 PM
To view the Git repository address, perform the following steps: 1. Open the command line and navigate to the repository directory; 2. Run the "git remote -v" command; 3. View the repository name in the output and its corresponding address.


