

How to correctly install paper for TSC printers

Many users of tsc printers may encounter some operational difficulties when using them for the first time, especially in the step of installing label paper. In order to help you operate the printer better, the following will briefly introduce the method of installing label paper in the tsc printer.
How to load paper in tsc printer
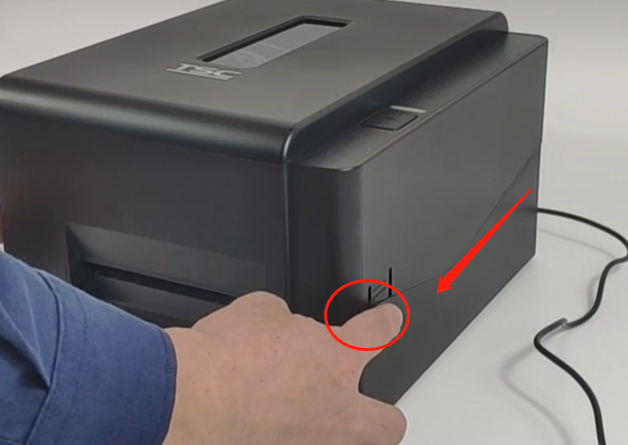
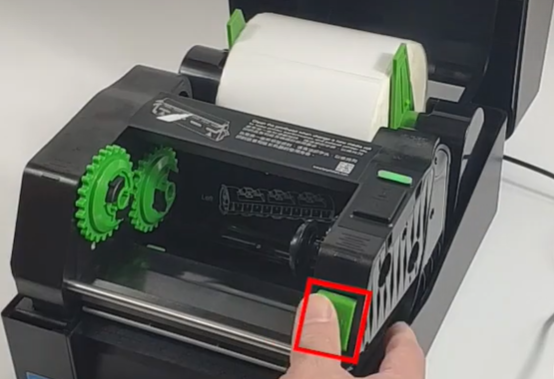
First of all, we need to master the correct operating steps to open the upper cover. Operation is very simple, just place your fingers on both sides of the button and lift it up. This way you can easily open the top cover. This step is very important, because only by opening the upper cover correctly can we proceed with the next operation. Therefore, please be sure to follow the correct steps!
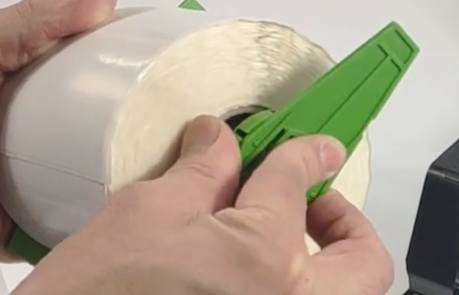
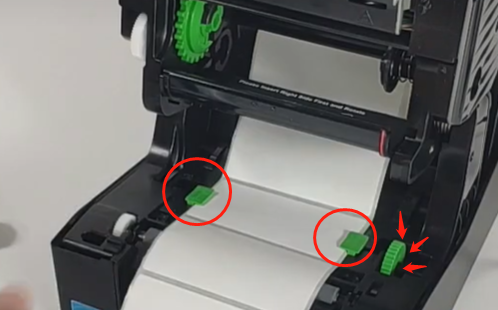
To center the label paper, we need to place it in the center of the paper clamp.
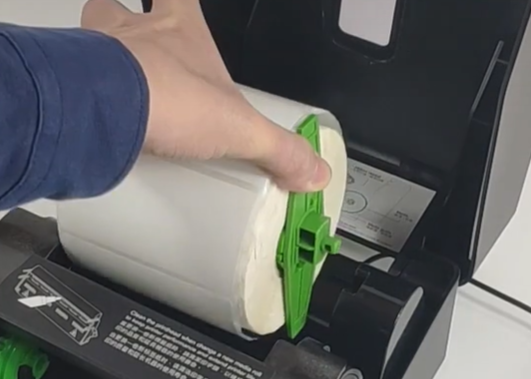
Just put the roll paper into the paper roll slot to complete the task.
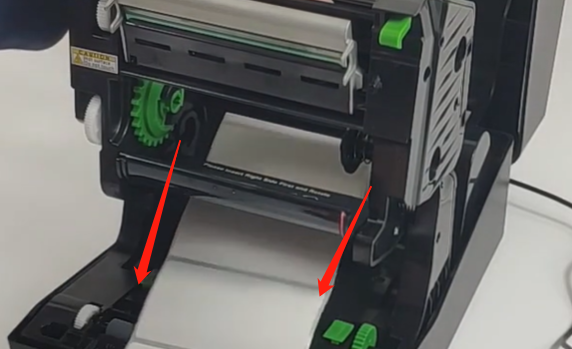
Press and hold the place marked by the red line and lift it up to open the print head.
Next, we need to remove the paper from the bottom of the print head. This is a necessary step to complete the task. Make sure we have finished printing and set the printer to stop before removing the paper. Look carefully under the print head. There is usually an indicator or button that releases the paper. Press the button, and then gently pull the paper out, making sure not to wrinkle or tear the paper. Once completed, we can store the paper properly or proceed with further processing. In this way, we successfully removed the paper from the bottom of the print head.
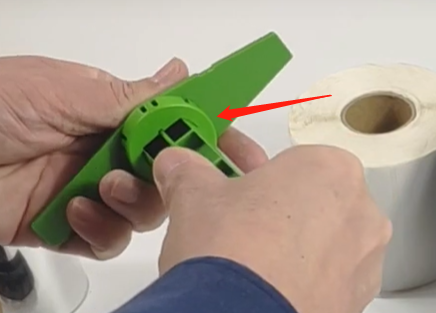
By turning the green knob, we can adjust the buckle to catch the label paper.
The above is the detailed content of How to correctly install paper for TSC printers. For more information, please follow other related articles on the PHP Chinese website!

Hot AI Tools

Undresser.AI Undress
AI-powered app for creating realistic nude photos

AI Clothes Remover
Online AI tool for removing clothes from photos.

Undress AI Tool
Undress images for free

Clothoff.io
AI clothes remover

AI Hentai Generator
Generate AI Hentai for free.

Hot Article
Hot Tools

Notepad++7.3.1
Easy-to-use and free code editor

SublimeText3 Chinese version
Chinese version, very easy to use

Zend Studio 13.0.1
Powerful PHP integrated development environment

Dreamweaver CS6
Visual web development tools

SublimeText3 Mac version
God-level code editing software (SublimeText3)
Hot Topics


 Illustrated installation steps of an electric fan 'A must-see for beginners: How to disassemble and assemble an electric fan'
Feb 06, 2024 pm 08:10 PM
Illustrated installation steps of an electric fan 'A must-see for beginners: How to disassemble and assemble an electric fan'
Feb 06, 2024 pm 08:10 PM
The disassembly and assembly operation of the electric fan can be carried out according to the actual maintenance needs. Let's take the Midea FTS35-M2 electric fan as an example to introduce the disassembly and assembly method of the electric fan. 1. Disassembly of the electric fan grille and fan blades The electric fan grille and fan blades are important components on the top of the electric fan. If you suspect that the fan blades are faulty, you need to remove the grille first and then the fan blades. The grille and blades of an electric fan are usually fixed with screws. When disassembling, find the screws on the grille, unscrew and remove the grille, and further disassemble the fan blades. Remove the electric fan grille and fan blades. The specific operation is as shown in the figure: 2. Removal of the electric fan motor casing. The electric fan motor is fixed in the electric fan casing by fixing screws. When it is suspected that the motor in the electric fan is faulty, The casing of the motor should be disassembled first.
 Step-by-step tutorial for installing win7 network card driver
Jul 27, 2023 am 10:53 AM
Step-by-step tutorial for installing win7 network card driver
Jul 27, 2023 am 10:53 AM
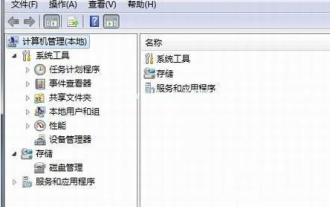
Whether an original win7 system professional version computer can work normally depends on whether our driver is normal. Just like whether our computer can access the Internet normally depends on whether our network card is installed. Then the next step is Let the editor tell you the step-by-step tutorial on installing the win7 network card driver, let’s take a look. 1. Right-click Computer-->Manage-->Device Manager: 2. Click on the network card device, select Properties, and then select the driver, as shown in the figure: 3. Click Update Driver. 4. Browse the computer for driver software and find the CD-ROM network card driver. 5. Install through the driver wizard. Download a driver wizard and open the driver management, it will pop up the driver you need to update or install, select update or
 Detailed explanation of pip installation guide on Ubuntu
Jan 27, 2024 am 09:45 AM
Detailed explanation of pip installation guide on Ubuntu
Jan 27, 2024 am 09:45 AM
Detailed explanation of the pip installation steps on Ubuntu On the Ubuntu operating system, pip is a Python package management tool that can easily help us install, upgrade and manage Python components. This article will detail the steps to install pip on Ubuntu and provide specific code examples. Step 1: Open Terminal First, open Terminal. In Ubuntu, you can open the terminal by clicking the "Applications" icon in the upper left corner and typing "terminal" in the search bar. Step 2:
 How to install Apple Pingfang font_Apple Pingfang font installation steps
Mar 23, 2024 pm 02:16 PM
How to install Apple Pingfang font_Apple Pingfang font installation steps
Mar 23, 2024 pm 02:16 PM
1. First download the Apple Pingfang font software package from this site. After the download is completed, you will get the zip format compressed package. 2. Right-click the downloaded zip format compressed package and select to extract it to the current folder to get the full set of Apple Square Font folders. 3. Double-click to open the folder and you can get the full set of Apple Pingfang fonts in .ttf format.
 Comprehensive Guide: Detailed Java Virtual Machine Installation Process
Jan 24, 2024 am 09:02 AM
Comprehensive Guide: Detailed Java Virtual Machine Installation Process
Jan 24, 2024 am 09:02 AM
Essentials for Java development: Detailed explanation of Java virtual machine installation steps, specific code examples required. With the development of computer science and technology, the Java language has become one of the most widely used programming languages. It has the advantages of cross-platform and object-oriented, and has gradually become the preferred language for developers. Before using Java for development, you first need to install the Java Virtual Machine (JavaVirtualMachine, JVM). This article will explain in detail the installation steps of the Java virtual machine and provide specific code examples.
 What is the download channel for win11 home version?
Jan 17, 2024 pm 01:57 PM
What is the download channel for win11 home version?
Jan 17, 2024 pm 01:57 PM
For ordinary users, the system is for computer use and does not require complicated functions. The home version is completely sufficient. So where can you download the win11 home version? In fact, this site provides a download link. Where can I download win11 home version: Answer: The win11 home version here on this site is very easy to use and smooth, and it is very convenient to install. You can install it directly by double-clicking to run it. Win11 Home Edition Installation Tutorial: 1. If you download win11 from this site, you can first right-click and "load" the file. 2. A folder will appear after loading, open it. 3. Then double-click the "One-click installation system.exe" to automatically install win11 home version.
 Installation tutorial and steps for pillow library
Jan 04, 2024 pm 01:41 PM
Installation tutorial and steps for pillow library
Jan 04, 2024 pm 01:41 PM
Pillow is a Python image processing library that can help us perform various image processing operations. This article will introduce the installation steps and methods of the Pillow library in detail, and provide corresponding code examples. 1. Install the Pillow library. Installing the Pillow library is very simple. We can install it through the pip command. Open the command line terminal and enter the following command to complete the installation: pipinstallpillow If you have already installed pip, run the above command and output the successful installation.
 How to install Microsoft win11
Jan 09, 2024 pm 05:18 PM
How to install Microsoft win11
Jan 09, 2024 pm 05:18 PM
Recently, Microsoft finally announced its latest operating system, Windows 11, which has been optimized and improved in many aspects to provide users with a better user experience. Therefore, many friends want to download and install it. Today I will introduce to you how to install Microsoft win11. Let’s take a look. How to install Microsoft win11 1. Users of win7, win8.1 and win10 can manually download and install the win11 system in "windows update". 2. Other system users and users who cannot download and install can install it through the win11 system image. 3. Click the blue link above to download the win11 image system. After the download is completed, load the file. 4. Loading
