

How to install UFIDA U8Win10: simple tutorial

When we use the win10 operating system, some friends need to use UF u8 on the computer because of work but don’t know how to operate it. Regarding this problem, the editor thinks that we can download UF u8 online first, and then use it on the computer. You can make corresponding settings in the properties, such as changing the computer name, modifying the registry, etc. Let’s take a look at how the editor did it for the specific detailed steps~
UFIDA u8win10 installation tutorial
Step 1:
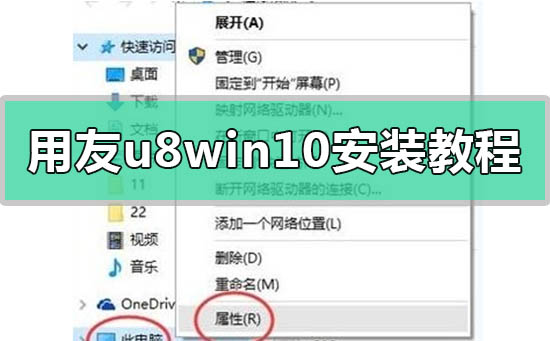
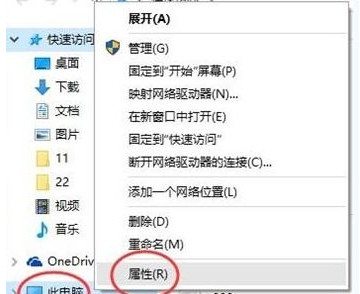
1 . On the "This PC" icon, select "Properties";
2. Click the Change Settings button under Computer Name, Domain and Workgroup Settings:
3. On the "Computer Name" page Click Click and enter the name that needs to be modified in the computer name field
(English letters within 8 characters, excluding punctuation and special symbols);
4. After modification, click "OK" button. The system will prompt that you need to restart the computer.
Click "OK" and select;
Step 2: Turn off UAC
1. Right Click the win icon in the lower left corner of the desktop and select Control Panel:
2. In the Control Panel, click: Category - "Large Icons"/"Small Icons", and then click "User Accounts":
3. Click, User Account, then click Change User Account Control, pull the button to Never notify, note that this step must be done,
4. Press win R to open run, enter regedit and click OK to open Registry;
5. Click: HKEY_LOCAL_MACHINE\Software\Microsoft\Windows\CurrentVersion\Polocies\System;
6. After expanding System, find "EnablelLua" on the right, double-click to open the preset Set the value to "1", change the value to "0" and click OK to save.
Okay, after the modification is completed, restart the computer before continuing with the settings.
Step 3: Modify variables
1. Press win x and click System;
2. Click Advanced System Settings on the left , click on the bottom of the pop-up interface box:
3. Double-click TEMP in the above picture, the following interface will appear, change the variable value to d:\temp
(note that it is changed to your If you have a drive letter, be sure to check if you have D drive. If you don’t have
, you can just change it to C drive or E drive. Also, be careful not to type the colon into a Chinese colon.
Otherwise, an error will be prompted later.) Modify the TMP again:
Step 4:
1. In the start menu Right-click on the top and select:
2. Click on the upper left corner of the opened interface:
3. Click to enable or disable Windows functions and find "internet information services" in the box that appears. ,
Expand the numbers in front of "Web Management Tools" and "World Wide Web Services" to the last level, and then check them all one by one:
4. Then click the "OK" button to prompt Windows function update icon,
Please connect your computer to the Internet and click "Download file from windows update", otherwise the IIS installed may be incomplete, which will cause the UFIDA software to be unable to use normally
More installation tutorial related information:
>>>windows10 system CD installation tutorial
>>>Tomato Garden win7 installation tutorial
>>>Deep Technology Win7 Spring Festival Edition Installation Tutorial
>>>Win7 Pure Edition Installation Tutorial
>>>Yulinmufeng win732-bit system download and installation tutorialThe above is the UFIDA u8win10 installation tutorial brought to you by the editor. All content, hope you will like it. For more related tutorials, please bookmark this site~
The above is the detailed content of How to install UFIDA U8Win10: simple tutorial. For more information, please follow other related articles on the PHP Chinese website!

Hot AI Tools

Undresser.AI Undress
AI-powered app for creating realistic nude photos

AI Clothes Remover
Online AI tool for removing clothes from photos.

Undress AI Tool
Undress images for free

Clothoff.io
AI clothes remover

Video Face Swap
Swap faces in any video effortlessly with our completely free AI face swap tool!

Hot Article
Hot Tools

Notepad++7.3.1
Easy-to-use and free code editor

SublimeText3 Chinese version
Chinese version, very easy to use

Zend Studio 13.0.1
Powerful PHP integrated development environment

Dreamweaver CS6
Visual web development tools

SublimeText3 Mac version
God-level code editing software (SublimeText3)
Hot Topics
 1390
1390
 52
52

 Quickly install OpenCV study guide using pip package manager
Jan 18, 2024 am 09:55 AM
Quickly install OpenCV study guide using pip package manager
Jan 18, 2024 am 09:55 AM
Use the pip command to easily install OpenCV tutorial, which requires specific code examples. OpenCV (OpenSource Computer Vision Library) is an open source computer vision library. It contains a large number of computer vision algorithms and functions, which can help developers quickly build image and video processing related applications. Before using OpenCV, we need to install it first. Fortunately, Python provides a powerful tool pip to manage third-party libraries
 Learn to install Selenium easily using PyCharm: PyCharm installation and configuration guide
Jan 04, 2024 pm 09:48 PM
Learn to install Selenium easily using PyCharm: PyCharm installation and configuration guide
Jan 04, 2024 pm 09:48 PM
PyCharm installation tutorial: Easily learn how to install Selenium, specific code examples are needed. As Python developers, we often need to use various third-party libraries and tools to complete project development. Among them, Selenium is a very commonly used library for automated testing and UI testing of web applications. As an integrated development environment (IDE) for Python development, PyCharm provides us with a convenient and fast way to develop Python code, so how
 PyCharm Community Edition Installation Guide: Quickly master all the steps
Jan 27, 2024 am 09:10 AM
PyCharm Community Edition Installation Guide: Quickly master all the steps
Jan 27, 2024 am 09:10 AM
Quick Start with PyCharm Community Edition: Detailed Installation Tutorial Full Analysis Introduction: PyCharm is a powerful Python integrated development environment (IDE) that provides a comprehensive set of tools to help developers write Python code more efficiently. This article will introduce in detail how to install PyCharm Community Edition and provide specific code examples to help beginners get started quickly. Step 1: Download and install PyCharm Community Edition To use PyCharm, you first need to download it from its official website
 How to install solidworks2016-solidworks2016 installation tutorial
Mar 05, 2024 am 11:25 AM
How to install solidworks2016-solidworks2016 installation tutorial
Mar 05, 2024 am 11:25 AM
Recently, many friends have asked me how to install solidworks2016. Next, let us learn the installation tutorial of solidworks2016. I hope it can help everyone. 1. First, exit the anti-virus software and make sure to disconnect from the network (as shown in the picture). 2. Then right-click the installation package and select to extract to the SW2016 installation package (as shown in the picture). 3. Double-click to enter the decompressed folder. Right-click setup.exe and click Run as administrator (as shown in the picture). 4. Then click OK (as shown in the picture). 5. Then check [Single-machine installation (on this computer)] and click [Next] (as shown in the picture). 6. Then enter the serial number and click [Next] (as shown in the picture). 7.
 A must-read for Python beginners: a concise and easy-to-understand pip installation guide
Jan 16, 2024 am 10:34 AM
A must-read for Python beginners: a concise and easy-to-understand pip installation guide
Jan 16, 2024 am 10:34 AM
Essential for Python novices: Simple and easy-to-understand pip installation tutorial Introduction: In Python programming, installing external libraries is a very important step. As the officially recommended package management tool for Python, pip is easy to understand and powerful, making it one of the essential skills for Python novices. This article will introduce you to the pip installation method and specific code examples to help you get started easily. 1. Installation of pip Before you start using pip, you need to install it first. Here is how to install pip: First,
 How to install NeXus desktop beautification-NeXus desktop beautification installation tutorial
Mar 04, 2024 am 11:30 AM
How to install NeXus desktop beautification-NeXus desktop beautification installation tutorial
Mar 04, 2024 am 11:30 AM
Friends, do you know how to install NeXus desktop beautification? Today I will explain the installation tutorial of NeXus desktop beautification. If you are interested, come and take a look with me. I hope it can help you. 1. Download the latest version of the Nexus desktop beautification plug-in software package from this site (as shown in the picture). 2. Unzip the Nexus desktop beautification plug-in software and run the file (as shown in the picture). 3. Double-click to open and enter the Nexus desktop beautification plug-in software interface. Please read the installation license agreement below carefully to see if you accept all the terms of the above license agreement. Click I agree and click Next (as shown in the picture). 4. Select the destination location. The software will be installed in the folder listed below. To select a different location and create a new path, click Next
 Simple pandas installation tutorial: detailed guidance on how to install pandas on different operating systems
Feb 21, 2024 pm 06:00 PM
Simple pandas installation tutorial: detailed guidance on how to install pandas on different operating systems
Feb 21, 2024 pm 06:00 PM
Simple pandas installation tutorial: Detailed guidance on how to install pandas on different operating systems, specific code examples are required. As the demand for data processing and analysis continues to increase, pandas has become one of the preferred tools for many data scientists and analysts. pandas is a powerful data processing and analysis library that can easily process and analyze large amounts of structured data. This article will detail how to install pandas on different operating systems and provide specific code examples. Install on Windows operating system
 Basic tutorial for learning Pygame: Quick introduction to game development
Feb 19, 2024 am 08:51 AM
Basic tutorial for learning Pygame: Quick introduction to game development
Feb 19, 2024 am 08:51 AM
Pygame installation tutorial: Quickly master the basics of game development, specific code examples are required Introduction: In the field of game development, Pygame is a very popular Python library. It provides developers with rich features and easy-to-use interfaces, allowing them to quickly develop high-quality games. This article will introduce you in detail how to install Pygame and provide some specific code examples to help you quickly master the basics of game development. 1. Installation of Pygame Install Python and start installing Pyga
