Teach you how to record screen on iPad: a simple tutorial
There are many ipad users who don’t know how to record the screen of Apple ipad, so they came to this site to ask the editor for help. In order to help everyone, the editor collected relevant information on the Internet and finally found a tutorial on how to use the ipad to record the screen. The following is The editor will introduce the method of recording screen on iPad in detail. If you need it, you can come to this site to check out the methods compiled by the editor.
How to record screen on Apple iPad?
The specific steps are as follows:
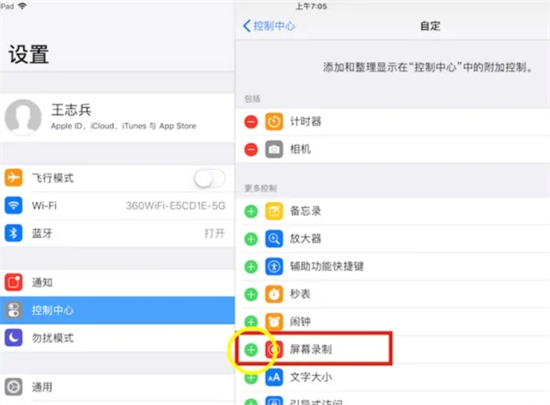
1. First open Settings - Control Center and enter to be added In the function list, you can see the screen recording function options. To enable this feature, click the green plus sign;
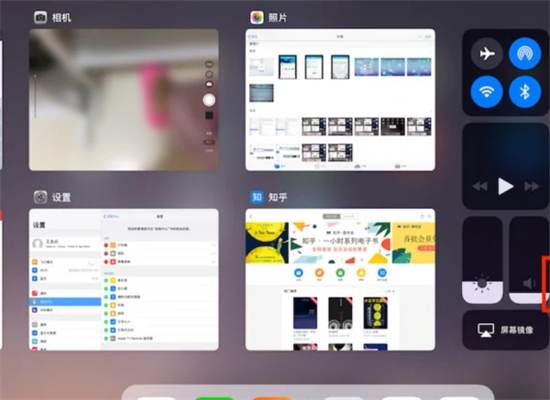
2. When the screen displays the desktop, swipe your finger upward from the bottom of the screen to see the new Added screen recording function button. After clicking, count down for three seconds to start recording, and within these three seconds, switch to the software or game you want to record;
3. During the recording process , the screen recording function button turns red;
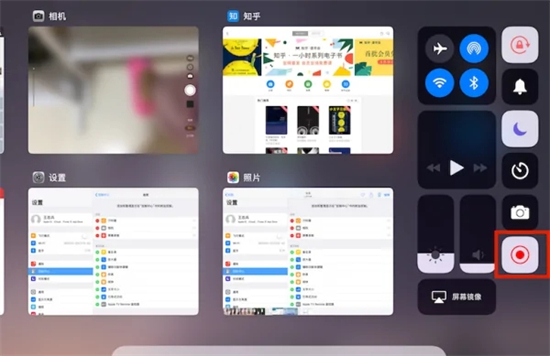
4. If you still need to collect your voice, before starting to record the screen, long press the screen recording function button and turn on the microphone audio Collection function;
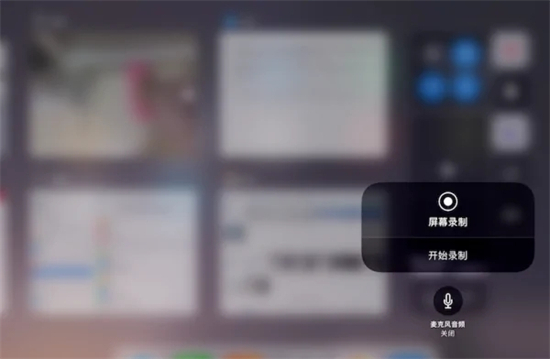
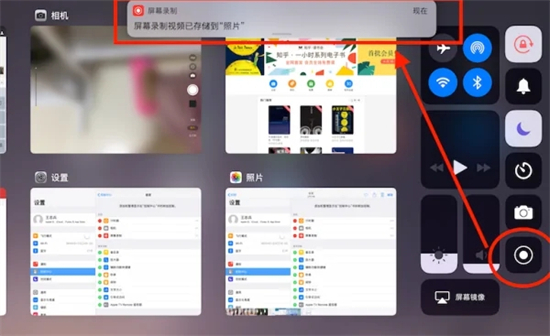
#5. After the recording is completed, return to the control center and click the screen recording function button again to end the recording. There will be a prompt telling you that the screen recording video has been saved in the photo album;
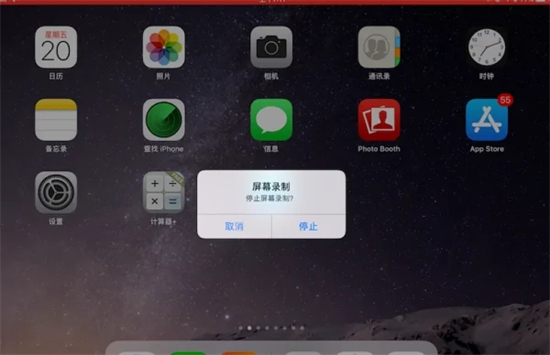
6. You can also press the power button (the round button to return to the desktop) , and end the recording in the pop-up dialog box;
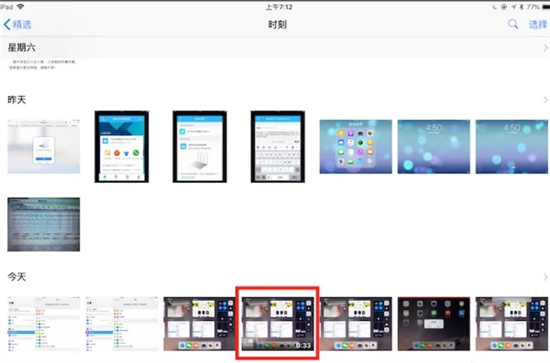
7. Finally, you can find the recorded video content in the album.
The above is the detailed content of Teach you how to record screen on iPad: a simple tutorial. For more information, please follow other related articles on the PHP Chinese website!

Hot AI Tools

Undresser.AI Undress
AI-powered app for creating realistic nude photos

AI Clothes Remover
Online AI tool for removing clothes from photos.

Undress AI Tool
Undress images for free

Clothoff.io
AI clothes remover

AI Hentai Generator
Generate AI Hentai for free.

Hot Article

Hot Tools

Notepad++7.3.1
Easy-to-use and free code editor

SublimeText3 Chinese version
Chinese version, very easy to use

Zend Studio 13.0.1
Powerful PHP integrated development environment

Dreamweaver CS6
Visual web development tools

SublimeText3 Mac version
God-level code editing software (SublimeText3)

Hot Topics
 Photoshop Is Officially Available on iPhone
Mar 06, 2025 am 09:56 AM
Photoshop officially logs on to iPhone! Say goodbye to the limitations of mobile image editing! Photoshop, a benchmark software in the field of image editing, has finally officially landed on iPhone! Photoshop has been the industry standard for more than three decades, but in the field of mobile phone image editing, users have had to rely on other applications. This situation has changed with the release of Photoshop iPhone version on February 25. You can now search for "Photoshop" on the App Store to download this free app. In addition to core imagery and design tools, numerous features are available for free: Selections, layers and masks Click Select Tool Stain Repair Painting
 Completely Uninstall Xiaomi Game Center: No Leftovers!
Mar 18, 2025 pm 06:00 PM
The article details steps to completely uninstall Xiaomi Game Center, remove residual files, prevent auto-reinstallation, and verify the app's removal from a device.
 How to Take Photos on Android Without All the Post-Processing Junk
Mar 13, 2025 pm 01:09 PM
Your phone's camera does so much filtering, processing, and AI adjustments, it can make you question reality itself. In a world where Google can put you into photos you take, what's even real? If you'd rather avoid letting your phone decide what
 Instagram Won't (Usually) Snitch If You Screenshot
Mar 07, 2025 am 09:56 AM
Instagram Screenshot Notifications: The Complete Guide Ever wondered if taking a screenshot of someone's Instagram Story or post alerts them? Let's clear up the confusion. While screenshots of regular posts and Stories don't trigger notifications,
 The Fastest Way to Uninstall Xiaomi Game Center (2025)
Mar 18, 2025 pm 06:03 PM
Article discusses the fastest way to uninstall Xiaomi Game Center in 2025 using built-in settings, with optional third-party tools for efficiency.Character count: 159
 How to Uninstall Xiaomi Game Center
Mar 18, 2025 pm 06:01 PM
The article provides a detailed guide on uninstalling Xiaomi Game Center, discussing standard and alternative methods, and potential performance improvements post-uninstallation.
 Xiaomi Game Center Stuck? Here's How to Uninstall It!
Mar 18, 2025 pm 06:01 PM
Article discusses uninstalling stuck Xiaomi Game Center, troubleshooting, and exploring gaming alternatives. Main issue is app malfunction and removal.
 How to Remove Xiaomi Game Center: Complete Uninstall Guide
Mar 18, 2025 pm 05:58 PM
Article details steps to completely uninstall Xiaomi Game Center from Xiaomi devices, discussing performance benefits and risks involved in the process.Character count: 159


