

Steps to install Realsense driver on Ubuntu14.04

It can be said that installing this driver is laborious. I installed it several times and reinstalled the system several times, but in the end I found that it is enough once. The reason why I went back and forth was mainly because I kept searching for installation instructions written by others on the Internet. In the tutorial, I did not look carefully at the doc folder under the installation file. There is actually an installation method in it. Next, I will explain the installation process in detail below. You must follow the steps.
First of all, the system I use is ubuntu14.04, specifically 14.04. I don’t know the number, it’s not important.
Then download the realsense driver: https://www.jb51.net/softs/373056.html
The specific download method can be directly clicked to download. You can use Git to download. However, if you use git, you should pay attention to the permissions of the folder. There may be problems. It is best to use chmod to set the scripts folder in the folder to 777.
After that, it is installed:
1. First cd into the realsense driver folder: cd realsense
Then use: sudo apt-get update && sudo apt-get upgrade && sudo apt-get dist-upgrade to update your software source and kernel version
In order to prevent this method from being useless, then enter: sudo apt-get install --install-recommends Linux-generic-lts-xenial xserver-xorg-core-lts-xenial xserver-xorg-lts- xenial xserver-xorg-video-all-lts-xenial xserver-xorg-input-all-lts-xenial libwayland-egl1-mesa-lts-xenial
Finally we enter: sudo update-grub && sudo reboot
The computer will restart at this time. After restarting, we select Advanced Options for Ubuntu on the interface where we select ubuntu, select the latest kernel version, then enter the system, and finally use: uname -r to confirm whether the version is the one you selected.
2. Install the required dependency packages
a. Install *libusb-1.0* and *pkg-config*: sudo apt-get install libusb-1.0-0-dev pkg-config
b.Install *glfw3*:./scripts/install_glfw3.sh
3. Generate library files and sample files
mkdir build && cd build
cmake ..
cmake ../ -DBUILD_EXAMPLES=true
make && sudo make install
4. Install Video4Linux
cd ..
sudo cp config/99-realsense-libusb.rules /etc/udev/rules.d/
sudo udevadm control --reload-rules && udevadm trigger
sudo apt-get install libssl-dev
./scripts/patch-realsense-ubuntu-xenial.sh
sudo dmesg | tail -n 50
Follow this order, after executing the last step, you will find that there is a new uvcvideo driver registered, otherwise there will be an error.
Finally plug in the camera and click on the example in the build to see the image.
The above is the detailed content of Steps to install Realsense driver on Ubuntu14.04. For more information, please follow other related articles on the PHP Chinese website!

Hot AI Tools

Undresser.AI Undress
AI-powered app for creating realistic nude photos

AI Clothes Remover
Online AI tool for removing clothes from photos.

Undress AI Tool
Undress images for free

Clothoff.io
AI clothes remover

AI Hentai Generator
Generate AI Hentai for free.

Hot Article
Hot Tools

Notepad++7.3.1
Easy-to-use and free code editor

SublimeText3 Chinese version
Chinese version, very easy to use

Zend Studio 13.0.1
Powerful PHP integrated development environment

Dreamweaver CS6
Visual web development tools

SublimeText3 Mac version
God-level code editing software (SublimeText3)
Hot Topics
 1378
1378
 52
52

 Does Logitech ghub driver not support win7? -Why can Logitech ghub driver only be installed on the c drive?
Mar 18, 2024 pm 05:37 PM
Does Logitech ghub driver not support win7? -Why can Logitech ghub driver only be installed on the c drive?
Mar 18, 2024 pm 05:37 PM
Does Logitech ghub driver not support win7? Not compatible. Since Windows 7 has stopped updating and is no longer Microsoft's main operating system, many new software no longer supports it, such as Logitech ghub. The main interface of the Logitech driver: 1. The main software interface is on the left. The three buttons are lighting, buttons, and sensitivity settings. 2. In the settings of the lighting interface, the general special effects are relatively conventional, and the audio visual effects are the highlight. They can change color according to the sound frequency, and can be set according to the high, middle and bass bands, with different colors and effects. 3. In button settings, users can edit them here according to their special requirements. 4. In the sensitivity settings, many users will have some of their own settings. They can add the DPI speed switching point by themselves, but
 Steps to restore Logitech driver to default configuration
Feb 28, 2024 am 11:04 AM
Steps to restore Logitech driver to default configuration
Feb 28, 2024 am 11:04 AM
Facing the Logitech driver that cannot be used normally, it can only be solved by restoring the factory settings. However, many friends do not know how to restore the factory settings. The following will provide you with detailed steps to restore the factory settings. I hope it can help you. Steps to restore the Logitech driver to the default configuration: 1. First download the Logitech dedicated driver software GHub, and open it after the download is complete. 2. Then open the mouse to set up, and click the settings (gear) in the upper right corner. 3. At the bottom, click "Restore default settings" , click directly and reopen the software to restore factory settings. How to connect the Logitech driver to the device 1. Open the back cover of the mouse and take out the wireless mouse socket. 2. Select the mouse socket next to the computer. 3. Set the corresponding parameter information for the mouse. 4. Bluetooth pair the device and long press Bluetooth.
 How to download Razer mouse driver
Mar 11, 2024 pm 03:40 PM
How to download Razer mouse driver
Mar 11, 2024 pm 03:40 PM
Steps to download the Razer mouse driver: 1. Open the browser and enter the Razer official website; 2. On the official website page, find and click "Technical Support" or a similar option; 3. On the technical support page, select "Mouse" or the specific subcategory; 4. On the mouse driver download page, you can see various mouse models and their corresponding drivers; 5. Click the download link for the selected driver; 6. After the download is completed, check whether the downloaded file is complete , make sure nothing is damaged or missing.
 How to install win11 driver without digital signature_Tutorial on how to deal with win11 driver without digital signature
Mar 20, 2024 pm 04:46 PM
How to install win11 driver without digital signature_Tutorial on how to deal with win11 driver without digital signature
Mar 20, 2024 pm 04:46 PM
Some users have encountered some problems when installing drivers for win11 computers. The computer prompts that the digital signature of this file cannot be verified, resulting in the inability to install the driver. How to solve this problem? Please see the following introduction for details. 1. Press the [Win + [Ctrl+Shift+Enter] Open the Windows Powershell window with administrator rights; 3. User Account Control window, do you want to allow this application to make changes to your device? Click [Yes]; 4. Administrator: Windows Powers
 How to solve the problem that win11 driver does not have digital signature? Tutorial to solve the problem that win11 driver does not have digital signature
Feb 19, 2024 pm 11:20 PM
How to solve the problem that win11 driver does not have digital signature? Tutorial to solve the problem that win11 driver does not have digital signature
Feb 19, 2024 pm 11:20 PM
When we install the win11 system or run the program, we sometimes need a digital signature to use it normally. However, many users are asking how to solve the problem that the win11 driver does not have a digital signature? Users can open a Windows Powershell window with administrator rights to perform operations. Let this site carefully introduce to users the solution to the problem that the win11 driver does not have a digital signature. Solution to the problem that the win11 driver does not have a digital signature: 1. Press the [Win+X] key combination, or [right-click] click the [Windows logo] on the taskbar, and select [Run] in the menu item that opens. 2. In the run window, enter [powershel
 Fix: System driver locked to manufacturer specifications
Sep 23, 2023 pm 07:25 PM
Fix: System driver locked to manufacturer specifications
Sep 23, 2023 pm 07:25 PM
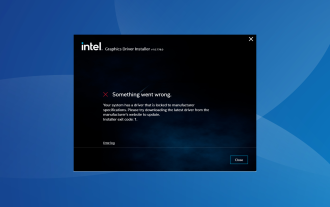
Graphics driver is one of the most important drivers on your PC, directly affecting performance and gaming experience. However, many people encounter the "Your system has drivers locked to manufacturer specifications" error when updating drivers through the installer. This issue occurs because the manufacturer restricts updates unless they are specifically pushed from their end. This ensures stability, but may be an issue for many people. So, let’s find out how to solve the problem now! How to fix your system with drivers locked to manufacturer specifications on Windows 11? Before we move on to slightly more complicated solutions, try these quick fixes: Make sure your computer and operating system meet the driver's system requirements. Boot your computer into safe mode, then
 Can the SteelSeries driver only be installed on the C drive?
Jan 02, 2024 am 08:07 AM
Can the SteelSeries driver only be installed on the C drive?
Jan 02, 2024 am 08:07 AM
Some SteelSeries users discovered after purchasing the driver that the default installation path was on the C drive. However, many people may not know that you can actually change the installation path. Now let's see how to make changes. Can the SteelSeries driver be installed only on the C drive? The SteelSeries driver is not limited to being installed on the C drive. SteelSeries driver files are usually installed in a specific folder under the C drive of the Windows operating system. Please note that the computer system will install its own driver on the C drive by default. Users can save downloaded third-party computer software on other disks. Users only need to change the installation path to the desired location during installation to make the replacement.
 How to add wireless network card driver in Win10?
Jul 07, 2023 pm 02:09 PM
How to add wireless network card driver in Win10?
Jul 07, 2023 pm 02:09 PM
Many computers now contain wireless receivers, which cannot be turned on without installing a wireless network card driver. So how to install this wireless network card driver? The editor below will teach you how to add a wireless network card driver to Win10. The specific method is as follows: 1. Right-click "This PC" and select "Properties". 2. Click to enter "Network Adapter". 3. Turn on "Network Adapter". 4. Right-click and select "Update Driver". 5. Select "Access my computer to search for driver software". 6. Add your program process driver and click "Next" to assemble. The above is the installation method of wireless network card driver, I hope it can help everyone.
