

The memory frequency of win7 has a great impact on our hardware running scores, and it will also affect certain actual use. However, many friends do not know how to change the memory frequency of win7. In fact, it is very convenient as long as you open the bios settings. Found it, let’s take a look together.
1. First, we press "DEL" when booting to enter the bios settings. (Different computers have different hotkeys, please check the manual for details)

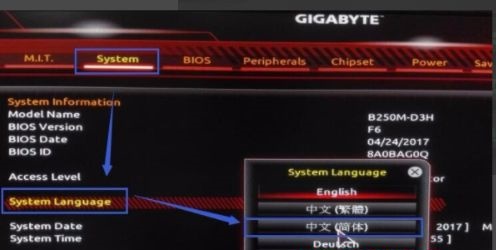
2. Then first change the language to Chinese under "system".
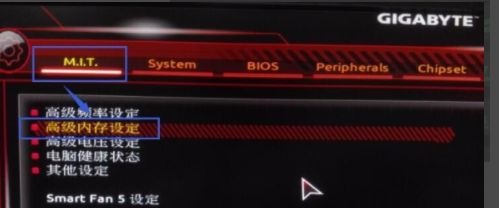
3. Then go to "M.I.T" and open the advanced memory settings.
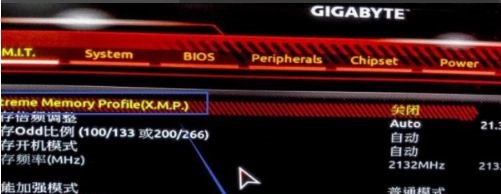
4. Then find the setting at the icon location. If it is off, turn it on.
5. Then change the performance enhancement mode to stable enhancement or stable mode below.
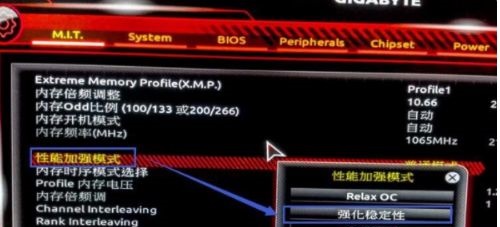
6. Finally, we can change the memory frequency in the memory multiplier adjustment.

The above is the detailed content of Tutorial on changing memory frequency in win7. For more information, please follow other related articles on the PHP Chinese website!


![[Web front-end] Node.js quick start](https://img.php.cn/upload/course/000/000/067/662b5d34ba7c0227.png)


