
 System Tutorial
LINUX
CentOS 6.6 system installation and configuration full illustrated tutorial
System Tutorial
LINUX
CentOS 6.6 system installation and configuration full illustrated tutorial
CentOS 6.6 system installation and configuration full illustrated tutorial


The server related settings are as follows:
Operating system: CentOS 6.6 64-bit
IP address: 192.168.21.129
Gateway: 192.168.21.2
DNS: 8.8.8.8 8.8.4.4
Note:
CentOS 6.6 system image has two versions, 32-bit and 64-bit, and there are also special versions for Server-optimized minimal version
If the production server has a large memory (4G
1. The computer memory on which CentOS 6.6 system is installed must be equal to or greater than 628M (minimum memory 628M) before graphical installation can be enabled Mode;
2. CentOS 6.6 system installation mode is divided into: graphical installation mode and text installation mode;
3. CentOS 6.6 text installation mode does not support custom partitions, and it is recommended to use graphical installation Mode installation;
5. CentOS 6.6 system operation mode is divided into: graphical mode with graphical interface, which can be operated with the mouse; and text mode without graphical interface, which can be operated directly by command line (CentOS minimal version defaults It runs in text mode, and there is no customization option for the system running mode during the system installation process);
## Interface description:
Install or upgrade an existing system Install or upgrade an existing system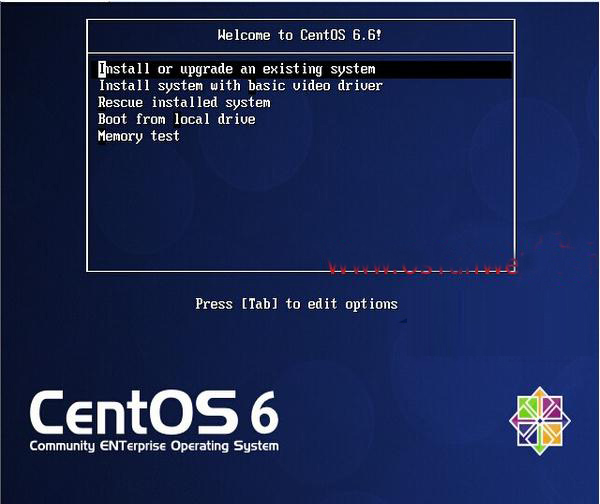
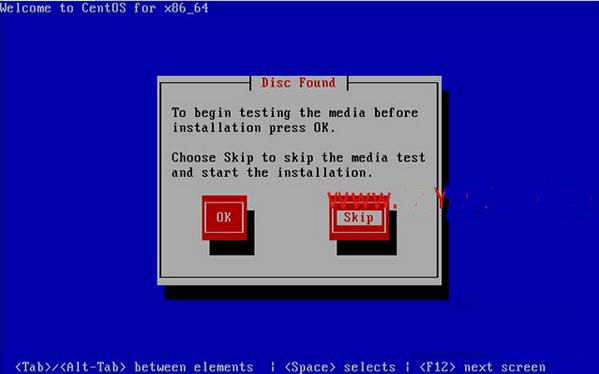
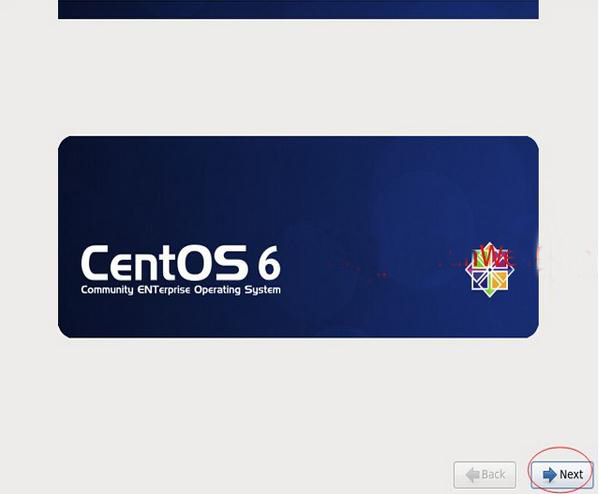
The following interface appears
Next
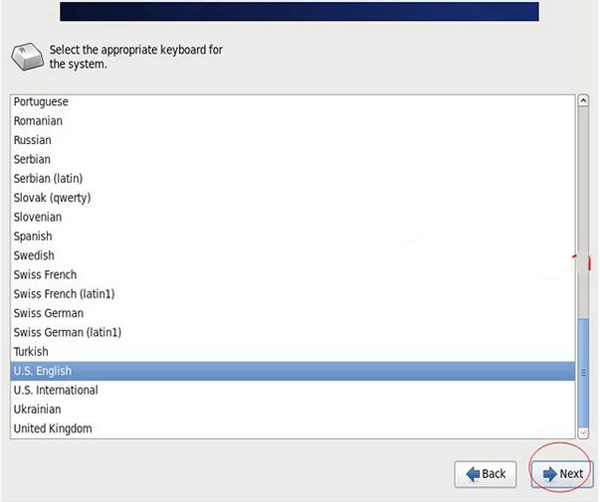
The selected language is: English (English ) #It is recommended to install the English version on the production server
Next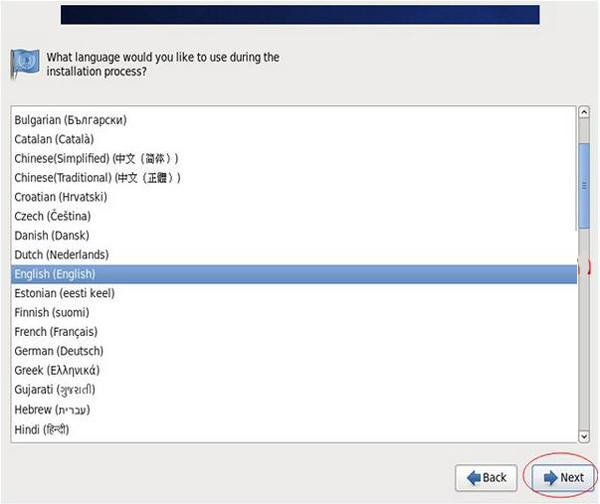
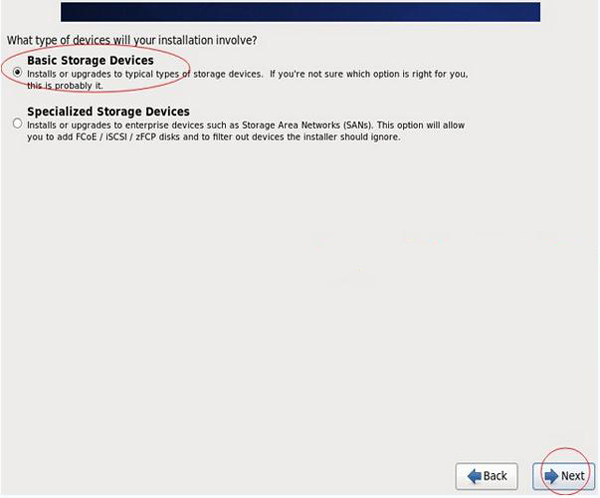
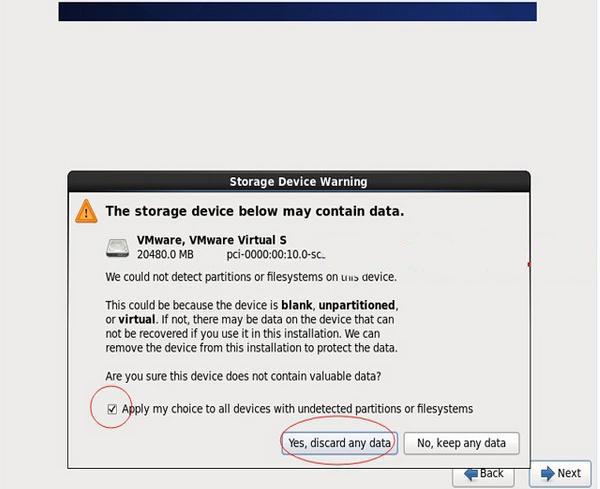
## Select the first item: Yes, ignore all data
Next
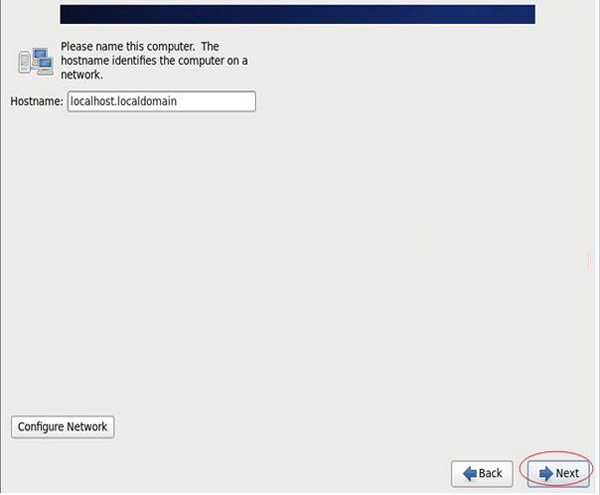
Set the host name. The default is enough. Modify it after the installation is complete.
Next
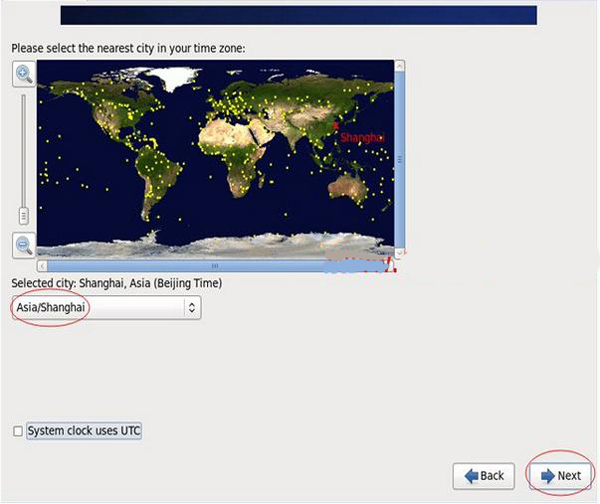
Time zone selection: Asia/Shanghai
“System clock user UTC” #Cancel the previous check mark and do not use UTC time
 #
#
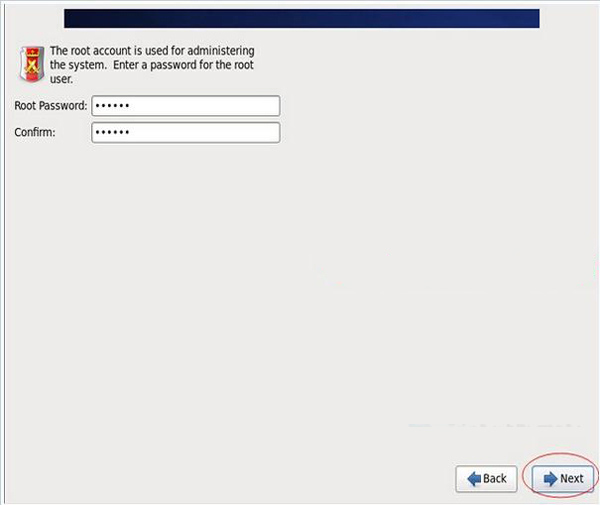
Select "Use Anyway" here
Production environment must set strong and complex passwords
Next
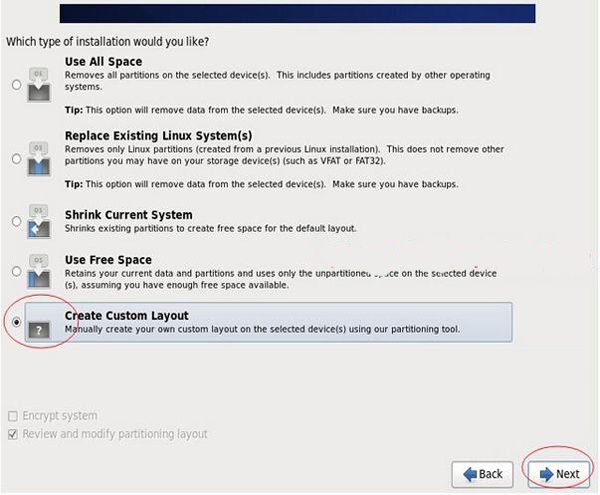
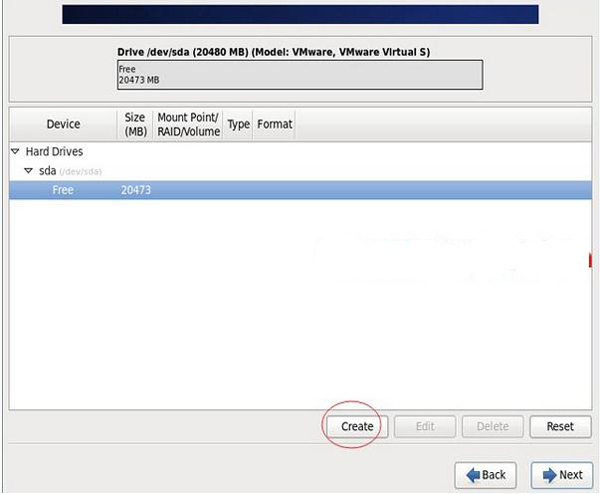 ## You can see the capacity of the hard drive. What I show here is 20G. Now customize it Partition.
NOTE: Before partitioning, you must first plan how to partition
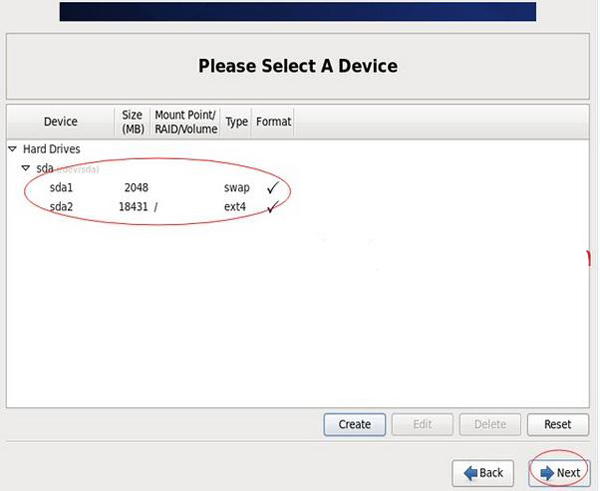
My partitions are as follows:
## PHhi The total hard disk is 20G HIswap #2048M, Generally set to 2 times the memory / #All remaining space Special note: For servers used in formal production, remember that the data disk must be partitioned separately to prevent system failure Ensure data integrity when problems arise. For example, you can divide another /data specifically to store data. Select the free partition Free and click Create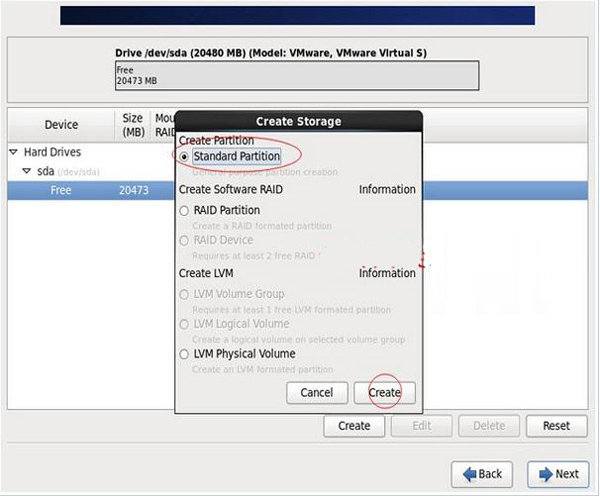
File system type: swap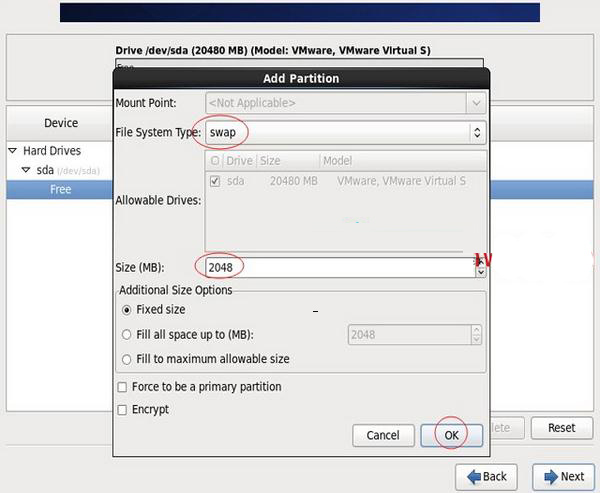
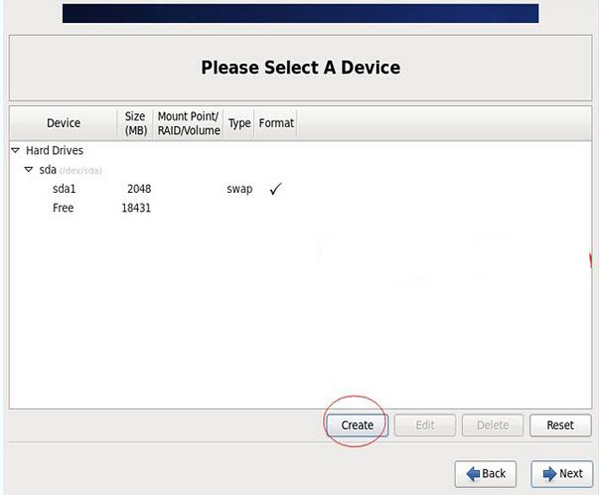 Select the standard partition Standard Partition and click Create
## Mount point: /
File system type: ext4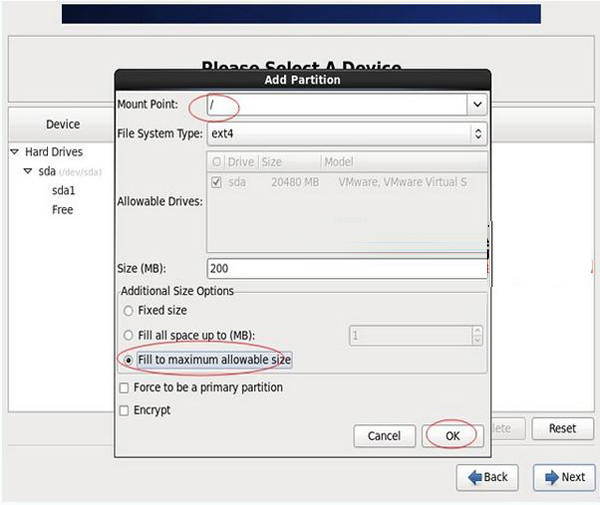
After creating the partition, as shown in the picture above, then click Next
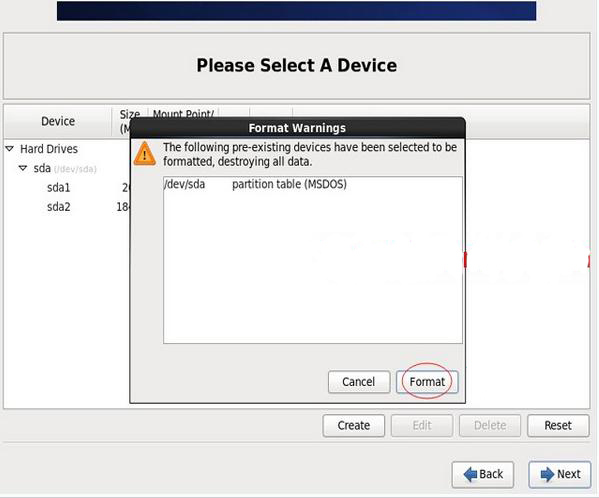
Click "Format" to format it
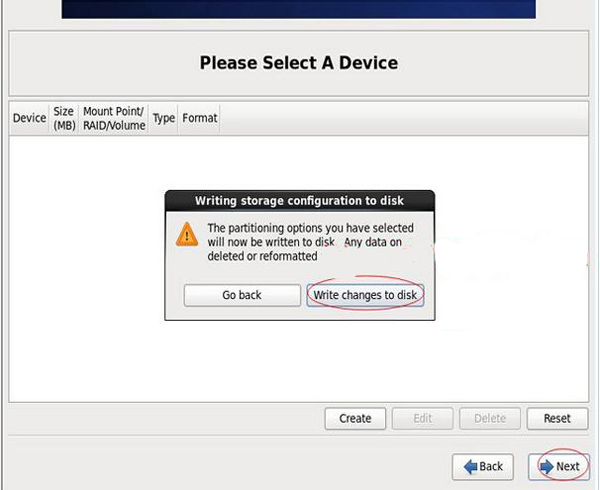
Select “Write changes to disk” to write changes to disk
Default
Next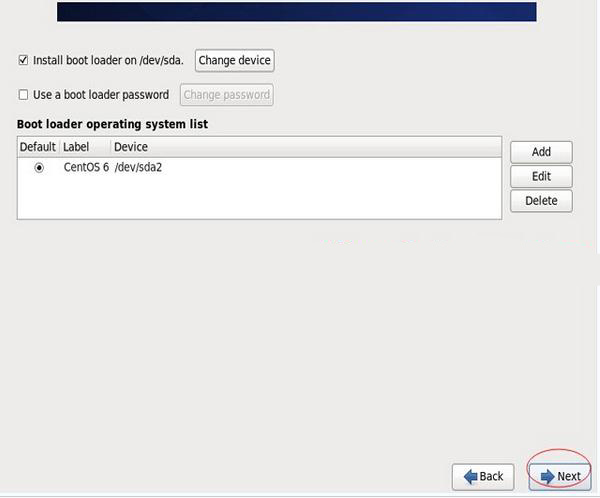
Start installation
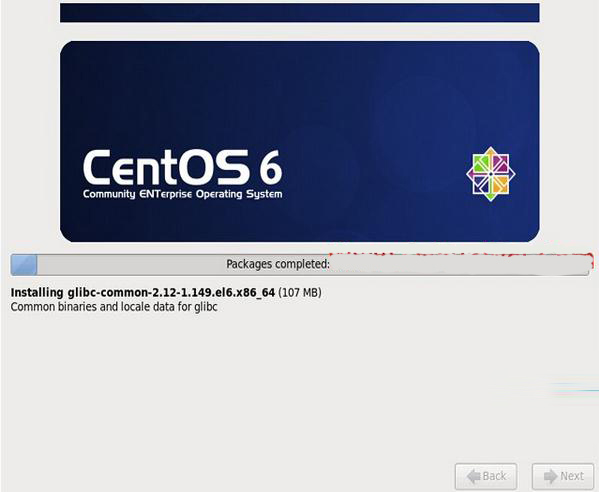
Installation completed
Click "Reboot" to reboot, the system will automatically restart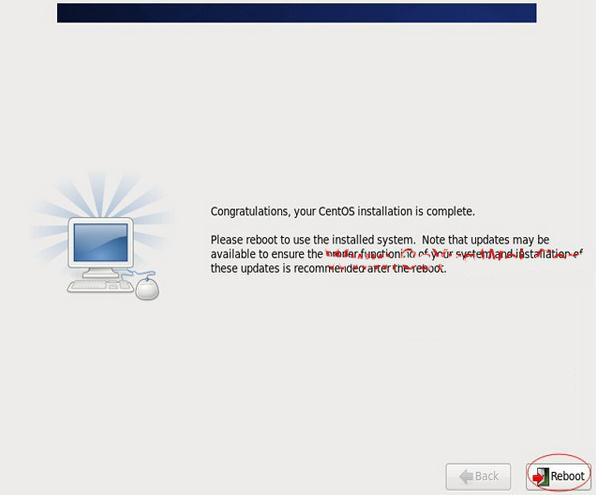
After restarting, the following login interface appears

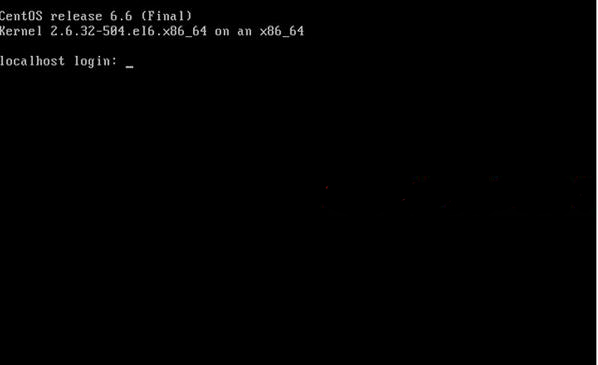 ## System installation completed
2. Set IP address, gateway, DNS
Agreement:
The first network card is the external network
The second network card is the internal network (machines without external networks must also configure the internal network on the second network card)
NOTE: CentOS 6.6 does not automatically open the network connection after it is installed by default!
Enter the account root
and then enter the password set during the installation process to log in to the system
vi /etc/sysconfig/network-scripts/ifcfg-eth0 #Edit configuration file , add and modify the following content
ˈBOOTPROTO=static #Enable static IP address
ˆONBOOT=yes #Turn on automatic network connection
ˆIPADDR=192.168.21.129 #Set IP address
## NETMASK=255.255.255.0 #Set subnet mask GATEWAY=192.168.21.2 #Set gateway DNS1=8.8.8.8 #Set primary DNS DNS2=8.8.4.4 #Set DNS IPV6INIT=no #forbid IPV6 :wq! #Save and exit hilservice ip6tables stop #Stop IPV6 service# chkconfig yum-updatesd off #Disable startup service network restart #Restart network connection ifconfig #View IP address 3. Set the host name Convention: Host name naming convention: Business. engine room. Main and backup. Domain name The host name is set here: bbs.hz.m.osyunwei.com ∣ 1. Hostname “bbs.hz.m.osyunwei.com” ∣ # Settings The host name is bbs.hz.m.osyunwei.com 2. vi /etc/sysconfig/network #Edit configuration file HOSTNAME= bbs.hz.m.osyunwei.com #Modify localhost.localdomain to bbs.hz.m.osyunwei.com :wq! #Save and exit 3. vi /etc/hosts #Edit configuration file 127.0.0.1 bbs.hz.m.osyunwei.com localhost #Modify localhost.localdomain For bbs.hz.m.osyunwei.com :wq! #Save and exit shutdown -r now #Restart the system At this point, the installation and configuration of the CentOS 6.6 system is completed The above is an introduction to the installation and configuration steps of the CentOS 6.6 system. This article I only introduce the installation and configuration of the CentOS 6.6 system using a CD. I hope it will be helpful to everyone. Please continue to pay attention to this site for more information. Recommended reading: CentOS 6.6 system installation and configuration graphic tutorial How to set the desktop font of CentOS 6.6 system?The above is the detailed content of CentOS 6.6 system installation and configuration full illustrated tutorial. For more information, please follow other related articles on the PHP Chinese website!

Hot AI Tools

Undresser.AI Undress
AI-powered app for creating realistic nude photos

AI Clothes Remover
Online AI tool for removing clothes from photos.

Undress AI Tool
Undress images for free

Clothoff.io
AI clothes remover

Video Face Swap
Swap faces in any video effortlessly with our completely free AI face swap tool!

Hot Article
Hot Tools

Notepad++7.3.1
Easy-to-use and free code editor

SublimeText3 Chinese version
Chinese version, very easy to use

Zend Studio 13.0.1
Powerful PHP integrated development environment

Dreamweaver CS6
Visual web development tools

SublimeText3 Mac version
God-level code editing software (SublimeText3)
Hot Topics
 1387
1387
 52
52

 How to use the audit log of a CentOS system to detect unauthorized access to the system
Jul 05, 2023 pm 02:30 PM
How to use the audit log of a CentOS system to detect unauthorized access to the system
Jul 05, 2023 pm 02:30 PM
How to use the audit log of the CentOS system to monitor unauthorized access to the system. With the development of the Internet, network security issues have become increasingly prominent, and many system administrators have paid more and more attention to the security of the system. As a commonly used open source operating system, CentOS's audit function can help system administrators monitor system security, especially for unauthorized access. This article will introduce how to use the audit log of the CentOS system to monitor unauthorized access to the system and provide code examples. 1. Start the audit day
 CentOS 6.6 system installation and configuration full illustrated tutorial
Jan 12, 2024 pm 04:27 PM
CentOS 6.6 system installation and configuration full illustrated tutorial
Jan 12, 2024 pm 04:27 PM
The server-related settings are as follows: Operating system: CentOS6.6 64-bit IP address: 192.168.21.129 Gateway: 192.168.21.2 DNS: 8.8.8.88.8.4.4 Remarks: CentOS6.6 system image has two versions, 32-bit and 64-bit, and There is also a minimal version of the production server that is specially optimized for servers. If the production server has large memory (4G) 1. The computer memory on which CentOS6.6 system is installed must be equal to or greater than 628M (minimum memory 628M) before the graphical installation mode can be enabled; 2. CentOS6.6 The system installation methods are divided into: graphical installation mode and text installation mode.
 How to set up your CentOS system to regularly update security patches
Jul 05, 2023 pm 04:17 PM
How to set up your CentOS system to regularly update security patches
Jul 05, 2023 pm 04:17 PM
How to set up CentOS systems to regularly update security patches As network security risks continue to increase, regularly updating security patches for the operating system is crucial to protecting the security of servers and terminal devices. This article will introduce how to set up automatic and regular security patch updates on CentOS systems and provide corresponding code examples. Using the yum-cron tool CentOS system provides a tool called yum-cron, which can help us automatically update system software packages and security patches. Use the following command to install
 How to use the logging function of CentOS system to analyze security events
Jul 05, 2023 pm 09:37 PM
How to use the logging function of CentOS system to analyze security events
Jul 05, 2023 pm 09:37 PM
How to use the logging function of CentOS system to analyze security events Introduction: In today's network environment, security events and attack behaviors are increasing day by day. In order to protect the security of the system, it becomes crucial to detect and respond to security threats in a timely manner. The CentOS system provides powerful logging functions that can help us analyze and monitor security events in the system. This article will introduce how to use the logging function of the CentOS system to analyze security events and provide relevant code examples. 1. Configuration log recording in CentOS system
 How to identify and deal with security vulnerabilities in CentOS systems
Jul 05, 2023 pm 09:00 PM
How to identify and deal with security vulnerabilities in CentOS systems
Jul 05, 2023 pm 09:00 PM
How to identify and deal with security vulnerabilities in CentOS systems In the Internet era, security vulnerabilities are crucial to the protection of systems and data. As a popular Linux distribution, CentOS is also different from other operating systems in that it requires users to identify and repair security vulnerabilities in a timely manner. This article will introduce readers to how to identify and deal with security vulnerabilities in CentOS systems, and provide some code examples for vulnerability repair. 1. Vulnerability Identification Using Vulnerability Scanning Tools Vulnerability scanning tools are a common method for identifying security vulnerabilities existing in the system.
 Install centos system to USB disk
Mar 18, 2024 pm 12:19 PM
Install centos system to USB disk
Mar 18, 2024 pm 12:19 PM
Today I received a request to install the Centos7.7 system on an already assembled host and use it as a server, which will later be used for program development. #Process Steps 1. First go to the official website to download the ISO image. The download address of the official website: https://www.centos.org/download/2. Burn the downloaded U disk to install the system. The tool I use here is Softdisk download address: https://cn.ultraiso.net/xiazai.html3. Insert the U disk for boot installation #Problems encountered during boot installation and solutions: Because I use the U disk to install using UEFI. The following occurred when booting the system
 How to use file integrity checking to detect file modifications on CentOS systems
Jul 05, 2023 pm 09:37 PM
How to use file integrity checking to detect file modifications on CentOS systems
Jul 05, 2023 pm 09:37 PM
How to use file integrity checking to detect file modifications on CentOS systems Introduction: In modern computer systems, file integrity checking is one of the important means to ensure system security. By periodically checking the integrity of system files, tampered or damaged files can be discovered and repaired in a timely manner, preventing the system from unknown security threats. In this article, we will introduce how to use the file integrity check feature on CentOS systems. 1. File integrity checking tool Cen in CentOS system
 How to configure a CentOS system to protect web applications from cross-site scripting attacks
Jul 05, 2023 pm 06:10 PM
How to configure a CentOS system to protect web applications from cross-site scripting attacks
Jul 05, 2023 pm 06:10 PM
How to configure a CentOS system to protect web applications from cross-site scripting attacks. With the increasing popularity and usage of web applications, cross-site scripting (XSS) attacks have become an important security concern for many web developers. question. In order to protect web applications from XSS attacks, we can take some configuration measures to improve the security of the system. This article will introduce how to perform relevant configurations on CentOS systems. Configure the firewall first,
