How to install SQL Server 2019
SQL Server 2019 now has the ability to run on Linux and in containers, and connects to the PolyBase technology of big data storage systems. Users can also move all big data workloads to SQL Server. It also provides support for the SQL Server database engine, SQL Server Analysis Services, SQL Server machine learning service, SQL Server and SQL Server Master Data Services on Linux provide additional functions and improvements. Because the software is more troublesome to install, many friends may not know it. For this reason, the editor brings you the sql server2019 installation tutorial. , let’s take a look together!
sql server2019 installation tutorial
1. First, you need to download and unzip the file on this site, get the official sql server 2019 download compressed package, and open the [sql_server_2019] folder.
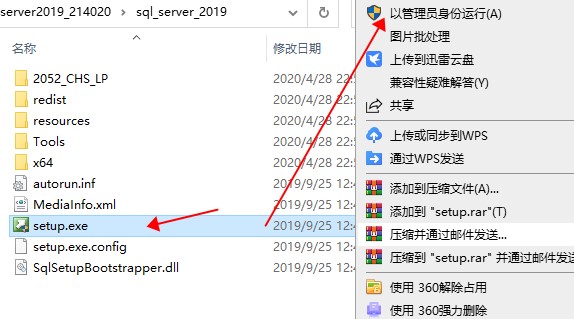
2. Right-click [setup.exe] to install the program and select [Run as administrator]
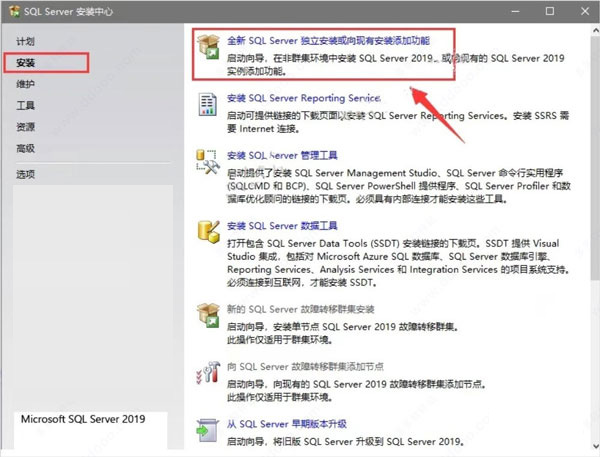
3. In the welcome installation interface of the software, directly Click Install on the left side of the interface, and then click directly to select [New SQL Server independent installation or add features to an existing installation]
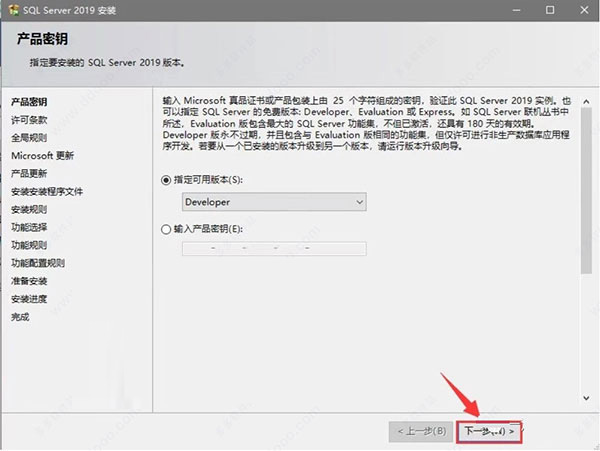
4. Directly click to check [Specify available versions], and then Then click [Next] directly
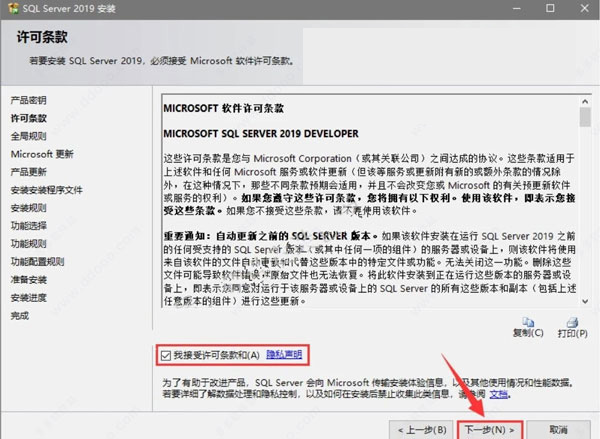
5. In the software license agreement interface, click to check [I accept the license terms], and then click [Next] directly
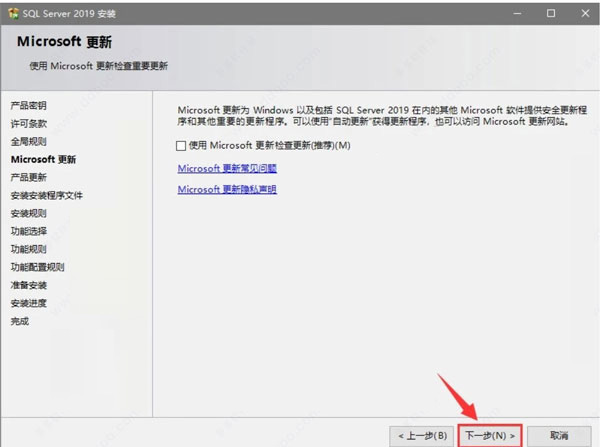
6. Click [Next]
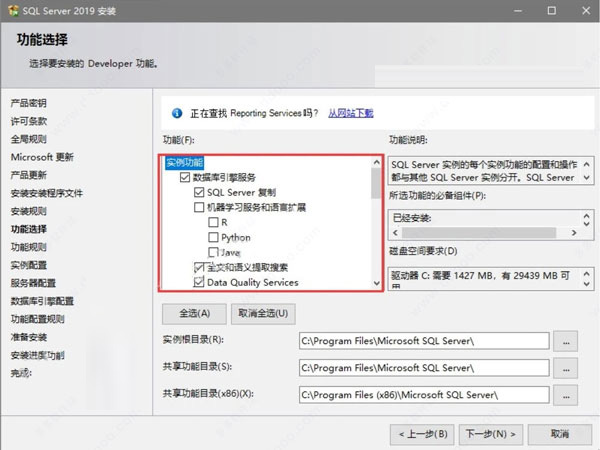
7. In the software installation function selection interface, users are asked to directly check the corresponding functions according to their own needs (not all necessary Check), in this case only the necessary functions are checked. After the installation is completed, you can still add functions
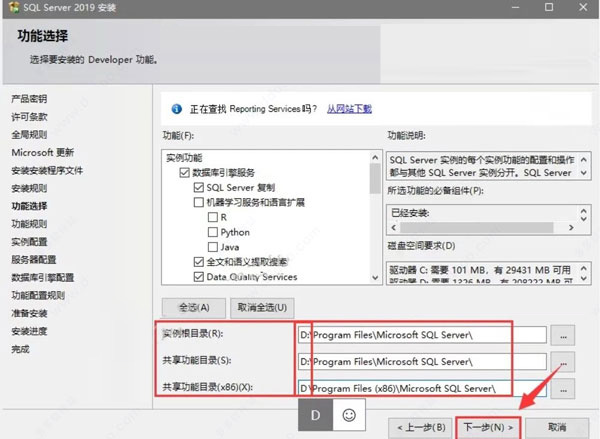
8. In the interface shown in the figure below, you need to change the installation path and shared directory of the software. In this case, we choose to install to the D drive, so just replace C in the original path with D, and then directly click [Next]
9. In the interface shown in the figure below, directly click again Click [Next]
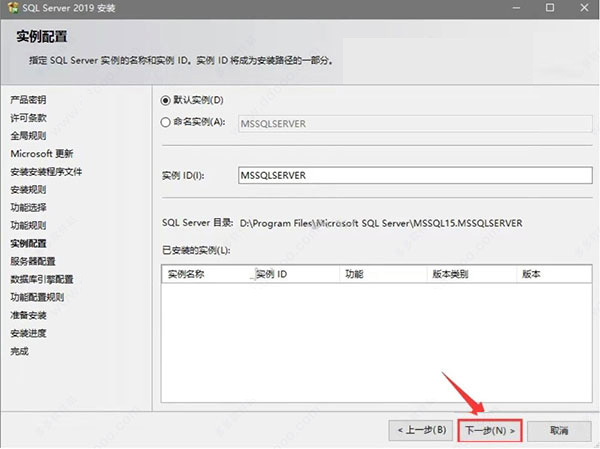
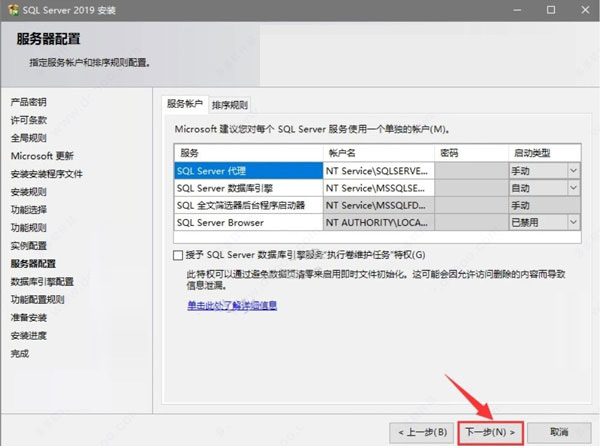
10. In the interface shown below, click [Next] directly again
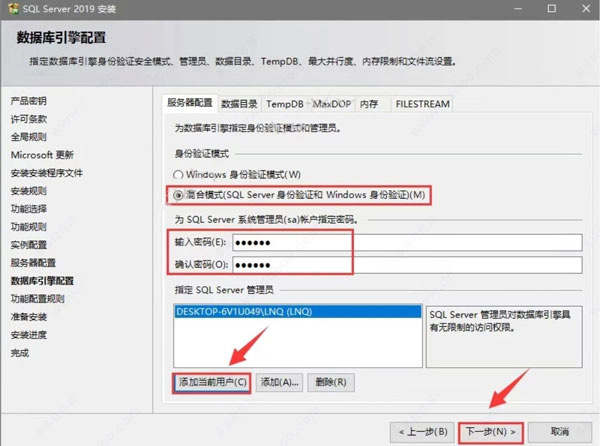
11. In the database engine configuration interface, Click directly to check [Mixed Mode], then enter the password you want to set, then click directly to add the current user, and finally click [Next] directly
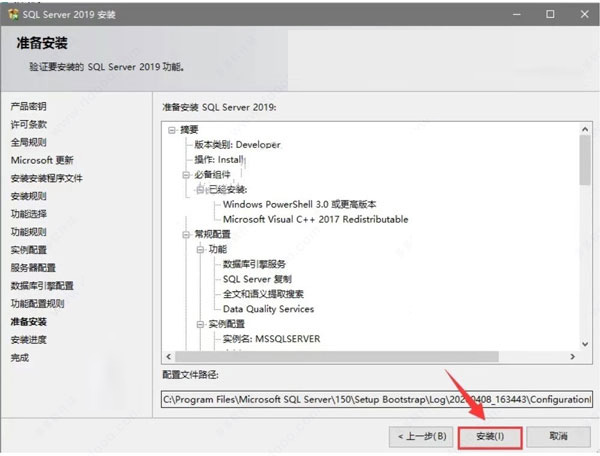
12. Wait until completed After the above operations, in the interface shown below, click [Install] directly
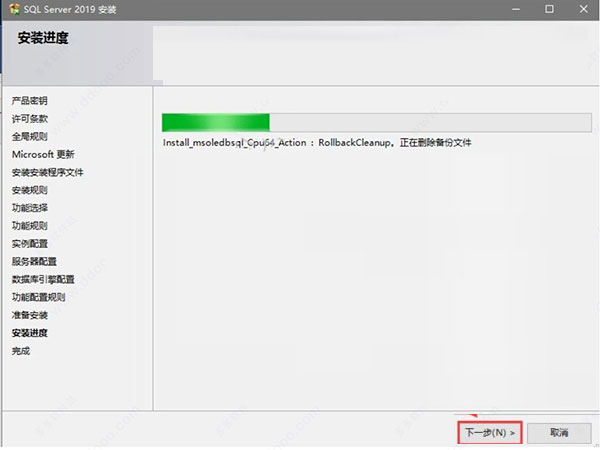
13 and wait for the software to be installed.
14. After the software installation is completed, directly click [Close] in the interface shown below to exit the software installation program.
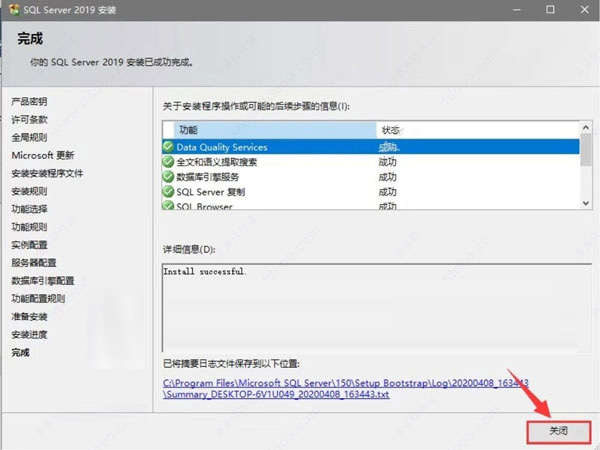
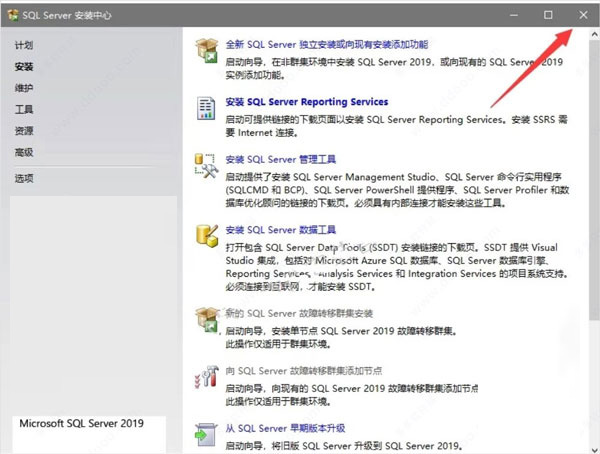
15. After completing the above operations, in the interface shown below, directly click the upper right corner of the interface to close the interface.
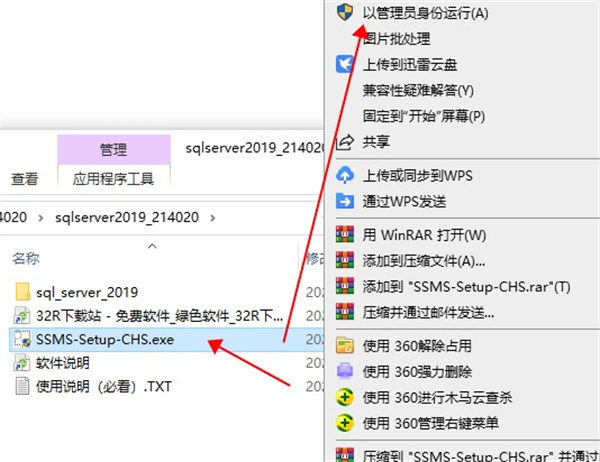
16. Then return to the folder you decompressed at the beginning, find and select the [SSMS-Setup-CHS.exe] executable file, right-click the mouse and select [Run as administrator]
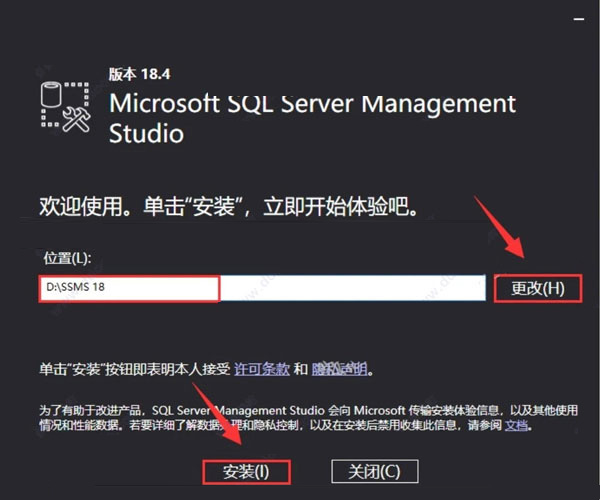
17. In the software installation path selection interface, click Change directly to change the software installation directory. It is recommended to install it on other disks besides C drive. You can install it on D drive or other disks. Create a new SSMS 18 folder in a drive letter with more remaining capacity, and then click [Install] directly
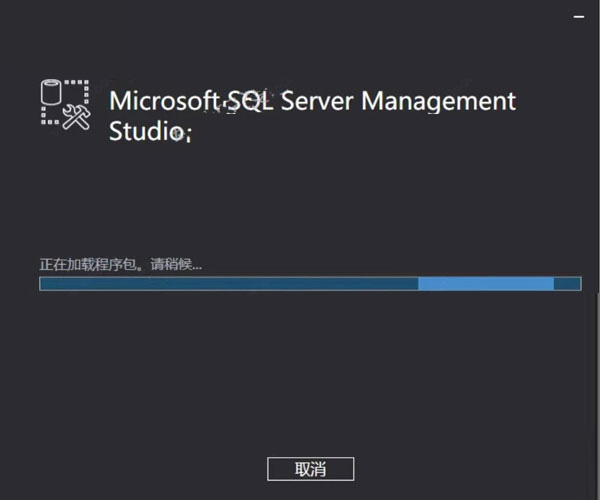
18 and wait for the software to be installed.
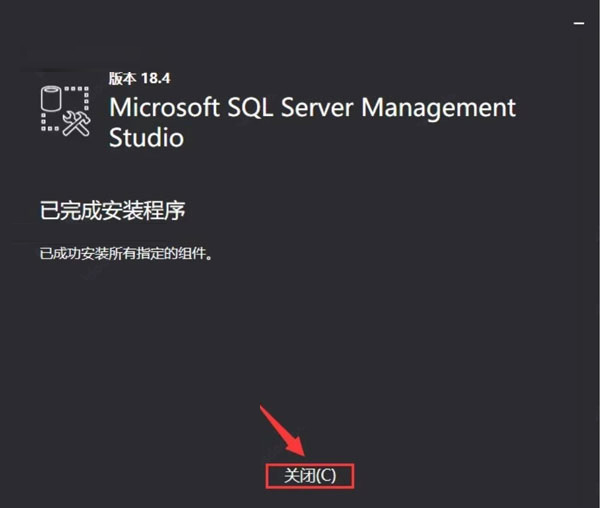
19. After the software installation is completed, directly click [Close] in the interface shown below to exit the software installation program.
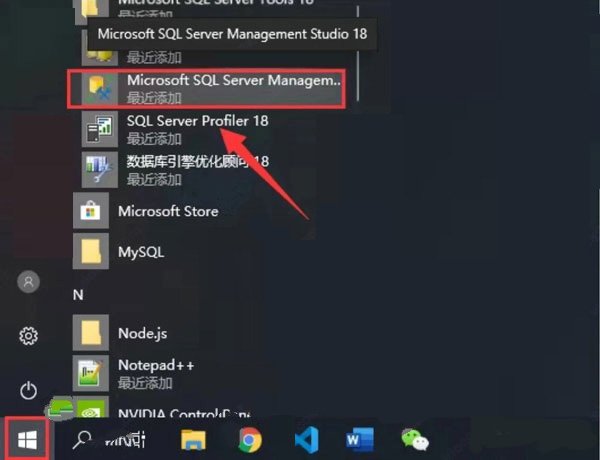
20. Then return to the desktop, open the start menu, find the software icon in the start menu, and drag it to the desktop to create a desktop shortcut.
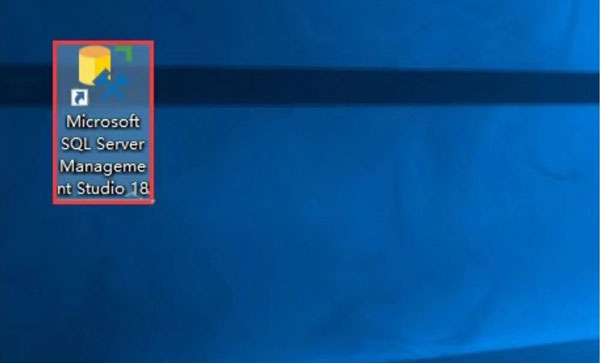
21. Then return to the desktop and double-click to open the software icon on the desktop.
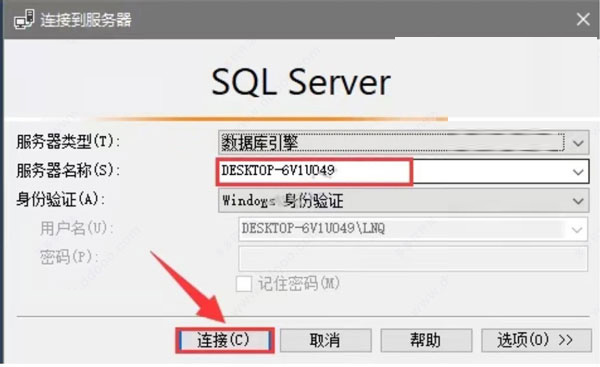
22. In the interface shown below, the server name will be automatically selected. If not, expand the drop-down box to select and click [Connect] directly
Warm reminder: The server name and The computer names are the same.
23. After the software installation is completed, you can start using it normally.
The above is the detailed content of How to install SQL Server 2019. For more information, please follow other related articles on the PHP Chinese website!

Hot AI Tools

Undresser.AI Undress
AI-powered app for creating realistic nude photos

AI Clothes Remover
Online AI tool for removing clothes from photos.

Undress AI Tool
Undress images for free

Clothoff.io
AI clothes remover

AI Hentai Generator
Generate AI Hentai for free.

Hot Article

Hot Tools

Notepad++7.3.1
Easy-to-use and free code editor

SublimeText3 Chinese version
Chinese version, very easy to use

Zend Studio 13.0.1
Powerful PHP integrated development environment

Dreamweaver CS6
Visual web development tools

SublimeText3 Mac version
God-level code editing software (SublimeText3)

Hot Topics
 1376
1376
 52
52
 Completely Uninstall Xiaomi Game Center: No Leftovers!
Mar 18, 2025 pm 06:00 PM
The article details steps to completely uninstall Xiaomi Game Center, remove residual files, prevent auto-reinstallation, and verify the app's removal from a device.
 How to Take Photos on Android Without All the Post-Processing Junk
Mar 13, 2025 pm 01:09 PM
Your phone's camera does so much filtering, processing, and AI adjustments, it can make you question reality itself. In a world where Google can put you into photos you take, what's even real? If you'd rather avoid letting your phone decide what
 The Fastest Way to Uninstall Xiaomi Game Center (2025)
Mar 18, 2025 pm 06:03 PM
Article discusses the fastest way to uninstall Xiaomi Game Center in 2025 using built-in settings, with optional third-party tools for efficiency.Character count: 159
 How to Uninstall Xiaomi Game Center
Mar 18, 2025 pm 06:01 PM
The article provides a detailed guide on uninstalling Xiaomi Game Center, discussing standard and alternative methods, and potential performance improvements post-uninstallation.
 Xiaomi Game Center Stuck? Here's How to Uninstall It!
Mar 18, 2025 pm 06:01 PM
Article discusses uninstalling stuck Xiaomi Game Center, troubleshooting, and exploring gaming alternatives. Main issue is app malfunction and removal.
 How to Remove Xiaomi Game Center: Complete Uninstall Guide
Mar 18, 2025 pm 05:58 PM
Article details steps to completely uninstall Xiaomi Game Center from Xiaomi devices, discussing performance benefits and risks involved in the process.Character count: 159
 Xiaomi Game Center Uninstall: Boost Phone Speed in Minutes!
Mar 18, 2025 pm 06:04 PM
The article provides a detailed guide on completely removing Xiaomi Game Center from Xiaomi devices, including uninstallation steps, disabling system integration, clearing residual data, and rebooting. It also discusses performance optimization post-
 'LikeTones' Is a Guitar Tuner With No Ads or Upsells
Mar 22, 2025 am 10:16 AM
I've been trying to get back into playing guitar and I've noticed one thing: Both the App Store and Google Play are replete with guitar-tuning apps that are full of either upsells or advertisements. Isn't there any application that helps tune you


