The Drawing Tool is an application that comes with Windows XP and can be found through "Programs" and "Accessories" in the Start menu. It is a simple and easy-to-use tool that can be used to create various types of drawings. Whether it is black and white or color images, you can draw them with this tool and save them as bitmap files. In addition, you can print out the drawn drawings, set them as desktop backgrounds, or paste them into other documents. If you need to view and edit scanned photos, you can also use the Paint program to do so. All in all, the drawing tool is a powerful and versatile tool suitable for a variety of drawing needs.
You can use the "Paint" program to process pictures in various formats, such as .jpg, .gif or .bmp files. It also lets you easily paste your Paint image into other documents or set it as your desktop background.
Help Viewer is a tool used to provide help for specific Windows XP programs and functions, such as Notepad, Paint, and Language Bar.
If you need to place the Help viewer next to the current program, resize the window or hide the navigation pane.
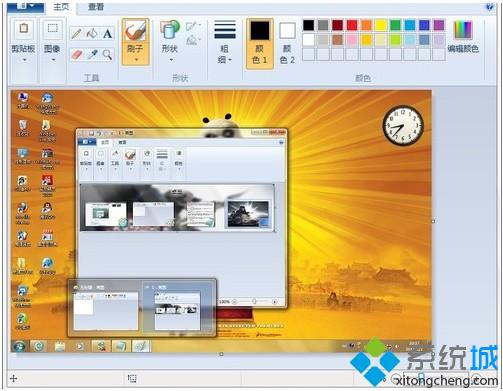
1. Use the win7 drawing tool to quickly zoom in and out of pictures
After opening a large-size image, you can drag the slider in the lower right corner to reduce the image for easier viewing. You can also click to zoom in/out in the view menu to adjust the display size, which is very convenient.

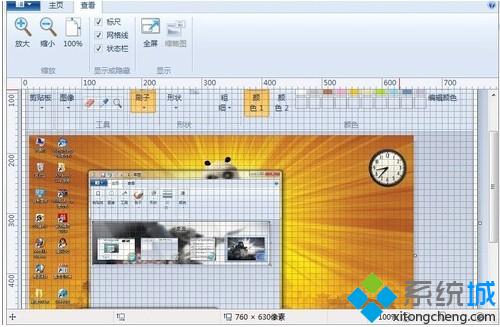
2. Display rulers and grid lines in win7 drawing tools
We can use the ruler and grid lines functions in the drawing tool to better understand the approximate size of parts of the picture. The method to open it is very simple, just click the "View" menu above the drawing tool window, and then check the "Ruler" and "Gridline" options. In this way, we can use the drawing tools conveniently and better utilize their functions.

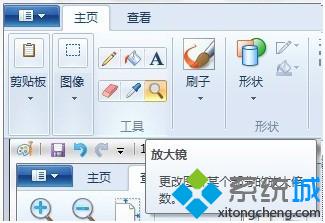
3. The magnifying glass function of win7 drawing tool
When part of the text or image in the picture is too small to see clearly, you can use the "magnifying glass" tool in Drawing to enlarge a certain part of the picture to view it. Click "Home" at the top of the window. You can see the magnifying glass. Move the magnifying glass to the area that needs to be magnified, as shown in the figure below:

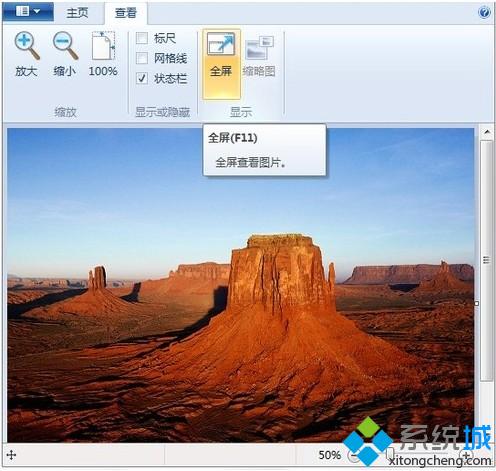
4. Full screen viewing mode of win7 drawing tool
The drawing tool that comes with Windows 7 also provides a "full screen" function, that is, viewing pictures in full screen mode on the screen. The method is: In the "Display" column of the "View" tab of Paint, click "Full Screen" to view the picture in full screen. When you need to exit full screen, click the displayed picture to return to the "Paint" window, as shown in the figure below. Show:

Open the drawing tool: The opening path is [Start/Programs/Accessories/Paint];
How to use the computer’s built-in drawing tools to draw floor plans
Familiar with the drawing tool layout: The entire drawing tool can be divided into three areas (title bar, tool bar, paint board). In the tool bar, when you click on the tool with the mouse, the corresponding function will be displayed;
How to use the computer’s built-in drawing tools to draw floor plans
Example drawing tutorial (complete the following house layout plan);
How to use the computer’s built-in drawing tools to draw floor plans
Create a new drawing and use the toolbar rectangle tool to plan the general layout;
How to use the computer’s built-in drawing tools to draw floor plans
Use the four tools of the toolbar selection rectangle and rubber straight line to refine the picture below;
How to use the computer’s built-in drawing tools to draw floor plans
6
For pictures that look difficult, you can use various tools to draw them, such as drawing the door in the picture below
How to use the computer’s built-in drawing tools to draw floor plans
7
Use pictures 5 and 6, put them together and stack them into the picture below (can be used with the selection transparency setting tool in the toolbar)
How to use the computer’s built-in drawing tools to draw floor plans
The above is the detailed content of How to use image editing tools on your computer. For more information, please follow other related articles on the PHP Chinese website!


