

Methods and steps for uninstalling Win10 system software

Recently, many netizens have asked how to uninstall software in win10. Generally, when we use software, we will uninstall it through third-party software. But uninstalling stubborn software is not that simple. We still need to solve it ourselves. Next, I will teach you how to uninstall software
win10 system is a rising star and is deeply loved by everyone. Now more and more friends choose to install win10 system. But I also encountered some problems when using win10 system, such as how to uninstall software in win10 system. Next, I will teach you the detailed steps to uninstall software in win10
Win10 system uninstall software tutorial
Method 1,
1, shortcut key win R , open the run window, enter control, click Enter to open the control panel
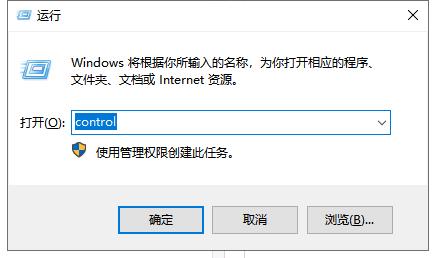
win10 uninstall software computer diagram 1
2. Find the program options and click "Uninstall a program" below.
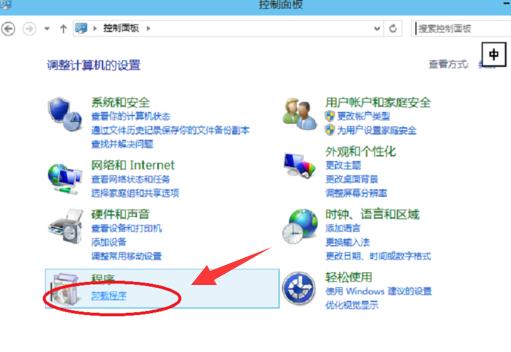
Software Computer Illustration 2
3. Open the Programs and Functions window, right-click the software you want to uninstall, and click Just uninstall it, but it cannot uninstall two software at the same time
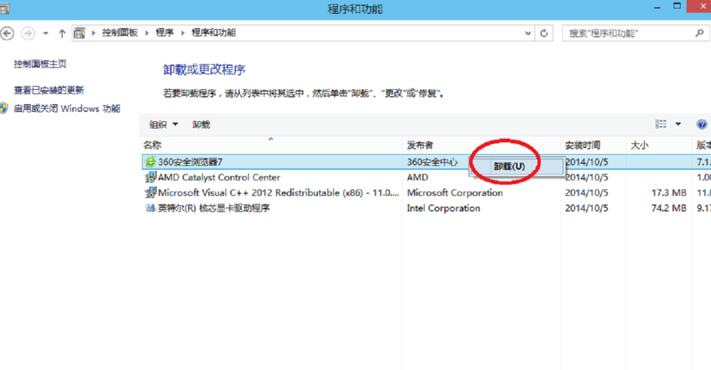
win10 system computer diagram 3
Method 2 . If you know the drive letter where the software is located, you can directly right-click to delete it
1. Right-click the software that needs to be uninstalled and select Delete. If the file is too large, it will be deleted directly. If the file is too small, it will be entered into the recycle bin.
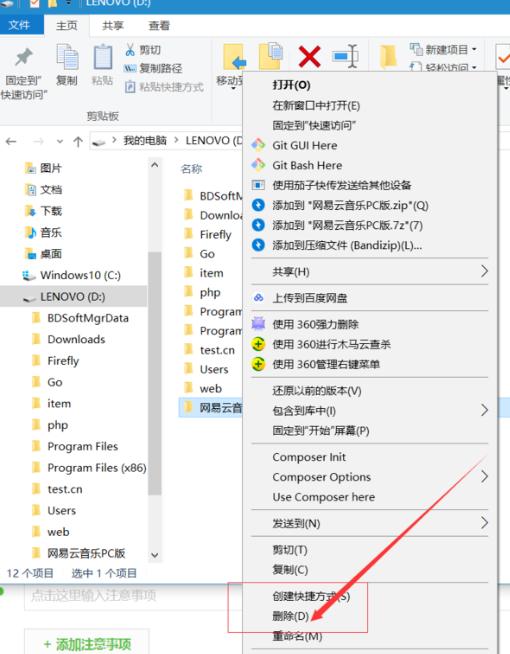
Win10 How to Uninstall Software Computer Illustration 4
2. Right-click the Recycle Bin and select Empty Recycle Bin La
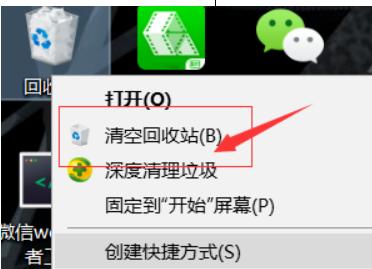
win10 uninstall software computer diagram 5
The above is the method to uninstall software in win10 system, I hope it can help your turn
The above is the detailed content of Methods and steps for uninstalling Win10 system software. For more information, please follow other related articles on the PHP Chinese website!

Hot AI Tools

Undresser.AI Undress
AI-powered app for creating realistic nude photos

AI Clothes Remover
Online AI tool for removing clothes from photos.

Undress AI Tool
Undress images for free

Clothoff.io
AI clothes remover

AI Hentai Generator
Generate AI Hentai for free.
Hot Article
Hot Tools

Notepad++7.3.1
Easy-to-use and free code editor

SublimeText3 Chinese version
Chinese version, very easy to use

Zend Studio 13.0.1
Powerful PHP integrated development environment

Dreamweaver CS6
Visual web development tools

SublimeText3 Mac version
God-level code editing software (SublimeText3)
Hot Topics
 1377
1377
 52
52

 How to install WinNTSetup into Win11 system_How to install WinNTSetup into Win11 system
May 08, 2024 am 11:19 AM
How to install WinNTSetup into Win11 system_How to install WinNTSetup into Win11 system
May 08, 2024 am 11:19 AM
First download the latest Win11 system ISO image, and then in Win10 system, you can directly right-click on the downloaded ISO image file and select [Load]; if it is under WinPE, WinXP, or Win7 system, you need to use the virtual optical drive tool to load the ISO Image; or you can directly decompress the ISO image file without using a virtual optical drive. Then run WinNTSetup. The software interface is as shown in the figure: First locate the location of the install.wim file. You can find the install.wim file in the sources directory of the Win11 ISO image loaded or decompressed by the virtual optical drive. Then set the location of the boot disk and installation disk. Generally, you are going to put W
 When I turn on the computer, it always stops at the motherboard logo screen. Nothing happens when I press anything, and I can't enter the bios?
Apr 23, 2024 am 09:13 AM
When I turn on the computer, it always stops at the motherboard logo screen. Nothing happens when I press anything, and I can't enter the bios?
Apr 23, 2024 am 09:13 AM
When I turn on the computer, it always stops at the motherboard logo screen. Nothing happens when I press anything, and I can't enter the bios? This is usually because the BIOS battery voltage is too low, and the system time has returned to the BIOS preset time, such as 2000.1.1, 00:00. You can use it after pressing F1 to enter the bios and set the time. Do not turn off the AC power after shutting down at night. Generally, the system time will not be lost when you turn on the computer the next day, and you can still enter the system normally. If the AC power is cut off, the battery voltage cannot sustain the power consumption of the bios, and the computer will be in the same state again the next day when it is turned on. Replacing the bios battery is the ultimate solution. Win11 is stuck on the motherboard logo interface when booting? 1. It is a problem with bios settings. We only need to find the corresponding setting items.
 How to check the root cause of Windows 10 system crash
Apr 23, 2024 pm 04:22 PM
How to check the root cause of Windows 10 system crash
Apr 23, 2024 pm 04:22 PM
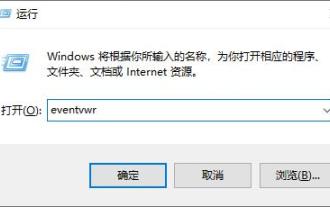
Faced with the sudden crash problem of Windows 10 system during use, users are often confused and do not know the specific reasons behind it. In order to help you effectively identify and solve this problem, this article will provide in-depth guidance on how to troubleshoot the root cause of the Win10 system crash, and provide a series of practical detection and analysis steps. Whether you are a user who frequently encounters crashes or want to take preventive measures in advance, you may wish to follow the following content to learn more about effective strategies for querying the causes of crashes. Operation method 1. Use the "win+R" shortcut key to start running, enter "eventvwr", and click "OK" to open. 2. After entering the "Event Viewer" page, click the "Windows Log" option in the left column. 3. Then you can choose
 How to open xps file in win10 system
Apr 19, 2024 pm 03:48 PM
How to open xps file in win10 system
Apr 19, 2024 pm 03:48 PM
There are three ways to open XPS files in Windows 10: Use the built-in XPS viewer Use the Microsoft Edge browser Use third-party XPS reader software such as Adobe Acrobat Reader or Foxit Reader
 How to change the default font in WIN10 system
Apr 24, 2024 pm 03:04 PM
How to change the default font in WIN10 system
Apr 24, 2024 pm 03:04 PM
1. Open the device and bring up the registry editor. 2. After the registry editor pops up, navigate to [Computer HKEY_LOCAL_MACHINESOFTWAREMicrosoftWindowsNTCurrentVersionFonts]. 3. Find MicrosoftYaHei&MicrosoftYaHeiUI(TrueType) on the right, which is the system default font. 4. Change the default font name to the font name you need. Specific operations: Change the msyh.ttc at the back to the font you want (right-click the font name you want to change, properties, copy the name above );as the picture shows:
 How to install Windows system on tablet computer
May 03, 2024 pm 01:04 PM
How to install Windows system on tablet computer
May 03, 2024 pm 01:04 PM
How to flash the Windows system on BBK tablet? The first way is to install the system on the hard disk. As long as the computer system does not crash, you can enter the system and download things, you can use the computer hard drive to install the system. The method is as follows: Depending on your computer configuration, you can install the WIN7 operating system. We choose to download Xiaobai's one-click reinstallation system in vivopad to install it. First, select the system version suitable for your computer, and click "Install this system" to next step. Then we wait patiently for the installation resources to be downloaded, and then wait for the environment to be deployed and restarted. The steps to install win11 on vivopad are: first use the software to check whether win11 can be installed. After passing the system detection, enter the system settings. Select the Update & Security option there. Click
 How to take screenshots on your computer. A must-read for beginners: 7 ways to take screenshots on your computer
Apr 23, 2024 pm 01:10 PM
How to take screenshots on your computer. A must-read for beginners: 7 ways to take screenshots on your computer
Apr 23, 2024 pm 01:10 PM
When using a computer for work, the screenshot function is often used. So what is a good way to take a screenshot? If you want to capture long pictures, irregular graphics, and extract text from screenshots, how should you do it? Today, let He Hanqian recommend several screenshot methods for you to help you solve the above problems easily. 1. Key combination: Win+Shift+SWin+Shift+S is the screenshot key combination that comes with the Win10 system. It has multiple functions to choose from, including rectangular screenshots, arbitrary shape screenshots, window screenshots, and full-screen screenshots. He Hanqian often uses it. For the screenshots of any shape, you can use the mouse to draw wherever you want. It is very easy to use. 2. Snipping and Sketching Tools Snipping and Sketching Tools are also image processing tools that come with the Win system. Click on the Start menu in the lower left corner.
 How to disable Xbox Game Bar in Windows 10
Apr 19, 2024 pm 05:40 PM
How to disable Xbox Game Bar in Windows 10
Apr 19, 2024 pm 05:40 PM
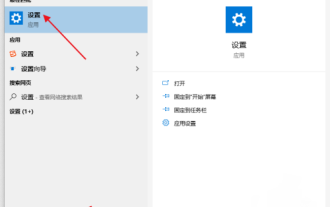
The Xbox Game Bar is a powerful gaming auxiliary tool integrated into the Windows 10 system. It integrates a variety of practical functions such as screenshots and video recordings, and is especially suitable for recording wonderful moments during the game. However, for non-gamers or those who want to disable this feature for a specific period of time, it is especially important to know how to turn off the Xbox Game Bar. This article will provide users in need with a detailed guide on how to turn off the Xbox Game Bar in Windows 10, allowing you to freely enable or disable this feature according to actual needs. Close method 1. Click the "Search" button in the taskbar in the lower left corner and enter "Settings" to open it. 2. After entering the new window interface, click the "Game" option. 3. Opening
