

Why can't I turn on the hotspot after my Mac is connected to WiFi?

Today, this site will share the experience of opening a hotspot on a Mac connected to WiFi to help you solve the problem. If it is helpful to you, please pay attention to this site. Start reading!
How to create a wifi hotspot on mac: Steps to set up wireless network wifi sharing on Apple mac
The method to create a WiFi hotspot on Apple Mac is very simple. First, make sure you have connected the network cable. Then, open the system settings and select the "Sharing" option. In the "Internet Sharing" section, select the type of network you want to share, which can be an Ethernet or PPPoE link. Next, you can set a name and password for your hotspot. Finally, enable WiFi sharing. In this way, your Mac has successfully created a WiFi hotspot through which other devices can access the Internet wirelessly.
We can try to use other devices to connect to the Wifi hotspot shared by Mac. Taking the iPhone as an example, you can find the wireless hotspot set by Mac in the wireless list, which starts with a capital B.
How to set up wifi hotspot on Mac Open "System Preferences" and click "Sharing → Internet Sharing".
First, click the [Apple] icon in the upper left corner according to the arrow. Then, in the pop-up menu bar, find and click the [System Preferences] option. Then, in the pop-up window, click the [Share] icon, as shown in the figure below.
The specific method is as follows: Open ‘System Preferences’, click ‘Sharing’, and select ‘Internet Sharing’.
The following is how to share your Mac WIFI network: 1. Open Settings and select Network. 2. Click "WIFI" in the left tab, and then click the "Advanced" button in the lower right corner. 3. Select the "Create a computer-to-computer network" option in the pop-up window. 4. Click on the WIFI icon in the upper right corner and select "Create Network". 5. Set the network name and password as needed. 6. Return to the "Settings" window and click the "Sharing" option. 7. Select "Ethernet" in the "Connection from shared source" drop-down menu. 8. Check "WIFI" in the WIFI options on the right and click the "WIFI Options" button. 9. Make further network settings as needed. The above is how to share WIFI network on Mac.
How to connect an Apple laptop to a mobile phone hotspot.
First, place the phone as close as possible to the laptop, such as next to the desktop. The main reason for this is that if the phone is too far away from the laptop, the hotspot signal may become weak, causing the laptop to be unable to search for or connect to the hotspot, resulting in slower Internet speeds.
In iPhone, to turn on the Personal Hotspot feature, you need to go to the Settings app and select the Personal Hotspot option. On this page, you can easily configure various parameters of the hotspot, such as Wi-Fi name and password.
First, click on the phone’s settings and turn on the cellular network. Next, enter Personal Hotspot and slide the switch to the right to turn it on. Then, open the laptop and find the mobile hotspot in the wireless connection. Finally, enter the password of the mobile hotspot to access the Internet.
On your computer’s Windows desktop, click the network icon in the lower right corner and select More Network Settings. In the new network settings window, click Manage connected devices. In the list of connected devices, select your phone and click Connect. After the connection is successful, the computer can access the Internet through the mobile hotspot.
How to turn on WiFi hotspot on Mac
How to set up WiFi hotspot on Mac Open "System Preferences" and click "Sharing → Internet Sharing".
First, click the [Apple] icon in the upper left corner according to the arrow. Then, in the pop-up menu bar, find and click the [System Preferences] option. Then, in the pop-up window, click the [Share] icon, as shown in the figure below.
Click on this wireless, enter the password we used when setting up the wireless hotspot on Mac before, and connect.
First, connect the network cable, enter settings, and select "Sharing". In the Internet Sharing column, select the network, Ethernet or PPPoE link to share. Then select Share via Wi-Fi below.
How to share WIFI hotspot with Mac computer
Step 1: Settings-Network, click WIFI-Advanced-Create a computer-to-computer network. Step 2: In the upper right corner of wifi, click Create Network. Set up the appropriate things. Settings - Sharing. Select Ethernet for the shared source connection, check WIFI on the right, click WIFI options, and set it up.
First, click the [Apple] icon in the upper left corner according to the arrow. Then, in the pop-up menu bar, find and click the [System Preferences] option. Then, in the pop-up window, click the [Share] icon, as shown in the figure below.
The first step is to search and open the [Sharing] window, and then set [Share connections from the following sources] to the network that the computer is currently connected to according to the arrow in the picture below. The second step is to find and check [Wi-Fi] as shown in the figure below.
What I will do next is use this wired network to share it with other devices using the wireless Wifi on my Mac computer.
Can I use a mac as a hotspot when it is connected to WiFi?
Yes, because the MacBook Pro I use only has one wireless network interface, so I need to install an external network cable on the computer. Network card, what I will do next is use this wired network to use the wireless Wifi on the Mac computer to share it with other devices.
Yes, I found the setting method in an encyclopedia: desktop computers can be connected to the network, and laptop computers can also be connected to the network. The former requires a network cable, while the latter requires wireless. Both teenagers and adults need to use the Internet.
If your mac itself is connected to the Internet through WiFi, you cannot use this Mac as a WiFi hotspot because the WiFi port is already occupied and in use. Besides, there is already wifi, so it doesn’t make much sense to use a mac as a hotspot. If your mac is connected to the Internet through a network card and a network cable, it can be used as a hotspot.
First, open System Preferences on your MAC. After opening, click the Sharing Options icon. Then, on the right side of the sharing interface, select Bluetooth PAN for sharing connections from the following sources, and select Wi-Fi for sharing to computers using the following ports. Next, click on the Wi-Fi option at the bottom.
Select Wi-Fi Select Wi-Fi to set your own network name, frequency band, security, and password. Click Internet Sharing on the left, and click the start green light icon to indicate that the wireless Wi-Fi has been set up to take effect. Information about the current wireless wifi hotspot can be seen in the menu bar at the top of the screen.
How to set up wifi hotspot on Mac
How to set up wifi hotspot on Mac Open "System Preferences" and click "Sharing → Internet Sharing".
Click on this wireless, enter the password we used when setting up the wireless hotspot on Mac before, and connect.
The method to create a WiFi hotspot on Apple Mac is simple. First, make sure you have connected the network cable. Then, open the system settings and select the "Sharing" option. In the "Internet Sharing" section, select the type of network you want to share, which can be an Ethernet or PPPoE link. Next, you can set a name and password for your hotspot. Finally, enable WiFi sharing. In this way, your Mac has successfully created a WiFi hotspot through which other devices can access the Internet wirelessly.
Conclusion: The above is all the content about opening a hotspot on a mac connected to wifi that this site has introduced to you. I hope it will be helpful to everyone. If you want to know more about this, remember to bookmark and follow it. This site.
The above is the detailed content of Why can't I turn on the hotspot after my Mac is connected to WiFi?. For more information, please follow other related articles on the PHP Chinese website!

Hot AI Tools

Undresser.AI Undress
AI-powered app for creating realistic nude photos

AI Clothes Remover
Online AI tool for removing clothes from photos.

Undress AI Tool
Undress images for free

Clothoff.io
AI clothes remover

AI Hentai Generator
Generate AI Hentai for free.

Hot Article
Hot Tools

Notepad++7.3.1
Easy-to-use and free code editor

SublimeText3 Chinese version
Chinese version, very easy to use

Zend Studio 13.0.1
Powerful PHP integrated development environment

Dreamweaver CS6
Visual web development tools

SublimeText3 Mac version
God-level code editing software (SublimeText3)
Hot Topics
 1377
1377
 52
52

 No response when entering password on mac keyboard?
Feb 20, 2024 pm 01:33 PM
No response when entering password on mac keyboard?
Feb 20, 2024 pm 01:33 PM
Introduction: In this article, this website will introduce to you the relevant content about the Mac keyboard not responding when entering passwords. I hope it will be helpful to you, let’s take a look. How to solve the problem that the password cannot be entered on the Apple Mac system? You can also try to connect this keyboard to other computers to see if it works normally. If the same problem occurs on another computer, it's most likely a fault with the keyboard itself. You may consider replacing the keyboard or repairing it. The first time you log in to Alipay with your Mac computer, you will find the login interface and cannot enter your password. The password input field displays: "Please click here to install the control", so Alipay login requires the installation of security controls. Security controls can encrypt and protect the information you enter (amount, password, etc.) to improve account security. Tie
 3 tips to easily customize your Mac computer name, host name and Bonjour name
Mar 06, 2024 pm 12:20 PM
3 tips to easily customize your Mac computer name, host name and Bonjour name
Mar 06, 2024 pm 12:20 PM
Many Mac users tend to keep the default name of their device and may never consider changing it. Many people choose to stick with the name from the initial setup, such as "Johnny's MacBook Air" or simply "iMac." Learning how to change the name of your Mac is a very useful skill, especially when you have multiple devices, as it can help you quickly distinguish and manage them. Next, we will teach you step by step how to change the computer name, host name and Bonjour name (local host name) in macOS system. Why should you change your Mac name? Changing the name of your Mac can not only show your personality, but also help improve the user experience: Personalize your Mac: The default name may not be to your taste, change it to a name you like.
 Forgot your mac installer password?
Feb 20, 2024 pm 01:00 PM
Forgot your mac installer password?
Feb 20, 2024 pm 01:00 PM
Introduction: In this article, this website will introduce to you the relevant content about forgetting the password of the Mac installation program. I hope it will be helpful to you, let’s take a look. What to do if you forget your password for Apple computer installation software. First, find iCloud in the phone settings and click to open it. Next, enter your account number and password. There is a line of small words below the login button that prompts you if you have forgotten your ID or password. Click this option. Normally, after you enter an incorrect password multiple times on the login interface, your MacBook Pro will prompt you to use your bound Apple ID to reset your password. You only need to follow the steps prompted by the system to complete the password reset. 3. First shut down your Mac, then restart it. While pressing the power button, immediately press and hold com on the keyboard.
 pkg file to install on mac?
Feb 20, 2024 pm 03:21 PM
pkg file to install on mac?
Feb 20, 2024 pm 03:21 PM
Preface: Today, this site will share with you the relevant content about installing pkg files on Mac. If it can solve the problem you are facing now, don’t forget to follow this site and start now! The previous version of macos pkg cannot be installed to upgrade the operating system: If your laptop is using an older operating system version, it is recommended to upgrade to the latest operating system version. Because older versions may not support installation of the latest macOS system. Select "Erase" in Disk Utility, then select the Macos extension in the format, do not check the encryption option, and do not select the apfs format, and finally click the "Erase" button to solve the problem of being unable to complete the macOS installation. Drag the application's icon to the file starting with App
 How to turn pages when typing on Apple Mac?
Feb 20, 2024 pm 12:54 PM
How to turn pages when typing on Apple Mac?
Feb 20, 2024 pm 12:54 PM
Introduction: Today, this site will share with you relevant content about how to turn pages when typing on Apple Mac. If it can solve the problem you are facing now, don’t forget to follow this site and start now! Tips for using the touchpad on Apple MacBook laptops. The steps for setting up two-finger sliding on Apple computers are as follows: Find the "Settings" icon on the computer desktop and click it. Select "Touchpad" in the settings interface, and then click "Scroll to Zoom". Check "Scroll direction: Natural" in the scroll zoom options to complete the setting. Setting up a two-finger swipe method on your Apple computer is easy. First, turn on your computer and click on the Settings icon at the top of the screen. In the settings interface, select the "Touchpad" option. Then click "Scroll Zoom" and make sure "Scroll Direction" is checked
 How to set up WeChat Mac to automatically convert voice messages into text - How to set up voice to text conversion
Mar 19, 2024 am 08:28 AM
How to set up WeChat Mac to automatically convert voice messages into text - How to set up voice to text conversion
Mar 19, 2024 am 08:28 AM
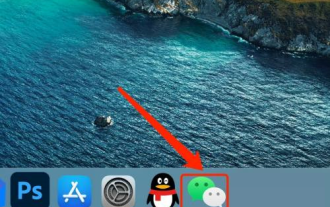
Recently, some friends have consulted the editor about how to set up WeChat Mac to automatically convert voice messages into text. The following is a method for setting up WeChat Mac to automatically convert voice messages into text. Friends in need can come and learn more. Step 1: First, open the Mac version of WeChat. As shown in the picture: Step 2: Next, click "Settings". As shown in the picture: Step 3: Then, click "General". As shown in the picture: Step 4: Then check the option "Automatically convert voice messages in chat to text". As shown in the picture: Step 5: Finally, close the window. As shown in the picture:
 Can Mac cut files to hard drive?
Feb 20, 2024 pm 01:00 PM
Can Mac cut files to hard drive?
Feb 20, 2024 pm 01:00 PM
Introduction: This article is here to introduce you to the relevant content of cutting files to the hard disk on Mac. I hope it will be helpful to you, let’s take a look. How to Export Photos to a Mobile Hard Drive on a Mac Computer You can use the Finder or Photos application to export photos to a mobile hard drive. When using Finder to export photos, first make sure the mobile hard drive is connected to the Mac and is successfully recognized by the Mac. The steps to transfer photos from Mac to hard drive are simple: first, connect the mobile hard drive to the computer, and then open the [Launcher] icon. Then, find and click the [Photos] icon in the pop-up window. In the opened [Photos] window, hold down the [Shift] key
 Mac black apple boot method?
Feb 20, 2024 pm 01:00 PM
Mac black apple boot method?
Feb 20, 2024 pm 01:00 PM
Preface: This article is here to introduce you to the relevant content about the mac black apple boot method. I hope it will be helpful to you, let’s take a look. Black Apple OC boot quick configuration tutorial 1. After entering the loverconfigurator software interface, click on the "Boot Parameters" setting. The default boot volume name is set to the disk name that was erased when installing the Black Apple system. But Benjuannai? 0, then click Save in the lower right corner, restart the computer, and replace the lover boot interface with the Apple logo boot interface. Secure Boot effectively prevents unsigned bootloaders from booting from any internal disk or USB drive. However, Clover or OC boot does not support the secure boot function. To start
