How to scale down image size (PS2019)
There are many friends who don’t know how to scale proportionally when using PS to operate pictures. Every time, the length and width of the picture are inconsistently scaled, causing the picture to be deformed and unable to achieve the effect you want. For this reason, the editor will give you I have brought you the following tutorial, let’s take a look!
1. First, we open ps2019, then select [File]-[Open] in the menu bar above to open the image through the path. We can also open PS first and drag the image directly into the blank area in the middle of PS. 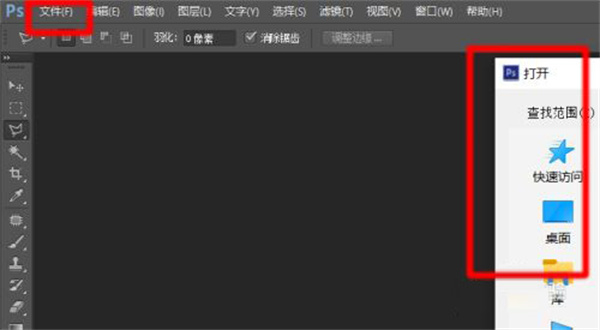
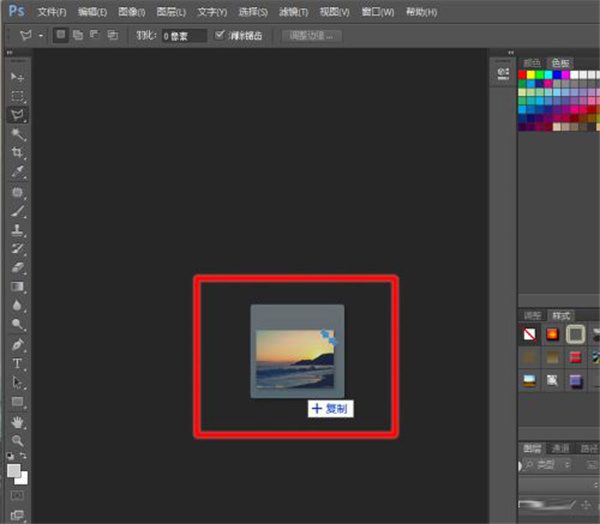
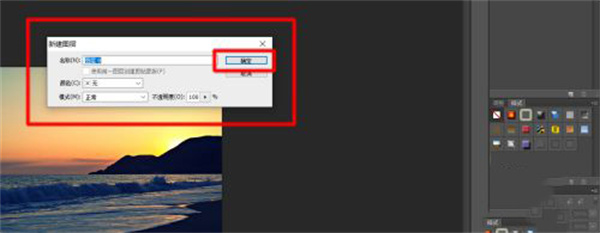
#2. What we need to pay attention to is the current status of the picture we open. We select [Layer] in the [Layer | Channel | Path] panel in the lower right corner of PS, and we can see the status of the image we just imported. Some pictures are imported as backgrounds, and we can see that there is a lock on the layer. We double-click the layer and click OK to convert the image's status from background to layer. (The picture cannot be moved or zoomed in the background state) 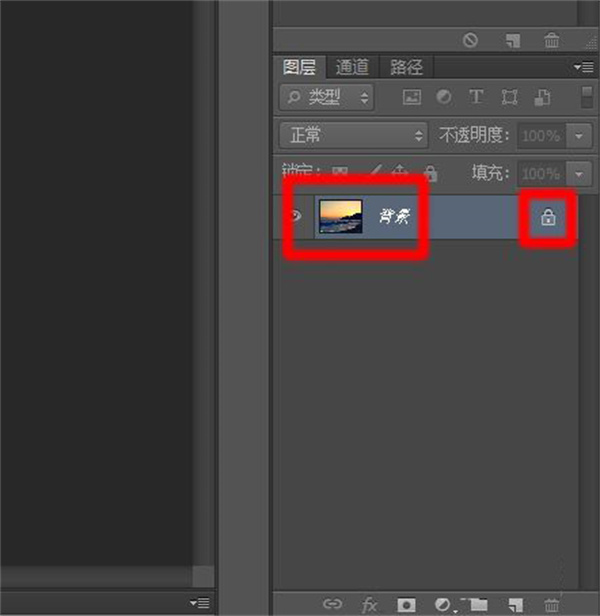
#3. We use the shortcut key Ctrl T to transform the layer. After pressing the shortcut key, we can see that the picture is framed by eight square points with an anchor point in the middle. We can zoom in and out by moving the mouse to the four corners of the image. You can hold down the Shift key when zooming to ensure equal scaling. The shortcut key Ctrl T key is effective for layer transformation in all versions of PS. 
4. What we just talked about is a picture, that is, a layer, scaled in equal proportions. What if there are multiple pictures and multiple layers scaled equally at the same time. We are still in the [Layer | Channel | Path] panel in the lower right corner, select [Layer], hold down the Ctrl key, and click with the mouse to select multiple layers. 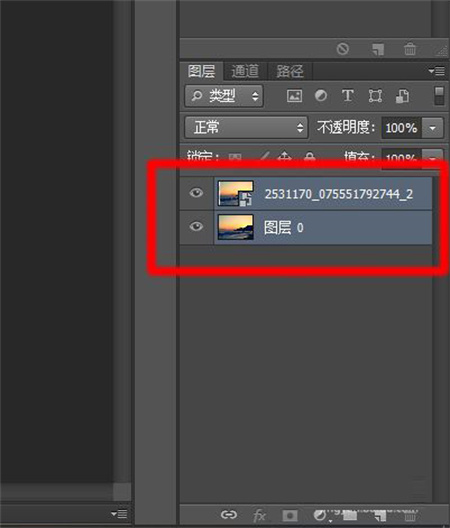
5. When multiple layers are selected at the same time, we can operate on multiple selected layers at the same time. But sometimes we click incorrectly and some layers are deselected. In order to make it more convenient and faster, we can use some tools. 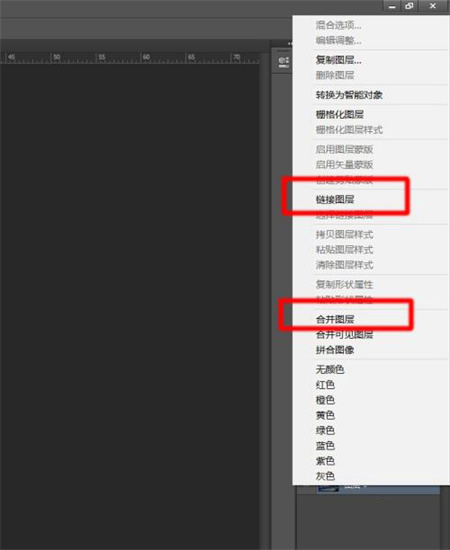
6. Then right-click the mouse and there are two methods in the pop-up menu. The first method is to link layers, which is to establish links between several layers. We then use the Ctrl T key to select any one of the layers, and all linked layers can be scaled equally at the same time. (In the picture below, we can see that there is a chain-like sign on the linked layer) 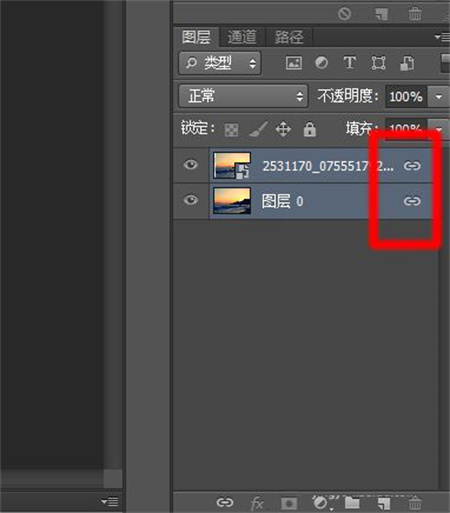
7. The second method in the menu is to merge layers. To merge layers, you need to Layers are merged together, and linked layers can be unlinked. However, after merging layers, the merged layers cannot be split again, which means that this operation is irreversible. (In the picture below, several layers are merged into one layer) After merging the layers, then scale. 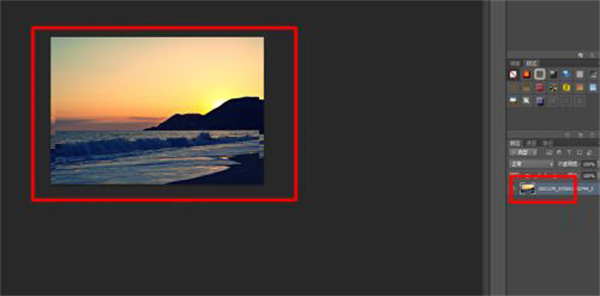
8,
The above is the detailed content of How to scale down image size (PS2019). For more information, please follow other related articles on the PHP Chinese website!

Hot AI Tools

Undresser.AI Undress
AI-powered app for creating realistic nude photos

AI Clothes Remover
Online AI tool for removing clothes from photos.

Undress AI Tool
Undress images for free

Clothoff.io
AI clothes remover

AI Hentai Generator
Generate AI Hentai for free.

Hot Article

Hot Tools

Notepad++7.3.1
Easy-to-use and free code editor

SublimeText3 Chinese version
Chinese version, very easy to use

Zend Studio 13.0.1
Powerful PHP integrated development environment

Dreamweaver CS6
Visual web development tools

SublimeText3 Mac version
God-level code editing software (SublimeText3)

Hot Topics
 How to Take Photos on Android Without All the Post-Processing Junk
Mar 13, 2025 pm 01:09 PM
Your phone's camera does so much filtering, processing, and AI adjustments, it can make you question reality itself. In a world where Google can put you into photos you take, what's even real? If you'd rather avoid letting your phone decide what
 Photoshop Is Officially Available on iPhone
Mar 06, 2025 am 09:56 AM
Photoshop officially logs on to iPhone! Say goodbye to the limitations of mobile image editing! Photoshop, a benchmark software in the field of image editing, has finally officially landed on iPhone! Photoshop has been the industry standard for more than three decades, but in the field of mobile phone image editing, users have had to rely on other applications. This situation has changed with the release of Photoshop iPhone version on February 25. You can now search for "Photoshop" on the App Store to download this free app. In addition to core imagery and design tools, numerous features are available for free: Selections, layers and masks Click Select Tool Stain Repair Painting
 Completely Uninstall Xiaomi Game Center: No Leftovers!
Mar 18, 2025 pm 06:00 PM
The article details steps to completely uninstall Xiaomi Game Center, remove residual files, prevent auto-reinstallation, and verify the app's removal from a device.
 I Tried Yope, Gen Z's New Favorite Photo-Sharing App
Mar 05, 2025 am 10:41 AM
Yope: A Gen Z Photo-Sharing App Review – Is It Worth the Hype? I'm always eager to explore new social media apps, especially those focused on photo sharing. Yope (iOS and Android), the current trendy app, launched in September 2024 and boasts impres
 The Fastest Way to Uninstall Xiaomi Game Center (2025)
Mar 18, 2025 pm 06:03 PM
Article discusses the fastest way to uninstall Xiaomi Game Center in 2025 using built-in settings, with optional third-party tools for efficiency.Character count: 159
 How to Uninstall Xiaomi Game Center
Mar 18, 2025 pm 06:01 PM
The article provides a detailed guide on uninstalling Xiaomi Game Center, discussing standard and alternative methods, and potential performance improvements post-uninstallation.
 Instagram Won't (Usually) Snitch If You Screenshot
Mar 07, 2025 am 09:56 AM
Instagram Screenshot Notifications: The Complete Guide Ever wondered if taking a screenshot of someone's Instagram Story or post alerts them? Let's clear up the confusion. While screenshots of regular posts and Stories don't trigger notifications,
 Xiaomi Game Center Stuck? Here's How to Uninstall It!
Mar 18, 2025 pm 06:01 PM
Article discusses uninstalling stuck Xiaomi Game Center, troubleshooting, and exploring gaming alternatives. Main issue is app malfunction and removal.


