

Step by step installation and configuration of pip on Mac


Teach you step by step how to install pip on Mac, specific code examples are required
Although the Mac system comes with a Python interpreter, it does not come with a pip package management tool , which caused us to encounter some difficulties when installing Python packages. Therefore, we need to install pip manually to make it more convenient to manage and install Python packages on Mac.
The following is a step-by-step guide on how to install pip on Mac, with code examples:
Step 1: Open the terminal
On Mac, we can use "Finder" -> "Applications" -> "Utilities" -> "Terminal" Open the terminal.
Step 2: Install homebrew
Homebrew is one of the most popular package managers on Mac and can help us install various software packages in the terminal. Enter the following command in the terminal to install Homebrew:
/bin/bash -c "$(curl -fsSL https://raw.githubusercontent.com/Homebrew/install/HEAD/install.sh)"
Press the Enter key and wait for the installation process to complete.
Step 3: Install Python through homebrew
We can easily install Python using Homebrew. Enter the following command in the terminal:
brew install python
Press Enter and wait for the installation process to complete.
Step 4: Install pip
After installing Python, we need to install pip manually. Enter the following command in the terminal:
sudo easy_install pip
Press the Enter key and the terminal will prompt you to enter your password. After entering your Mac password, press Enter to start the installation.
Step 5: Verify whether pip is installed successfully
Enter the following command to verify whether pip is installed successfully:
pip --version
If the installation is successful, the terminal will display the version number information of pip.
Step 6: Update pip
In order to ensure that you are using the latest version of pip, we need to update it manually.
Enter the following command in the terminal:
pip install --upgrade pip
Press the Enter key and wait for the update process to complete.
At this point, we have successfully installed pip on Mac. Now, you can use the pip command to install various Python packages.
It should be noted that if you are using the Python2.x version, you need to use the following command when installing pip:
sudo easy_install pip
In addition, if you have multiple Python versions and want to To use pip in a specific Python environment, you can use the following command:
python -m pip install [package_name]
When using the above command, replace [package_name] with the name of the package you want to install.
Summary: Through the above steps, we successfully installed pip on Mac and verified its functionality in the terminal. Now, you can use pip to manage and install Python packages.
Hope this article can help you! If you have any other questions about installing pip on Mac, please feel free to ask.
The above is the detailed content of Step by step installation and configuration of pip on Mac. For more information, please follow other related articles on the PHP Chinese website!

Hot AI Tools

Undresser.AI Undress
AI-powered app for creating realistic nude photos

AI Clothes Remover
Online AI tool for removing clothes from photos.

Undress AI Tool
Undress images for free

Clothoff.io
AI clothes remover

AI Hentai Generator
Generate AI Hentai for free.

Hot Article
Hot Tools

Notepad++7.3.1
Easy-to-use and free code editor

SublimeText3 Chinese version
Chinese version, very easy to use

Zend Studio 13.0.1
Powerful PHP integrated development environment

Dreamweaver CS6
Visual web development tools

SublimeText3 Mac version
God-level code editing software (SublimeText3)
Hot Topics


 What should I do if I download other people's wallpapers after logging into another account on wallpaperengine?
Mar 19, 2024 pm 02:00 PM
What should I do if I download other people's wallpapers after logging into another account on wallpaperengine?
Mar 19, 2024 pm 02:00 PM
When you log in to someone else's steam account on your computer, and that other person's account happens to have wallpaper software, steam will automatically download the wallpapers subscribed to the other person's account after switching back to your own account. Users can solve this problem by turning off steam cloud synchronization. What to do if wallpaperengine downloads other people's wallpapers after logging into another account 1. Log in to your own steam account, find cloud synchronization in settings, and turn off steam cloud synchronization. 2. Log in to someone else's Steam account you logged in before, open the Wallpaper Creative Workshop, find the subscription content, and then cancel all subscriptions. (In case you cannot find the wallpaper in the future, you can collect it first and then cancel the subscription) 3. Switch back to your own steam
 How to download links starting with 115://? Download method introduction
Mar 14, 2024 am 11:58 AM
How to download links starting with 115://? Download method introduction
Mar 14, 2024 am 11:58 AM
Recently, many users have been asking the editor, how to download links starting with 115://? If you want to download links starting with 115://, you need to use the 115 browser. After you download the 115 browser, let's take a look at the download tutorial compiled by the editor below. Introduction to how to download links starting with 115:// 1. Log in to 115.com, download and install the 115 browser. 2. Enter: chrome://extensions/ in the 115 browser address bar, enter the extension center, search for Tampermonkey, and install the corresponding plug-in. 3. Enter in the address bar of 115 browser: Grease Monkey Script: https://greasyfork.org/en/
 Introduction to how to download and install the superpeople game
Mar 30, 2024 pm 04:01 PM
Introduction to how to download and install the superpeople game
Mar 30, 2024 pm 04:01 PM
The superpeople game can be downloaded through the steam client. The size of this game is about 28G. It usually takes one and a half hours to download and install. Here is a specific download and installation tutorial for you! New method to apply for global closed testing 1) Search for "SUPERPEOPLE" in the Steam store (steam client download) 2) Click "Request access to SUPERPEOPLE closed testing" at the bottom of the "SUPERPEOPLE" store page 3) After clicking the request access button, The "SUPERPEOPLECBT" game can be confirmed in the Steam library 4) Click the install button in "SUPERPEOPLECBT" and download
 How to download Quark network disk to local? How to save files downloaded from Quark Network Disk back to the local computer
Mar 13, 2024 pm 08:31 PM
How to download Quark network disk to local? How to save files downloaded from Quark Network Disk back to the local computer
Mar 13, 2024 pm 08:31 PM
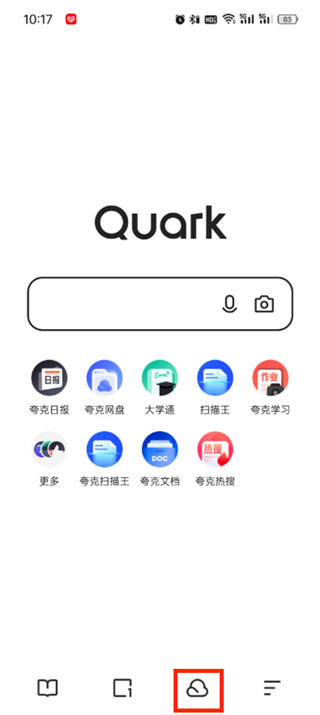
Many users need to download files when using Quark Network Disk, but we want to save them locally, so how to set this up? Let this site introduce to users in detail how to save files downloaded from Quark Network Disk back to the local computer. How to save files downloaded from Quark network disk back to your local computer 1. Open Quark, log in to your account, and click the list icon. 2. After clicking the icon, select the network disk. 3. After entering Quark Network Disk, click My Files. 4. After entering My Files, select the file you want to download and click the three-dot icon. 5. Check the file you want to download and click Download.
 What should I do if Baidu Netdisk is downloaded successfully but cannot be installed?
Mar 13, 2024 pm 10:22 PM
What should I do if Baidu Netdisk is downloaded successfully but cannot be installed?
Mar 13, 2024 pm 10:22 PM
If you have successfully downloaded the installation file of Baidu Netdisk, but cannot install it normally, it may be that there is an error in the integrity of the software file or there is a problem with the residual files and registry entries. Let this site take care of it for users. Let’s introduce the analysis of the problem that Baidu Netdisk is successfully downloaded but cannot be installed. Analysis of the problem that Baidu Netdisk downloaded successfully but could not be installed 1. Check the integrity of the installation file: Make sure that the downloaded installation file is complete and not damaged. You can download it again, or try to download the installation file from another trusted source. 2. Turn off anti-virus software and firewall: Some anti-virus software or firewall programs may prevent the installation program from running properly. Try disabling or exiting the anti-virus software and firewall, then re-run the installation
 How to download foobar2000? -How to use foobar2000
Mar 18, 2024 am 10:58 AM
How to download foobar2000? -How to use foobar2000
Mar 18, 2024 am 10:58 AM
foobar2000 is a software that can listen to music resources at any time. It brings you all kinds of music with lossless sound quality. The enhanced version of the music player allows you to get a more comprehensive and comfortable music experience. Its design concept is to play the advanced audio on the computer The device is transplanted to mobile phones to provide a more convenient and efficient music playback experience. The interface design is simple, clear and easy to use. It adopts a minimalist design style without too many decorations and cumbersome operations to get started quickly. It also supports a variety of skins and Theme, personalize settings according to your own preferences, and create an exclusive music player that supports the playback of multiple audio formats. It also supports the audio gain function to adjust the volume according to your own hearing conditions to avoid hearing damage caused by excessive volume. Next, let me help you
 Where to download files from Quark Network Disk_How to download Quark Network Disk to local area and share
Mar 21, 2024 pm 03:57 PM
Where to download files from Quark Network Disk_How to download Quark Network Disk to local area and share
Mar 21, 2024 pm 03:57 PM
As a convenient and practical network disk tool, Quark can help users easily obtain their favorite resources. What if you want to download a file locally? Let the editor tell you now, let’s learn it together! How to download Quark Network Disk to local sharing method 1. First open the Quark software, enter the homepage, and click the [Cloud Icon] on the lower right; 2. Then on the Quark Network Disk page, we click the [Document] function; 3. Then go to the document page, select the file you want to download, and click the [three-dot icon]; 4. After the final click, we click [Download] in the pop-up dialog box;
 How to install Android apps on Linux?
Mar 19, 2024 am 11:15 AM
How to install Android apps on Linux?
Mar 19, 2024 am 11:15 AM
Installing Android applications on Linux has always been a concern for many users. Especially for Linux users who like to use Android applications, it is very important to master how to install Android applications on Linux systems. Although running Android applications directly on Linux is not as simple as on the Android platform, by using emulators or third-party tools, we can still happily enjoy Android applications on Linux. The following will introduce how to install Android applications on Linux systems.
