
 Backend Development
Python Tutorial
Django installation tutorial: detailed steps and commands to install django
Backend Development
Python Tutorial
Django installation tutorial: detailed steps and commands to install django
Django installation tutorial: detailed steps and commands to install django


Django is a web application framework written in Python that helps developers build high-quality web applications in a faster and easier way. The many features and tools in Django make it one of the most popular and used web frameworks. Although Django has a rich documentation library and community support, installing Django can be a bit challenging for beginners. This article aims to provide a clear and specific Django installation tutorial so that novices can start using Django for web application development as soon as possible.
Step One: Install Python
Django is based on Python, so the first step is to make sure Python is installed on your computer. For best results, it is recommended to install the latest version of Python. You can download and install Python from the Python official website (https://www.python.org/downloads/). The installation wizard provides simple steps to help you complete the installation process.
Step 2: Install Django
After completing the installation of Python, the next step is to install Django. Before installing Django, it is recommended to create a virtual environment on your local computer. With virtual environments, you can create independent Python environments on your local computer, thus avoiding version conflicts between different versions of Python. You can use the following command to install the virtual environment:
pip install virtualenv
Next, you can create a virtual environment named "myenv" on your computer and use the following command:
virtualenv myenv
After completing the creation of the virtual environment, You can activate it as follows:
source myenv/bin/activate
Now, once you are in the virtual environment, you can install Django using the following command:
pip install django
This will install the latest version of Django. If you want to install a specific version, you can use the following command:
pip install django==2.1.5
This will install Django version 2.1.5. After the installation is complete, you can use the following command to verify that Django has been installed correctly:
python -m django --version
This will display the currently installed Django version.
Step 3: Create a Django project
After installing Django, the next step is to create a Django project. The project directory can be created anywhere, but for convenience it is recommended to create a dedicated directory outside the virtual environment directory. In order to create a Django project named "myproject", run the following command on the command line:
django-admin startproject myproject
This will create a Django project named "myproject" in the current directory. This command will create a file named "manage.py" in the project root directory, which is a Django command line tool for managing Django projects.
Next, you can enter the project directory and start the Django development server. Run the following command:
cd myproject
python manage.py runserver
This will start the Django development server. By default the server address is http://127.0.0.1:8000/. The default page of a Django application can be accessed by entering this address in a web browser. If all goes well, you should be able to see the "Welcome to Django" message.
Step 4: Create a Django application
Although the Django project has been created, it is still an empty project without any application functionality. Django applications are modules or applications that provide specific functionality. Therefore, you need to create one or more Django applications to implement your web application.
In order to create a Django application named "myapp", please run the following command in the Django project directory:
python manage.py startapp myapp
This command will create a directory containing the specified application name and provide some template files. Now, you can edit the application's views.py file (located in the myapp directory) to define the logic of the web application.
from django.http import HttpResponse

def index(request):
return HttpResponse("Hello, World! This is my first Django app.")Next, link the url pattern with the view function. This can be achieved by defining the URL pattern in the urls.py file in the myproject directory. Please edit the file to add the following lines of code:
from django.conf.urls import url
from django.contrib import admin
from myapp.views import index

urlpatterns = [
    url(r'^admin/', admin.site.urls),
    url(r'^$', index),
]Now you have successfully created a simple Django application and linked it with a web application using url patterns.
Conclusion:
In this article, we have provided a detailed Django installation tutorial so that you can quickly start using Django for web application development. We detail installation steps and common commands, and provide practical code examples. While this is just the basics of Django, it gives you a good start in learning Django.
The above is the detailed content of Django installation tutorial: detailed steps and commands to install django. For more information, please follow other related articles on the PHP Chinese website!

Hot AI Tools

Undresser.AI Undress
AI-powered app for creating realistic nude photos

AI Clothes Remover
Online AI tool for removing clothes from photos.

Undress AI Tool
Undress images for free

Clothoff.io
AI clothes remover

AI Hentai Generator
Generate AI Hentai for free.

Hot Article
Hot Tools

Notepad++7.3.1
Easy-to-use and free code editor

SublimeText3 Chinese version
Chinese version, very easy to use

Zend Studio 13.0.1
Powerful PHP integrated development environment

Dreamweaver CS6
Visual web development tools

SublimeText3 Mac version
God-level code editing software (SublimeText3)
Hot Topics


 How to run SUDO commands in Windows 11/10
Mar 09, 2024 am 09:50 AM
How to run SUDO commands in Windows 11/10
Mar 09, 2024 am 09:50 AM
The sudo command allows users to run commands in elevated privilege mode without switching to superuser mode. This article will introduce how to simulate functions similar to sudo commands in Windows systems. What is the Shudao Command? Sudo (short for "superuser do") is a command-line tool that allows users of Unix-based operating systems such as Linux and MacOS to execute commands with elevated privileges typically held by administrators. Running SUDO commands in Windows 11/10 However, with the launch of the latest Windows 11 Insider preview version, Windows users can now experience this feature. This new feature enables users to
 How to check the MAC address of the network card in Win11? How to use the command to obtain the MAC address of the network card in Win11
Feb 29, 2024 pm 04:34 PM
How to check the MAC address of the network card in Win11? How to use the command to obtain the MAC address of the network card in Win11
Feb 29, 2024 pm 04:34 PM
This article will introduce readers to how to use the command prompt (CommandPrompt) to find the physical address (MAC address) of the network adapter in Win11 system. A MAC address is a unique identifier for a network interface card (NIC), which plays an important role in network communications. Through the command prompt, users can easily obtain the MAC address information of all network adapters on the current computer, which is very helpful for network troubleshooting, configuring network settings and other tasks. Method 1: Use "Command Prompt" 1. Press the [Win+X] key combination, or [right-click] click the [Windows logo] on the taskbar, and in the menu item that opens, select [Run]; 2. Run the window , enter the [cmd] command, and then
 Where is hyperv enhanced session mode? Tips for enabling or disabling Hyper-V enhanced session mode using commands in Win11
Feb 29, 2024 pm 05:52 PM
Where is hyperv enhanced session mode? Tips for enabling or disabling Hyper-V enhanced session mode using commands in Win11
Feb 29, 2024 pm 05:52 PM
In Win11 system, you can enable or disable Hyper-V enhanced session mode through commands. This article will introduce how to use commands to operate and help users better manage and control Hyper-V functions in the system. Hyper-V is a virtualization technology provided by Microsoft. It is built into Windows Server and Windows 10 and 11 (except Home Edition), allowing users to run virtual operating systems in Windows systems. Although virtual machines are isolated from the host operating system, they can still use the host's resources, such as sound cards and storage devices, through settings. One of the key settings is to enable Enhanced Session Mode. Enhanced session mode is Hyper
 Super practical! Sar commands that will make you a Linux master
Mar 01, 2024 am 08:01 AM
Super practical! Sar commands that will make you a Linux master
Mar 01, 2024 am 08:01 AM
1. Overview The sar command displays system usage reports through data collected from system activities. These reports are made up of different sections, each containing the type of data and when the data was collected. The default mode of the sar command displays the CPU usage at different time increments for various resources accessing the CPU (such as users, systems, I/O schedulers, etc.). Additionally, it displays the percentage of idle CPU for a given time period. The average value for each data point is listed at the bottom of the report. sar reports collected data every 10 minutes by default, but you can use various options to filter and adjust these reports. Similar to the uptime command, the sar command can also help you monitor the CPU load. Through sar, you can understand the occurrence of excessive load
 What is the correct way to restart a service in Linux?
Mar 15, 2024 am 09:09 AM
What is the correct way to restart a service in Linux?
Mar 15, 2024 am 09:09 AM
What is the correct way to restart a service in Linux? When using a Linux system, we often encounter situations where we need to restart a certain service, but sometimes we may encounter some problems when restarting the service, such as the service not actually stopping or starting. Therefore, it is very important to master the correct way to restart services. In Linux, you can usually use the systemctl command to manage system services. The systemctl command is part of the systemd system manager
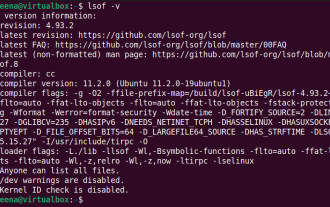 How to use LSOF to monitor ports in real time
Mar 20, 2024 pm 02:07 PM
How to use LSOF to monitor ports in real time
Mar 20, 2024 pm 02:07 PM
LSOF (ListOpenFiles) is a command line tool mainly used to monitor system resources similar to Linux/Unix operating systems. Through the LSOF command, users can get detailed information about the active files in the system and the processes that are accessing these files. LSOF can help users identify the processes currently occupying file resources, thereby better managing system resources and troubleshooting possible problems. LSOF is powerful and flexible, and can help system administrators quickly locate file-related problems, such as file leaks, unclosed file descriptors, etc. Via LSOF Command The LSOF command line tool allows system administrators and developers to: Determine which processes are currently using a specific file or port, in the event of a port conflict
 How to install NeXus desktop beautification-NeXus desktop beautification installation tutorial
Mar 04, 2024 am 11:30 AM
How to install NeXus desktop beautification-NeXus desktop beautification installation tutorial
Mar 04, 2024 am 11:30 AM
Friends, do you know how to install NeXus desktop beautification? Today I will explain the installation tutorial of NeXus desktop beautification. If you are interested, come and take a look with me. I hope it can help you. 1. Download the latest version of the Nexus desktop beautification plug-in software package from this site (as shown in the picture). 2. Unzip the Nexus desktop beautification plug-in software and run the file (as shown in the picture). 3. Double-click to open and enter the Nexus desktop beautification plug-in software interface. Please read the installation license agreement below carefully to see if you accept all the terms of the above license agreement. Click I agree and click Next (as shown in the picture). 4. Select the destination location. The software will be installed in the folder listed below. To select a different location and create a new path, click Next
 Detailed explanation of Linux ldconfig command
Mar 14, 2024 pm 12:18 PM
Detailed explanation of Linux ldconfig command
Mar 14, 2024 pm 12:18 PM
Detailed explanation of the Linuxldconfig command 1. Overview In the Linux system, ldconfig is a command used to configure shared libraries. It is used to update the links and cache of shared libraries and enable the system to load dynamically linked shared libraries correctly. The main function of ldconfig is to find dynamic link libraries and create symbolic links for program use. This article will delve into the usage and working principle of the ldconfig command, and use specific code examples to help readers better understand the functions of ldconfig
