
 Computer Tutorials
Troubleshooting
How to enter the BIOS of the ASL motherboard and boot from the USB flash drive? I'm a little confused
Computer Tutorials
Troubleshooting
How to enter the BIOS of the ASL motherboard and boot from the USB flash drive? I'm a little confused
How to enter the BIOS of the ASL motherboard and boot from the USB flash drive? I'm a little confused


I'm a little confused about how to enter the bios of the ASL motherboard and boot from the USB disk?
The key of ASL motherboard BIOS shortcut boot USB disk is: F10
(1) First use U-Master USB boot disk creation tool to make a USB boot disk, U-Master compatibility OK, the startup success rate is high!
(2) Next, find the shortcut key suitable for the motherboard brand or laptop brand you are currently using, and then restart the computer.
(3) When the computer is just turned on, press and hold the F10 shortcut startup button on the ASL motherboard, select the U disk you are currently using, and you will enter the "U disk installation system" startup interface.
(4) After choosing to enter the U-Master 03PE or WIN8PE system, you can install the system through the "U-Master One-Click Quick Installation Tool" on the desktop.
How to set up U disk boot in ASL motherboard bios?
The key of ASL motherboard BIOS to quickly start the USB disk is: F10(1) First use the U-Master U-disk startup disk creation tool to make a U-disk startup disk. U-Master has good compatibility and a high startup success rate. !
(2) Next, find the shortcut key suitable for the motherboard brand or laptop brand you are currently using, and then restart the computer.
(3) When the computer is just turned on, press and hold the F10 shortcut startup button on the ASL motherboard, select the U disk you are currently using, and you will enter the "U disk installation system" startup interface.
(4) After choosing to enter the U-Master 03PE or WIN8PE system, you can install the system through the "U-Master One-Click Quick Installation Tool" on the desktop.
Can I refresh the bios on ASL r780?
Generally speaking, most motherboards can flash the BIOS, including the ASL r780. However, before flashing the BIOS, make sure you have backed up the current version of the BIOS and understand the features and possible risks of the new version. If you are not sure how to flash the BIOS, it is recommended to seek help from a professional technician.
How to set up the ASL motherboard?
Keyboard startup requires motherboard jumpers and BIOS support. In addition, the keyboard's Power key needs to support ASL N68V-U (DDR3 version, integrated graphics card). The motherboard does not support keyboard startup. The motherboard does not have jumper support. BIOS power management There is no related option support, so keyboard startup is not supported at all.
How to enter bios on ASL motherboard?
First of all, press and hold the hotkey F10 while turning on the computer to enter the bios setting interface.
Secondly, after entering the bios setting interface, you can set the bios according to your own wishes and system requirements. After the settings are completed, press F10 to save and exit, and restart the computer to complete.
Axis motherboard bios settings solid state boot?
Method:
1. Connect the prepared Xinbaicai U disk boot disk to the computer, restart the computer, when the ASL logo appears on the monitor, press the startup shortcut key F10;
2. After pressing the startup shortcut key, the system enters the startup item selection window. Use the up and down arrow keys on the keyboard to select the USB disk to start, and press the Enter key to confirm;
3. Select After the U disk is started, the system will enter the Xinbaicaiu main menu interface. In the Xinbaicaiu main menu, select the options you need to operate. At this point, you can successfully start the U disk startup of the computer assembled with the ASL motherboard.
The above is the detailed content of How to enter the BIOS of the ASL motherboard and boot from the USB flash drive? I'm a little confused. For more information, please follow other related articles on the PHP Chinese website!

Hot AI Tools

Undresser.AI Undress
AI-powered app for creating realistic nude photos

AI Clothes Remover
Online AI tool for removing clothes from photos.

Undress AI Tool
Undress images for free

Clothoff.io
AI clothes remover

AI Hentai Generator
Generate AI Hentai for free.

Hot Article
Hot Tools

Notepad++7.3.1
Easy-to-use and free code editor

SublimeText3 Chinese version
Chinese version, very easy to use

Zend Studio 13.0.1
Powerful PHP integrated development environment

Dreamweaver CS6
Visual web development tools

SublimeText3 Mac version
God-level code editing software (SublimeText3)
Hot Topics


 R.E.P.O. Save File Location: Where Is It & How to Protect It?
Mar 06, 2025 pm 10:41 PM
R.E.P.O. Save File Location: Where Is It & How to Protect It?
Mar 06, 2025 pm 10:41 PM
Are you hooked on R.E.P.O.? Curious where your game progress is stored? This guide reveals the location of your R.E.P.O. save files and shows you how to protect them. Losing your game progress is frustrating, so let's ensure your hard work is safe
 Easily Fixed - Monster Hunter Wilds Keeps Compiling Shaders
Mar 04, 2025 pm 08:05 PM
Easily Fixed - Monster Hunter Wilds Keeps Compiling Shaders
Mar 04, 2025 pm 08:05 PM
Monster Hunter Wilds Shader Compilation Fix: A Comprehensive Guide Many players are encountering an issue where Monster Hunter Wilds gets stuck endlessly compiling shaders. This guide provides effective solutions to resolve this frustrating problem a
 Monster Hunter Wilds Communication Error on PC, Quick Fix
Mar 03, 2025 pm 08:02 PM
Monster Hunter Wilds Communication Error on PC, Quick Fix
Mar 03, 2025 pm 08:02 PM
Encountering the Monster Hunter Wilds communication error S9052-TAD-W79J? This frustrating issue affects many players, but several solutions have proven effective. This guide compiles these fixes to help you get back to hunting. Monster Hunter Wilds
 Find Monster Hunter Wilds Save File Location & Back up Data
Mar 03, 2025 pm 08:01 PM
Find Monster Hunter Wilds Save File Location & Back up Data
Mar 03, 2025 pm 08:01 PM
To secure your Monster Hunter Wilds game progress, you'll need to know where the save files are located and how to back them up. This guide provides step-by-step instructions for both tasks. Monster Hunter Wilds, available on multiple platforms, requ
 How to fix Microsoft Teams error 9hehw in Windows?
Mar 07, 2025 am 12:00 AM
How to fix Microsoft Teams error 9hehw in Windows?
Mar 07, 2025 am 12:00 AM
Understanding Microsoft Teams error tag 9hehw on Windows Microsoft Teams is a crucial communication and collaboration application by which users are able to joi
 Spotlight on KB5053606 Not Installing for Windows 10, Exact Steps
Mar 13, 2025 pm 08:02 PM
Spotlight on KB5053606 Not Installing for Windows 10, Exact Steps
Mar 13, 2025 pm 08:02 PM
Windows 10 KB5053606 Update installation failed? This guide provides effective solutions! Many users are having problems trying to install the Windows 10 KB5053606 update released on Tuesday of Microsoft's March 2025 patch, such as SSH connection interruption, Dwm.exe unresponsiveness, or input method editor (IME) issues. Updates may be stuck during downloading or installation, or error codes may appear, such as 0x800f0922, 0xd000034, 0x80070437 and 0x80072efe. KB5053606 installation failure is usually caused by a variety of reasons, including Windows update component failure, system file corruption, and disk
 R.E.P.O. Crashing & Freezing on PC? Result-Driven Fixes
Mar 07, 2025 pm 08:02 PM
R.E.P.O. Crashing & Freezing on PC? Result-Driven Fixes
Mar 07, 2025 pm 08:02 PM
Troubleshooting R.E.P.O. Game Crashes: A Comprehensive Guide Experiencing frustrating game crashes, especially in a team-based game like R.E.P.O., can be incredibly disruptive. This guide offers several solutions to resolve R.E.P.O. crashes, freezes
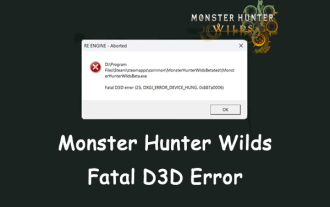 All Fixes for Monster Hunter Wilds Fatal D3D Error on PC
Mar 05, 2025 pm 06:01 PM
All Fixes for Monster Hunter Wilds Fatal D3D Error on PC
Mar 05, 2025 pm 06:01 PM
Monster Hunter Wilds players are encountering frustrating crashes due to Fatal D3D or RE Engine Aborted errors. This guide provides solutions to resolve these issues and get you back to hunting. Understanding the Problem Monster Hunter Wilds uses Cap
