

Detailed explanation of pip installation guide on Ubuntu


Detailed explanation of the pip installation steps on Ubuntu
On the Ubuntu operating system, pip is a Python package management tool that can easily help us install, upgrade and Manage Python components. This article will detail the steps to install pip on Ubuntu and provide specific code examples.
Step 1: Open the terminal
First, open the terminal. In Ubuntu, you can open the terminal by clicking the "Applications" icon in the upper left corner and typing "terminal" in the search bar.
Step 2: Update the software package list
In the terminal, we need to update the software package list first to ensure that the latest software package version is obtained from the latest software source. Enter the following command and press Enter:
sudo apt update
You will be prompted to enter your password, enter your password and press Enter.
Step 3: Install pip
After the update is completed, we can use the following command to install pip:
sudo apt install python3-pip
This command will download and install pip. You will be prompted to confirm if you want to continue with the installation, enter "Y" and press Enter.
Step 4: Verify installation
After the installation is completed, you can run the following command to verify whether pip is installed successfully:
pip3 --version
If output similar to the following appears, it means that pip is installed successfully:
pip 21.0.1 from /usr/lib/python3/dist-packages/pip (python 3.8)
Step 5: Use pip to install Python components
Once pip is installed successfully, you can use it to install Python components. The following is an example of using pip to install a virtual environment management tool virtualenv.
First, enter the following command to install virtualenv:
pip3 install virtualenv
After the command execution is completed, you can use the following command to verify whether the virtualenv is successfully installed:
virtualenv --version
If something similar to the following appears The output indicates that virtualenv is successfully installed:
virtualenv 20.4.2 from /usr/local/lib/python3.8/dist-packages/virtualenv (python 3.8)
Through the above steps, you have successfully installed pip and installed a Python component using pip. You can use similar commands to install other Python components.
Summary
Using pip to install Python components on Ubuntu is very convenient and can be completed in just a few simple steps. This article details the steps to install pip on Ubuntu and provides specific code examples. By following the above steps, you can easily install and manage Python components on your Ubuntu system.
The above is the detailed content of Detailed explanation of pip installation guide on Ubuntu. For more information, please follow other related articles on the PHP Chinese website!

Hot AI Tools

Undresser.AI Undress
AI-powered app for creating realistic nude photos

AI Clothes Remover
Online AI tool for removing clothes from photos.

Undress AI Tool
Undress images for free

Clothoff.io
AI clothes remover

AI Hentai Generator
Generate AI Hentai for free.

Hot Article
Hot Tools

Notepad++7.3.1
Easy-to-use and free code editor

SublimeText3 Chinese version
Chinese version, very easy to use

Zend Studio 13.0.1
Powerful PHP integrated development environment

Dreamweaver CS6
Visual web development tools

SublimeText3 Mac version
God-level code editing software (SublimeText3)
Hot Topics
 1377
1377
 52
52

 Illustrated installation steps of an electric fan 'A must-see for beginners: How to disassemble and assemble an electric fan'
Feb 06, 2024 pm 08:10 PM
Illustrated installation steps of an electric fan 'A must-see for beginners: How to disassemble and assemble an electric fan'
Feb 06, 2024 pm 08:10 PM
The disassembly and assembly operation of the electric fan can be carried out according to the actual maintenance needs. Let's take the Midea FTS35-M2 electric fan as an example to introduce the disassembly and assembly method of the electric fan. 1. Disassembly of the electric fan grille and fan blades The electric fan grille and fan blades are important components on the top of the electric fan. If you suspect that the fan blades are faulty, you need to remove the grille first and then the fan blades. The grille and blades of an electric fan are usually fixed with screws. When disassembling, find the screws on the grille, unscrew and remove the grille, and further disassemble the fan blades. Remove the electric fan grille and fan blades. The specific operation is as shown in the figure: 2. Removal of the electric fan motor casing. The electric fan motor is fixed in the electric fan casing by fixing screws. When it is suspected that the motor in the electric fan is faulty, The casing of the motor should be disassembled first.
 What should I do if the Ubuntu terminal cannot be opened? How to fix the problem that Ubuntu cannot open the terminal
Feb 29, 2024 pm 05:30 PM
What should I do if the Ubuntu terminal cannot be opened? How to fix the problem that Ubuntu cannot open the terminal
Feb 29, 2024 pm 05:30 PM
It is a very common problem these days that Ubuntu does not allow its users to open the terminal. If you receive a similar issue and don’t know what to do next, learn about five fixes on how to resolve this “Ubuntu cannot open terminal” issue on your Linux device. Without further ado, let’s dive into what causes it and the solutions available to it. Why can't Ubuntu open the terminal on it? This mainly happens when you install some defective software or modify the terminal configuration. In addition to this, new applications or games that interact with locales and corrupt them can cause similar problems. Some users reported a fix for this issue when searching for Terminal in Ubuntu's activity menu. This shows that
 Log in to Ubuntu as superuser
Mar 20, 2024 am 10:55 AM
Log in to Ubuntu as superuser
Mar 20, 2024 am 10:55 AM
In Ubuntu systems, the root user is usually disabled. To activate the root user, you can use the passwd command to set a password and then use the su- command to log in as root. The root user is a user with unrestricted system administrative rights. He has permissions to access and modify files, user management, software installation and removal, and system configuration changes. There are obvious differences between the root user and ordinary users. The root user has the highest authority and broader control rights in the system. The root user can execute important system commands and edit system files, which ordinary users cannot do. In this guide, I'll explore the Ubuntu root user, how to log in as root, and how it differs from a normal user. Notice
 What is the difference between pip and pip3? Introduction and distinction
Jan 27, 2024 am 09:38 AM
What is the difference between pip and pip3? Introduction and distinction
Jan 27, 2024 am 09:38 AM
What are pip and pip3? What's the difference between them? When developing applications using the Python programming language, we often need to install and manage various third-party packages or libraries. In order to simplify this process, Python officially launched the pip tool, which is a Python package manager for downloading, installing and managing Python packages. pip is the default package manager in the Python2 version, and pip3 is the package manager in the Python3 version. The two are basically the same in function, the main difference is that
 A sneak peek of the seven highlights of Ubuntu 24.04 LTS
Feb 27, 2024 am 11:22 AM
A sneak peek of the seven highlights of Ubuntu 24.04 LTS
Feb 27, 2024 am 11:22 AM
Ubuntu24.04LTS, codenamed "NobleNumbat" will be released soon! If you are using a non-LTS version such as Ubuntu 23.10, sooner or later you will need to consider upgrading. For those using Ubuntu20.04LTS or Ubuntu22.04LTS, it is worth thinking about whether to upgrade. Canonical has announced that Ubuntu 24.04LTS will provide update support for up to 12 years, broken down as follows: As an LTS version, it will have 5 years of regular maintenance and security updates. If you subscribe to Ubuntu Pro, you can enjoy an additional 5 years of support. Currently, this additional support period has been extended to 7 years, which means you will get up to 12
 Ubuntu 20.04 screen recording software OBS installation and uninstallation graphic tutorial
Feb 29, 2024 pm 04:01 PM
Ubuntu 20.04 screen recording software OBS installation and uninstallation graphic tutorial
Feb 29, 2024 pm 04:01 PM
OBS is open source software developed by volunteer contributors around the world in their free time. A video live recording software, mainly used for video recording and live streaming. Please note that when installing Ubuntu/Mint, OBSStudio cannot fully work on ChromeOS, and functions such as screen and window capture cannot be used. It is recommended to use xserver-xorg1.18.4 or newer version to avoid potential performance issues with certain features in OBS, such as full-screen projectors. FFmpeg is required. If you don't have FFmpeg installed (if you're not sure, you probably don't), you can get it with: sudoaptinstallffmpeg I already have it installed here
 How to install Angular on Ubuntu 24.04
Mar 23, 2024 pm 12:20 PM
How to install Angular on Ubuntu 24.04
Mar 23, 2024 pm 12:20 PM
Angular.js is a freely accessible JavaScript platform for creating dynamic applications. It allows you to express various aspects of your application quickly and clearly by extending the syntax of HTML as a template language. Angular.js provides a range of tools to help you write, update and test your code. Additionally, it provides many features such as routing and form management. This guide will discuss how to install Angular on Ubuntu24. First, you need to install Node.js. Node.js is a JavaScript running environment based on the ChromeV8 engine that allows you to run JavaScript code on the server side. To be in Ub
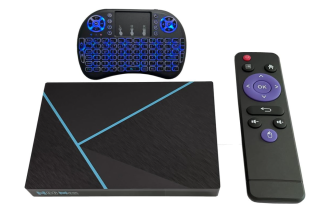 Android TV Box gets unofficial Ubuntu 24.04 upgrade
Sep 05, 2024 am 06:33 AM
Android TV Box gets unofficial Ubuntu 24.04 upgrade
Sep 05, 2024 am 06:33 AM
For many users, hacking an Android TV box sounds daunting. However, developer Murray R. Van Luyn faced the challenge of looking for suitable alternatives to the Raspberry Pi during the Broadcom chip shortage. His collaborative efforts with the Armbia
