

How to reinstall graphics card driver in Win11 system


How to reinstall the graphics card driver in Win11 system? This is a common problem that many users encounter when using Win11 system. The graphics card driver is the key to ensuring display effect and performance, but sometimes driver problems may occur, causing display abnormalities. In this article, PHP editor Xinyi will introduce you in detail the steps and precautions for reinstalling the graphics card driver, helping you solve graphics card driver problems and restore normal display effects.
The graphics card driver plays a vital role in the computer. It is responsible for controlling the work of the graphics card and ensuring the display effect of the image. However, sometimes we may encounter problems with the graphics card driver. At this time, reinstalling the graphics card driver becomes the key to solving the problem. This article will introduce how to reinstall the graphics card driver under Win11 system.
Step 1: Uninstall the original graphics card driver 1. Open the "Settings" menu of the Win11 system and click the "Apply" option. 2. On the "Apps" page, find and click "Apps and Features". 3. In the "Apps and Features" page, find the graphics card driver you want to uninstall and click it. 4. Click the "Uninstall" button and follow the prompts to complete the uninstall process.
Step 2: Download the latest graphics card driver 1. Open the official website of the graphics card manufacturer, such as NVIDIA, AMD or Intel. 2. Find the latest graphics card driver that supports Win11 system on the website and download it locally.
Step 3: Install the new graphics card driver 1. Double-click the downloaded graphics card driver installation package and run the installation program. 2. Follow the installer prompts to select the installation path and other options. 3. Wait for the installer to complete the graphics card driver installation process.
Step 4: Restart the computer 1. After the installation is complete, restart the computer. 2. After the computer restarts, the new graphics card driver will take effect.
Step 5: Check whether the graphics card driver is installed successfully 1. Right-click a blank space on the desktop and select "Display Settings". 2. On the "Display Settings" page, click "Advanced Display Settings". 3. On the Advanced Display Settings page, click Display Adapter Properties. 4. In the "Display Adapter Properties" dialog box, you can see the display adapter information. Confirm whether the driver version in the information is consistent with the graphics card driver you just installed.
Through the above steps, you can successfully reinstall the graphics card driver. Reinstalling the graphics card driver can solve some graphics card problems, such as blurry images and flickering. If your computer has these problems, you might as well try reinstalling the graphics card driver, I believe it will help.
The above is the detailed content of How to reinstall graphics card driver in Win11 system. For more information, please follow other related articles on the PHP Chinese website!

Hot AI Tools

Undresser.AI Undress
AI-powered app for creating realistic nude photos

AI Clothes Remover
Online AI tool for removing clothes from photos.

Undress AI Tool
Undress images for free

Clothoff.io
AI clothes remover

AI Hentai Generator
Generate AI Hentai for free.

Hot Article
Hot Tools

Notepad++7.3.1
Easy-to-use and free code editor

SublimeText3 Chinese version
Chinese version, very easy to use

Zend Studio 13.0.1
Powerful PHP integrated development environment

Dreamweaver CS6
Visual web development tools

SublimeText3 Mac version
God-level code editing software (SublimeText3)
Hot Topics


 How to connect PS4 controller in Win11_Operation steps to match PS4 controller in Win11
May 08, 2024 pm 03:01 PM
How to connect PS4 controller in Win11_Operation steps to match PS4 controller in Win11
May 08, 2024 pm 03:01 PM
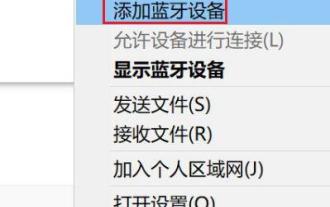
1. First enter the win11 system, right-click the Bluetooth icon in the lower right corner and select [Add Bluetooth Device]. 2. Then enter the device interface and click [Add Bluetooth or other devices] to enter. 3. In the added device interface, click the Bluetooth option to enter. 4. Then use the controller, press and hold the SHARE button and PS4 button on the controller when it is turned off and not connected to the computer. It only takes about 5 seconds for the indicator light behind the controller to start flashing quickly to enter the pairing state. 5. Finally, you can search for the PS4 controller Bluetooth device on the computer's Add Device interface, and click WirelessController to pair it.
 How to install WinNTSetup into Win11 system_How to install WinNTSetup into Win11 system
May 08, 2024 am 11:19 AM
How to install WinNTSetup into Win11 system_How to install WinNTSetup into Win11 system
May 08, 2024 am 11:19 AM
First download the latest Win11 system ISO image, and then in Win10 system, you can directly right-click on the downloaded ISO image file and select [Load]; if it is under WinPE, WinXP, or Win7 system, you need to use the virtual optical drive tool to load the ISO Image; or you can directly decompress the ISO image file without using a virtual optical drive. Then run WinNTSetup. The software interface is as shown in the figure: First locate the location of the install.wim file. You can find the install.wim file in the sources directory of the Win11 ISO image loaded or decompressed by the virtual optical drive. Then set the location of the boot disk and installation disk. Generally, you are going to put W
 When I turn on the computer, it always stops at the motherboard logo screen. Nothing happens when I press anything, and I can't enter the bios?
Apr 23, 2024 am 09:13 AM
When I turn on the computer, it always stops at the motherboard logo screen. Nothing happens when I press anything, and I can't enter the bios?
Apr 23, 2024 am 09:13 AM
When I turn on the computer, it always stops at the motherboard logo screen. Nothing happens when I press anything, and I can't enter the bios? This is usually because the BIOS battery voltage is too low, and the system time has returned to the BIOS preset time, such as 2000.1.1, 00:00. You can use it after pressing F1 to enter the bios and set the time. Do not turn off the AC power after shutting down at night. Generally, the system time will not be lost when you turn on the computer the next day, and you can still enter the system normally. If the AC power is cut off, the battery voltage cannot sustain the power consumption of the bios, and the computer will be in the same state again the next day when it is turned on. Replacing the bios battery is the ultimate solution. Win11 is stuck on the motherboard logo interface when booting? 1. It is a problem with bios settings. We only need to find the corresponding setting items.
 How to change the win11 system interface to the classic version? Share how to change the win11 system interface to the classic version
May 09, 2024 pm 02:19 PM
How to change the win11 system interface to the classic version? Share how to change the win11 system interface to the classic version
May 09, 2024 pm 02:19 PM
Win11 has designed a new modern user interface, providing new interactions and appearances. However, many users still prefer the classic version of the desktop, so how should they be changed to the classic version? Let’s take a look below! 1. Adjust the taskbar: - Right-click the taskbar and select Taskbar Settings. -In the taskbar settings, you have the option to change the taskbar position to the bottom and adjust the size of the taskbar icons. - There is also the option to hide the task view button, task view and the new notification center. Also available: Xiaozhi Eye Protector. Quickly beautify the taskbar and experience a different desktop. 2. Adjust the start menu: - Right-click the start button on the taskbar and select Start button settings. -In the start button settings you can choose to set the start menu style to classic which will
 What version is 360 Extreme Browser X? Introduction to the advantages of 360 Extreme Browser X
Apr 23, 2024 pm 02:30 PM
What version is 360 Extreme Browser X? Introduction to the advantages of 360 Extreme Browser X
Apr 23, 2024 pm 02:30 PM
What version is 360 Speed Browser X? In fact, this is the 64-bit version of 360 Speed Browser. If you enter the 360 Speed Browser official website to download the 64-bit version, you will find that the version number is the same as 360 Speed Browser X. If the user's computer is 64-bit, then naturally use 360 Extreme Browser X is better. This software has many advantages. 360 Speed Browser Upgraded, high-quality search is done in one step, very convenient and easy to use. 360 Extreme Browser X is a 64-bit version. Now the 64-bit system
 Tutorial on assembling a computer and installing a system? How to install win11 system when assembling a computer?
Apr 27, 2024 pm 03:38 PM
Tutorial on assembling a computer and installing a system? How to install win11 system when assembling a computer?
Apr 27, 2024 pm 03:38 PM
Tutorial on assembling a computer and installing a system? Nowadays, the system installation for assembling computers is very simple and convenient, and only requires a CD. First enter the bios settings, set the computer to boot first with the CD-ROM drive, then restart the computer and load the system CD into the CD-ROM drive. The CD will automatically enter the installation state. At this time, you only need to manually repartition the partitions, and the rest will be completed automatically. How to install win11 system when assembling a computer? 1. First, we need to download a win11 image file from this site before installing it. 2. The win11 image file has undergone a large number of professional tests to ensure stable installation and smooth operation. 3. After the download is completed, load the folder in the download path and run the "windowssetup" process in it.
 How to skip the network installation system in win11 24h2? The latest version of win11 24h2 skips the online installation tutorial
May 03, 2024 pm 09:13 PM
How to skip the network installation system in win11 24h2? The latest version of win11 24h2 skips the online installation tutorial
May 03, 2024 pm 09:13 PM
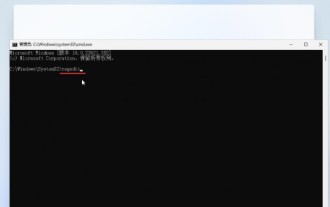
The 24h2 version is the latest operating system released by Microsoft. I believe many users have seen some download packages on the Internet. So how can win1124h2 skip the Internet installation system? Let this site carefully introduce the latest version of win1124h2 to users. Skip the Internet installation tutorial. The latest version of win1124h2 skips the online installation tutorial. Method 1: Skip by modifying the registry. 1. Press the Shift+F10 keys to bring up the cmd command prompt window and enter the following command: regedit and press Enter to quickly open the registry editor. If users feel that the 24h2 version is not used to the operation, they can click on the 23h2 version below to reinstall it. Win1123H22263
 How to solve the problem that disk management cannot be opened in win11 system? Win11 disk management cannot be opened solution
May 07, 2024 pm 05:01 PM
How to solve the problem that disk management cannot be opened in win11 system? Win11 disk management cannot be opened solution
May 07, 2024 pm 05:01 PM
We need to use disk management to perform formatting, partitioning, etc. Recently, many win11 users have reported that their computer disk management cannot be opened. This situation is usually because the corresponding function is turned off by group policy. , so access cannot be opened. As long as it is set to not configured, it can be started successfully. In order to facilitate the operation of the majority of users, today's win11 tutorial will bring you detailed operation steps. Let's take a look at the complete method. What to do if Disk Management cannot be opened in Win11 system 1. First press Win+R on the keyboard to open Run. 3. Then go to User Configuration - Administrative Templates - Windows Components on the left. 5. Then double-click to open the disk management option.
