php editor Xinyi brings you a solution on how to change the Win11 23H2 desktop right-click menu back to the old version. The new version of Win11 brings many improvements and new features, but some users may not be used to the new right-click menu. If you want to restore the right-click menu to its original appearance, we will explain how to set it up in detail. Whether you want to restore the right-click menu of the old version or change the right-click settings of Win11, we will provide you with detailed steps and operation methods in this article. Let’s take a look!
How to set the original appearance of win11 right-click?
Method 1:
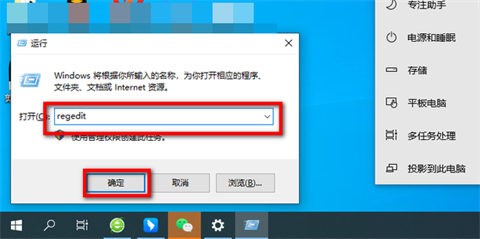
1. First, we click win r on the keyboard, and then enter regedit in it.

2. Then open HKEY_LOCAL_MACHINESYSTEMCurrentControlSetControlFeatureManagementOverrides4 in sequence.

3. Then we create a new project key named 586118283.
4. Then we create five new DEORD values:
EnabledState, EnabledStateOptions, Variant, VariantPayload, VariantPayloadKind, and assign EnabledState and EnabledStateOptions to 1.

Method 2:
1. Win R key to open the run dialog box, enter the command regedit and press Enter or click OK.

2. Search the path computer HKEY_LOCAL_MACHINESOFTWAREMicrosoftWindowsCurrentVersionShellUpdatePackages in the opened registry.

#3. Right-click on the opened page to create a new DWORD (32-bit).

4. Rename it to UndockingDisabled.

5. Right-click UndockingDisabled and click Modify.

#6. Change the numerical data to 1. After restarting, you will find that the menu has changed to win10 style.

The above is the detailed content of How to restore the Win11 23H2 desktop right-click menu to the old version? Win11 right-click settings to restore to original style-detailed guide. For more information, please follow other related articles on the PHP Chinese website!
 win10 bluetooth switch is missing
 Why do all the icons in the lower right corner of win10 show up?
 The difference between win10 sleep and hibernation
 Win10 pauses updates
 What to do if the Bluetooth switch is missing in Windows 10
 win10 connect to shared printer
 Clean up junk in win10
 How to share printer in win10


