
 Computer Tutorials
System Installation
Configure WinXP to share a network printer between two computers
Computer Tutorials
System Installation
Configure WinXP to share a network printer between two computers
Configure WinXP to share a network printer between two computers

How to set up two computers to share a printer in WinXP: first step, connect the printer to the computer, second step, install the driver, select "Set up a home or small office network", third step, click "Next" , the fourth step is to enter the same information into the two computers and wait.

Detailed steps for setting up two computers to share a printer in WinXP:
Recommended: Where is the game that comes with winxp
1. Before sharing Settings
1. First, connect the printer to a computer, install the driver, and confirm that the printer can print normally:
2. Double-click Network Places on the computer where the printer is installed. Then select "Set up a home or small office network":
3. Click "Next" on the network installation wizard:
4. Click "Next":
5. Select "This computer connects to the Internet through another computer on my network or a residential gateway" and click "Next" (this option is for users who have already set up an office LAN):
6. Enter the computer name, and then click "Next":
7. Enter the workgroup name. You can enter it arbitrarily, but make sure that the second computer also enters the same group name. Click "Next":
8. Confirm the setting information, and then click "Next":
9. Wait patiently for the installation to complete:
10. Select " After completing the wizard. I don't need to run this wizard on other computers", click "Next":
11. Click "Finish":
12. To ensure normal operation When using the sharing function, it is recommended to click "Yes" when prompted to restart:
2. Install a shared printer Method 1:
1. Click on the computer where the printer has been installed. "Start, run", then enter cmd and press Enter:
2. Enter ipconfig/all in the character interface and press Enter, and then write down the string after the Ip Address:
3. Click "Start, Run", then enter \\, enter the IP address you just noted down, that is \\192.168.0.38, and press Enter:
4. Then install it to a local network printer Right-click above and select "Connect":
5. Click "Yes" on the dialog box prompting to download the printer driver, and then wait patiently for the driver installation to complete:
3. Install the shared printer Method 2:
1. Click "Start, Printers and Faxes" (or open the Control Panel first, and then double-click "Printers and Faxes"), and then click "Add Printer" on the left side of the window:
2. Click "Next" on the Add Printer icon:
3. Select "Network printer or printer connected to other computers":
4. Select " Printer", then click "Next", and then wait patiently for the scanned printer results, click the printer, and select the next step to install:
5, or directly select "Connect to this printer" , enter the IP address and name of the shared network printer, click "Next" to copy the driver and install it:
6. As needed, determine whether to set the network printer as the default printer, and then click "Next step":
7. Click "Finish" to complete the installation of the network printer:
The above is the detailed content of Configure WinXP to share a network printer between two computers. For more information, please follow other related articles on the PHP Chinese website!

Hot AI Tools

Undresser.AI Undress
AI-powered app for creating realistic nude photos

AI Clothes Remover
Online AI tool for removing clothes from photos.

Undress AI Tool
Undress images for free

Clothoff.io
AI clothes remover

AI Hentai Generator
Generate AI Hentai for free.

Hot Article
Hot Tools

Notepad++7.3.1
Easy-to-use and free code editor

SublimeText3 Chinese version
Chinese version, very easy to use

Zend Studio 13.0.1
Powerful PHP integrated development environment

Dreamweaver CS6
Visual web development tools

SublimeText3 Mac version
God-level code editing software (SublimeText3)
Hot Topics


 How to solve win11 shared printer 0x00000040
Mar 28, 2024 am 09:33 AM
How to solve win11 shared printer 0x00000040
Mar 28, 2024 am 09:33 AM
Error code 0x00000040 indicates that the printer driver is out of date, a firewall is blocking communication, file and printer sharing is not enabled, or permissions are not set correctly when sharing a printer. Solutions include: 1. Update printer driver; 2. Enable printer sharing; 3. Check firewall settings; 4. Enable file and printer sharing; 5. Grant sharing permissions; 6. Restart printer and computer; 7. Check network connection .
 How to solve the problem of offline shared printer in win11
Mar 28, 2024 am 09:30 AM
How to solve the problem of offline shared printer in win11
Mar 28, 2024 am 09:30 AM
To resolve the shared printer offline issue in Windows 11, follow these steps: Check the network connection and shared printer status. Update the printer driver on the access computer. Reconnect to the shared printer. Enable the print spooler. Disable bidirectional support. Clear the print spooler cache.
 How to solve the problem that the candidate word box is not displayed when typing in the input method in Windows 11 system
Apr 11, 2024 pm 05:20 PM
How to solve the problem that the candidate word box is not displayed when typing in the input method in Windows 11 system
Apr 11, 2024 pm 05:20 PM
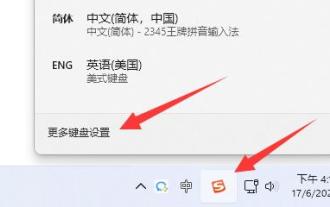
Recently, some users have encountered the problem that the candidate word box cannot be displayed normally when typing in the Microsoft input method when using the Windows 11 operating system. This prevents users from conveniently selecting the required Chinese characters when entering text, affecting work efficiency and user experience. . What should you do if you encounter this situation? The following brings you detailed solutions, let’s take a look. Solution 1. Right-click the input method icon in the taskbar in the lower right corner and select "More Keyboard Settings" in the option box. 2. Then click the three-dot icon on the right side of Chinese and select "Language Options" in the option list. 3. Then click the three dots icon on the right side of the input method and select "Keyboard Options" to open it. 4. Then click the "General" option. 5. Finally, press the switch under "Compatibility"
 Can I access the Internet by plugging the network cable directly into my computer?
Apr 25, 2024 am 08:30 AM
Can I access the Internet by plugging the network cable directly into my computer?
Apr 25, 2024 am 08:30 AM
Can I access the Internet by plugging the network cable directly into my computer? If it is a desktop, it cannot be used directly. You need to open the computer network sharing center, find the adapter interface, and click on the Ethernet card properties. Then open settings, click the "Configuration" option, select "Advanced" and find the connection speed and duplex mode. Finally, change "Automatic Detection" to "10M Duplex" or "10M Half-Duplex", and click to confirm that there is a router. Connect the computer to the router with a network cable to access the Internet. Use a network cable to connect the LAN interface of the computer and the router. After the connection is completed, you can access the Internet normally. Can you access the Internet after checking that the host is online? Under normal circumstances, the new computer will be able to access the Internet as long as all the hardware drivers are installed, including the network card driver. ,So
 How to set up a shared printer in win11
Mar 27, 2024 am 09:24 AM
How to set up a shared printer in win11
Mar 27, 2024 am 09:24 AM
Here are the steps to set up a shared printer in Windows 11: Enable printer sharing and determine the network name. On the other computer, add the printer and select "WSD Port." In the Port Name field, enter a network name. Test the shared printer to verify that it is working properly.
 How to adjust the fonts on the computer to be blurry
Mar 24, 2024 pm 09:01 PM
How to adjust the fonts on the computer to be blurry
Mar 24, 2024 pm 09:01 PM
How to adjust the fonts on the computer screen to be blurry 1. Question 6: What to do if the fonts are blurry after adjusting the resolution of the computer? Right-click on the desktop - Properties - Appearance - Font Size. You can adjust the font to large or extra large. If you are vague. 2. First, right-click on the desktop and click to select resolution, as shown in the figure. 2 Then, use the mouse to drag the resolution to the highest level and click Save, as shown in the picture. 3. The computer desktop fonts are blurred mainly for the following reasons: Incorrect resolution settings: If the resolution is set too low, all images and fonts on the screen will become blurred, especially on large screens. It is recommended to adjust the resolution to the highest level to ensure the best display effect. 4. First, we click on the windows icon under the desktop, and in the pop-up window, we click
 Printer operation cannot be completed error 0x0000709 Solution
Apr 20, 2024 pm 10:10 PM
Printer operation cannot be completed error 0x0000709 Solution
Apr 20, 2024 pm 10:10 PM
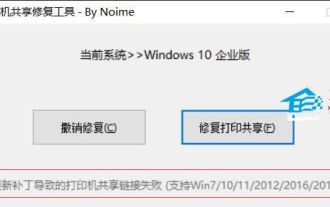
In daily office and study, printers are indispensable tools. However, encountering printer errors is a very common situation. Recently, some users have encountered error code 0x0000709 when using the printer, and the system prompts that the operation cannot be completed. We have prepared four solutions to this problem, let’s take a look. Method 1: NT6 Printer Sharing Repair Tool The NT6 Printer Sharing Repair Tool is an excellent printer repair tool that can easily solve the problem of printer sharing link failure caused by updating patches, such as the recent problem when connecting Win10 and Win11 to share a printer. Errors reported, printer error codes 0x0000011b, 0x00000709 and other issues. This tool provides
 Huawei mobile phone USB sharing network to computer
May 08, 2024 am 08:25 AM
Huawei mobile phone USB sharing network to computer
May 08, 2024 am 08:25 AM
How to connect a Huawei phone to a computer via USB to access the Internet. First, we open the phone settings and search for "HDB". Then we click to open "Mobile Network Sharing" in More. Then we can click to open "USB Sharing Network" in the pop-up window. Summary First, connect the Huawei mobile phone to the computer through the data cable. Open "Settings" on your phone and enter the settings interface. Click "Personal Hotspot", select "USB tethering" and click the switch button at the back to turn it on. First click "Settings About Phone", then click "Version Number" 7 times in succession. You will be prompted to enter developer mode. Then return to the "Settings" list, "Developer Options" will appear, then click to enter "Developer Options", turn on the "USB Debugging" switch, and click
