

How to install printer driver in Win11 system

php editor Strawberry brings you a detailed guide to installing printer drivers on Win11 system. With the launch of Win11 system, many users want to connect their printers to the new system. However, due to changes brought about by system upgrades, you may encounter some problems when installing the printer driver. In this article, we will introduce you how to successfully install the printer driver on your Win11 system so that you can smoothly use the printer for printing. Whether you are a newbie or an experienced user, this article will provide you with detailed steps and precautions to help you easily solve the problem and enjoy an efficient printing experience.
There may be some new steps and precautions when installing the printer driver in Win11 system. Below I will introduce you to a simple method to install the printer driver.
First of all, we need to ensure that the printer and computer are connected properly. You can connect the printer to your computer using a USB cable, or you can connect the printer and computer over a wireless network. Make sure the printer is turned on and available.
Next, we need to find the printer driver. Typically, the printer comes with a CD containing the driver and other necessary software. If you don't have a CD, you can try downloading the latest driver from the printer manufacturer's official website.
Once you find the driver, double-click it to run it. During the installation process, you may be asked to agree to the license agreement and select installation options. Follow the prompts and make sure you select the correct printer model and operating system version.
After the installation is complete, you can try to print a test page to confirm whether the printer is working properly. In Win11, you can press the Win I key to open the settings menu and select the "Devices" option. Select "Printers and Scanners" on the left menu, then find your printer on the right. Click on the printer name and select the Manage option. In the pop-up window, you should be able to see an option to "Print a test page." Click it and follow the prompts.
If your printer is still not working properly, you can try the following methods to solve the problem:
1. Update the driver: Sometimes, the old driver may not work well with the new operating system. compatible. You can try downloading the latest driver from the printer manufacturer's official website and updating it.
2. Check the connection: Make sure the connection between the printer and the computer is normal. If you are using a USB connection, try changing the USB cable or connecting the printer to a different USB port. If you are using a wireless connection, make sure both the printer and computer are connected to the same wireless network.
3. Reinstall the printer: If none of the above methods work, you can try reinstalling the printer. First, uninstall the current printer driver. In Win11, you can press the Win I key to open the settings menu and select the "Devices" option. Select "Printers and Scanners" on the left menu, then find your printer on the right. Click on the printer name and select the "Delete Device" option. Once done, reinstall the printer driver and follow the steps mentioned earlier.
To sum up, installing the printer driver does not make much difference in Win11 system. Just make sure the printer is properly connected to the computer, select the correct driver, and follow the prompts. If you encounter a problem, you can try updating the driver, checking the connection, or reinstalling the printer to resolve it. Hope this article is helpful to everyone!
The above is the detailed content of How to install printer driver in Win11 system. For more information, please follow other related articles on the PHP Chinese website!

Hot AI Tools

Undresser.AI Undress
AI-powered app for creating realistic nude photos

AI Clothes Remover
Online AI tool for removing clothes from photos.

Undress AI Tool
Undress images for free

Clothoff.io
AI clothes remover

AI Hentai Generator
Generate AI Hentai for free.

Hot Article
Hot Tools

Notepad++7.3.1
Easy-to-use and free code editor

SublimeText3 Chinese version
Chinese version, very easy to use

Zend Studio 13.0.1
Powerful PHP integrated development environment

Dreamweaver CS6
Visual web development tools

SublimeText3 Mac version
God-level code editing software (SublimeText3)
Hot Topics


 How to connect PS4 controller in Win11_Operation steps to match PS4 controller in Win11
May 08, 2024 pm 03:01 PM
How to connect PS4 controller in Win11_Operation steps to match PS4 controller in Win11
May 08, 2024 pm 03:01 PM
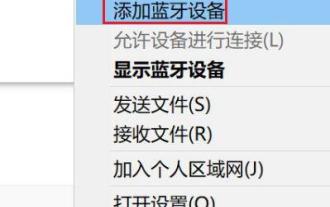
1. First enter the win11 system, right-click the Bluetooth icon in the lower right corner and select [Add Bluetooth Device]. 2. Then enter the device interface and click [Add Bluetooth or other devices] to enter. 3. In the added device interface, click the Bluetooth option to enter. 4. Then use the controller, press and hold the SHARE button and PS4 button on the controller when it is turned off and not connected to the computer. It only takes about 5 seconds for the indicator light behind the controller to start flashing quickly to enter the pairing state. 5. Finally, you can search for the PS4 controller Bluetooth device on the computer's Add Device interface, and click WirelessController to pair it.
 How to change the win11 system interface to the classic version? Share how to change the win11 system interface to the classic version
May 09, 2024 pm 02:19 PM
How to change the win11 system interface to the classic version? Share how to change the win11 system interface to the classic version
May 09, 2024 pm 02:19 PM
Win11 has designed a new modern user interface, providing new interactions and appearances. However, many users still prefer the classic version of the desktop, so how should they be changed to the classic version? Let’s take a look below! 1. Adjust the taskbar: - Right-click the taskbar and select Taskbar Settings. -In the taskbar settings, you have the option to change the taskbar position to the bottom and adjust the size of the taskbar icons. - There is also the option to hide the task view button, task view and the new notification center. Also available: Xiaozhi Eye Protector. Quickly beautify the taskbar and experience a different desktop. 2. Adjust the start menu: - Right-click the start button on the taskbar and select Start button settings. -In the start button settings you can choose to set the start menu style to classic which will
 Laptop power on but black screen
May 09, 2024 am 09:04 AM
Laptop power on but black screen
May 09, 2024 am 09:04 AM
What should I do if the laptop power-on indicator light comes on and the screen goes black? It may be caused by poor contact. It is recommended to restart the laptop. If the problem still cannot be solved, the monitor is broken and it is recommended to go to a repair shop for repair. When the notebook is turned on, the screen is black, but there is sound entering the system, and the external monitor is still abnormal. It may be a problem with the graphics card or motherboard. Just remove and replace it. Start switch problem. Black screen when booting, no self-test. Use the meter pin to short-circuit the startup terminal on the motherboard, and it will start normally. Memory stick problem. There will be a long beep when the screen is black when the phone is turned on. Just take out the memory stick, clean it and then plug it back in. cpu problem. It is recommended to use an external monitor of the computer, which is a general desktop monitor, and connect it to the external display interface of the notebook. If a
 How to connect Redmi Note13RPro to the computer?
May 09, 2024 pm 06:52 PM
How to connect Redmi Note13RPro to the computer?
May 09, 2024 pm 06:52 PM
The phone Redmi Note13RPro has been very popular recently. Many consumers have purchased this phone. However, many users are using this phone for the first time, so they don’t know how to connect the Redmi Note13RPro to the computer. In this regard, the editor is here to explain to you Detailed tutorial introduction is provided. How to connect Redmi Note13RPro to the computer? 1. Use a USB data cable to connect the Redmi phone to the USB interface of the computer. 2. Open the phone settings, click Options, and turn on USB debugging. 3. Open the device manager on your computer and find the mobile device option. 4. Right-click the mobile device, select Update Driver, and then select Automatically search for updated drivers. 5. If the computer does not automatically search for the driver,
 What should I do if the Win11 taskbar does not display the time? Introduction to the most effective solutions
May 09, 2024 pm 01:13 PM
What should I do if the Win11 taskbar does not display the time? Introduction to the most effective solutions
May 09, 2024 pm 01:13 PM
The win11 taskbar is very unique. Many users will also adjust the transparency of the taskbar to beautify the taskbar. However, they don’t know what to do when the win11 taskbar does not display the time? Let’s take a look below! 1. Restart Windows 11: Sometimes, restarting the system can solve the taskbar display problem. 2. Check the taskbar settings: right-click an empty space on the taskbar and select "Taskbar Settings". Make sure the "Show time" option is enabled. If it's not enabled, toggle the switch to enable it. 3. Check your date and time settings: Open the Settings app, select Time & Language, then select Date & Time. Make sure the date, time and time zone are set correctly. 4. Update operating system: Make sure your Wind
 How to disable snapshot layout in Windows 11_ Tips for not using snapshot layout in win11
May 08, 2024 pm 06:46 PM
How to disable snapshot layout in Windows 11_ Tips for not using snapshot layout in win11
May 08, 2024 pm 06:46 PM
Win11 system announced the new [Snapshot Layout], which provides users with various window layout options through the [Maximize] button, so that users can choose from multiple layout templates to display two, three or four on the screen. open applications. This is an improvement over dragging multiple windows to the sides of the screen and then adjusting everything manually. [SnapGroups] will save the collection of apps the user is using and their layout, allowing the user to easily return to that setting when they have to stop and deal with other things. If someone is using a monitor that the user must unplug, when re-docking, the previously used snapshot layout will also be restored. To use snapshot layout, we can use the keyboard shortcut WindowsKey+Z to start
 How to assemble an acer desktop computer?
May 08, 2024 pm 08:25 PM
How to assemble an acer desktop computer?
May 08, 2024 pm 08:25 PM
How to assemble an acer desktop computer? The assembly method of Acer desktop computer is as follows: open the case, install the power supply into the case, and tighten the screws. Install the CPU onto the motherboard, making sure the pins on the CPU are aligned with the slots on the motherboard, and tighten the screws on the CPU heat sink. Install the memory module onto the motherboard, making sure that the bumps on the memory module are aligned with the slots on the motherboard. Press down hard until you hear a "pop" sound to complete the installation. Install graphics cards, sound cards, network cards and other boards onto the motherboard, making sure the screws on the boards are tightened. Install storage devices such as hard drives and optical drives into the chassis, making sure the screws are tightened. Connect the motherboard to the chassis, including power cables, hard drive cables, optical drive cables, etc. Finally, close the chassis cover and tighten the screws to complete the assembly. exist
 How to solve: The problem that the software icon cannot be fixed on the Win11 taskbar
May 09, 2024 pm 05:31 PM
How to solve: The problem that the software icon cannot be fixed on the Win11 taskbar
May 09, 2024 pm 05:31 PM
Win11 is one of the systems used by many people, but recently many users are saying that the Win11 taskbar cannot fix software icons. How to solve it specifically? Let’s take a look below! Restart your computer. Sometimes, some minor system problems may be temporary and can be solved by restarting the computer. If the software icon still cannot be fixed after restarting, then you need to perform some further operations. Log in to the system account again. It may be that there is some abnormality in the current account, which prevents the software icon from being fixed. We can try to switch to another account to log in, or log out of the current account and log in again to see if this problem can be solved. Reset the taskbar. In Win11 system, right-click the taskbar to enter the taskbar settings interface.
