

How to change bios from English to Chinese?

"php editor Yuzai will answer for you: How to convert BIOS from English to Chinese?" BIOS (Basic Input/Output System) is the basic input and output system in the computer system, and its default language is usually English. However, for some non-English users, using the English interface may cause some confusion. Fortunately, we can switch the BIOS interface language from English to Chinese with some simple steps. Next, we will introduce you to the specific operation methods in detail to help you easily complete the process of converting BIOS from English to Chinese.

#How to change bios from English to Chinese?
If your computer's BIOS is in English, you can try the following methods to change it to Chinese:
1. Enter the BIOS interface. When turning on the computer, press Del, F1, F2, F10 or other keys (the specific key positions depend on the computer brand and model) to enter the BIOS interface.
2. Find the language option. In the BIOS interface, find the language option, usually in the "Advanced" or "Setup" options.
3. Select Chinese language. In the language options, find the Chinese language option and select it. If there is no Chinese option, you can try selecting other language options, such as Japanese or Korean, which may have Chinese translations.
4. Save settings and exit. After selecting the Chinese language, follow the interface prompts to save the settings and exit the BIOS interface.
5. Restart the computer. After restarting the computer, enter the BIOS interface and you should see that the interface has changed to Chinese.
It should be noted that the BIOS interfaces of different computer brands and models may be slightly different. The above method is for reference only. If in doubt, we recommend checking your computer's user manual or contacting your computer manufacturer for assistance.
How to set bios after changing the motherboard?
You don’t need to change any settings after replacing the motherboard battery on your computer. Just press F10 and hit Enter twice.
1) The bios settings have not been changed, and the bios will adapt.
2) If you have changed the bios settings before, you need to restore the bios to factory settings.
3) If you are prompted to press F1 after booting, you can press F10 and hit Enter twice.
Use the keyboard arrow keys to select the optimization value and press the esc key or Y key. Press F10 or select save and exit setup (save and exit the settings) to save the changed settings and exit
What are the best bios settings for MSI b450 motherboard?
The best way to set the performance of MSI motherboard BIOS is as follows:
1. Enter the BIOS setting interface: press the DEL key or F2 key when the computer starts (the specific keys may vary depending on the motherboard model ) to enter the BIOS setup interface.
2. Enter the advanced settings menu: In the BIOS setting interface, find the "Advanced" tab and enter the advanced settings menu.
3. Set the CPU frequency: In the advanced settings menu, find options such as "CPU Frequency" or "CPU Settings" and enter this menu to set the CPU frequency. You can adjust the CPU frequency to the highest state for better performance.
4. Set the memory frequency: In the advanced settings menu, find options such as "Memory Frequency" or "Memory Settings" and enter this menu to set the memory frequency. The memory frequency can be adjusted to the highest state for better performance. However, it should be noted that when adjusting the memory frequency, you need to ensure that the memory and motherboard support the frequency, otherwise the system may be unstable or unable to start.
5. Disable the CPU limit function: In the advanced settings menu, find options such as "CPU Features" or "CPU Function" and enter this menu to set the CPU limit function. CPU throttling features (such as Intel Turbo Boost Technology, Intel Hyper-Threading Technology, etc.) can be disabled for better performance. However, it should be noted that disabling the CPU throttling feature may cause the CPU temperature to be too high, so you need to ensure a good cooling system to avoid CPU overheating.
6. Save and exit the BIOS setup interface: After completing the above settings, follow the prompts to save the settings and exit the BIOS setup interface. The computer will restart and apply the new BIOS settings.
Onda a520sd4 motherboard bios settings?
The following are the BIOS setting steps for the Onda a520sd4 motherboard:
1. Press the computer power button, and after booting, press the Del key to enter the BIOS.
2. Enter EZ (Easy) mode and select BIOS settings.
3. Select "Advanced" in the menu bar and enter "CPU setup".
4. In "CPU frequency", press the Enter key to adjust the CPU multiplier to an appropriate value.
5. In "Memory training", select "Reset" to reset, and then select "OK" to save the settings.
6. Finally, select "ErP" in "Power" to reduce power consumption, and then select "Save & Exit" to save and exit the settings.
Please note that you must be careful when setting up the BIOS, as incorrect settings may cause hardware damage. If you're not sure how to set it up, seek professional help.
Jingyue b760i motherboard bios settings?
Regarding the BIOS settings of the Jingyue b760i motherboard, you need to pay attention to the following points: 1. First enter the BIOS interface, which can be entered by pressing the DEL key or the F2 key; 2. In the motherboard settings, you can set the CPU Parameters such as operating frequency, memory, hard disk, etc. need to be adjusted accordingly according to your own hardware configuration; 3. In the advanced settings, you can set some advanced options, such as boot sequence, safe boot, etc.; 4. In the power management, You can adjust power-related parameters, such as energy-saving mode, etc. It should be noted that BIOS settings need to be operated with caution to avoid misoperation causing motherboard failure. If you need specific operation steps, you can refer to the motherboard user manual or seek help from relevant technical personnel.
Asus a520m-k motherboard bios settings?
Proceed in three steps.
1. For ASUS computer motherboards, generally press the Del or ESC key and the F2 key to enter the BIOS.
2. After entering, this is the first interface. The main function of this item is to display some basic information about the computer. There is nothing to set except the time.
3. Use the mouse or the left and right arrow keys to move the cursor to the Advanced item. This item is the advanced BIOS setting item.
MSI h610m-e motherboard bios settings?
The BIOS settings of the MSI H610M-E motherboard can be performed through the following steps:
1. Press the Delete key when booting to enter the BIOS setting interface. If the Delete key does not respond, you can try using the F2 or F10 key.
2. After entering the BIOS setup interface, you can use the arrow keys on the keyboard to navigate between different options.
3. In the BIOS setting interface, you can find various setting options, including system time and date, startup sequence, hardware monitoring, security settings, etc.
4. Use the arrow keys to select the setting option you want to modify, and then press the Enter key to enter the detailed setting interface for that option.
5. In the detailed settings interface, you can modify it as needed. Use the arrow keys to select different options and press Enter to modify.
6. After the modification is completed, press the F10 key to save the modification and exit the BIOS setup interface.
Please note that before making any BIOS setting modifications, please make sure you know what you are doing and proceed with caution. Incorrect settings may cause system instability or even failure to boot. If you're not sure what a setting does, refer to your motherboard's user manual or MSI technical support.
How to set display settings in bios?
To set the BIOS display settings, you need to enter the BIOS interface. The specific steps are as follows
1. Press the corresponding button to enter the BIOS setting interface when turning on the computer. The buttons of different brands of computers may be different, usually F2F10Delete, etc.
2. After entering the BIOS setting interface, find the "Advanced" or "Display" option, and then enter "Video Configuration" or "Graphics Settings" and other related options.
3. In this interface, you can set the display's resolution, refresh rate, color depth and other parameters, and you can also select the working mode of the graphics card (such as integrated graphics or independent graphics).
4. After the settings are completed, press the "F10" key to save the settings and exit the BIOS interface. The computer will automatically restart.
The above is the detailed content of How to change bios from English to Chinese?. For more information, please follow other related articles on the PHP Chinese website!

Hot AI Tools

Undresser.AI Undress
AI-powered app for creating realistic nude photos

AI Clothes Remover
Online AI tool for removing clothes from photos.

Undress AI Tool
Undress images for free

Clothoff.io
AI clothes remover

AI Hentai Generator
Generate AI Hentai for free.

Hot Article
Hot Tools

Notepad++7.3.1
Easy-to-use and free code editor

SublimeText3 Chinese version
Chinese version, very easy to use

Zend Studio 13.0.1
Powerful PHP integrated development environment

Dreamweaver CS6
Visual web development tools

SublimeText3 Mac version
God-level code editing software (SublimeText3)
Hot Topics
 1382
1382
 52
52

 How to enter bios on hp motherboard
May 04, 2024 pm 09:01 PM
How to enter bios on hp motherboard
May 04, 2024 pm 09:01 PM
How to set up the U disk boot in the HP notebook bios (how to enter the HP computer bios) and then insert the U disk to be booted first into the USB port of the notebook. If you want to install the system, the system program must have been prepared in the U disk. First, open the laptop. Make sure the laptop is turned off. Setting the bios must be done with the computer turned off. Then insert the U disk that you want to boot first into the USB port of the notebook. If you want to install the system, the prerequisite is that the system program has been prepared in the U disk. Take the HP ProDesk400G5SFF desktop computer as an example. Set the BIOS disk startup method: First, restart the computer and wait for the startup screen to appear. There are two ways to set up USB disk startup on HP notebooks. One is to directly press the shortcut key to select
 Specific steps for expanding the C drive using the partition tool diskgenius
May 08, 2024 pm 08:04 PM
Specific steps for expanding the C drive using the partition tool diskgenius
May 08, 2024 pm 08:04 PM
First, download and install the [DiskGenius] tool on your computer, then open the tool, then click [File Menu] at the top, and then click [Restart the system and run the DiskGenius software], as shown in the figure. Then click [OK] in the pop-up prompt box, as shown in the figure. After that, the computer will restart and then enter the Diskgen hard disk partition interface. At this time, if we want to expand the C drive, we only need to right-click the D drive next to the logical partition and click "Adjust Partition Size" in the pop-up menu, as shown in the figure shown. Then you need to adjust the size of the D drive partition. For example, the current capacity of the D drive is 14.99GB, as shown in the figure below. At this time, we can adjust the installment of the D drive. For example, if we want to allocate 1.03GB to the C drive, we only need to allocate 1.03GB to the C drive.
 How to skip the network installation system in win11 24h2? The latest version of win11 24h2 skips the online installation tutorial
May 03, 2024 pm 09:13 PM
How to skip the network installation system in win11 24h2? The latest version of win11 24h2 skips the online installation tutorial
May 03, 2024 pm 09:13 PM
The 24h2 version is the latest operating system released by Microsoft. I believe many users have seen some download packages on the Internet. So how can win1124h2 skip the Internet installation system? Let this site carefully introduce the latest version of win1124h2 to users. Skip the Internet installation tutorial. The latest version of win1124h2 skips the online installation tutorial. Method 1: Skip by modifying the registry. 1. Press the Shift+F10 keys to bring up the cmd command prompt window and enter the following command: regedit and press Enter to quickly open the registry editor. If users feel that the 24h2 version is not used to the operation, they can click on the 23h2 version below to reinstall it. Win1123H22263
 Tutorial on assembling a computer and installing a system? How to install win11 system when assembling a computer?
Apr 27, 2024 pm 03:38 PM
Tutorial on assembling a computer and installing a system? How to install win11 system when assembling a computer?
Apr 27, 2024 pm 03:38 PM
Tutorial on assembling a computer and installing a system? Nowadays, the system installation for assembling computers is very simple and convenient, and only requires a CD. First enter the bios settings, set the computer to boot first with the CD-ROM drive, then restart the computer and load the system CD into the CD-ROM drive. The CD will automatically enter the installation state. At this time, you only need to manually repartition the partitions, and the rest will be completed automatically. How to install win11 system when assembling a computer? 1. First, we need to download a win11 image file from this site before installing it. 2. The win11 image file has undergone a large number of professional tests to ensure stable installation and smooth operation. 3. After the download is completed, load the folder in the download path and run the "windowssetup" process in it.
 MSI motherboard boot logo
May 08, 2024 pm 02:20 PM
MSI motherboard boot logo
May 08, 2024 pm 02:20 PM
How to cancel the MSI motherboard icon when booting 1. Press the DEL key when booting to enter the BIOS. Generally, in the "Advanced Features" item, you can find the words MSI motherboard LOGO screen. Select DISABLED, save and exit. There will no longer be this MSI motherboard LOGO screen when you turn on the computer in the future. MSI motherboard refers to the motherboard brand developed by MSI (MSI Technology Company). 2. The logo displayed when the computer is turned on is basically that of the motherboard manufacturer. You can set QUICKPOST to DISENABLE in the BIOS, so that the logo will generally no longer be displayed. It will display computer configuration-related information and give you more details. 3. First, teach you how to flash the BIOS in Windows environment. First: Go online
 How to enter bios after assembling a computer? How to enter bios when assembling a computer?
May 07, 2024 am 09:13 AM
How to enter bios after assembling a computer? How to enter bios when assembling a computer?
May 07, 2024 am 09:13 AM
How to enter bios after assembling a computer? Before entering the BIOS, you need to make sure that the computer is completely shut down and powered off. Here are several common ways to enter the BIOS: 1. Use shortcut keys: Most computer manufacturers will display a prompt message at startup telling you which key to press to enter the BIOS settings. Usually the F2, F10, F12 or Delete key. After pressing the appropriate keys, you should be able to see a screen with information about your computer's hardware and BIOS settings. 2. Use the button on the motherboard: Some computer motherboards have a dedicated button for entering BIOS settings. This button is usually labeled "BIOS" or "UEFI". After pressing the button you should be able to see
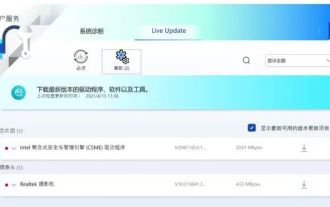 How to update the driver for MyASUS?
Apr 29, 2024 pm 05:22 PM
How to update the driver for MyASUS?
Apr 29, 2024 pm 05:22 PM
How to update the driver of ASUS Butler MyASUS? You can find LiveUpdate in the user service of the MyASUS software, which means online update. This function can update the computer's hardware driver and obtain the latest updates of the software. So below, the editor will tell my friends about ASUS Butler MyASUS Software update driver method. How to download the latest driver? LiveUpdate: You can view the latest available versions of computer drivers and application software. You can click the download button to download and install. After updating the driver, there may still be some problems with the operation of the hardware. At this time, system diagnosis can be performed. What should I do if the system encounters a problem? System diagnosis: Provide "charger&rd"
 What is the appropriate temperature for playing Apex computer?
May 06, 2024 am 09:31 AM
What is the appropriate temperature for playing Apex computer?
May 06, 2024 am 09:31 AM
What is the appropriate temperature for playing Apex computer? 80 degrees is suitable. When running large-scale games or playing high-definition videos, the temperature can reach about 80°C. Generally, it is considered normal to not exceed 90°C under high load. Graphics cards are generally the hardware that generates the most heat among computer hardware. Generally, it is normal for the temperature of a graphics card to be around 30℃-80℃. Due to external temperature, it is normal for most graphics card temperatures to be between 50℃-85℃ in summer. range, if you are running large-scale 3D games or playing high-definition videos for a long time, the highest temperature may reach about 95°C. This temperature range will affect the life of the computer hardware. No matter how high the temperature is, you must consider strengthening heat dissipation and cleaning dust. How to play with the apex handle and the computer ? Method/step-by-step reading: 1. Use wired or wireless
