

2 Ways to Lock Photos on Mac

When you store photos on your Mac, there may be some you want to keep private. To make sure they aren't visible to others, you can lock those photos on your Mac so they're protected from prying eyes. This article will guide you on how to lock photos on your Mac so you can view them when you need them.
How to Lock Photos on Mac [2 Methods]
You can lock photos on Mac in two ways – using the Photos app or the Disk Utility app.
Method 1: Using the Photos app
If you store your photos in this app, you can use the Photos app to lock them. If the photos are stored elsewhere, they need to be moved to the Photos app to lock them.
Step 1: Add pictures to the Photos app
If you store pictures in your Mac’s storage, you can add them to the Photos app.
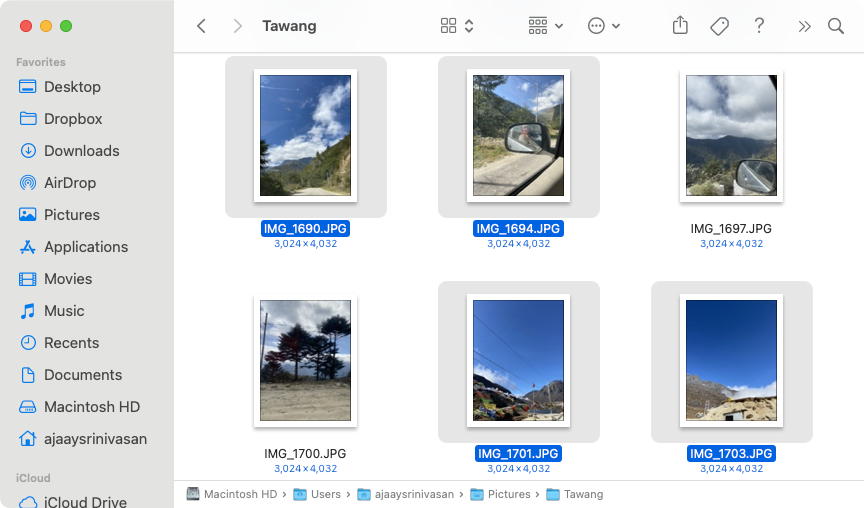
- Open the Finder app and find the picture you want to lock.

- Once you find these images, hold down the Command (⌘) key and click on the image you want to select.
- Once selected, right-click or Control-click any of the selected files and go to Share >Add to Photos from the menu that appears.
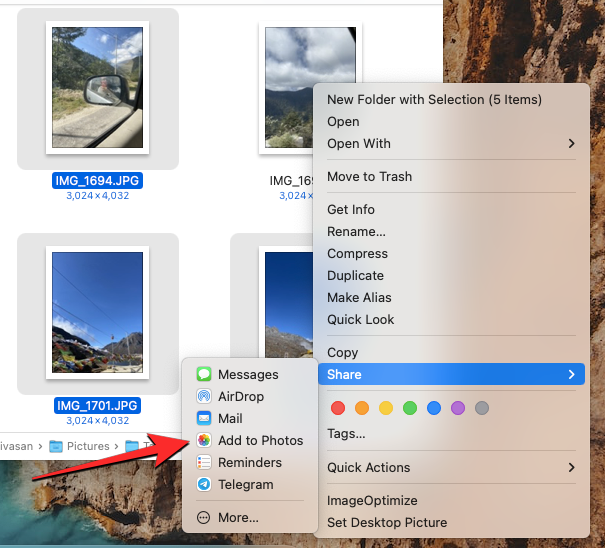
The selected picture will now be sent to the Photos app.
Step 2: Hide pictures on Photos
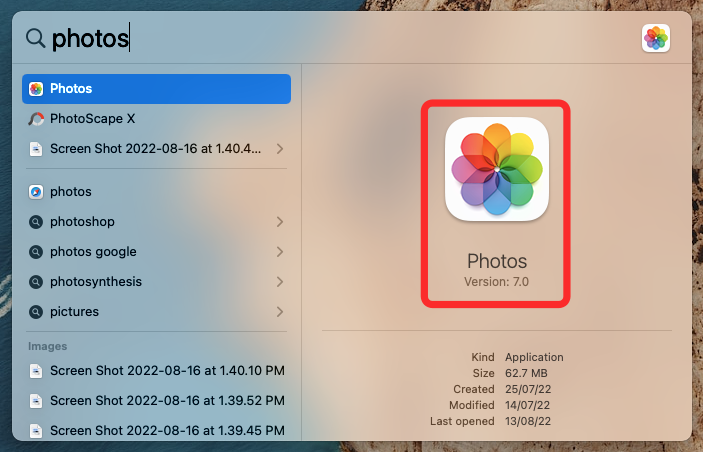
- To lock pictures, open Photos on Mac from the Finder, Launchpad, or Spotlight "App."
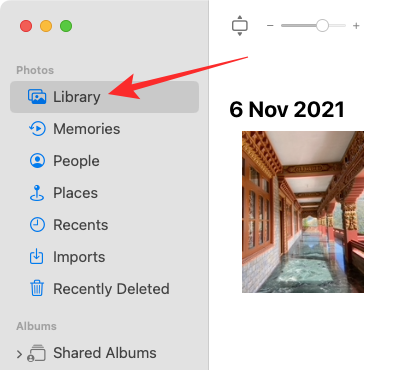
- In Photos, click the Library tab on the left sidebar.
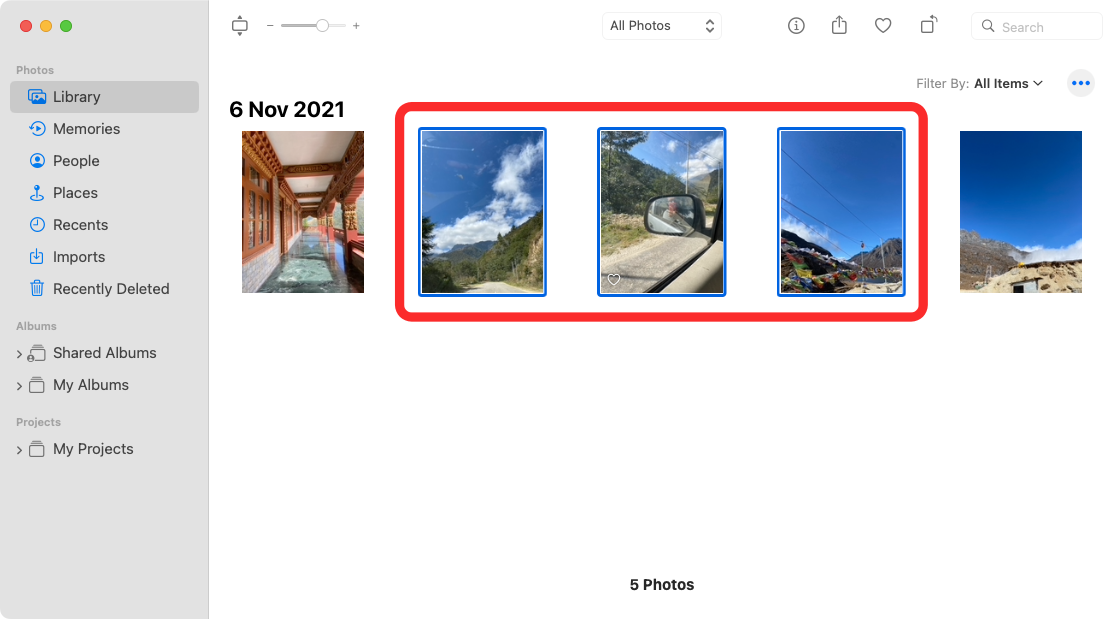
- Now you will see all the pictures you have ever added to the Photos app. To select a photo to lock, hold down the Command (⌘) key on your keyboard and click the picture you want to select.
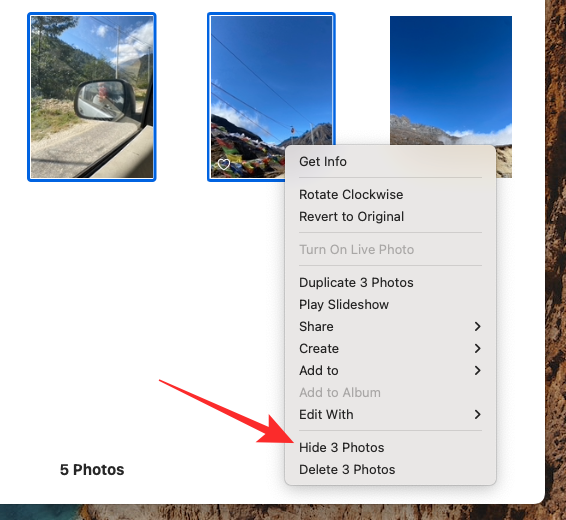
- Once selected, right-click or Control-click any selected picture and select Hide
Photos, where n is the number of photos selected.
- To confirm your action, click Hide in the prompt that appears.
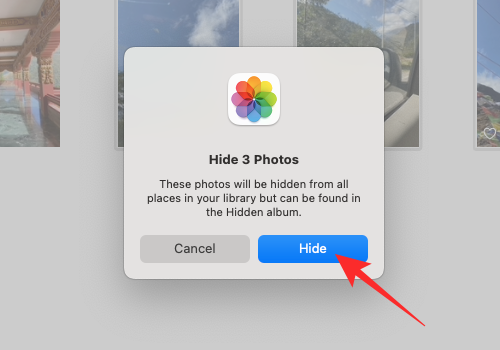
#The pictures you selected will now be locked in the Hidden folder on the Photos app. Anyone who opens the Photos app won't be able to access the photos because they will be hidden.
Method 2: Use the Disk Utility application
If you have a bunch of pictures scattered in different folders on your Mac, then you can use the Disk Utility application to lock it with a password they. Until then, you can compile all the pictures you want to lock into separate folders on your Mac.
Step 1: Create the folder containing the pictures you want to lock
- First, open the Finder app and navigate to the location where you want to place the "Locked" folder.
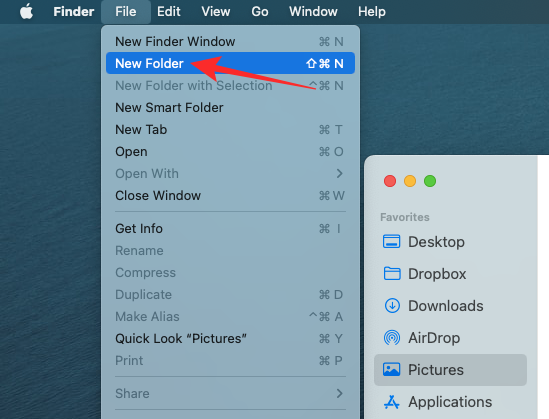
- Within this location, click the File tab in the top menu bar and select New Folder.
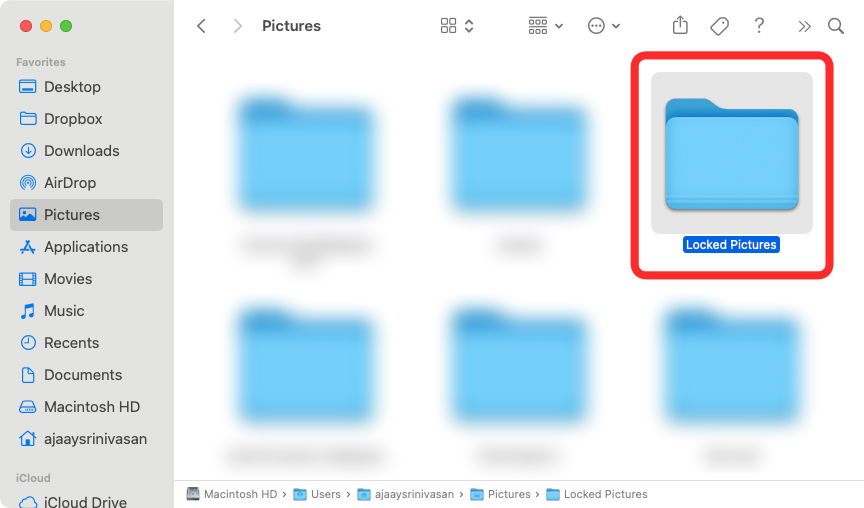
- After creating the new folder, type the name of the folder and press the Return key on your keyboard when finished.
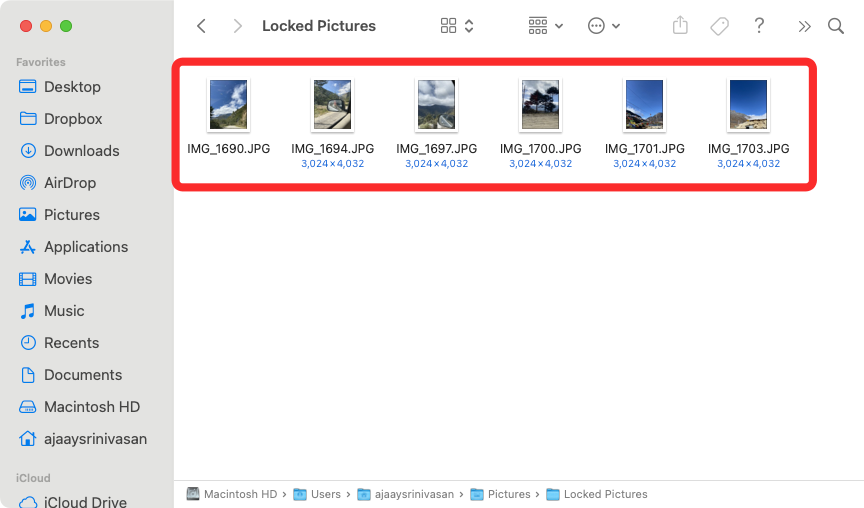
- When finished, move the pictures from your Mac to this newly created folder before locking them. To do this, you can use the following keyboard shortcuts to accomplish it: To select multiple files: Hold down Command (⌘) and click on the files you want to select.
To cut selected files: Use the Command (⌘) X shortcut on your keyboard.
To paste selected files: Use the Command (⌘) V shortcut key on your keyboard.
After you have moved all the pictures you want to hide, you can now lock them using the next step. -
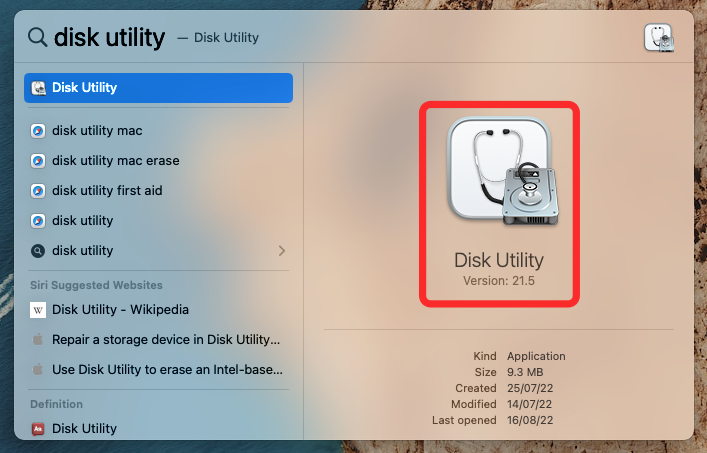
- To lock the folder with a password, open it from the Finder Open the Disk Utility app in , Launchpad or Spotlight.
-
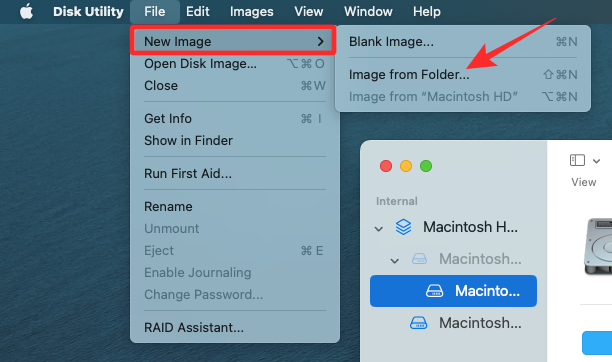
When the Disk Utility application opens, click the File tab in the top menu bar and go to New from Folder > Disk Image.
-
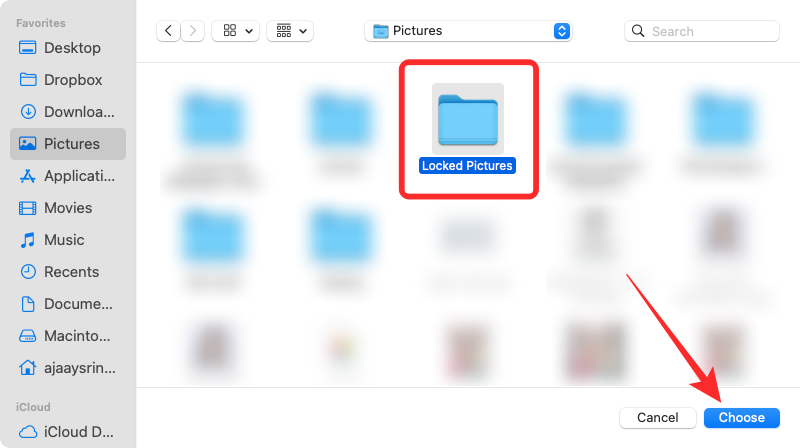
In the Finder window that appears on the screen, navigate to the folder you created in step #1, select it, and click Select.
-
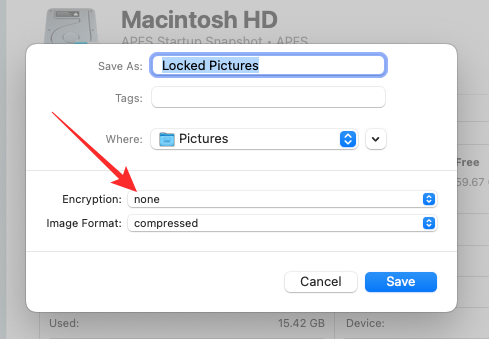
You will now see the "New Image from Folder" menu on your screen. To lock the selected folder, click the "Encrypt" drop-down box.
-
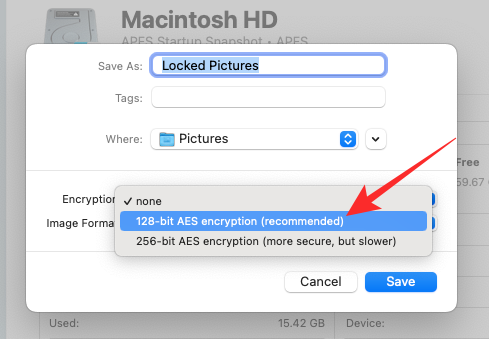
In the menu that appears, select 128-bit AES encryption (recommended).
-
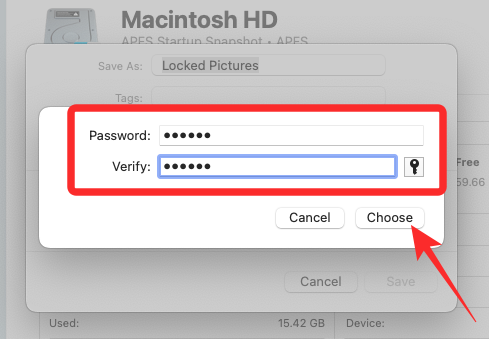
Now you will see a prompt asking you to create a password to lock the selected folder. Carefully type your preferred password in the Password and Verification boxes and click Select.
-
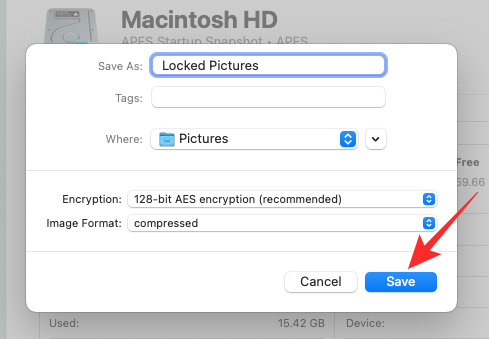
You will now return to the "New Images in Folder" menu. Here you can edit the locked image's name, where to save it, and add tags to it. When finished, click Save in the lower right corner.
-
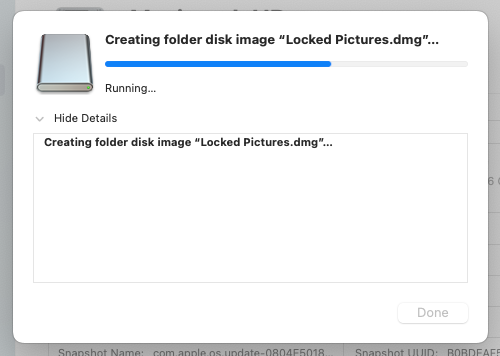
The Disk Utility application will now start creating a disk image of the locked folder.
-
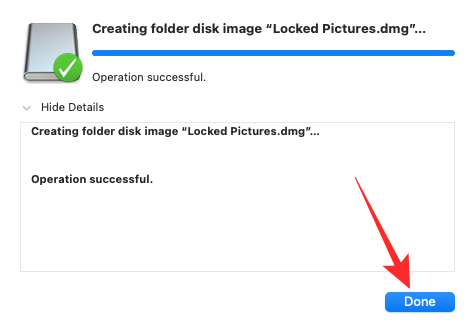
When ready, you will see the following message. To continue, click Finish.
-
The selected folder will now be locked and saved as a DMG file in your preferred location. You can open it to check if everything is there and then delete the original folder from your Mac.
-
- Open the Photos app on your Mac.
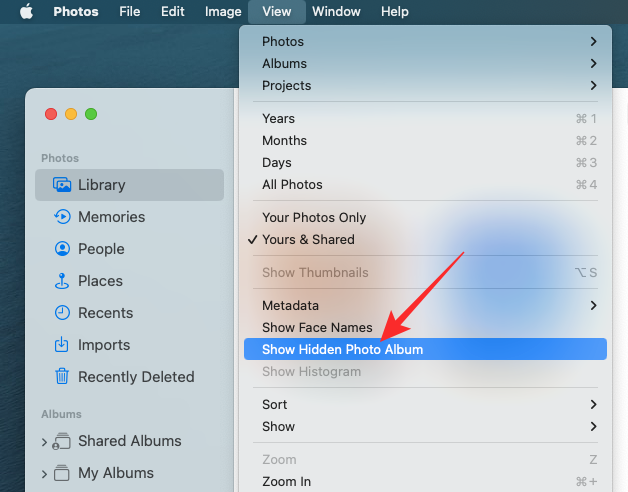
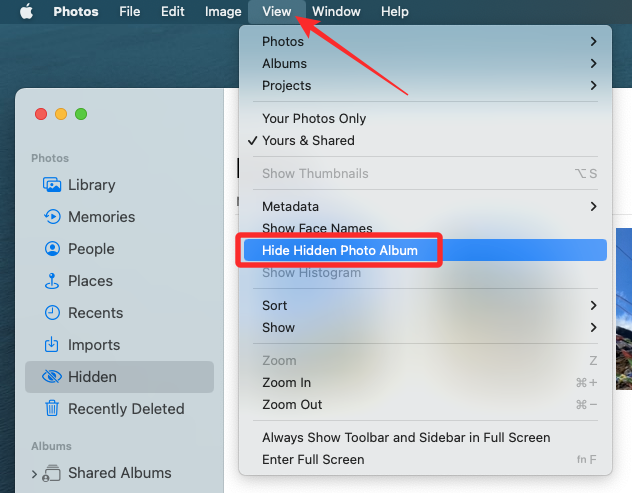
- With the Photos app open, click the View tab on the top menu bar and select Show Hidden Albums.
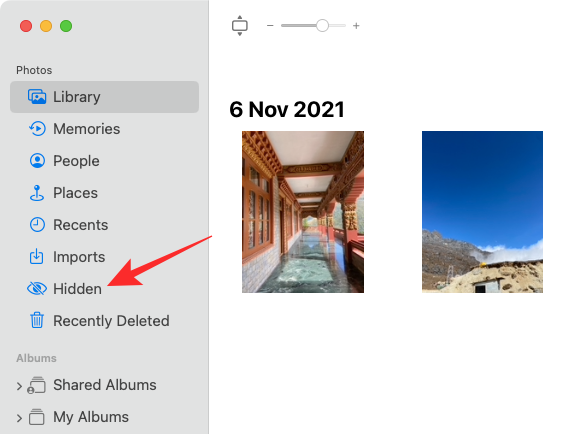
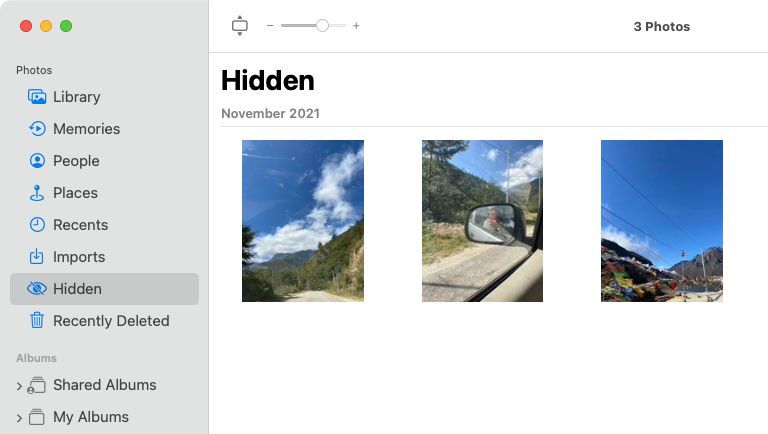
- Now you will see a new tab inside the Photos app. To open a locked photo, click the "Hide" tab on the left sidebar.
- Here you will see all the pictures you locked using method #1 above.
- To hide these pictures again, click the View tab in the menu bar and select Hide Hidden Albums.
Method 2: If you locked the picture using Disk Utility
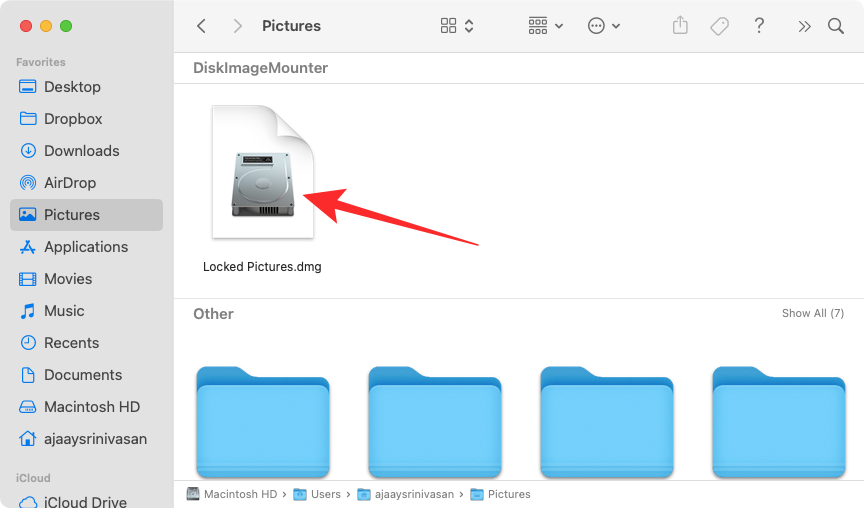
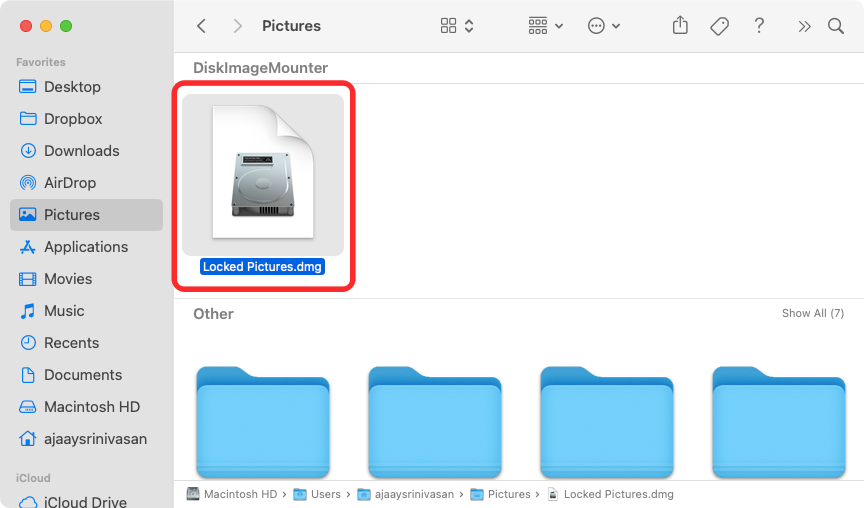
- If you locked the picture on your Mac using Method 2 above, you can View them by opening the Finder application and navigating to the location where the folder lock image was created.
- Once you find the disk image you created, double-click it to access its contents.
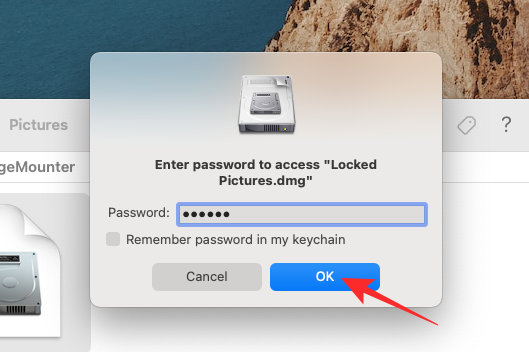
- Now you will see a prompt on the screen asking you to enter your password. Type the password you added to the folder in Method #2 and click OK.
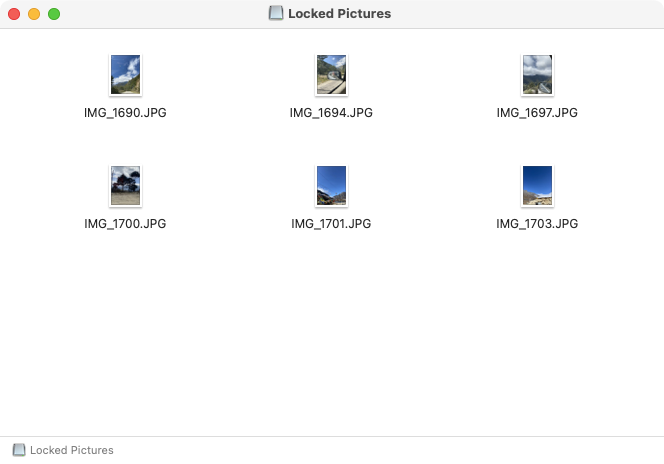
- The contents of the locked folder will now appear in the disk image folder in a new window. You can open, copy, or share pictures just like in any folder.
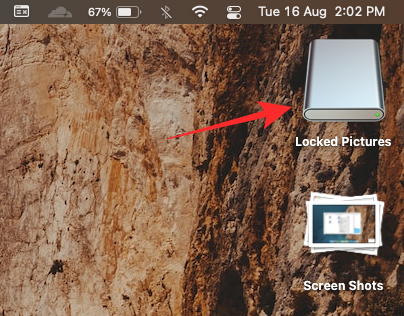
- The disk image will also appear on the desktop with a gray drive icon.
- After you have accessed the image, right-click or Control-click the disk image and select Eject
.

If you leave the disk image as injected, you can access it from the desktop and other users who open it may not need to enter the necessary password. Therefore, pop up after you are done with the locked folder Disk images are very important.
How to Disable Photos from Other Apps on Mac
Lock pictures have many uses, but if you want to prevent other apps on your Mac from accessing Photos stored in " pictures in the Photos app, you need to disable this access from macOS settings.
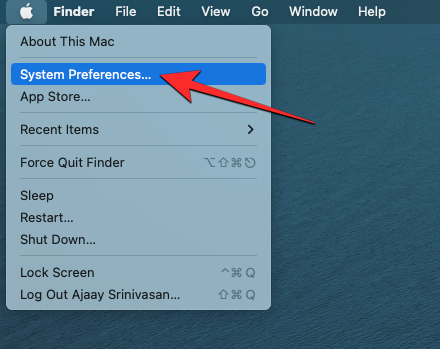
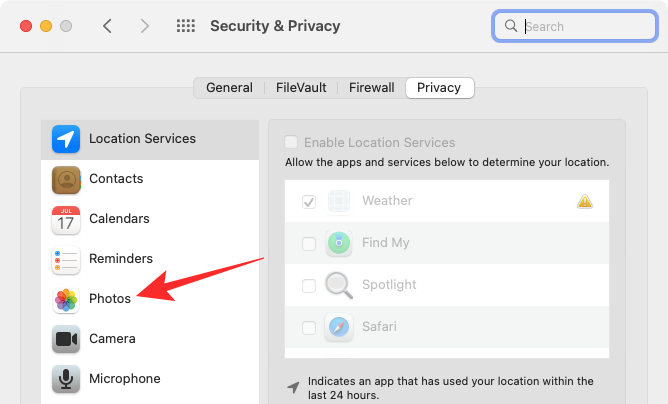
- Open the System Preferences app from the Dock, Launchpad, or Spotlight on your Mac. You can also open it by clicking the Apple () icon in the menu bar and selecting System Preferences from the menu.
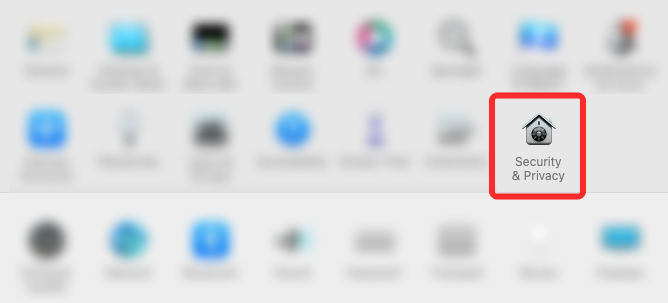
- In System Preferences, click Security & Privacy.
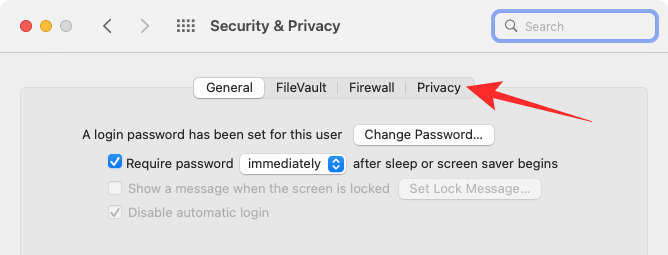
- On the next screen, select the Privacy tab at the top.
- Here, click on the Photos tab in the left pane.
- Now you will see a list of apps that can access pictures and videos from the Photos app. The selected apps are the apps that currently have permission to view your content in Photos. To disable this access from an app, uncheck the checkbox to the left of the app you want to remove permission from.
- When you uncheck this box, any content in the Photos app will not be accessible on the selected app.
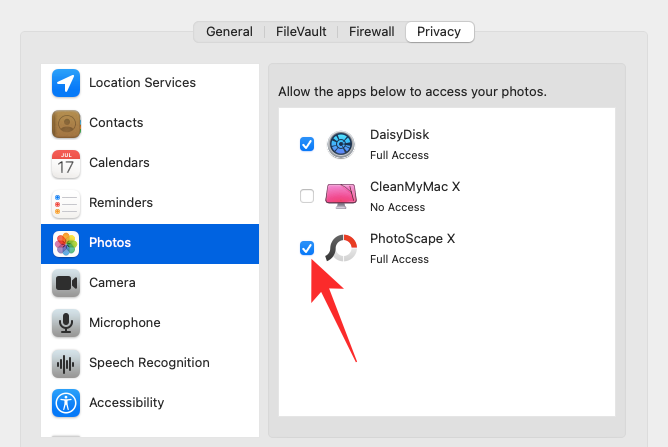

You can repeat this for other apps that you want to block access to Photos.
The above is the detailed content of 2 Ways to Lock Photos on Mac. For more information, please follow other related articles on the PHP Chinese website!

Hot AI Tools

Undresser.AI Undress
AI-powered app for creating realistic nude photos

AI Clothes Remover
Online AI tool for removing clothes from photos.

Undress AI Tool
Undress images for free

Clothoff.io
AI clothes remover

Video Face Swap
Swap faces in any video effortlessly with our completely free AI face swap tool!

Hot Article
Hot Tools

Notepad++7.3.1
Easy-to-use and free code editor

SublimeText3 Chinese version
Chinese version, very easy to use

Zend Studio 13.0.1
Powerful PHP integrated development environment

Dreamweaver CS6
Visual web development tools

SublimeText3 Mac version
God-level code editing software (SublimeText3)
Hot Topics
 1386
1386
 52
52

 How to sort photos by favorites in Windows 11
Mar 18, 2024 am 09:37 AM
How to sort photos by favorites in Windows 11
Mar 18, 2024 am 09:37 AM
In this article, we will explain how to sort photos using the Favorites feature in Windows 11. The Photos app in Windows offers a convenient feature that allows you to mark specific photos or videos as Favorites or Preferences. Once you mark these items as favorites, they are automatically organized into a separate folder, allowing you to easily browse your favorite content without having to hunt through your entire photo library. This feature enables you to quickly access and manage your favorite photos and videos, saving you a lot of time and effort. Normally, photos in the Favorites folder are sorted by date in descending order, so that the newest photos appear first, followed by older photos. However, if you wish to focus on
 How to disable Face ID or Touch ID for hidden and recently deleted photos on iPhone
Mar 04, 2024 pm 04:40 PM
How to disable Face ID or Touch ID for hidden and recently deleted photos on iPhone
Mar 04, 2024 pm 04:40 PM
Apple's Photos app offers a feature that locks photos in Hidden and Recently Deleted albums to ensure they're hidden from prying eyes. This provides an extra layer of protection for the sensitive photos and videos you may have stored in those albums because they are locked behind your iPhone's Face ID, Touch ID, or device passcode. If you have difficulty accessing Hidden and Recently Deleted albums using this lock feature, you may consider disabling it to make the content more accessible. This article will explain to you in detail how to disable FaceID or TouchID authentication for Photos app on iPhone. How to disable Face ID or Touch ID for the Photos app Required: Running iOS 16 or later
 No response when entering password on mac keyboard?
Feb 20, 2024 pm 01:33 PM
No response when entering password on mac keyboard?
Feb 20, 2024 pm 01:33 PM
Introduction: In this article, this website will introduce to you the relevant content about the Mac keyboard not responding when entering passwords. I hope it will be helpful to you, let’s take a look. How to solve the problem that the password cannot be entered on the Apple Mac system? You can also try to connect this keyboard to other computers to see if it works normally. If the same problem occurs on another computer, it's most likely a fault with the keyboard itself. You may consider replacing the keyboard or repairing it. The first time you log in to Alipay with your Mac computer, you will find the login interface and cannot enter your password. The password input field displays: "Please click here to install the control", so Alipay login requires the installation of security controls. Security controls can encrypt and protect the information you enter (amount, password, etc.) to improve account security. Tie
 Photos cannot open this file because the format is not supported or the file is corrupted
Feb 22, 2024 am 09:49 AM
Photos cannot open this file because the format is not supported or the file is corrupted
Feb 22, 2024 am 09:49 AM
In Windows, the Photos app is a convenient way to view and manage photos and videos. Through this application, users can easily access their multimedia files without installing additional software. However, sometimes users may encounter some problems, such as encountering a "This file cannot be opened because the format is not supported" error message when using the Photos app, or file corruption when trying to open photos or videos. This situation can be confusing and inconvenient for users, requiring some investigation and fixes to resolve the issues. Users see the following error when they try to open photos or videos on the Photos app. Sorry, Photos cannot open this file because the format is not currently supported, or the file
 What should I do if the 'Unable to upload' message appears in the iPhone 'Photos' app?
Feb 28, 2024 pm 09:00 PM
What should I do if the 'Unable to upload' message appears in the iPhone 'Photos' app?
Feb 28, 2024 pm 09:00 PM
If you turn on the iCloud photo function, the photos and videos taken on your iPhone will be synchronized to Apple servers for storage. However, during the synchronization process to iCloud, a "Unable to upload" prompt or album may appear. Usually, this status will be displayed at the bottom of the iPhone Photos app, with a prompt saying "Unable to sync [number] items to iCloud." A new album named "Cannot Upload" will be added in the "Photos" App. To add these photos or videos to iCloud Photos, you can try exporting them from the Photos App and then re-importing them. Note, however, that any edits or keywords previously applied to these photos or videos will be lost. on iPhone
 3 tips to easily customize your Mac computer name, host name and Bonjour name
Mar 06, 2024 pm 12:20 PM
3 tips to easily customize your Mac computer name, host name and Bonjour name
Mar 06, 2024 pm 12:20 PM
Many Mac users tend to keep the default name of their device and may never consider changing it. Many people choose to stick with the name from the initial setup, such as "Johnny's MacBook Air" or simply "iMac." Learning how to change the name of your Mac is a very useful skill, especially when you have multiple devices, as it can help you quickly distinguish and manage them. Next, we will teach you step by step how to change the computer name, host name and Bonjour name (local host name) in macOS system. Why should you change your Mac name? Changing the name of your Mac can not only show your personality, but also help improve the user experience: Personalize your Mac: The default name may not be to your taste, change it to a name you like.
 How to blur photos with Yitian camera
Feb 23, 2024 pm 06:40 PM
How to blur photos with Yitian camera
Feb 23, 2024 pm 06:40 PM
You can blur the photos in Yitian Camera, so how to blur the photos? Users can click Edit to select a photo, then click Effects and select Blur to blur the photo. This introduction to how to blur photos can tell you the specific content. The following is a detailed introduction, come and take a look! Yitian Camera usage tutorial. How to blur photos with Yitian Camera. Answer: Go to Edit-Special Effects-Blur. The specific process: 1. First open the app and click Edit on the lower left. 2. Then click on a picture and click the edit button. 3. Then click the special effects button below. 4. You can find the blur function below. 5. Then select the magnification of the blur.
 How to make photos black and white with Meitu Camera
Mar 28, 2024 am 09:11 AM
How to make photos black and white with Meitu Camera
Mar 28, 2024 am 09:11 AM
In this colorful world, sometimes we also long for the simple black and white beauty. As a classic image processing method, black and white filters can not only give photos a retro and elegant atmosphere, but also highlight the theme and emotion of the picture through contrast and changes in light and shade. Meitu Xiuxiu, as a popular image processing software, provides us with the function of easily adding black and white filters. So for users who want to add but don’t know how to add it yet, the editor of this website will bring you a detailed step-by-step introduction below. Come and follow this article to add it! How to turn photos into black and white on mobile phone Meitu Xiuxiu. First we need to open Meitu Xiuxiu on the mobile phone. After entering the main interface, select "Beautify Pictures" and select the picture we need to modify. 2. Then click
