In the desktop environment, when a device (such as a USB device) is inserted, the system will automatically mount it to the specified directory, usually in the /media/username/device-label directory. This way, you can enter the directory and access the files on the device. However, the situation is different on the server. You need to manually mount the device and specify a mount point.
In Linux systems, use specific device files in the /dev directory to identify inserted devices. You will see some files in this directory, such as /dev/sda or /dev/hda, which represent your first primary device, using a number for each partition Identification, such as /dev/sda1 or /dev/hda1 represents the first partition of the main device, and so on. These device files can help you find and identify USB devices connected to your system.
$ ls /dev/sda*

List all device names under Linux system
Now let's find out the device name using some special command line tools below.
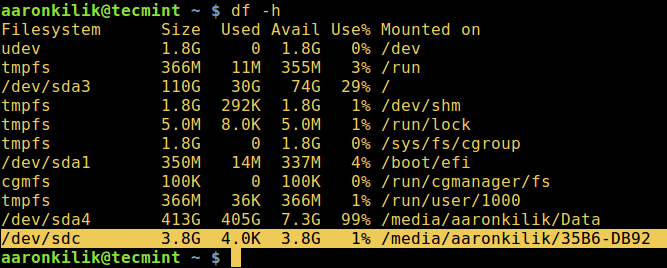
To view each device plugged into your system and the corresponding mount point, you can use the df command in the figure below to check the disk space usage of the Linux system:
$ df -h

Use the df command to find the USB device name
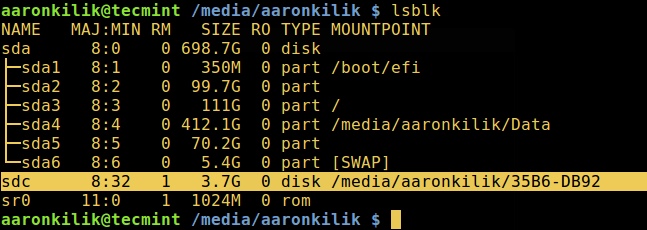
Use the lsblk command to find the USB device name
You can also use the following lsblk command (list block devices) to list all block devices plugged into your system:
$ lsblk

List block devices in Linux system
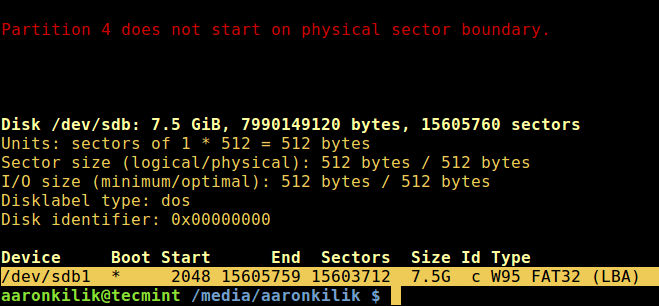
fdisk is a powerful tool for viewing all partition tables in your system, including all USB devices. Use root privileges to execute the following command:
$ sudo fdisk -l

List the partition table of the block device
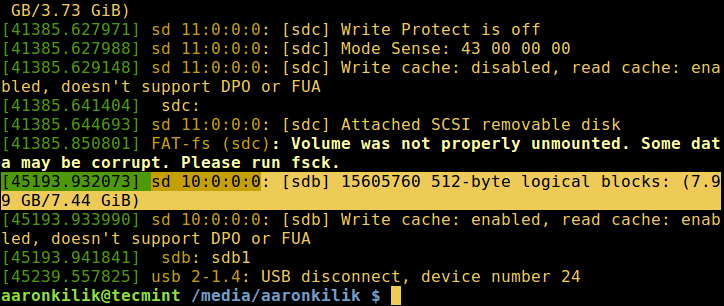
dmesg is an important command used to print or control the kernel ring buffer. The ring buffer is a data structure that stores information about the kernel's operating data.
Run the following command to view kernel operation information. It will also print out USB device information:
$ dmesg

dmesg – Print USB device name
The above is the detailed content of 4 ways to identify USB devices in Linux systems. For more information, please follow other related articles on the PHP Chinese website!


