Use vscode to remotely debug the Linux kernel
Preface
The previous article introduced the use of QEMU GDB to debug the Linux kernel. However, sometimes it is not very convenient to directly use GDB to debug and view the code. Therefore, on such an important occasion, how can the artifact of vscode be missing? This article introduces how to use vscode to remotely debug the kernel.
Environment of this article:
- windows10
- vscode
- ubuntu 20.04
I personally use Tencent Cloud Server, so I save the process of installing a virtual machine. Start directly from vscode configuration.
vscode plug-in installation
remote-ssh
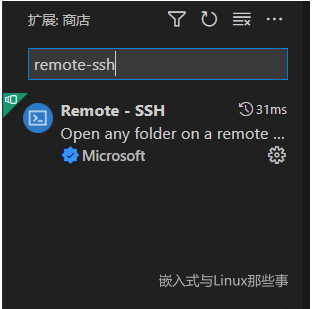
Find the Remote-SSH plug-in in the plug-in library and install it.
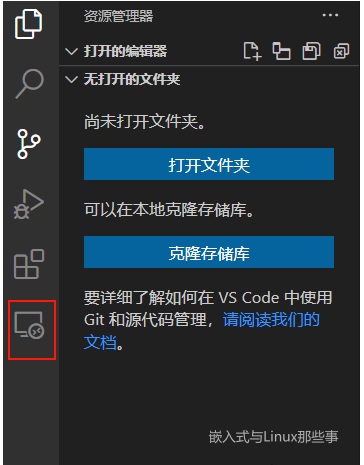
After the installation is complete, there will be an additional function on the right toolbar
Press F1 to call out the dialog box, enter remote-ssh, and select open ssh configuration file.

Select the first configuration file

# Read more about SSH config files: https://linux.die.net/man/5/ssh_config
Host ubuntu
    HostName 服务器IP地址
    User 用户名
    IdentityFile 私钥路径
I am using the private key method to log in to the server, and IdentityFile fills in the absolute path of the private key.
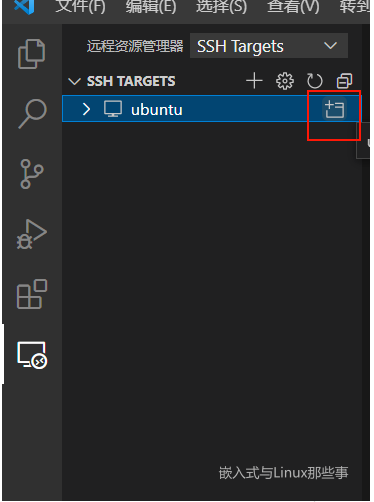
After configuration, click the plus button to log in to the server
Error: Setting up SSH Host XX:Copying VS Code Server to host with scp
I got stuck while connecting and have been waiting for Setting up SSH Host XX:Copying VS Code Server to host with scp.
reason
It’s because the home directory ~/.vscode-server/bin/commit_id/vscode-servlet.tar.gz is not downloaded under the remote server.
commit_id can be viewed in vscode [Help]->[Terminal].
Solution
Then we will download vscode-servlet.tar.gz manually. Download via the link below.
#注意把:${commit_id}替换成对应的Commit ID
https://update.code.visualstudio.com/commit:${commit_id}/server-linux-x64/stable
Run the following line of command. Delete everything in the ~/.vscode-server/bin directory.
rm ~/.vscode-server/bin/* -rf
If there is no ~/.vscode-server/bin directory, create it. If there is, please ignore this step*.
mkdir -p ~/.vscode-server/bin
Place the downloaded compressed package vscode-server-linux-x64.tar.gz in the ~/.vscode-server/bin directory.
Run the following three lines of commands, where ${commit_id} needs to be replaced with the commit_id recorded in step 2.
cd ~/.vscode-server/bin
tar -zxf vscode-server-linux-x64.tar.gz
mv vscode-server-linux-x64 ${commit_id}
报错:Permissions for ‘vscode_rsa’ are too open.
然后就可以在原来的文件浏览界面,打开远程的文件夹。但是在配置好进行连接的时候,VScode的终端报错了:
@@@@@@@@@@@@@@@@@@@@@@@@@@@@@@@@@@@@@@@@@@@@@@@@@@@@@@@@@@@
@     WARNING: UNPROTECTED PRIVATE KEY FILE!     @
@@@@@@@@@@@@@@@@@@@@@@@@@@@@@@@@@@@@@@@@@@@@@@@@@@@@@@@@@@@
Permissions for 'vscode_rsa' are too open.
It is required that your private key files are NOT accessible by others.
This private key will be ignored.
Load key "vscode_rsa": bad permissions
根本原因是私钥的权限问题。这要是在Linux里,直接使用chmod,就可以修改,修改为644即可,但是windows,就稍微麻烦点。
在私钥上右击选择属性,然后选择【安全】选项卡,然后点击下面的【高级】按钮,然后在新弹出的窗口下方点击【禁用继承】,然后点击继承那个按钮上面的【添加】按钮重新将当前window登录用户设置为私钥的所有者,并勾选所有权限。最后跟下面一样即可:
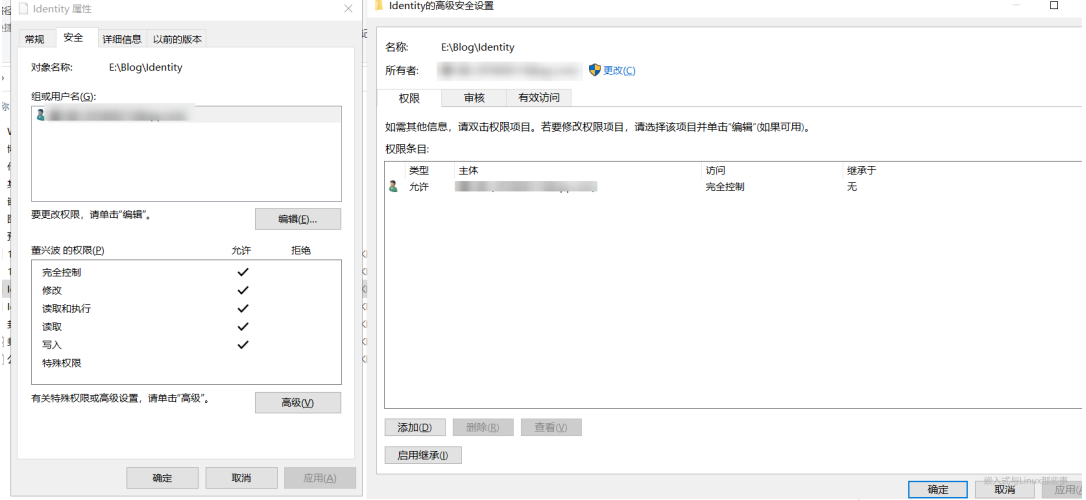
这时再次打开VScode远程连接,就没有问题了。
C/C++
安装C/C++插件
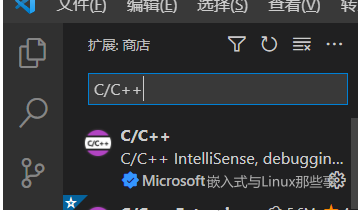
依次点击【运行】->【打开配置】,将以下配置复制到launch.json中。
{
    "version": "0.2.0",
    "configurations": [
        {
            "name": "kernel-debug",
            "type": "cppdbg",
            "request": "launch",
            "miDebuggerServerAddress": "127.0.0.1:1234",
            "program": "${workspaceFolder}/vmlinux",
            "args": [],
            "stopAtEntry": false,
            "cwd": "${workspaceFolder}",
            "environment": [],
            "externalConsole": false,
            "logging": {
                "engineLogging": false
            },
            "MIMode": "gdb",
        }
    ]
}
然后在main函数中,打上两个断点,在服务器上开启QEMU,F5即可开启调试。
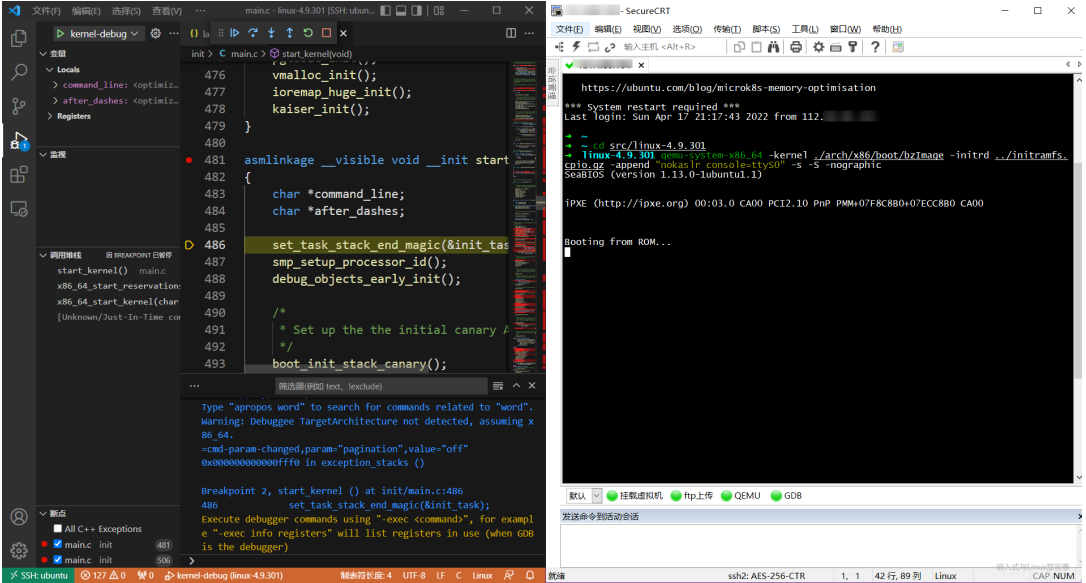
在vscode中调试内核,和正常的在windows调试代码是一样的,侧边栏可以看到变量,监视变量,调用堆栈等,非常方便。
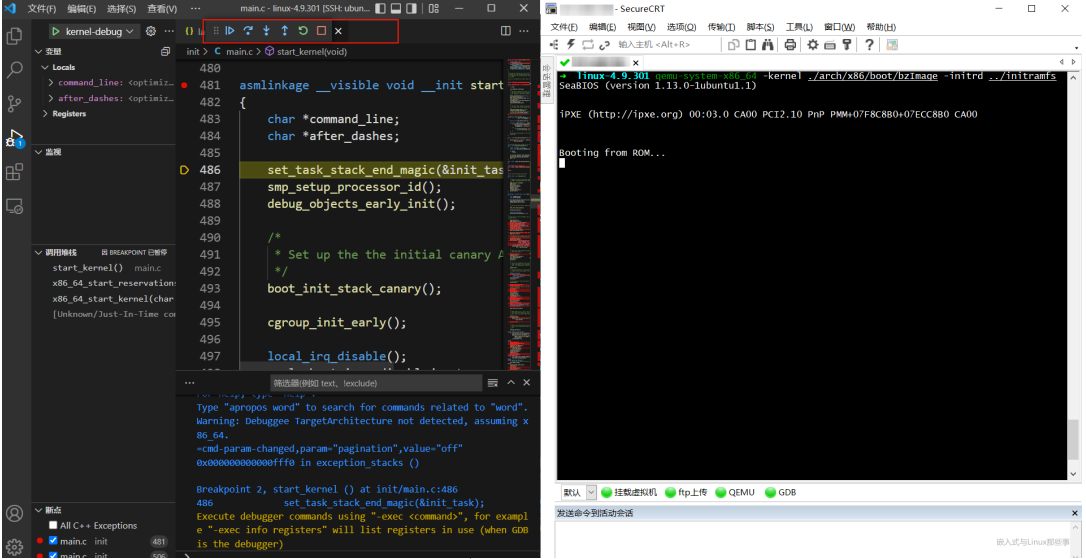
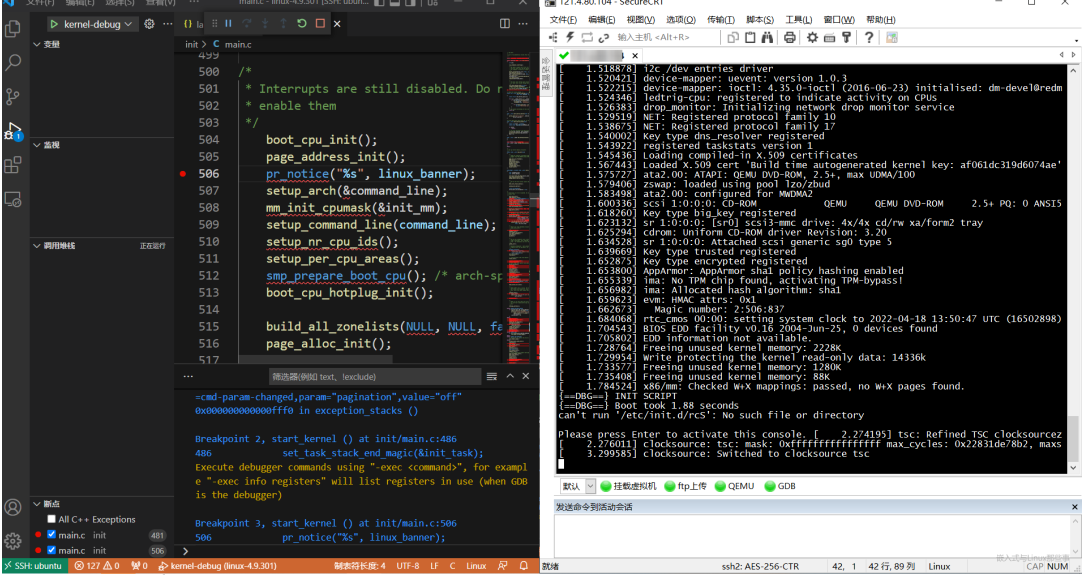
大功告成,以后就可以在可视化界面调试内核了!
The above is the detailed content of Use vscode to remotely debug the Linux kernel. For more information, please follow other related articles on the PHP Chinese website!

Hot AI Tools

Undresser.AI Undress
AI-powered app for creating realistic nude photos

AI Clothes Remover
Online AI tool for removing clothes from photos.

Undress AI Tool
Undress images for free

Clothoff.io
AI clothes remover

AI Hentai Generator
Generate AI Hentai for free.

Hot Article

Hot Tools

Notepad++7.3.1
Easy-to-use and free code editor

SublimeText3 Chinese version
Chinese version, very easy to use

Zend Studio 13.0.1
Powerful PHP integrated development environment

Dreamweaver CS6
Visual web development tools

SublimeText3 Mac version
God-level code editing software (SublimeText3)

Hot Topics
 deepseek web version entrance deepseek official website entrance
Feb 19, 2025 pm 04:54 PM
DeepSeek is a powerful intelligent search and analysis tool that provides two access methods: web version and official website. The web version is convenient and efficient, and can be used without installation; the official website provides comprehensive product information, download resources and support services. Whether individuals or corporate users, they can easily obtain and analyze massive data through DeepSeek to improve work efficiency, assist decision-making and promote innovation.
 How to install deepseek
Feb 19, 2025 pm 05:48 PM
There are many ways to install DeepSeek, including: compile from source (for experienced developers) using precompiled packages (for Windows users) using Docker containers (for most convenient, no need to worry about compatibility) No matter which method you choose, Please read the official documents carefully and prepare them fully to avoid unnecessary trouble.
 BITGet official website installation (2025 beginner's guide)
Feb 21, 2025 pm 08:42 PM
BITGet is a cryptocurrency exchange that provides a variety of trading services including spot trading, contract trading and derivatives. Founded in 2018, the exchange is headquartered in Singapore and is committed to providing users with a safe and reliable trading platform. BITGet offers a variety of trading pairs, including BTC/USDT, ETH/USDT and XRP/USDT. Additionally, the exchange has a reputation for security and liquidity and offers a variety of features such as premium order types, leveraged trading and 24/7 customer support.
 Ouyi okx installation package is directly included
Feb 21, 2025 pm 08:00 PM
Ouyi OKX, the world's leading digital asset exchange, has now launched an official installation package to provide a safe and convenient trading experience. The OKX installation package of Ouyi does not need to be accessed through a browser. It can directly install independent applications on the device, creating a stable and efficient trading platform for users. The installation process is simple and easy to understand. Users only need to download the latest version of the installation package and follow the prompts to complete the installation step by step.
 Get the gate.io installation package for free
Feb 21, 2025 pm 08:21 PM
Gate.io is a popular cryptocurrency exchange that users can use by downloading its installation package and installing it on their devices. The steps to obtain the installation package are as follows: Visit the official website of Gate.io, click "Download", select the corresponding operating system (Windows, Mac or Linux), and download the installation package to your computer. It is recommended to temporarily disable antivirus software or firewall during installation to ensure smooth installation. After completion, the user needs to create a Gate.io account to start using it.
 Ouyi Exchange Download Official Portal
Feb 21, 2025 pm 07:51 PM
Ouyi, also known as OKX, is a world-leading cryptocurrency trading platform. The article provides a download portal for Ouyi's official installation package, which facilitates users to install Ouyi client on different devices. This installation package supports Windows, Mac, Android and iOS systems. Users can choose the corresponding version to download according to their device type. After the installation is completed, users can register or log in to the Ouyi account, start trading cryptocurrencies and enjoy other services provided by the platform.
 gate.io official website registration installation package link
Feb 21, 2025 pm 08:15 PM
Gate.io is a highly acclaimed cryptocurrency trading platform known for its extensive token selection, low transaction fees and a user-friendly interface. With its advanced security features and excellent customer service, Gate.io provides traders with a reliable and convenient cryptocurrency trading environment. If you want to join Gate.io, please click the link provided to download the official registration installation package to start your cryptocurrency trading journey.
 The first dual-core cultural and tourism digital hominid in the country! Tencent Cloud helps Huaguoshan Scenic Area connect to DeepSeek, making the 'Sage Monkey King' smarter and warmer
Mar 12, 2025 pm 12:57 PM
Lianyungang Huaguoshan Scenic Area joins hands with Tencent Cloud to launch the first "dual-core brain" Digital Homo sapiens in the cultural and tourism industry - Monkey King! On March 1, the scenic spot officially connected the Monkey King to the DeepSeek platform, so that it has the two AI model capabilities of Tencent Hunyuan and DeepSeek, bringing tourists a smarter and more considerate service experience. Huaguoshan Scenic Area has previously launched the Monkey King of the Digital Homo sapiens based on Tencent Hunyuan model. This time, Tencent Cloud further utilizes technologies such as the big model knowledge engine to connect it to DeepSeek to achieve a "dual-core" upgrade. This makes the Monkey King's interactive ability to a higher level, faster response speed, stronger understanding ability, and more warmth. Monkey King has strong natural language processing capabilities and can understand various ways of asking questions from tourists.


