
 Backend Development
Golang
GoESL vs. Temporal: The call does not originate from a certain point in FreeSWITCH
Backend Development
Golang
GoESL vs. Temporal: The call does not originate from a certain point in FreeSWITCH
GoESL vs. Temporal: The call does not originate from a certain point in FreeSWITCH

I am integrating GoESL (https://www.php.cn/link/d9b64cee05c46d31b10b9869a3198a6d) with Temporal to automate via FreeSWITCH dial. This setup allows 1,000 concurrent channels and 50 calls per second (CPS). Each dialing attempt starts a temporary workflow that initiates the call through an activity.
After 96 successfully initiated calls (a variable number), FreeSWITCH handles no more calls. There are no logs in the CLI and no events in the event socket layer to indicate further attempts. However, if I stop the Temporal Worker, the previously "stuck" calls appear in the FreeSWITCH CLI indicating that they have been queued by the GoESL client. I can confirm that the worker is not stuck as it continues to launch the main workflow.
The following are relevant code snippets:
Lead processing loop:
for _, lead := range leadResult.Leads {
    // [omitted setup and checks]

    // Checking for channel availability and sleeping to respect CPS limits
    workflow.Await(ctx, func() bool {
        return dialerQueryResponse.AvailableChannels > 0
    })

    timeToSleep := time.Second / time.Duration(dialerQueryResponse.CallsPerSecondLimit)
    workflow.Sleep(ctx, timeToSleep)

    // Dialing the lead
    fmt.Printf("dialing lead %s\n", lead)
    dialLead(lead, selectedDialer.Id, callTimeout)
    fmt.Print("lead dialed\n\n")
}Dial-up guidance logic:
dialLead := func(lead string, selectedDialerId, dialerCallTimeout int) {
    // Setup child workflow context with unique ID
    cwo.WorkflowID = fmt.Sprintf("Campaign_Call_%s", lead)
    childCtx := workflow.WithChildOptions(ctx, cwo)

    // Struct to pass input to the child workflow
    input := domain.CallWorkflowInput{
        Lead:                lead,
        DialerId:            selectedDialerId,
        CampaignName:        cds.CampaignName,
        DialplanExtension:   cc.Survey.DialplanExtension,
        CallTimeout:         dialerCallTimeout,
    }

    // Executing the child workflow and handling its future
    future := workflow.ExecuteChildWorkflow(childCtx, CallWorkflow, input)
    var dialerId int
    selector.AddFuture(future, func(f workflow.Future) {
        err := f.Get(ctx, &dialerId)
        // Error handling and updating concurrency state
        // ...
    })
}Call workflow function:
func CallWorkflow(ctx workflow.Context, input domain.CallWorkflowInput) (int, error) {
    // [omitted setup]

    // Executing the originate call activity
    var dialLeadResult domain.DialLeadResponse
    if err := workflow.ExecuteActivity(ctx, activity.Dialer.OriginateCallActivity, dialInput).Get(ctx, &dialLeadResult); err != nil {
        // Error handling
    }

    // [omitted post-call handling]
}Execute the call initiating activities in sequence:
func (a *DialerActivities) OriginateCallActivity(ctx context.Context, input domain.DialLeadRequest) (domain.DialLeadResponse, error) {
    // [omitted client selection]

    // Command to originate the call
    cmd := fmt.Sprintf("originate {%s}%s/%s/%s 704 XML default test %s 10", variables, protocol, gateway, input.DestinationNumber, input.OriginatingNumber)
    err := selectedClient.BgApi(cmd)

    if err != nil {
        // Error handling
    }

    // [omitted response preparation]
}}, nil
}Has anyone encountered a similar issue using GoESL or Temporal, where calls seem to be queued and not executed past a certain point? Any suggestions on how to debug this situation or why killing the temporary worker thread might trigger the handling of queued calls?
What I tried:
- Make sure to follow the restrictions.
- Use the FreeSWITCH CLI to debug and inspect CDRs.
- Check the FreeSWITCH logs to try to find any anomalies.
- Attempted to log GoESL events in the FreeSWITCH setup, but no logs were written to the file.
- Modify the
workflow.Sleepduration from a few milliseconds to 5 - 10 seconds to ensure it is not network latency causing the problem. - Confirm that no errors are thrown in my code or logs before terminating the workflow.
- The FreeSWITCH instance has been stopped to ensure this is not a communication issue between GoESL and FreeSWITCH. When stopping a FreeSWITCH instance, the log indicates communication failure. Otherwise I don't receive any logs.
- Research: Found this article on Google (https://lists.freeswitch.org/pipermail/freeswitch-users/2019-May/131768.html) which seems to be related to the same problem we encountered, However, there is no solution.
Correct answer
Decided to change the GoESL software package (https://www.php.cn/link/d9b64cee05c46d31b10b9869a3198a6d) to use Different GoESL packages (https://www.php.cn/link/8c8566b78ac2b99c542bef8c37cac179) and the problem has been solved. Seems to be a fundamental issue in the initial GoESL package.
I've opened an issue on the Github repository here (https://github.com/0x19/goesl/issues/40) in case anyone encounters the same problem in the future.
The above is the detailed content of GoESL vs. Temporal: The call does not originate from a certain point in FreeSWITCH. For more information, please follow other related articles on the PHP Chinese website!

Hot AI Tools

Undresser.AI Undress
AI-powered app for creating realistic nude photos

AI Clothes Remover
Online AI tool for removing clothes from photos.

Undress AI Tool
Undress images for free

Clothoff.io
AI clothes remover

AI Hentai Generator
Generate AI Hentai for free.

Hot Article
Hot Tools

Notepad++7.3.1
Easy-to-use and free code editor

SublimeText3 Chinese version
Chinese version, very easy to use

Zend Studio 13.0.1
Powerful PHP integrated development environment

Dreamweaver CS6
Visual web development tools

SublimeText3 Mac version
God-level code editing software (SublimeText3)
Hot Topics
 1377
1377
 52
52

 How to hide photo album on Redmi Note13RPro?
May 01, 2024 pm 12:50 PM
How to hide photo album on Redmi Note13RPro?
May 01, 2024 pm 12:50 PM
RedmiNote13RPro is a new model with very good performance and configuration. This phone has a very useful function of hiding photo albums. It can help users hide their photo albums so that others cannot view your photo albums. Next, the editor will tell you how to hide the photo album on Redmi Note13R Pro to help you protect your privacy. How to hide photo album on Redmi Note13RPro? 1. Enter the settings of your Xiaomi phone. 2. Then click Privacy and Protection. 3. Click Protect Privacy here again. 4. Click on the safe. 5. Finally, you can set up a private photo album here. Frequently Asked Questions Connecting to Bluetooth Changing Input Method Theme Changing Factory Settings Hide Applications Mirroring TV NFC Enable Dual SIM Installation Activation Time
 How to adjust the font size on Redmi Note13RPro?
May 07, 2024 pm 06:34 PM
How to adjust the font size on Redmi Note13RPro?
May 07, 2024 pm 06:34 PM
Do not change the meaning of the original content, fine-tune the content, rewrite the content, do not continue. Redmi Note13RPro not only has excellent performance, but also has an even better user experience. In order to give everyone a more comfortable experience, Redmi Note13RPro is equipped with a font adjustment function to allow users to Ability to adjust fonts for your phone. If you want to know how to adjust the font size of Redmi Note13R Pro, then take a look. How to adjust the font size on Redmi Note13RPro? 1. Open the Settings app. 2. Scroll to the bottom and select "Display." 3. Click "Text Size". 4. On this screen, you can adjust the font size by dragging the slider or select a preset font size. 5. After the adjustment is completed, press "OK" to save
 How to connect Redmi Note13RPro to the computer?
May 09, 2024 pm 06:52 PM
How to connect Redmi Note13RPro to the computer?
May 09, 2024 pm 06:52 PM
The phone Redmi Note13RPro has been very popular recently. Many consumers have purchased this phone. However, many users are using this phone for the first time, so they don’t know how to connect the Redmi Note13RPro to the computer. In this regard, the editor is here to explain to you Detailed tutorial introduction is provided. How to connect Redmi Note13RPro to the computer? 1. Use a USB data cable to connect the Redmi phone to the USB interface of the computer. 2. Open the phone settings, click Options, and turn on USB debugging. 3. Open the device manager on your computer and find the mobile device option. 4. Right-click the mobile device, select Update Driver, and then select Automatically search for updated drivers. 5. If the computer does not automatically search for the driver,
 How to extract text from pictures on Redmi Note13RPro?
May 08, 2024 pm 10:00 PM
How to extract text from pictures on Redmi Note13RPro?
May 08, 2024 pm 10:00 PM
The Redmi Note13RPro mobile phone integrates a number of smart tools in terms of software functions. Among them, quickly and accurately extracting text content from pictures is one of them. The following editor will introduce to you how Redmi Note13RPro extracts text from pictures. How to extract text from pictures on Redmi Note13RPro? Use the Xiaomi QR code scanning function, open the QR code scanning application on your phone, click the picture icon, select a picture, and then click the "Recognize text" option on the right to successfully extract the text in the picture. Operate through mobile phone album. Find the picture for which text needs to be extracted in the mobile phone album, click "More" below the picture, and select "Extract Text". After successful recognition, you can copy or save the text as needed. Use WeChat mini programs. Open micro
 A complete guide to all levels of 'Whole Life'
May 07, 2024 pm 06:31 PM
A complete guide to all levels of 'Whole Life'
May 07, 2024 pm 06:31 PM
Entire Huoba is a very fun casual puzzle game that everyone can experience on multiple platforms! The game provides countless exciting levels waiting to be unlocked. Each level is full of novelty and challenges, allowing you to experience an interesting adventure of answering questions and unlock new game content. So how to clear the entire level of Huoba? Today I bring you a complete guide to all levels of "Whole Life". If you encounter any problems in passing the level, you can refer to it! "The Whole Life" complete guide to all levels of "The Whole Life" The complete guide to all levels of "The Whole Life" Help her to watch the New Year's Eve, help the little sister to identify the scumbag wolf, and the grandmother helps the little girl escape from danger for outdoor adventure, pretending not to see Ah Piao and transforming back The humanoid helped the orangutan to become a humanoid. Someone in the back seat stayed calm and dealt with the female ghost. The night-shift taxi kept calm and dealt with the female ghost.
 How to turn off the camera sound on Redmi Note13RPro?
May 02, 2024 pm 06:31 PM
How to turn off the camera sound on Redmi Note13RPro?
May 02, 2024 pm 06:31 PM
The camera function of Redmi Note13RPro is very easy to use, especially when taking pictures, it will simulate the sound of the camera shutter. However, this function may affect others in quiet situations such as libraries, so many users want to know how to turn off the camera sound of Redmi Note13RPro. , let the editor tell you below. How to turn off the camera sound on Redmi Note13RPro? 1. For the first method, you first need to open the settings of your phone. 2. Then find system applications under the settings menu. 3. Then we find the camera option under the system application interface. 4. Finally, we can set whether to turn off the camera sound in the camera interface. We only need to turn off the switch on the right side of the camera sound. 5. The second method, the first step, open
 How to set traffic display on Redmi Note13RPro?
May 02, 2024 pm 03:34 PM
How to set traffic display on Redmi Note13RPro?
May 02, 2024 pm 03:34 PM
RedmiNote13RPro is a mobile phone that is loved by many users. This phone provides a special method to display traffic on the phone. If you still don’t know how to set up RedmiNote13RPro to display traffic, then follow the editor to find out. How to set traffic display on Redmi Note13RPro? 1. Enter "Settings" and click "Dual SIM Mobile Network". 2. Scroll down to select the "Data Package Settings" option. 3. Turn on the function switches on the right side of "Display traffic information in the notification bar" and "Display the current network speed in the status bar". 4. After the setting is successful, pull down the status bar to see the display of real-time network speed and traffic information. FAQ Connect Bluetooth Change input method theme Change factory settings Hide application casting
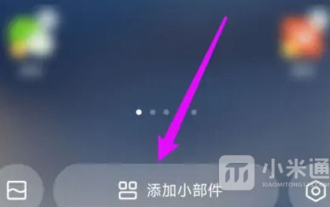 How to set up one-click screen lock on Redmi Note13RPro?
May 01, 2024 pm 12:37 PM
How to set up one-click screen lock on Redmi Note13RPro?
May 01, 2024 pm 12:37 PM
Redmi Note13R Pro is the latest flagship phone launched by Redmi. This phone has many user-friendly functions, such as the one-click screen lock function, which can help everyone quickly lock the screen and protect everyone's privacy. If you want to know how to lock the screen of Redmi Note13RPro with one click, then don’t miss it. How to set up one-click screen lock on Redmi Note13RPro? 1. Swipe up from the bottom and click where to add the widget. 2. Find the widgets here, and then click "All" 3. Click "Android Widgets" below 4. Find the lock screen and add it. Frequently Asked Questions Connecting to Bluetooth Changing Input Method Theme Changing Factory Settings Hide Applications Mirroring TV NFC Enable Dual SIM Installation Activation Time
