
 Software Tutorial
Mobile Application
How to disassemble a toshiba notebook 'A must-read for beginners: Toshiba TR200 solid state drive notebook disassembly and assembly'
Software Tutorial
Mobile Application
How to disassemble a toshiba notebook 'A must-read for beginners: Toshiba TR200 solid state drive notebook disassembly and assembly'
How to disassemble a toshiba notebook 'A must-read for beginners: Toshiba TR200 solid state drive notebook disassembly and assembly'

php editor Strawberry brings you a guide on the disassembly and assembly of Toshiba laptops, especially the disassembly of Toshiba TR200 solid-state drives. For novices, disassembling a laptop can be a bit confusing, but this article will explain each step in detail so that you can easily complete the disassembly. Whether you're replacing a hard drive or cleaning the inside, it's important to know the correct disassembly method. Let’s learn how to disassemble and assemble a Toshiba laptop!
Since 2015, solid-state drives have been increasingly adopted by many DIY players. Whether they are ordinary users or enthusiast gamers, they will give priority to solid-state mechanical matching solutions almost when installing. Generally, solid-state system disks are used, so that the booting speed can be reduced from half a minute of a traditional mechanical hard disk to 10 seconds, which can be said to be a considerable improvement. Non-system disks use cheaper traditional mechanical hard disks to store a large amount of data. personal information.

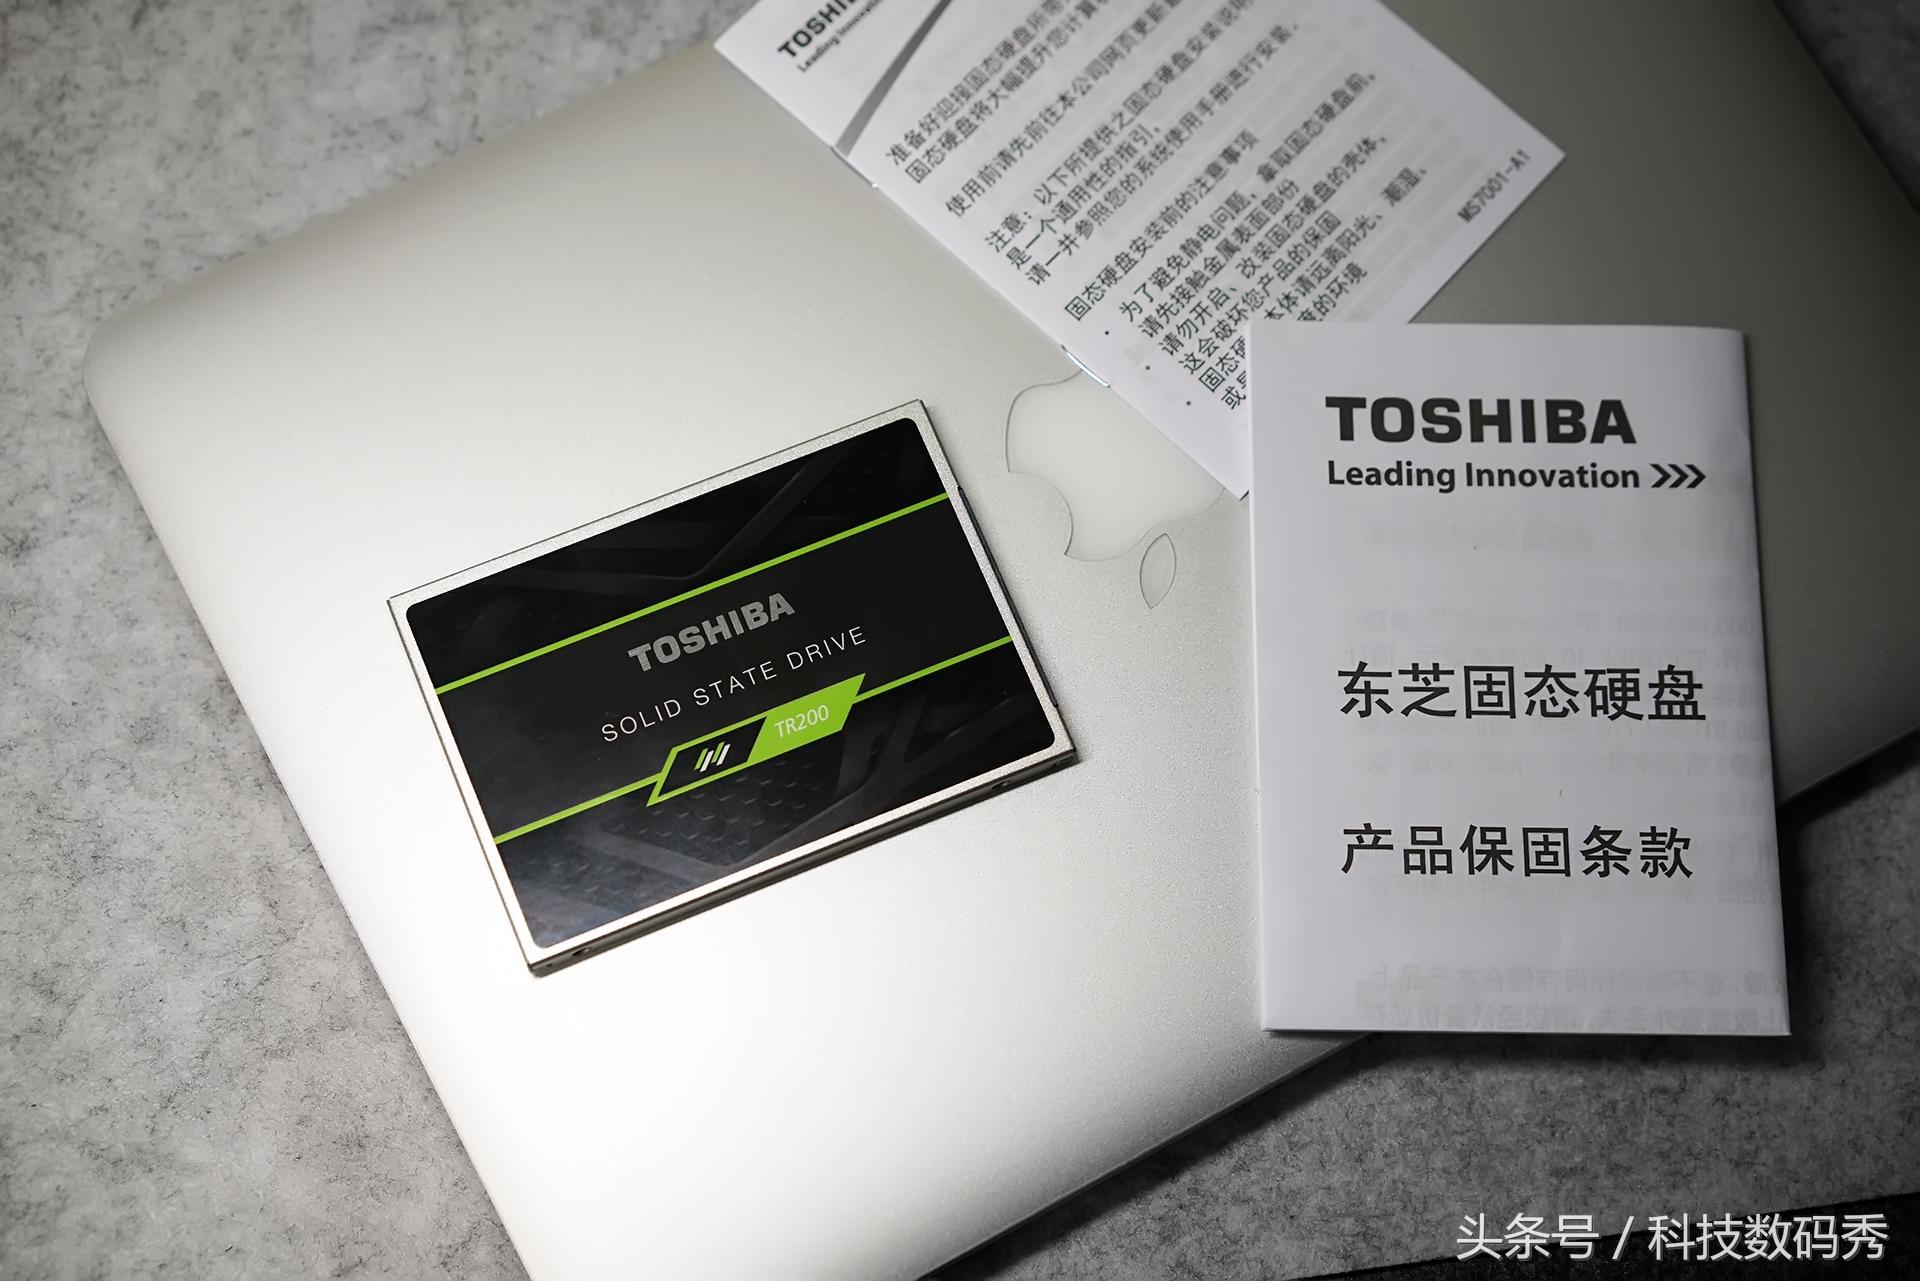
In this issue, we introduce to you Toshiba’s latest SSD solid state drive-TR200. The hard drive has a capacity of 240G and a size of 2.5 inches. It is currently priced at 579 yuan on the JD platform (30 yuan cashback E-card for orders during 2017.12.25-2017.1.7, JD.com members plus can enjoy a lower price of 567 yuan). This solid-state drive features high-speed transmission and strong stability, making it an ideal choice for improving computer performance. Whether it is used to store large amounts of files or perform high-load applications, the TR200 can provide excellent performance. Buying TR200 not only provides high cost performance, but also enjoys the additional benefits of JD.com Plus members.
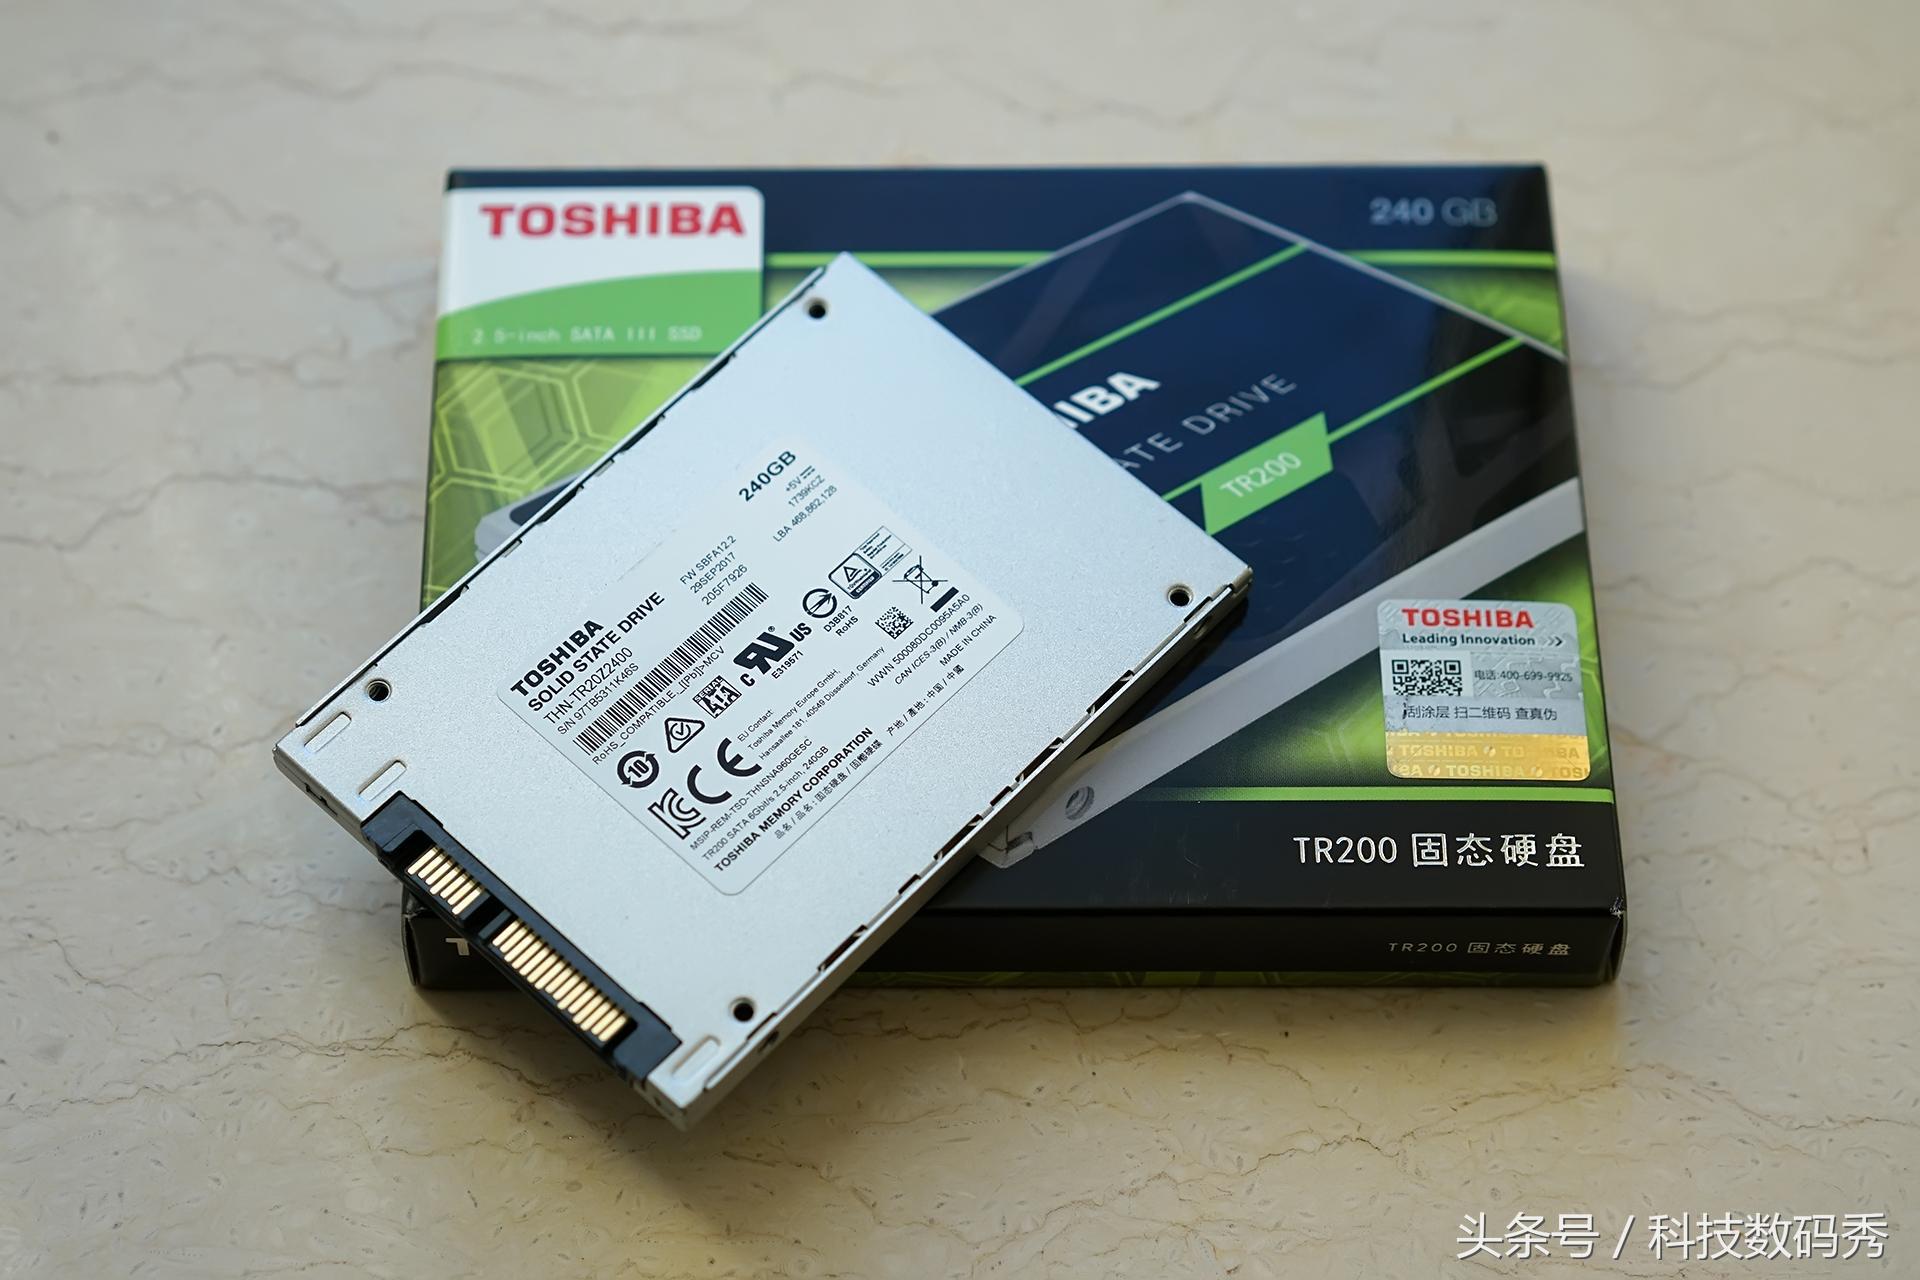
In terms of interface, TR200 uses SATA3 6Gb/s, and its main control and particles are from Toshiba original factory. As a professional hard disk manufacturer, Toshiba's biggest advantage is that it uses Toshiba's original main control and new 64-layer 3D BiCS FLASH memory, which makes it less noisy and consumes less power.

The 2.5-inch size can be used regardless of whether you have a PC desktop or a notebook. Today I will take my personal ThinkPad t430 as an example. Let me show you how to disassemble and install the solid state drive.
The hard drive of ThinkPad t430 is located in the upper left corner of the notebook. Open the protective cover, use a tool to pop out the black pull strap of the hard drive, and then pull it out gently.
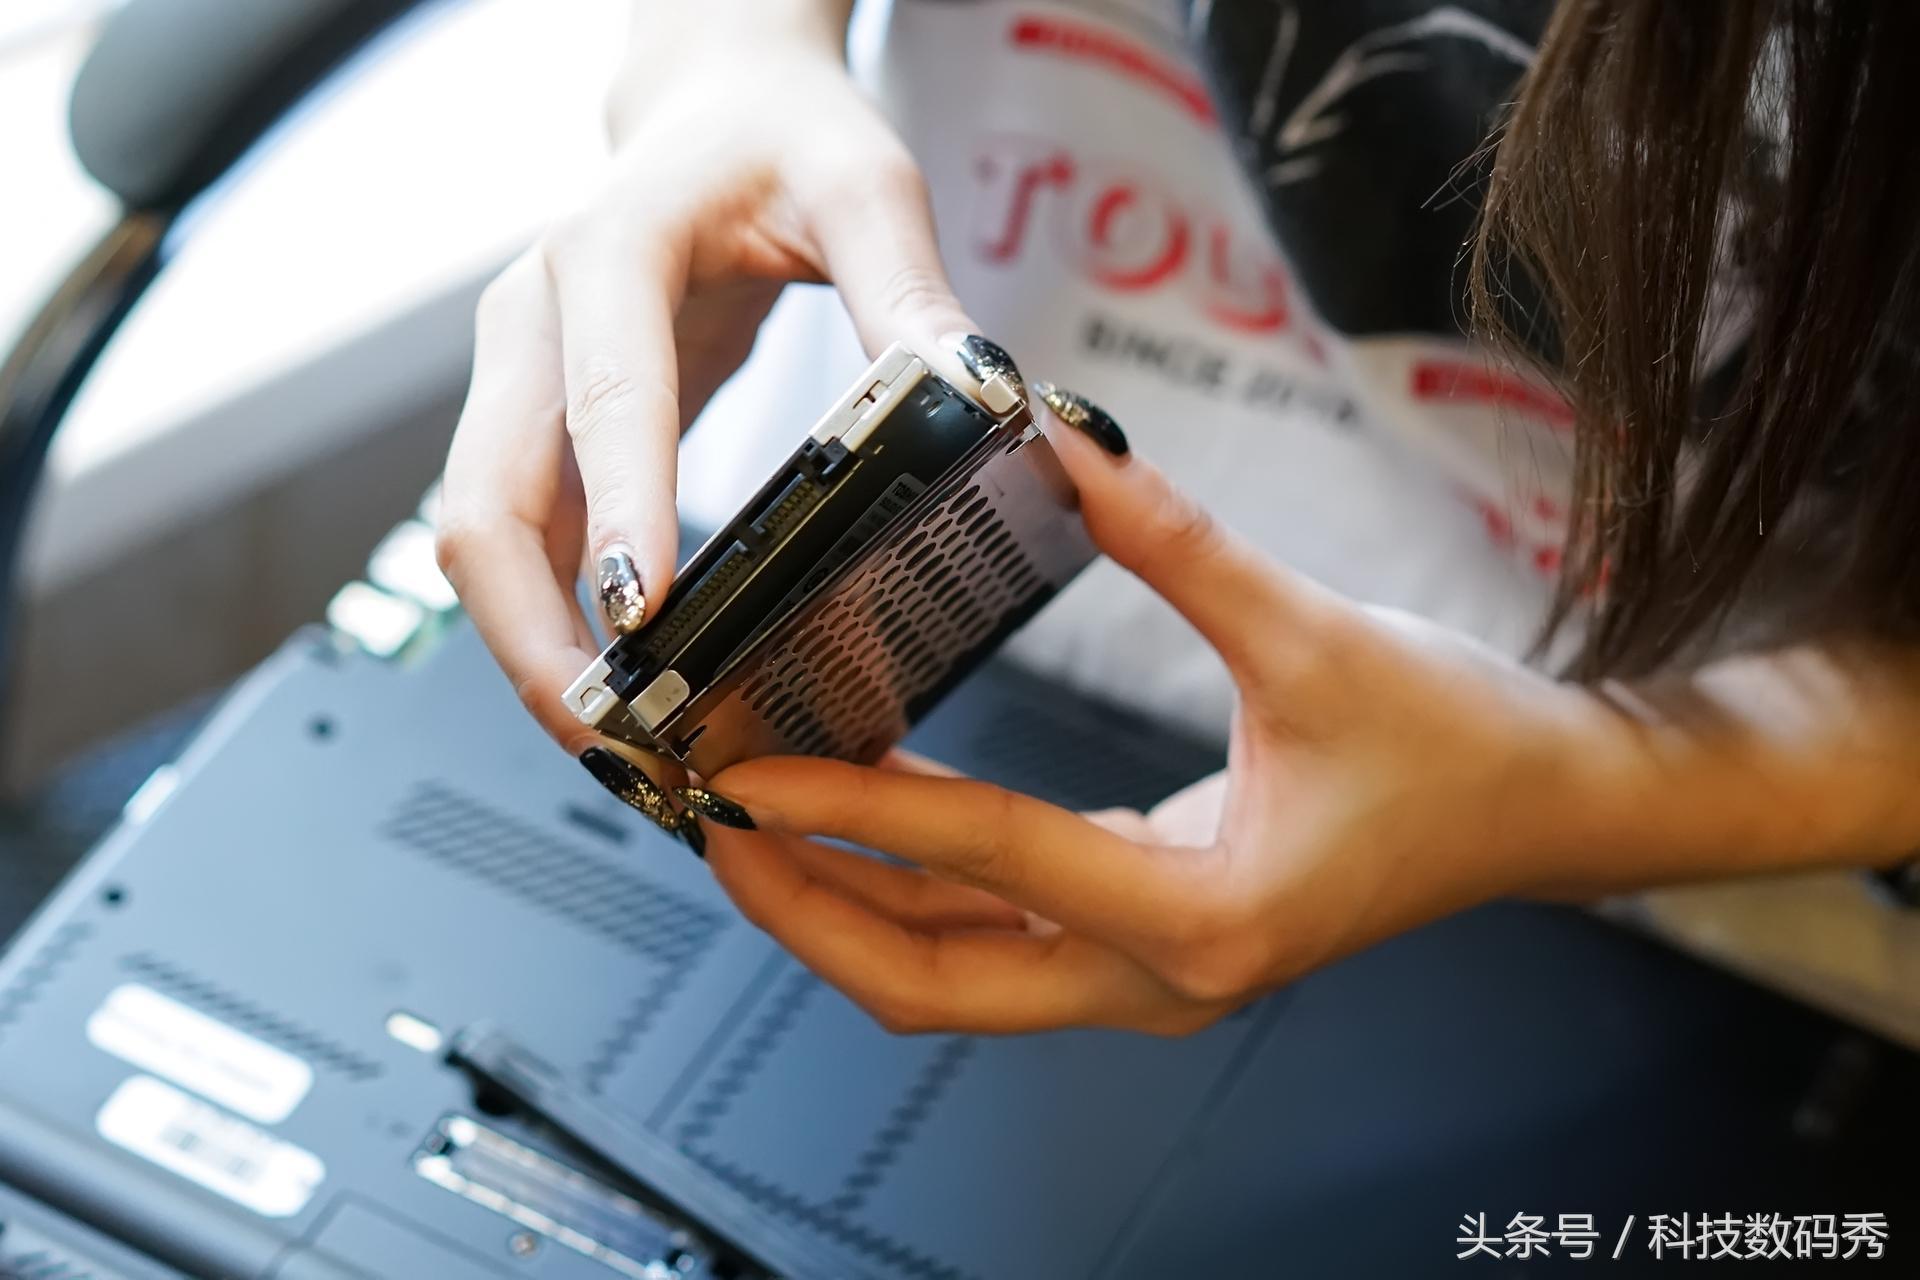
Then loosen the screws on both sides of the tray (in fact, it is very secure to put it in the bracket without installing the screws), and remove the old hard drive. Next, install the new Toshiba TR200 solid state.

#When installing, align the direction of the interface and push it in with a little force. Note that the black drawstring can be pressed together in advance and stuffed into the hard drive compartment.


According to the official parameters, we can know that the read performance of TR200 is 555MB/s and the write speed is 540MB/s, which is also the speed that most first-class brands can achieve. The operating power consumption is
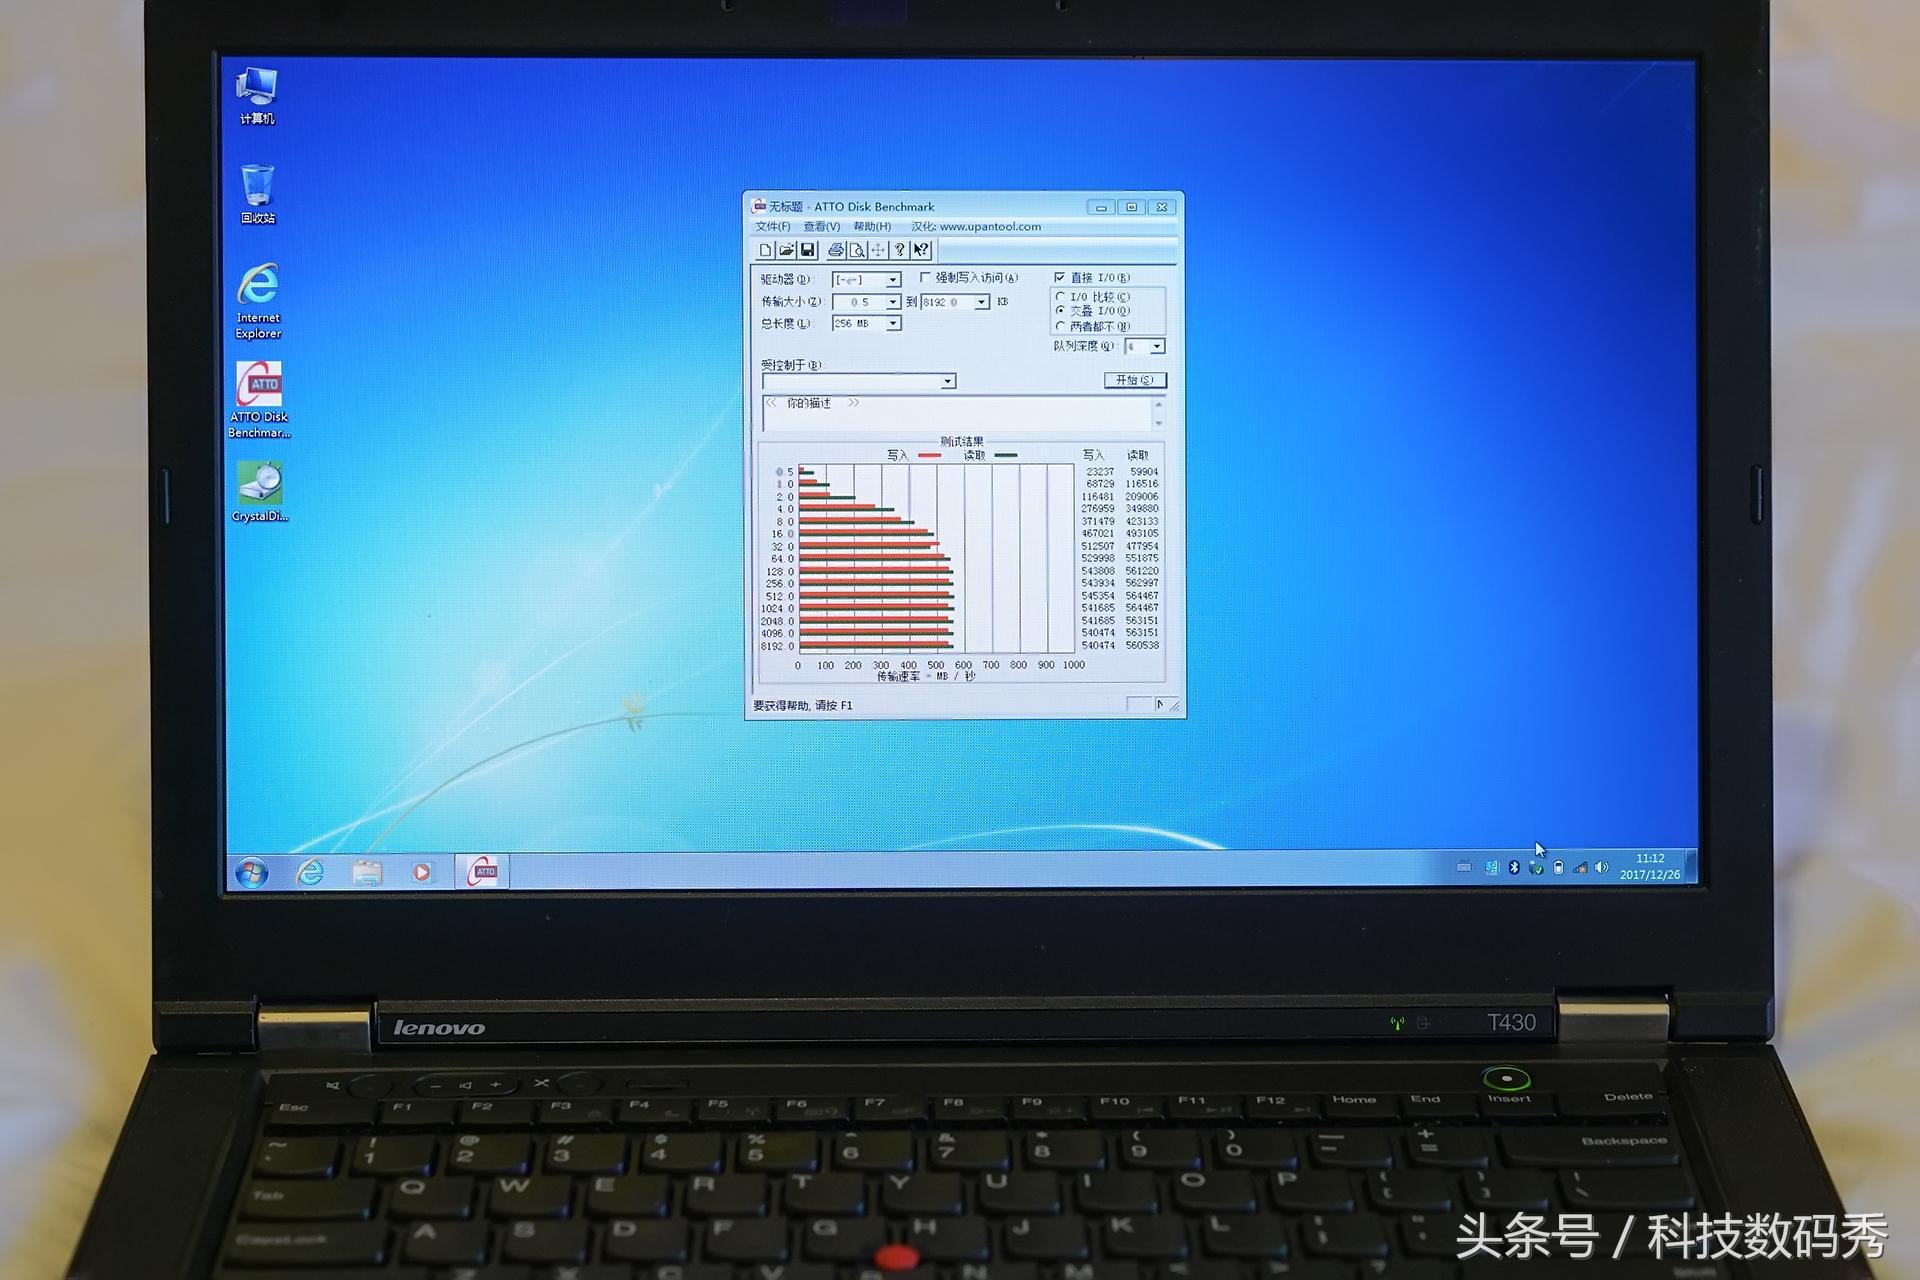
Because I had placed it in the hard disk box before and divided it into two partitions using DiskGen. Using a USB drive with PE boot, Ghost successfully installed the Win7 system in the C drive of the main partition. Next, we use two professional hard drive speed testing software to test.
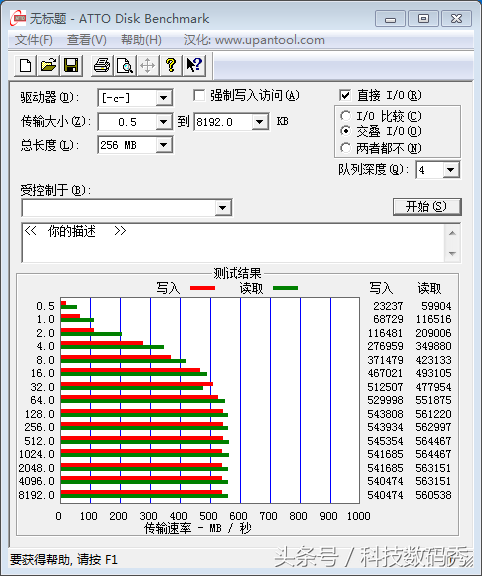
First of all, in ATTO Disk Benchmark, by writing and reading data of different sizes, we can see that when the file is larger than 64KB , its reading and writing speed has become stable, basically in the middle of 500-600, which is basically the same as the official data.
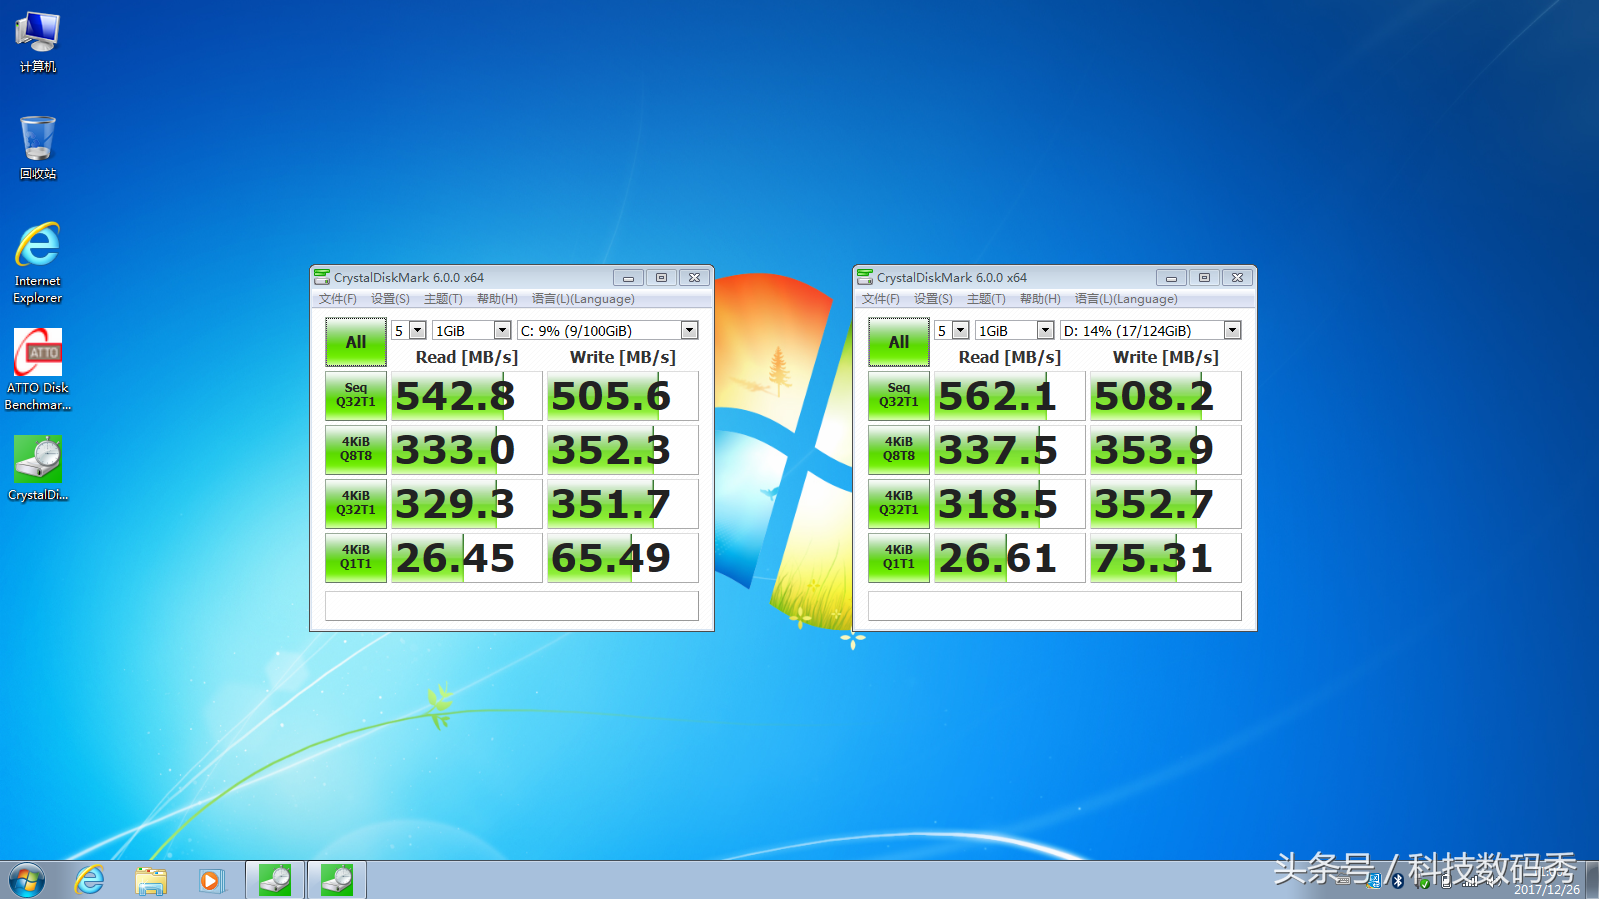
In another authoritative speed testing software, CrystalDiskMark, test the speed of two partitions respectively (actually they should be the same, just one hard disk partition Only two zones), the system disk and data partition read speeds reached 542.8MB/s and 562.1MB/s, and the write speeds were 505.6MB/s and 508.2MB/s respectively.
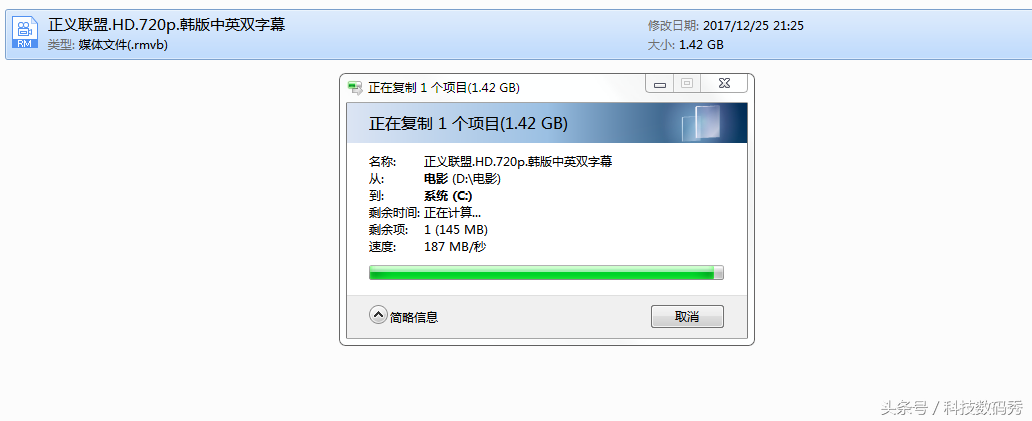
The two authoritative speed testing software can already explain the problem, but in order to focus on the actual experience, I reformatted it into a partition and installed it on On the desktop computer at home, at this time, the D drive is a traditional mechanical hard drive. When reading from a mechanical hard disk and writing to the C drive Toshiba TR200, due to the bottleneck of mechanical hard disk reading, the writing speed is 187MB/s, which is mainly affected by the reading of the mechanical hard disk.
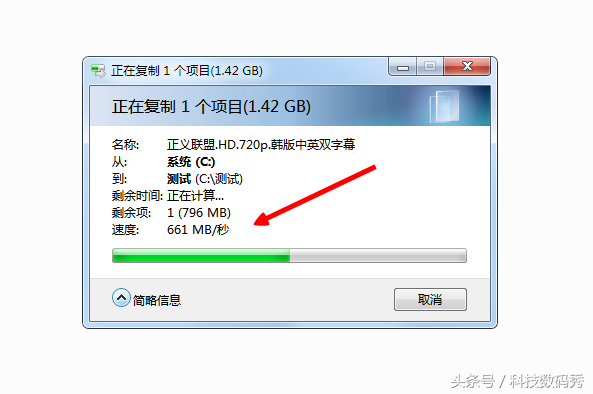
Putting aside the influence of the mechanical hard drive, when testing the copy of TR200 itself, we can find that its average speed is basically maintained at around 550MB/s. , the peak value is even as high as 661MB/s. It can be said that this speed is quite incredible. A 1.42GB copy of "Justice League" only takes 3 seconds, which is quite impressive.
When running large-scale games, this high-speed read and write solid-state drive has an extremely obvious effect on improving the overall fluency. In PlayerUnknown's Battlegrounds " When playing "Chicken", you can clearly feel that the loading speed of the game is much faster, especially when the picture details are rich, and there is no noise from reading and writing the hard disk, making "Chicken" even more powerful.
Exquisite appearance, high-speed SATA3 interface, 550MB/s read and 540MB/s write performance make this hard drive a great addition to the overall computer The improvement plays a key role. The most important thing is that its measured performance is consistent with the theoretical data and even exceeds expectations. Toshiba TR200 is the best choice for installation!
The above is the detailed content of How to disassemble a toshiba notebook 'A must-read for beginners: Toshiba TR200 solid state drive notebook disassembly and assembly'. For more information, please follow other related articles on the PHP Chinese website!

Hot AI Tools

Undresser.AI Undress
AI-powered app for creating realistic nude photos

AI Clothes Remover
Online AI tool for removing clothes from photos.

Undress AI Tool
Undress images for free

Clothoff.io
AI clothes remover

Video Face Swap
Swap faces in any video effortlessly with our completely free AI face swap tool!
Hot Article
Hot Tools

Notepad++7.3.1
Easy-to-use and free code editor

SublimeText3 Chinese version
Chinese version, very easy to use

Zend Studio 13.0.1
Powerful PHP integrated development environment

Dreamweaver CS6
Visual web development tools

SublimeText3 Mac version
God-level code editing software (SublimeText3)
Hot Topics
 1664
1664
 14
1422
52
1316
25
1267
29
1239
24
14
1422
52
1316
25
1267
29
1239
24

 How to install WinNTSetup into Win11 system_How to install WinNTSetup into Win11 system
May 08, 2024 am 11:19 AM
How to install WinNTSetup into Win11 system_How to install WinNTSetup into Win11 system
May 08, 2024 am 11:19 AM
First download the latest Win11 system ISO image, and then in Win10 system, you can directly right-click on the downloaded ISO image file and select [Load]; if it is under WinPE, WinXP, or Win7 system, you need to use the virtual optical drive tool to load the ISO Image; or you can directly decompress the ISO image file without using a virtual optical drive. Then run WinNTSetup. The software interface is as shown in the figure: First locate the location of the install.wim file. You can find the install.wim file in the sources directory of the Win11 ISO image loaded or decompressed by the virtual optical drive. Then set the location of the boot disk and installation disk. Generally, you are going to put W
 Reasons why Baidu Netdisk download failed 125201
Apr 30, 2024 pm 10:42 PM
Reasons why Baidu Netdisk download failed 125201
Apr 30, 2024 pm 10:42 PM
Baidu Netdisk download failed 125201 Error reason: Network problems: unstable/slow connection, router failure, busy server File problems: damaged/incomplete files, invalid links Baidu Netdisk restrictions: download limit exceeded, membership expiration/account restricted Browser/application issues: out-of-date version/poor compatibility, download manager failure System issues: viruses/malware, missing components/drivers
 How to enter bios after assembling a computer? How to enter bios when assembling a computer?
May 07, 2024 am 09:13 AM
How to enter bios after assembling a computer? How to enter bios when assembling a computer?
May 07, 2024 am 09:13 AM
How to enter bios after assembling a computer? Before entering the BIOS, you need to make sure that the computer is completely shut down and powered off. Here are several common ways to enter the BIOS: 1. Use shortcut keys: Most computer manufacturers will display a prompt message at startup telling you which key to press to enter the BIOS settings. Usually the F2, F10, F12 or Delete key. After pressing the appropriate keys, you should be able to see a screen with information about your computer's hardware and BIOS settings. 2. Use the button on the motherboard: Some computer motherboards have a dedicated button for entering BIOS settings. This button is usually labeled "BIOS" or "UEFI". After pressing the button you should be able to see
 How to install Windows system on tablet computer
May 03, 2024 pm 01:04 PM
How to install Windows system on tablet computer
May 03, 2024 pm 01:04 PM
How to flash the Windows system on BBK tablet? The first way is to install the system on the hard disk. As long as the computer system does not crash, you can enter the system and download things, you can use the computer hard drive to install the system. The method is as follows: Depending on your computer configuration, you can install the WIN7 operating system. We choose to download Xiaobai's one-click reinstallation system in vivopad to install it. First, select the system version suitable for your computer, and click "Install this system" to next step. Then we wait patiently for the installation resources to be downloaded, and then wait for the environment to be deployed and restarted. The steps to install win11 on vivopad are: first use the software to check whether win11 can be installed. After passing the system detection, enter the system settings. Select the Update & Security option there. Click
 How to upgrade Win11 system on old computers_Tutorial on upgrading Win11 system on old computers
May 07, 2024 pm 08:07 PM
How to upgrade Win11 system on old computers_Tutorial on upgrading Win11 system on old computers
May 07, 2024 pm 08:07 PM
1. First we need to download the win11 image file. 2. Put the downloaded win11 image into another disk. 3. Then we find the win11 image file among the searched image files. 4. Then when we come to this interface, we select install.wim to proceed to the next step. 5. Then select the Windows 11 system and click OK to restore the image file. 6. Then we wait for pe to download and install. Wait patiently. After the download is completed, click restart according to the prompts. 7. Then come to this interface, we select the second xiaobaiPE. After selecting, the win11 system will be automatically installed for us. After the installation is completed, click to restart the computer immediately according to the prompts. 8. Finally, the system installation is completed, and we come to
 What you need to know when reinstalling the system from a USB flash drive: How to set up the BIOS correctly
May 06, 2024 pm 03:00 PM
What you need to know when reinstalling the system from a USB flash drive: How to set up the BIOS correctly
May 06, 2024 pm 03:00 PM
Reinstalling the system is a problem that many computer users often encounter. Whether it is due to system crash, poisoning or wanting to upgrade the system, reinstalling the system is a good choice. However, many people encounter various problems when reinstalling the system, such as not knowing how to set up the BIOS, not knowing how to choose a suitable installation disk, etc. Today, we will talk about some things you must know when reinstalling the system from a USB flash drive, and teach you how to set up the BIOS correctly and successfully complete the system reinstallation. Tool materials: System version: Windows1020H2 Brand model: Lenovo Xiaoxin Air14 Software version: Pocket machine One-click reinstallation of system software v1.0 1. Preparation 1. Prepare a U disk with a capacity of no less than 8GB, preferably USB3. 0, so the speed will be faster
 Does the newly assembled computer keyboard light not light up?
May 07, 2024 pm 04:40 PM
Does the newly assembled computer keyboard light not light up?
May 07, 2024 pm 04:40 PM
Does the newly assembled computer keyboard light not light up? The motherboard model should be UEFIbios. First find a keyboard with PS2 port, enter bios, turn off UEFI boot, and change to Legacy mode. If there is fast boot, turn off options like FastBoot, UEFI boot, turn on fast boot, and enter the system. USB interface detection may be turned off before, and USB devices can be used to assemble the computer after entering the system. The mouse and keyboard lights do not light up when the computer is turned on? If the keyboard light does not come on, there is a high possibility of memory failure, or it may be caused by static electricity on the motherboard or the motherboard is faulty. Use an eraser to wipe the gold finger of the memory graphics card, and remove and insert the memory several times. The problem remains. There are dual memory sticks and a single memory stick is used for testing. The problem persists. Re-plug the various cables inside and outside the chassis, and then unplug the connector on the motherboard.
 How to assemble an acer desktop computer?
May 08, 2024 pm 08:25 PM
How to assemble an acer desktop computer?
May 08, 2024 pm 08:25 PM
How to assemble an acer desktop computer? The assembly method of Acer desktop computer is as follows: open the case, install the power supply into the case, and tighten the screws. Install the CPU onto the motherboard, making sure the pins on the CPU are aligned with the slots on the motherboard, and tighten the screws on the CPU heat sink. Install the memory module onto the motherboard, making sure that the bumps on the memory module are aligned with the slots on the motherboard. Press down hard until you hear a "pop" sound to complete the installation. Install graphics cards, sound cards, network cards and other boards onto the motherboard, making sure the screws on the boards are tightened. Install storage devices such as hard drives and optical drives into the chassis, making sure the screws are tightened. Connect the motherboard to the chassis, including power cables, hard drive cables, optical drive cables, etc. Finally, close the chassis cover and tighten the screws to complete the assembly. exist
