 Software Tutorial
 Mobile Application
 Illustration of how to connect a broken headphone cable. Recommended wiring principles and welding operations for headphones.
Illustration of how to connect a broken headphone cable. Recommended wiring principles and welding operations for headphones.
php editor Xinyi will introduce to you the diagram of how to connect the broken headphone cable and the recommended wiring principles and welding operations. When the headphone cable breaks, we can repair it by welding to restore the normal use of the headset. The wiring principle is to connect the broken wires through welding to ensure that the signal can be transmitted normally. When performing welding operations, you need to pay attention to the welding time and temperature to avoid damaging the headphone cable or causing the welding to be unstable. With correct wiring and soldering operations, we can easily repair headphone cables and extend the life of the headphones.
There are two common types of 3.5MM plug headphones, three-section wire type and four-section wire type. The difference lies in whether there is a microphone. The three-section wire does not have a microphone input line, while the four-section wire does. They are introduced below. Schematic diagram and wiring method of three-segment line and four-segment line.
One and three-segment lines
The three lines of the three-segment line are the left channel, the right channel, and the common ground terminal. The three-stage headphone plug and the actual picture are as follows:


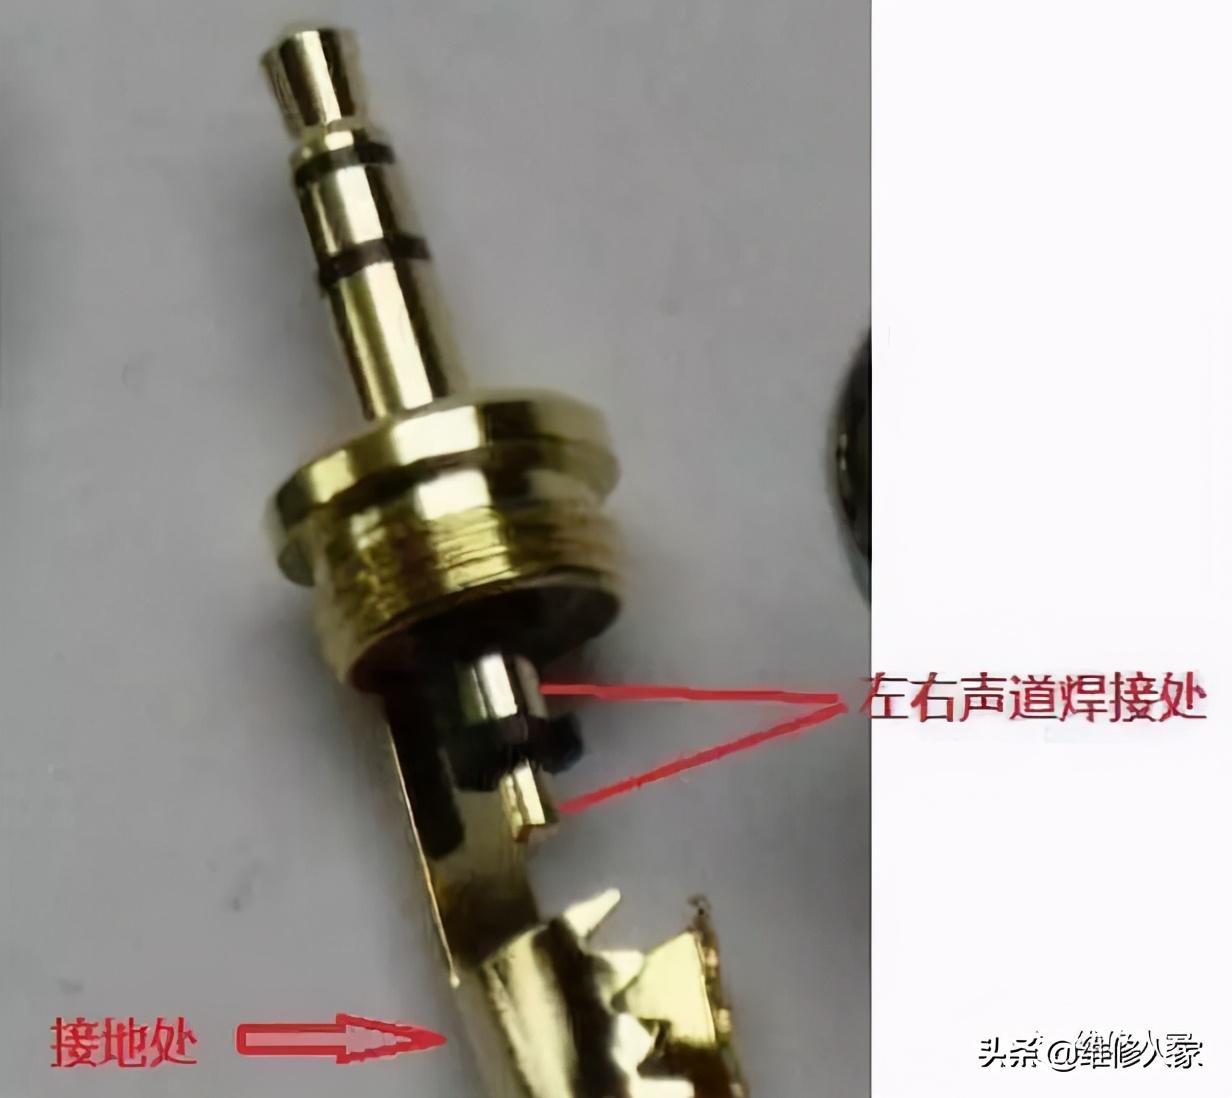

Two and four-segment lines
In addition to the left channel, right channel, and common ground terminal, the four-segment line also has a microphone input connection. However, the wiring sequence on the four-segment cable plug is not exactly the same. The difference lies in the difference in the position of the ground terminal and the microphone terminal. The wiring principle and actual objects are as follows:
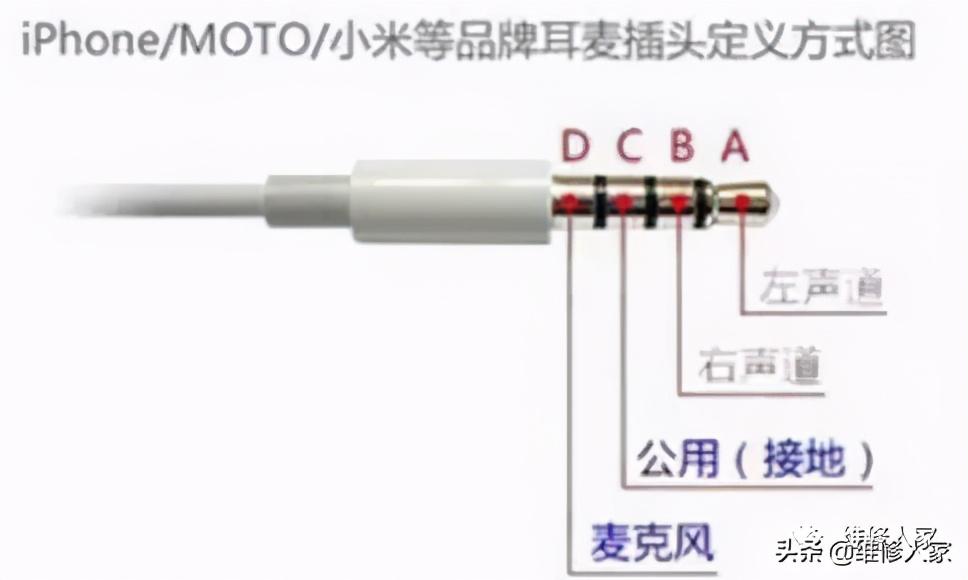

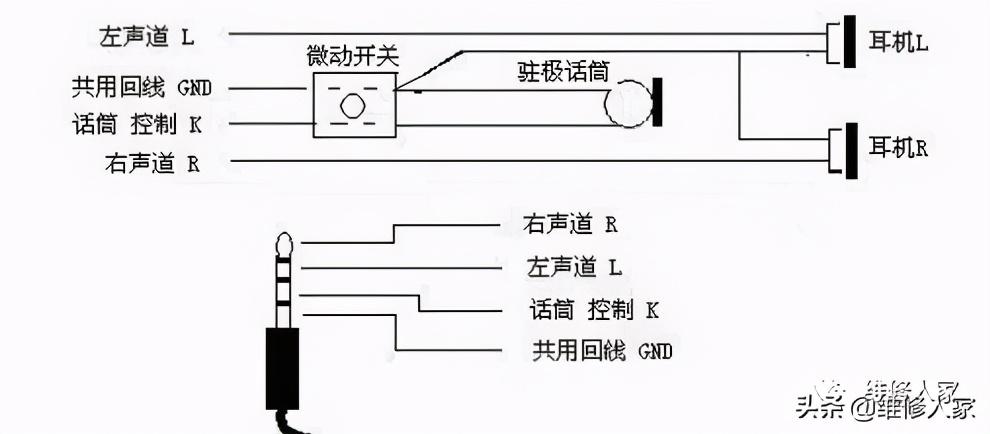

3. Joint wiring and welding operations
1. Check the joints and determine the order of welding. The three wires start from the bottom Weld upward.
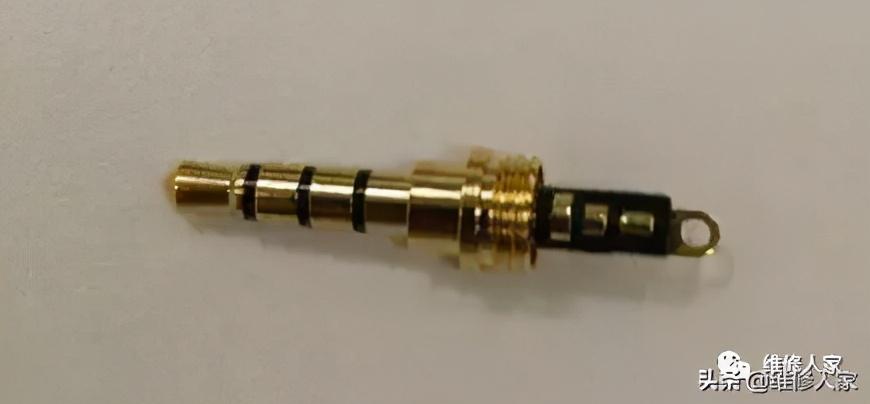

2. Fix the joint, clamp the joint in place, and give yourself a convenient angle for your next work.
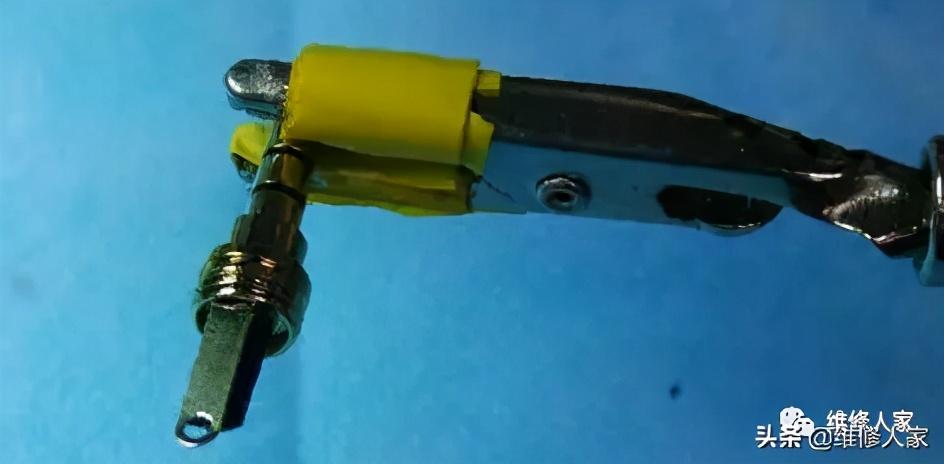

3. Twist the headphone cable, separate all four wires, and separate the wires you want to solder.
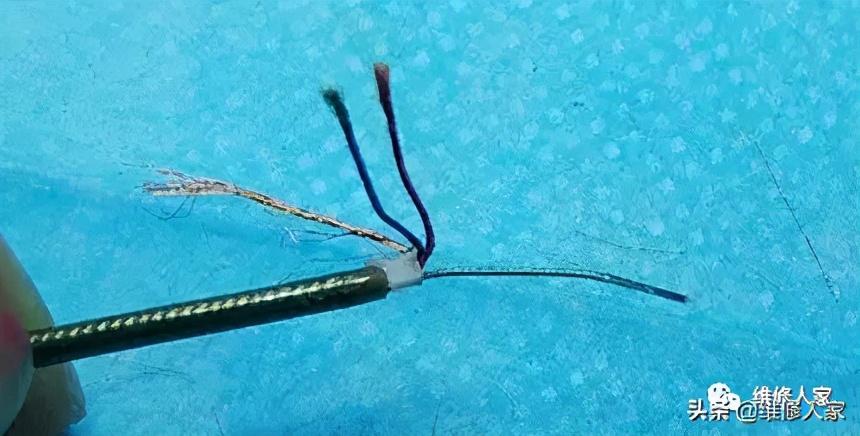

4. Thread the heat shrink tube, the spiral tube of the headphone head, and the transparent fixing sleeve in order.
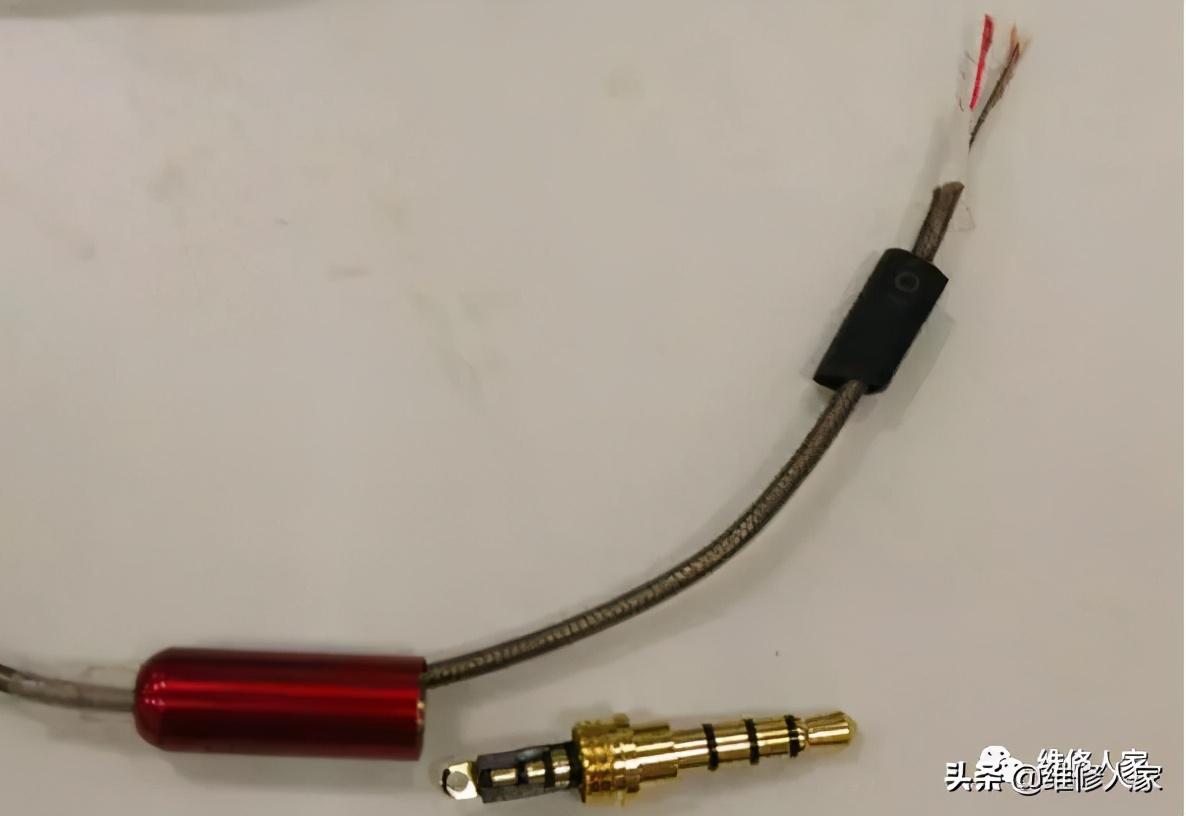
 5. Check the original connector wiring sequence and compare it with the wiring sequence you determined before to make sure it is correct.
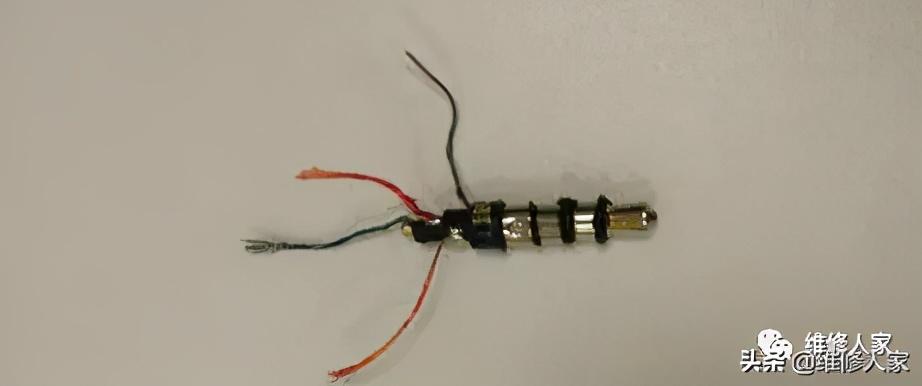
 6. Welding. Don't use too much solder when welding, because the three wiring locations are relatively small and close together, making it easy to connect them together.
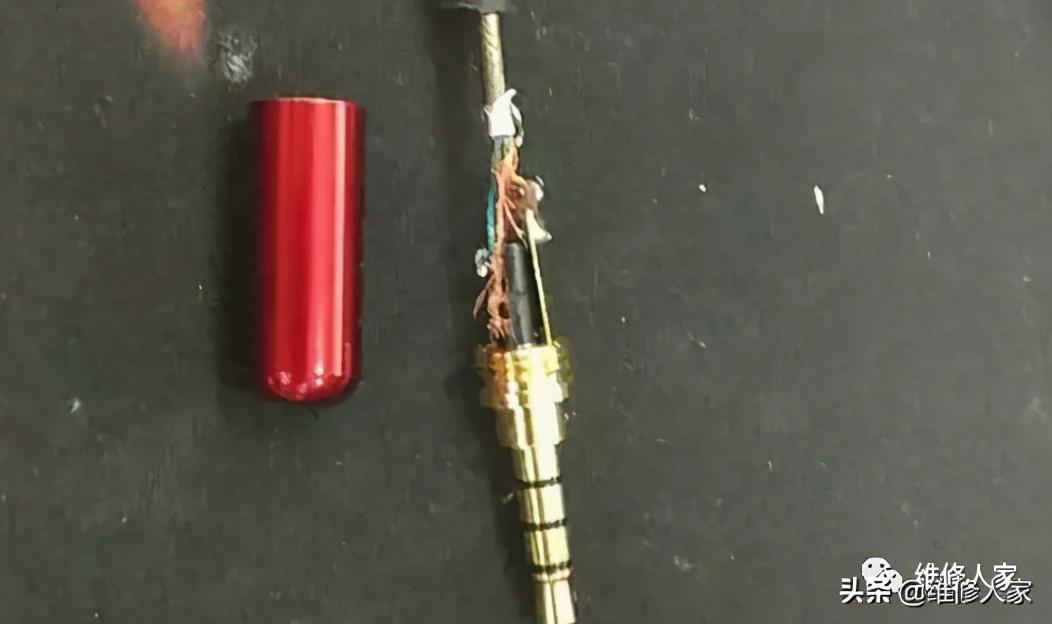

7. Connect the plug to the earphones, turn the sound up to the maximum, and try to see if the sound is normal.
8. If successful, put the heat shrink tube on the joint, heat it with an alcohol lamp to protect it, and then tighten the screw head.
4. Earplug wiring operation
1. After the preparations are done, remove the plug. Some plugs are threaded and easier to remove, while most plugs are glued. At this time, you need to use a hot air gun. When using the hot air gun, be careful not to blow hard at one place all the time, otherwise the thread will be damaged. Just blow it around like a hair dryer. Blow it for a while and try to pull it out. Be sure to use a rag or toilet paper because it is very hot.
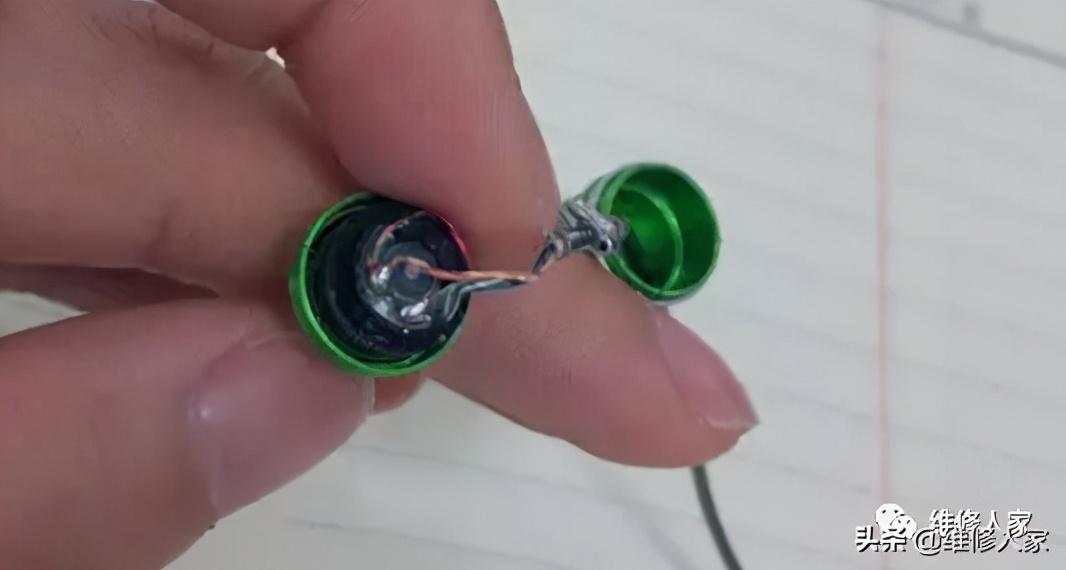

2. Determine the location of the wiring based on the plug you removed. There are usually two wires, a ground wire (usually brass), and a left and right channel wire (red or blue). At this time, you can cut the thread short and leave a small section on the plug.
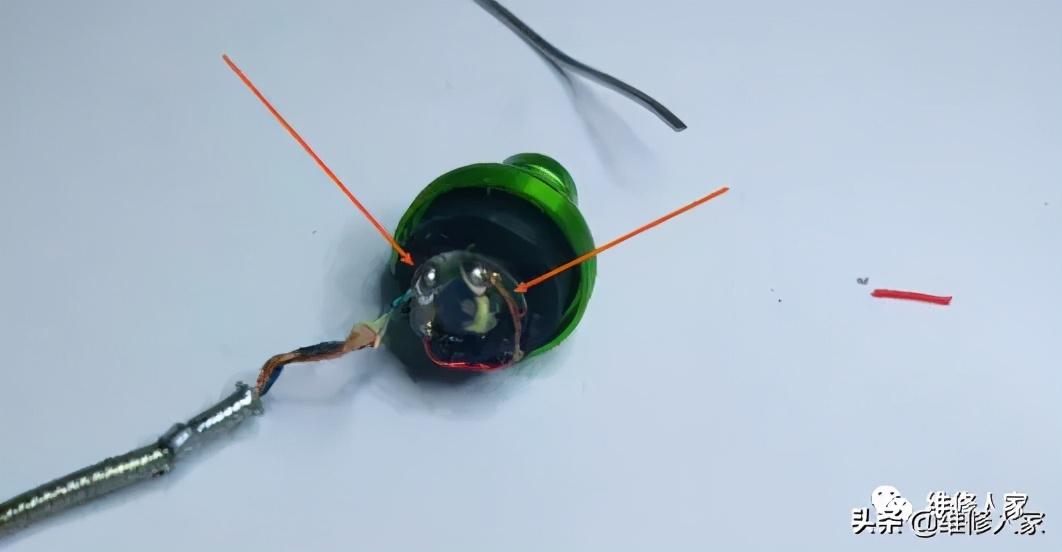

3. Thread the new thread. If you have also removed this black thing, you must plug in the black thing first and then thread it, otherwise it will be difficult to insert it after threading it.
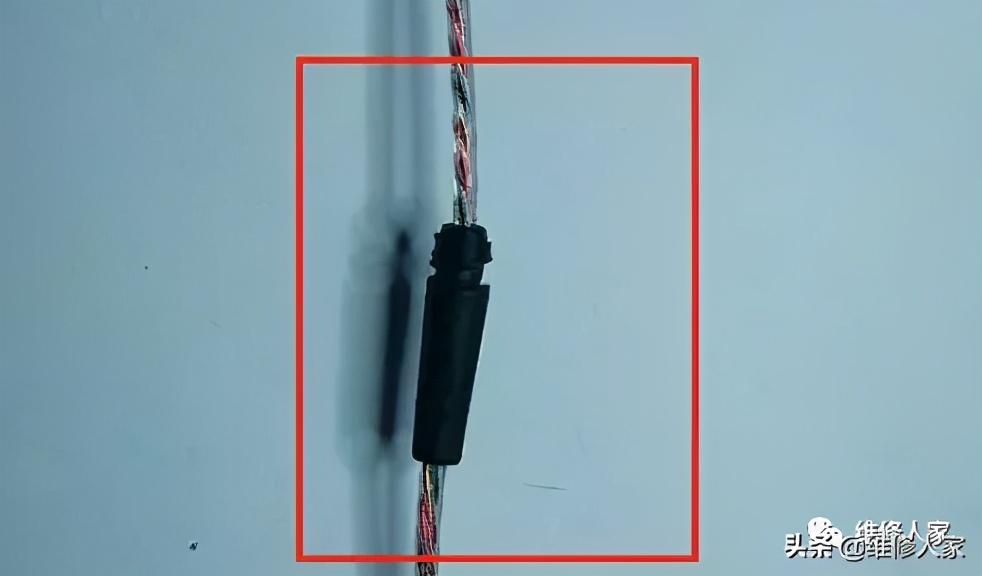

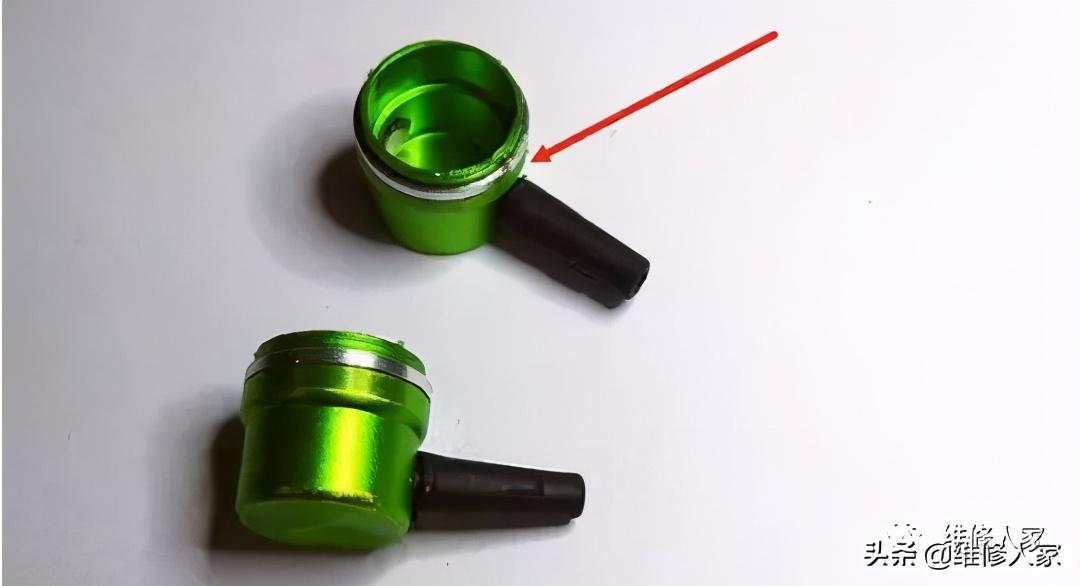

4. If there is limited space after wearing it Metal is better, but if not, it’s best to tie a knot to protect the joint.
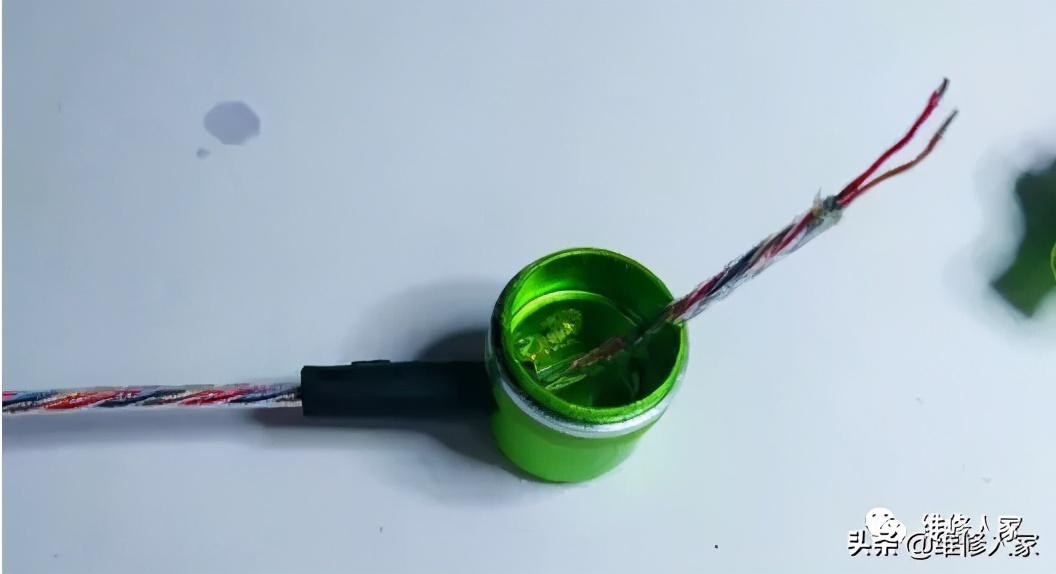

5. Fix the plug, still weld the ground wire first, and then the sound channel wire. Test the position before welding. To make it easier for the other half of the plug to be buckled, this should be taken into consideration when reinstalling.
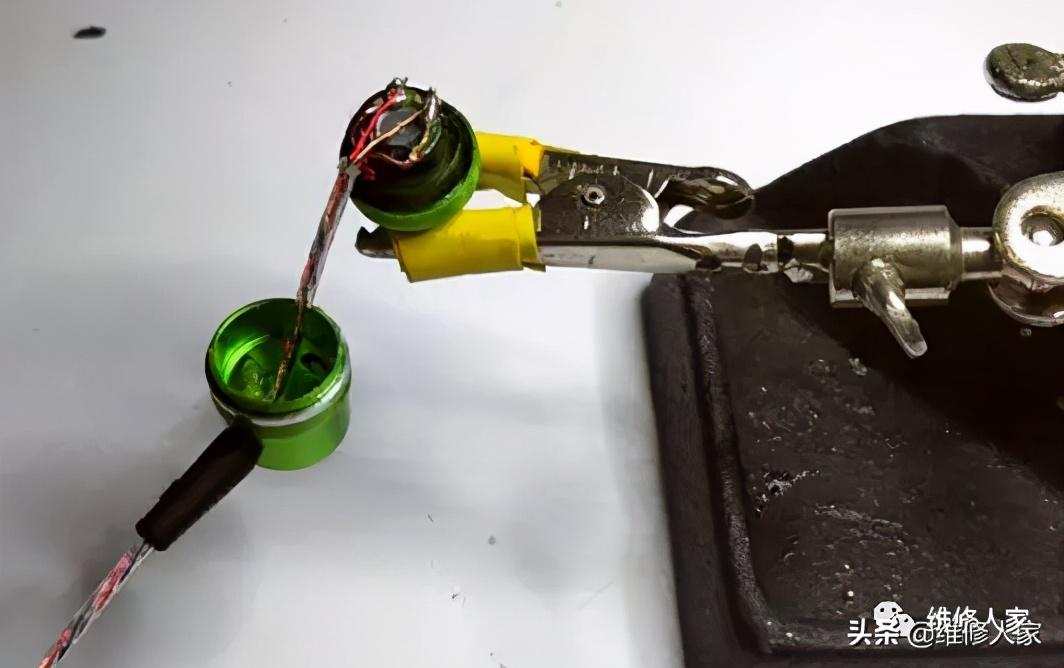

6. After welding, use hot melt glue or other glue to fix the bottom of the other half of the plug.
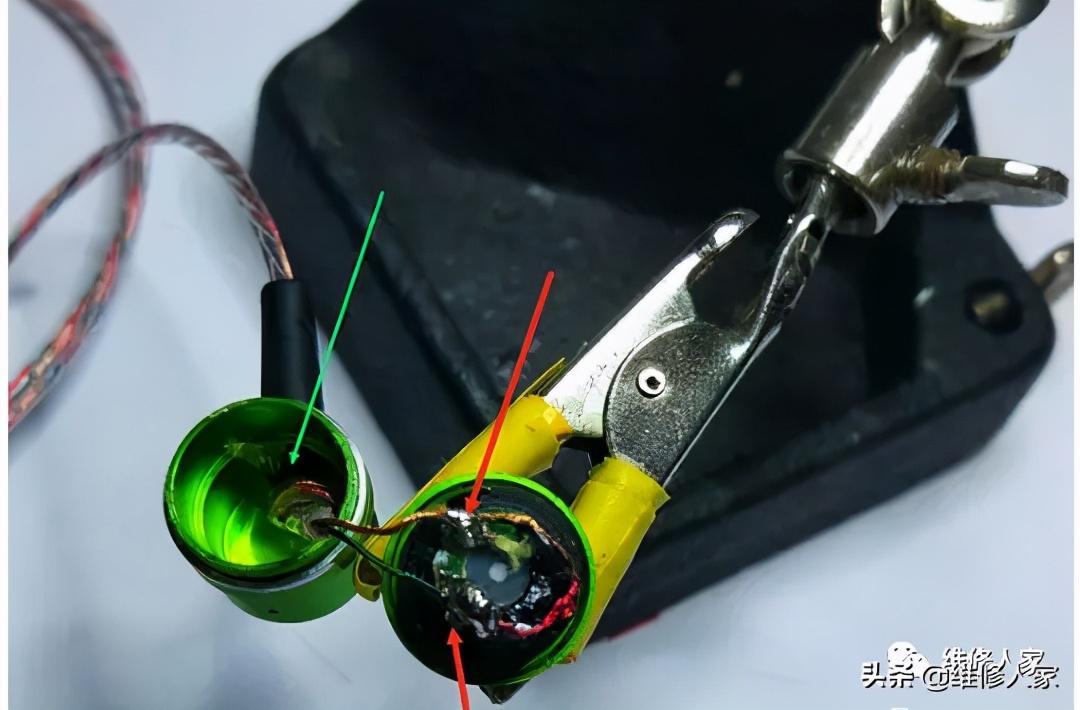
 7. Cover the plug and seal it with 502. The test machine is normal and the repair is perfect.
The above is the detailed content of Illustration of how to connect a broken headphone cable. Recommended wiring principles and welding operations for headphones.. For more information, please follow other related articles on the PHP Chinese website!

Hot AI Tools

Undresser.AI Undress
AI-powered app for creating realistic nude photos

AI Clothes Remover
Online AI tool for removing clothes from photos.

Undress AI Tool
Undress images for free

Clothoff.io
AI clothes remover

Video Face Swap
Swap faces in any video effortlessly with our completely free AI face swap tool!

Hot Article

Hot Tools

Notepad++7.3.1
Easy-to-use and free code editor

SublimeText3 Chinese version
Chinese version, very easy to use

Zend Studio 13.0.1
Powerful PHP integrated development environment

Dreamweaver CS6
Visual web development tools

SublimeText3 Mac version
God-level code editing software (SublimeText3)

Hot Topics
 1386
1386
 52
52
 'LikeTones' Is a Guitar Tuner With No Ads or Upsells
Mar 22, 2025 am 10:16 AM
I've been trying to get back into playing guitar and I've noticed one thing: Both the App Store and Google Play are replete with guitar-tuning apps that are full of either upsells or advertisements. Isn't there any application that helps tune you
 'Find My Device' for Android Now Lets You Track People
Mar 21, 2025 am 10:33 AM
The Android Find My Device app has been updated with a new, user-friendly interface. Now featuring separate "Devices" and "People" tabs, it simplifies location sharing with friends and family, making it easy to coordinate meetups
 TikTok Has a New Security Checkup Dashboard
Mar 21, 2025 am 10:50 AM
TikTok enhances user security with a new built-in Security Checkup tool. This dashboard helps users monitor their account's security status and provides step-by-step instructions to improve their settings. Accessing TikTok's Security Checkup To acces
 How to Take Photos on iOS Without All the Post-Processing Junk
Mar 27, 2025 am 10:40 AM
Your iPhone's camera boasts impressive AI-powered features, including selfie relighting and background object removal. However, this processing can sometimes compromise the accuracy of your photos. Fortunately, several alternatives offer greater co
 It's Not Just You, YouTube Looks Like Crap Right Now
Mar 25, 2025 am 10:21 AM
Usually you can blame a low-quality video stream on a bandwidth slowdown or a poor internet connectio—sites like YouTube will adjust a video's resolution accordingly, so instead of a crisp HD or 4K stream, you end up with a blurry, pixelated mess
 You Can Finally Change Your Default Feed on Threads
Mar 27, 2025 am 10:39 AM
Threads App Update: Choose Your Default Feed and More! Threads finally lets you select a default feed – "Following" or a custom feed – for when you open the app. This means you'll see posts from the accounts you follow, rather than the alg
 Why is Google Maps full of ads?
Apr 09, 2025 am 12:18 AM
The reason why GoogleMaps is full of advertising is that its business model needs to cover operational costs through advertising. 1) Google maintains free services by embedding various forms of ads in -maps. 2) Users can manage ads by identifying results with “sponsored” or “advertising” tags. 3) Tips to improve the user experience include using offline maps and "Explore" functions.
 Trump Just Delayed the TikTok Ban (Again)
Apr 11, 2025 am 10:48 AM
TikTok's US ban is again delayed, this time until June 18th. President Trump announced on Truth Social a new executive order extending the deadline by 75 days, allowing more time for ByteDance to find a US buyer. This marks the second delay of the P


