

How to set startup items in Win11 system


php Xiaobian Youzi will introduce to you how to set startup items in Win11 system. In the Win11 system, setting startup items can allow your computer to automatically run specific programs or applications when you start up, improving usage efficiency. With simple operations, you can easily add or delete startup items and customize your own startup item list. Next, we will introduce in detail how to set startup items in Win11 system to help you better manage and optimize the computer startup process.
In the process of using the computer, we often encounter some software or applications that need to be started automatically when the computer is turned on. This saves us the trouble of opening them manually and improves work efficiency. This article will introduce how to set startup items in Win11 system to help you easily achieve self-starting.
Method 1: Use Task Manager to set startup items
1. First, press the Win X key combination and select "Task Manager" to open the Task Manager.
2. In the Task Manager window, click the "Startup" tab.
3. In the Startup tab, you can see a list of applications that have been set to start at startup. If you want to add a new startup item, click "More Details".
4. In the details window, find the application you want to set to start at startup, right-click it and select "Enable".
5. If you want to disable the startup of an application, right-click it and select "Disable".
Method 2: Use system settings to set startup items
1. First, press the Win I key combination to open the settings of the Win11 system.
2. In the settings window, click the "Apply" option.
3. In the application options, click the "Launch" option on the left.
4. In the startup options, you can see a list of applications that have been set to start at startup. If you want to add a new startup item, click the "Add" button.
5. In the Add Application window, find the application you want to set to start at startup, click it, and then click "Add".
6. If you want to disable an application from starting at startup, find it and click the switch button next to it to close it.
Through the above two methods, you can easily set the startup items of the Win11 system. However, you need to be careful not to set too many applications to start at startup, otherwise it may cause the system to start slowly. Just select apps that you use frequently and need to start automatically when you turn on your computer.
This article introduces two methods on how to set startup items in Win11 system, namely using the task manager and using system settings. Through these methods, you can easily set startup items and improve work efficiency. But remember to choose the applications that are started at startup reasonably to avoid too many startup items that will slow down the system startup. Hope this article is helpful to you!
The above is the detailed content of How to set startup items in Win11 system. For more information, please follow other related articles on the PHP Chinese website!

Hot AI Tools

Undresser.AI Undress
AI-powered app for creating realistic nude photos

AI Clothes Remover
Online AI tool for removing clothes from photos.

Undress AI Tool
Undress images for free

Clothoff.io
AI clothes remover

Video Face Swap
Swap faces in any video effortlessly with our completely free AI face swap tool!

Hot Article
Hot Tools

Notepad++7.3.1
Easy-to-use and free code editor

SublimeText3 Chinese version
Chinese version, very easy to use

Zend Studio 13.0.1
Powerful PHP integrated development environment

Dreamweaver CS6
Visual web development tools

SublimeText3 Mac version
God-level code editing software (SublimeText3)
Hot Topics
 1393
1393
 52
37
110
52
37
110

 Win11 24H2 will adjust security rules and NAS user access may fail
Jun 25, 2024 pm 05:23 PM
Win11 24H2 will adjust security rules and NAS user access may fail
Jun 25, 2024 pm 05:23 PM
Digital enthusiasts all know that Microsoft has released a preview version of Windows 1124H2, and the official version of Windows 1124H2 will be coming soon. This is a very important version update, and many friends are paying close attention to it. Of course, the most noteworthy thing about Windows 1124H2 is the new features and improvements in AI. It is said that Microsoft will deeply integrate Copliot. However, AI is not the subject of this article. The subject of this article is to introduce readers to two new security rule changes in the Windows 1124H2 version, which may affect some NAS users. Specifically, in the Windows 1124H2 version, Microsoft will make changes to two important network access rules:
 What should I do if the win11 dual-screen calendar does not exist on the second monitor?
Jun 12, 2024 pm 05:47 PM
What should I do if the win11 dual-screen calendar does not exist on the second monitor?
Jun 12, 2024 pm 05:47 PM
An important tool for organizing your daily work and routine in Windows 11 is the display of time and date in the taskbar. This feature is usually located in the lower right corner of the screen and gives you instant access to the time and date. By clicking this area, you can bring up your calendar, making it easier to check upcoming appointments and dates without having to open a separate app. However, if you use multiple monitors, you may run into issues with this feature. Specifically, while the clock and date appear on the taskbar on all connected monitors, the ability to click the date and time on a second monitor to display the calendar is unavailable. As of now, this feature only works on the main display - it's unlike Windows 10, where clicking on any
 Is Win11 LTSC not suitable for individual users at all? Analysis of the advantages and disadvantages of the LTSC version
Jun 25, 2024 pm 10:35 PM
Is Win11 LTSC not suitable for individual users at all? Analysis of the advantages and disadvantages of the LTSC version
Jun 25, 2024 pm 10:35 PM
Microsoft provides multiple versions of Windows systems, each targeting different usage scenarios. In addition to the Home, Professional, Education and Enterprise editions, there is also a special LTSC edition designed for the specific needs of large businesses and organizations. Although Windows 11 LTSC has become quite popular recently, it lacks commonly used functions and is not suitable for individual users. And this version has not yet been officially launched, and is expected to be released around September in the second half of 2024. Interesting thing: From Windows 1.0 to 11, the evolution of Windows versions. What is Windows 11 LTSC? Windows11LTSC is a feature of Windows11 operating system
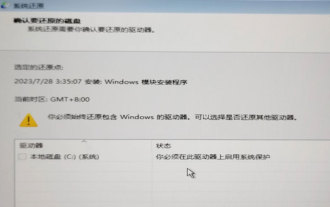 System Restore prompts that you must enable system protection on this drive
Jun 19, 2024 pm 12:23 PM
System Restore prompts that you must enable system protection on this drive
Jun 19, 2024 pm 12:23 PM
The computer has a restore point, and when the system is restored, it prompts "You must enable system protection on this drive." This usually means that the system protection function is not turned on. System protection is a feature provided by the Windows operating system that can create system restore points to back up system files and settings. That way, if something goes wrong, you can revert to a previous state. When the system fails and you cannot enter the desktop to start it, you can only try the following method: Troubleshooting-Advanced Options-Command Prompt Command 1 netstartvssrstrui.exe/offline:C:\windows=active Command 2 cd%windir%\system32 \configrenSYSTEMsy
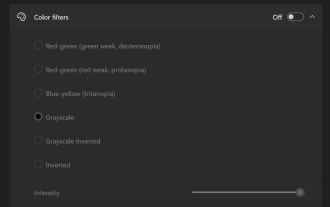 Is win11 24h2 worth installing? Comparison of the differences between Win11 24H2 and 23H2
Jun 11, 2024 pm 03:17 PM
Is win11 24h2 worth installing? Comparison of the differences between Win11 24H2 and 23H2
Jun 11, 2024 pm 03:17 PM
The win1124h2 version is a version that many users are looking forward to. Now that the small update of Win1124H2 has been completed, it will welcome a larger Moment update. However, many users are asking whether win1124h2 is easy to use? What is the difference between Win1124H2 and 23H2? Let this site carefully introduce to users the differences between Win1124H2 and 23H2. What is the difference between Win1124H2 and 23H2? The Windows 1124H2 update brings many adjustments and new features to the Settings application, and accelerates the migration of Control Panel-related functions/features. Improved accessibility Windows 1124H2 includes several accessibility improvements: including color filters
 What should I do if my win11 wallpaper is locked and cannot be changed? What to do if my computer wallpaper is locked and cannot be changed?
Jun 09, 2024 pm 08:58 PM
What should I do if my win11 wallpaper is locked and cannot be changed? What to do if my computer wallpaper is locked and cannot be changed?
Jun 09, 2024 pm 08:58 PM
What should I do if my win11 wallpaper is locked and cannot be changed? Users can directly click on this computer, then click on the search box and directly enter %ProgramData%MicrosoftWindows to perform the operation. Now, let this website give users a detailed introduction to the detailed explanation of Win11 wallpaper being locked and unable to be changed. The win11 wallpaper is locked and cannot be changed. Detailed explanation method one: 1. Double-click the mouse to enter [This PC]. 2. After entering, enter a string of codes like [%ProgramData%MicrosoftWindows] in the search box at the top of the page, and then click Enter. 3. Then find [systemdata] in the folder below and click in
 Quick solution to the unresponsiveness of clicking desktop icons in Windows 11
Jun 05, 2024 pm 01:03 PM
Quick solution to the unresponsiveness of clicking desktop icons in Windows 11
Jun 05, 2024 pm 01:03 PM
Nowadays, more and more people are using the win11 system. This system will inevitably have some problems. Recently, many users have encountered the problem of no response when clicking desktop icons in win11. Let’s take a look at the specific solutions! Method 1 1. On the Windows 10 desktop, we right-click the Start button in the lower left corner, and then select the "Run" menu item in the pop-up menu. 2. The Windows 10 run window will open, enter the command regedit in the window, and then click the OK button. 3. The Registry Editor window will open. In the window, we locate Computer\HKEY_CURRENT_USER\Software\Microsoft\Windows\
 Several most effective solutions to the most effective solutions for win11 systems that often jump back to the desktop for no reason
Jun 05, 2024 pm 04:45 PM
Several most effective solutions to the most effective solutions for win11 systems that often jump back to the desktop for no reason
Jun 05, 2024 pm 04:45 PM
Some background programs may pop you out of the current app while trying to gain focus. This is usually caused by some applications that need to be updated regularly or prompt information. There are some other reasons. So how to solve it? Let’s take a look below! 1. Check background programs and use the Ctrl+Shift+Esc shortcut keys to immediately open the Task Manager. Carefully review the list of currently running applications and background processes, focusing on programs that are not system processes and are unfamiliar to you. If you find any suspicious or unwanted program, right-click on it and select "End Task" to close the program. 2. Perform a system update check and install all available updates, including driver and system security updates. By clicking the Start button and then selecting the Settings icon (
