
php editor Baicao brings you a solution to the problem of Win11 account being deactivated. When encountering this situation, many users may feel confused and anxious and don't know how to solve it. This article will introduce in detail how to cancel the prompt that the Win11 account is deactivated, help users solve this problem, and restore your system to normal use. Whether you are encountering this problem for the first time or you have tried a few methods without resolution, this article will provide you with detailed solutions. Let’s take a look!
Win11 prompts that your account has been deactivated?
1. First of all, don’t panic and click the mouse to start.
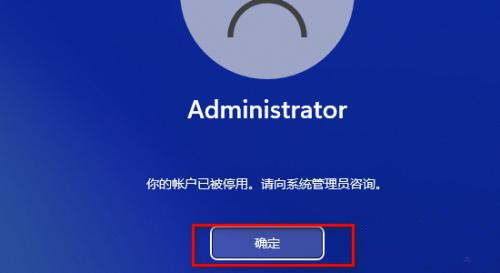
#2. After clicking OK, notice that there will be a few more buttons in the lower right corner of the system. Click to shut down.

3. After shutting down, of course you have to turn it on. There are tricks to turning it on. When the grid icon appears when turning on the phone, press the power button immediately to force it to shut down. This interface must be used. Ah, you need to do this for more than three consecutive times.

#4. Wait until the prompt "Preparing for automatic repair" appears. When this interface appears, you cannot shut down the computer and wait for a while for it to automatically repair.

#5. It is normal that it cannot be repaired automatically, but it will jump to another interface. At this time, select the advanced option.

#6. Select Troubleshooting.
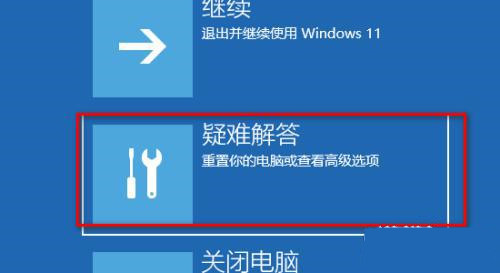
#7. Select the advanced option in the troubleshooter.
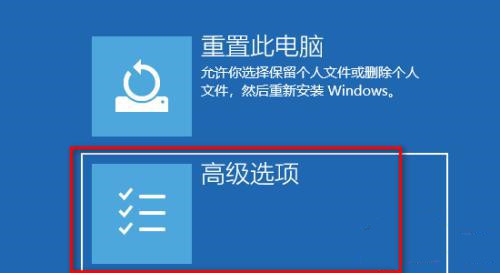
#8. In the advanced options interface, 6 options will appear. Here you need to pay attention to select Startup Settings.
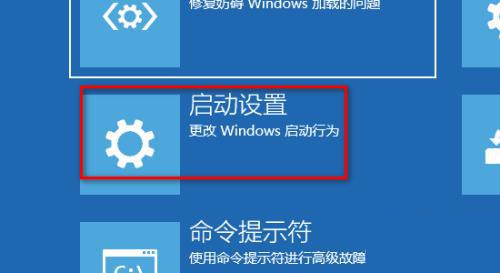
#9. Don’t worry about the startup settings interface and just find Restart in the lower right corner.

#10. After restarting, you need to pay attention to the startup interface settings. You need to press F4 on the keyboard to enter safe mode.

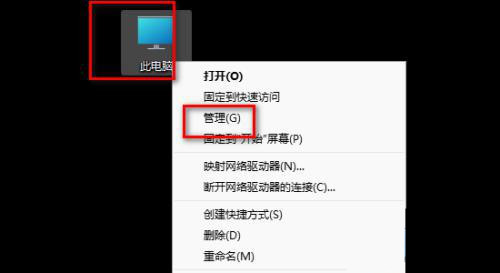
#11. Enter safe mode, find the computer icon on the desktop, right-click the mouse and select Manage and click to enter.
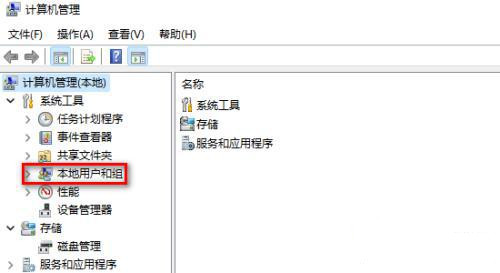
#12. Find local users and groups in the computer management interface and click on them.
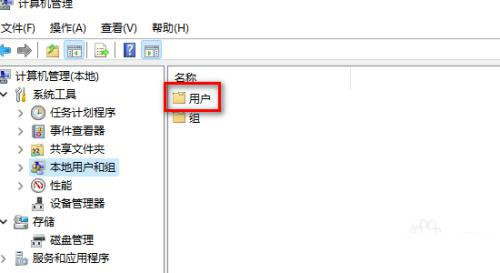
#13. Find it on the right and right-click it.
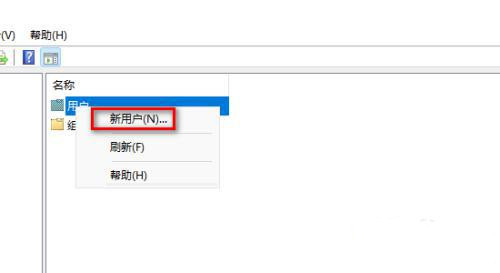
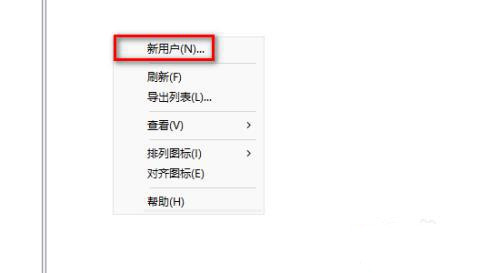
#14. Right-click the mouse in the blank space and select New User.
#15. Create a user here without setting a password and click Create directly.
#16. Restart the computer after creating it.
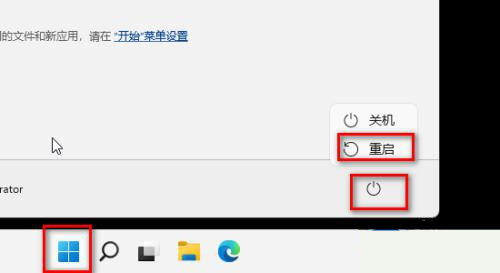
#17. It is normal that the desktop will be rearranged after restarting. Just wait.

#18. Click Accept directly on the privacy selection interface.

19. Enter the new desktop and open the Recycle Bin.
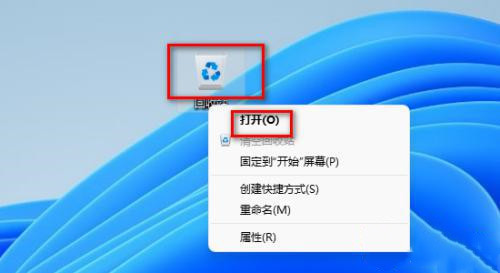
#20. Find This Computer on the left side of the Recycle Bin, right-click it and select Show more options.
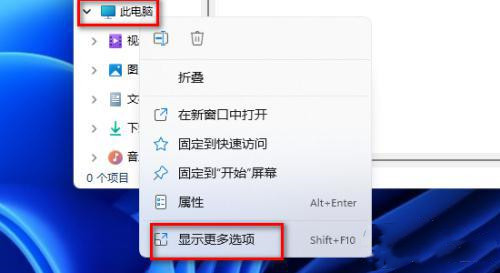
#21. In the pop-up interface with more options, select Manage.

#22. Find local users and groups, click on them and then click on users.
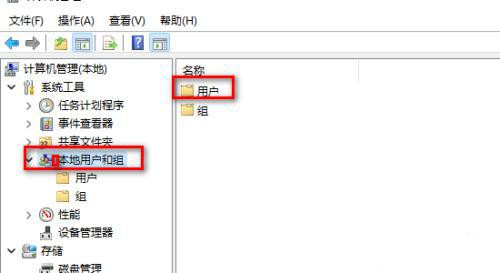
#23. Find the user name you used before and double-click it. For example, the user name I used here was administrator.
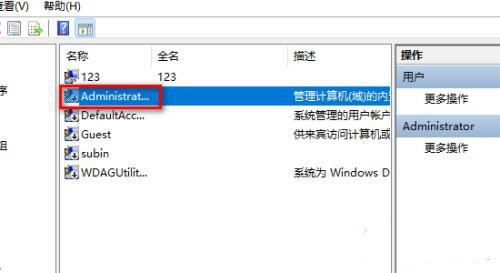
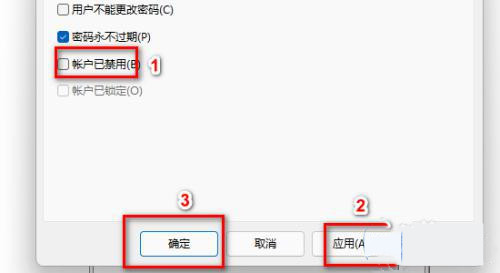
#24. In the username attribute you selected, uncheck the box in front of "This account is disabled".
#25. After finding the user you just created, double-click the mouse to disable it. For example, the user I just created is 123.
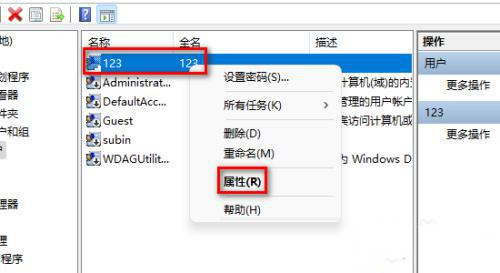
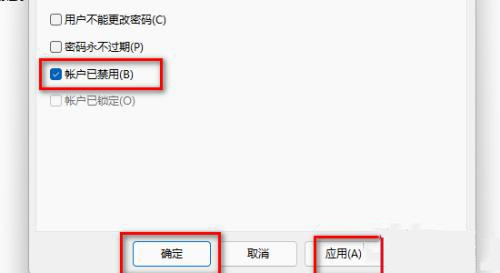
26. Restart the computer and you will automatically log in as your previous user.
The above is the detailed content of How to cancel Win11 prompts that your account has been deactivated? (solved). For more information, please follow other related articles on the PHP Chinese website!
 There is no WLAN option in win11
 How to skip online activation in win11
 Win11 skips the tutorial to log in to Microsoft account
 How to open win11 control panel
 Introduction to win11 screenshot shortcut keys
 Windows 11 my computer transfer to the desktop tutorial
 Solution to the problem of downloading software and installing it in win11
 How to skip network connection during win11 installation


