

Deepin Linux Installation WiFi and Deepin Linux Installation Guide

php editor Xiaoxin will take you to explore the Linux operating system in depth, introduce you in detail how to install WiFi in the Linux system, and provide a comprehensive and in-depth Linux installation guide. Whether you are new to Linux or an experienced user, we will provide you with clear and easy-to-understand steps and techniques to help you easily complete the WiFi installation and solve any problems you may encounter. Let's learn more about Linux and master its powerful features!
Deepin Linux installation WiFi
1. Check the network card model
In Deepin Linux, you first need to check the network card model to determine the need For the installed driver, you can check the network card model through the following command:
`lspci | grep -i net`
2. Download the driver
According to the network card model, in the official Download the corresponding driver from the website or open source community.
3. Install the driver
Unzip the downloaded driver, enter the decompressed directory, execute the installation script or binary file, and follow the prompts to complete the driver installation.
4. Configure the network connection
After installing the driver, you can use the network management tool or command line tool to configure the network connection and connect to the WiFi network.
Deepin Linux installation steps
1. Download the Deepin Linux image file
Download the Deepin Linux image file from the official website or open source community.
2. Make a boot disk
Use tool software to make a boot disk from the downloaded image file, such as UltraISO software.
3. Set the BIOS startup item
Insert the prepared startup disk into the computer, restart the computer, enter the BIOS settings startup item, and select to boot from the startup disk.
4. Install Deepin Linux
Follow the prompts to complete the installation of Deepin Linux, including selecting partitions, setting user names and passwords, etc.
LINUX Little Knowledge
Linux is an open source operating system. Due to its openness and freedom, it is widely used in servers, embedded devices, personal computers and other fields. The following is a Linux Trivia: The founder of Linux is Linus Torvalds, who first released the Linux kernel in 1991 and has now become one of the largest open source operating systems in the world.
The above is an introduction to the specific steps of deepin Linux installation WiFi and deepin Linux installation. I hope this article can help you and let you better use the deepin Linux operating system. If you have any questions or suggestions, please Contact us at any time to share a little Linux knowledge. I hope you can better understand the history and background of this open source operating system.
The above is the detailed content of Deepin Linux Installation WiFi and Deepin Linux Installation Guide. For more information, please follow other related articles on the PHP Chinese website!

Hot AI Tools

Undresser.AI Undress
AI-powered app for creating realistic nude photos

AI Clothes Remover
Online AI tool for removing clothes from photos.

Undress AI Tool
Undress images for free

Clothoff.io
AI clothes remover

Video Face Swap
Swap faces in any video effortlessly with our completely free AI face swap tool!

Hot Article
Hot Tools

Notepad++7.3.1
Easy-to-use and free code editor

SublimeText3 Chinese version
Chinese version, very easy to use

Zend Studio 13.0.1
Powerful PHP integrated development environment

Dreamweaver CS6
Visual web development tools

SublimeText3 Mac version
God-level code editing software (SublimeText3)
Hot Topics
 1386
1386
 52
52

 How to adjust the font size on Redmi Note13RPro?
May 07, 2024 pm 06:34 PM
How to adjust the font size on Redmi Note13RPro?
May 07, 2024 pm 06:34 PM
Do not change the meaning of the original content, fine-tune the content, rewrite the content, do not continue. Redmi Note13RPro not only has excellent performance, but also has an even better user experience. In order to give everyone a more comfortable experience, Redmi Note13RPro is equipped with a font adjustment function to allow users to Ability to adjust fonts for your phone. If you want to know how to adjust the font size of Redmi Note13R Pro, then take a look. How to adjust the font size on Redmi Note13RPro? 1. Open the Settings app. 2. Scroll to the bottom and select "Display." 3. Click "Text Size". 4. On this screen, you can adjust the font size by dragging the slider or select a preset font size. 5. After the adjustment is completed, press "OK" to save
 MSI motherboard boot logo
May 08, 2024 pm 02:20 PM
MSI motherboard boot logo
May 08, 2024 pm 02:20 PM
How to cancel the MSI motherboard icon when booting 1. Press the DEL key when booting to enter the BIOS. Generally, in the "Advanced Features" item, you can find the words MSI motherboard LOGO screen. Select DISABLED, save and exit. There will no longer be this MSI motherboard LOGO screen when you turn on the computer in the future. MSI motherboard refers to the motherboard brand developed by MSI (MSI Technology Company). 2. The logo displayed when the computer is turned on is basically that of the motherboard manufacturer. You can set QUICKPOST to DISENABLE in the BIOS, so that the logo will generally no longer be displayed. It will display computer configuration-related information and give you more details. 3. First, teach you how to flash the BIOS in Windows environment. First: Go online
 How to connect Redmi Note13RPro to the computer?
May 09, 2024 pm 06:52 PM
How to connect Redmi Note13RPro to the computer?
May 09, 2024 pm 06:52 PM
The phone Redmi Note13RPro has been very popular recently. Many consumers have purchased this phone. However, many users are using this phone for the first time, so they don’t know how to connect the Redmi Note13RPro to the computer. In this regard, the editor is here to explain to you Detailed tutorial introduction is provided. How to connect Redmi Note13RPro to the computer? 1. Use a USB data cable to connect the Redmi phone to the USB interface of the computer. 2. Open the phone settings, click Options, and turn on USB debugging. 3. Open the device manager on your computer and find the mobile device option. 4. Right-click the mobile device, select Update Driver, and then select Automatically search for updated drivers. 5. If the computer does not automatically search for the driver,
 How to extract text from pictures on Redmi Note13RPro?
May 08, 2024 pm 10:00 PM
How to extract text from pictures on Redmi Note13RPro?
May 08, 2024 pm 10:00 PM
The Redmi Note13RPro mobile phone integrates a number of smart tools in terms of software functions. Among them, quickly and accurately extracting text content from pictures is one of them. The following editor will introduce to you how Redmi Note13RPro extracts text from pictures. How to extract text from pictures on Redmi Note13RPro? Use the Xiaomi QR code scanning function, open the QR code scanning application on your phone, click the picture icon, select a picture, and then click the "Recognize text" option on the right to successfully extract the text in the picture. Operate through mobile phone album. Find the picture for which text needs to be extracted in the mobile phone album, click "More" below the picture, and select "Extract Text". After successful recognition, you can copy or save the text as needed. Use WeChat mini programs. Open micro
 A complete guide to all levels of 'Whole Life'
May 07, 2024 pm 06:31 PM
A complete guide to all levels of 'Whole Life'
May 07, 2024 pm 06:31 PM
Entire Huoba is a very fun casual puzzle game that everyone can experience on multiple platforms! The game provides countless exciting levels waiting to be unlocked. Each level is full of novelty and challenges, allowing you to experience an interesting adventure of answering questions and unlock new game content. So how to clear the entire level of Huoba? Today I bring you a complete guide to all levels of "Whole Life". If you encounter any problems in passing the level, you can refer to it! "The Whole Life" complete guide to all levels of "The Whole Life" The complete guide to all levels of "The Whole Life" Help her to watch the New Year's Eve, help the little sister to identify the scumbag wolf, and the grandmother helps the little girl escape from danger for outdoor adventure, pretending not to see Ah Piao and transforming back The humanoid helped the orangutan to become a humanoid. Someone in the back seat stayed calm and dealt with the female ghost. The night-shift taxi kept calm and dealt with the female ghost.
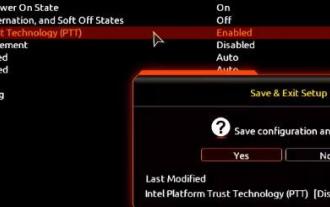
 How to enable tpm2.0 in win11_How to enable tpm2.0 in win11
May 08, 2024 pm 06:10 PM
How to enable tpm2.0 in win11_How to enable tpm2.0 in win11
May 08, 2024 pm 06:10 PM
1. Gigabyte motherboard 1. First, we restart the computer and use the keyboard [DEL] to enter the BIOS settings when restarting. 2. Find and enter the [Settings] tab above. 3. Then find and enter [Miscellaneous] under settings. 4. Set [Intel Platform Trust Technology (PTT)] to [Enabled]. 5. After the settings are completed, use the keyboard [F10] to save, and then click [YES] to exit. 2. ASUS motherboard 1. First restart the computer and continuously tap [del] on the keyboard to enter the bios settings when booting. 2. Click [AdvancedMode] or press [F7] to find [A
 What should I do if my graphics card is blackened by flashing the BIOS?
May 10, 2024 am 12:09 AM
What should I do if my graphics card is blackened by flashing the BIOS?
May 10, 2024 am 12:09 AM
Flashing the BIOS of the graphics card refers to the situation where an error occurs when modifying the BIOS and the graphics card cannot start. Solutions include: 1. Power-off method: release the residual power and then restart; 2. Short-circuit method: short-circuit the short-circuit point on the PCB; 3. Restore the BIOS to default values; 4. Use third-party tools to refresh the BIOS; 5. Contact technology Support seeking help. Be careful to back up the original BIOS, use a compatible version, and proceed with caution to avoid damage.
 How to set bios in win11_Detailed method of setting bios in win11
May 07, 2024 pm 12:30 PM
How to set bios in win11_Detailed method of setting bios in win11
May 07, 2024 pm 12:30 PM
1. After entering the system, restart the computer and press the shortcut key when restarting to set the bios. 2. When the startup logo appears on your computer, press the shortcut key to enter the bios and start setting up directly. 3. This shortcut key is determined according to the user's computer brand, and not every one is the same. 4. Here you can see the operation shortcut keys corresponding to each brand, and you can use them according to your own model.
