
 Computer Tutorials
Computer Knowledge
How to set the first driver for Gigabyte motherboard USB disk
Computer Tutorials
Computer Knowledge
How to set the first driver for Gigabyte motherboard USB disk
How to set the first driver for Gigabyte motherboard USB disk

php Editor Banana will introduce you to the method of setting the U disk as the first driver for Gigabyte motherboard. When the computer starts, the hard disk is usually selected as the first drive by default, but sometimes we need to boot the system or install the operating system through a USB flash drive. To set the USB flash drive as the first drive, you can enter the BIOS setup interface of the Gigabyte motherboard, find the startup options, set the USB flash drive as the first boot device, and save the settings. In this way, the computer will give priority to booting from the USB flash drive to meet your needs. Below, let us learn more about the specific setup steps!
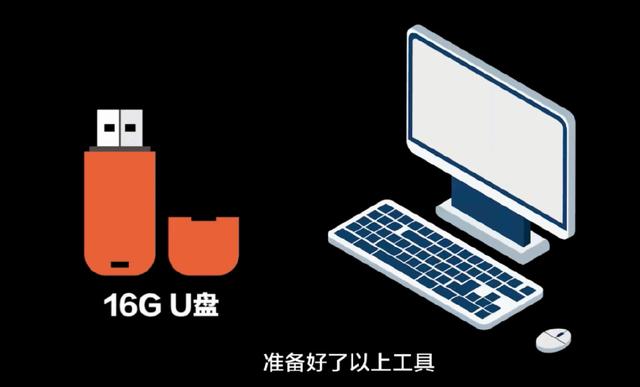
Because this can make the system installation faster and requires a computer that can be used normally and has access to the Internet
We have prepared the system and required files, and now we can jump Go to the installation steps.
The next step is to prepare the software tools. We need to use two software. The first is the win10 system image and the second is the pe tool.

The pe tool we demonstrate here is Lao Baicai. This pe tool does not have any bundled rogue software
Open the official website, select at the top of the official website, especially scroll down to find the address to download the software and open this local link
In this case, the two software After the download is completed, a download pop-up window will also pop up. Using training download can speed up the download speed.
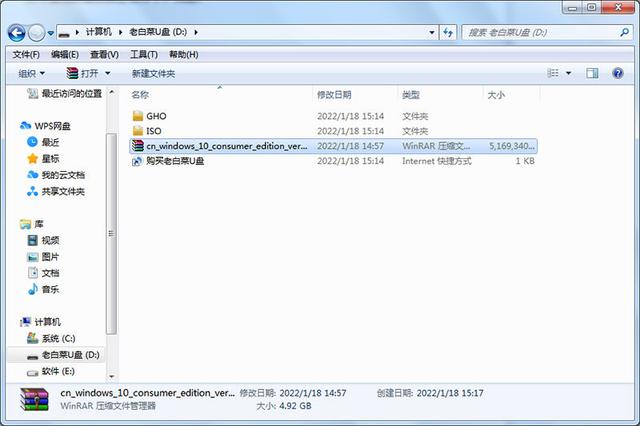
Unzip the downloaded system software, open the folder and then open the program, then insert the USB disk into the computer and click New Create
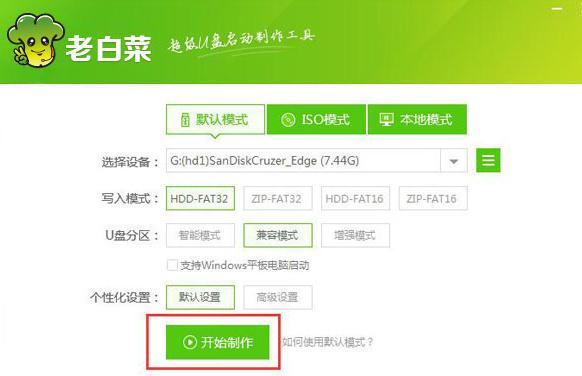
It should be noted here that if it is a blank USB disk, you can ignore if u If there is important information in the disk, you must save it
The PE tool will delete all contents in the U disk. After confirmation, wait for the progress bar to complete. The appearance of this interface indicates that the USB flash drive is successfully created. Copy the downloaded Win10 system files to the USB flash drive.
Theoretically we can install the system directly, but there are some special motherboards that will have no network card driver after installing the system
So it is best to choose your own motherboard model Download the network card driver from the official website and copy it to the USB flash drive to ensure that you will not be embarrassed when such a problem occurs. Install the system and officially start inserting the USB flash drive into the computer where you need to install the system. You need to pay attention to inserting the USB flash drive as much as possible because it is b3 0. The interface is blue
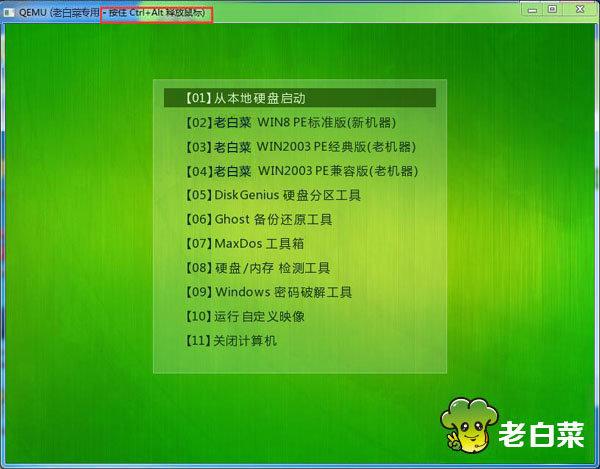
or the red interface will be faster. I have found a hotkey startup case for major motherboards. You can refer to it.
I will give it here. Let's demonstrate the startup methods of Gigabyte, ASUS, and MSI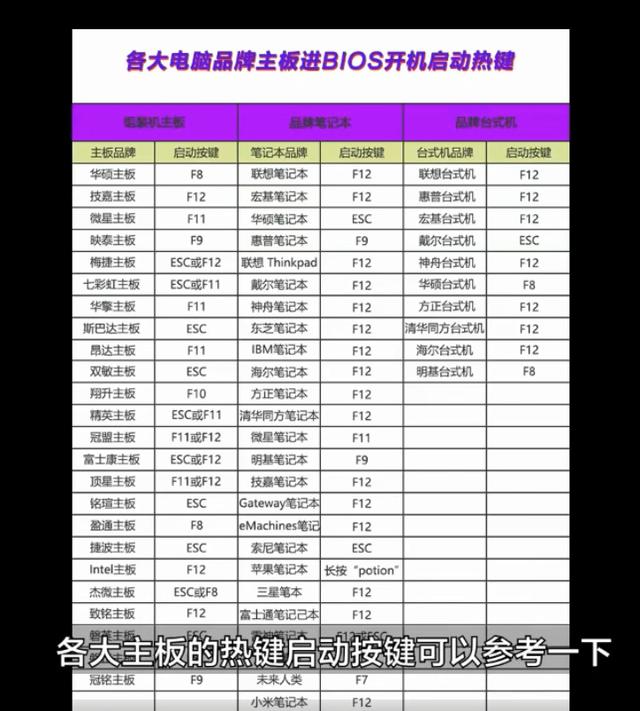
The first Gigabyte motherboard is powered on, and continuous clicks on the F12 button on the keyboard
This is the startup interface. The second ASUS motherboard is powered on, and continuous clicks on the keyboard are The f8 button above is the startup image of the ASUS motherboard.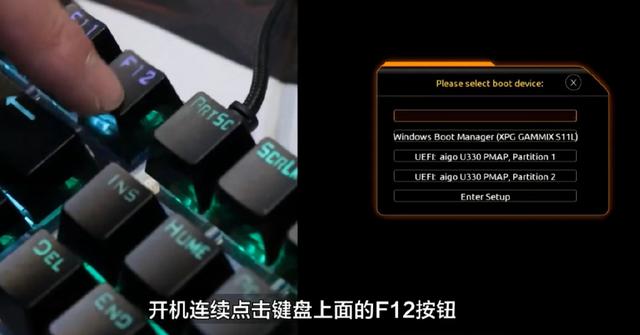 When the third MSI motherboard is turned on, click the f141 button on the keyboard continuously. This is the startup image of the MSI motherboard.
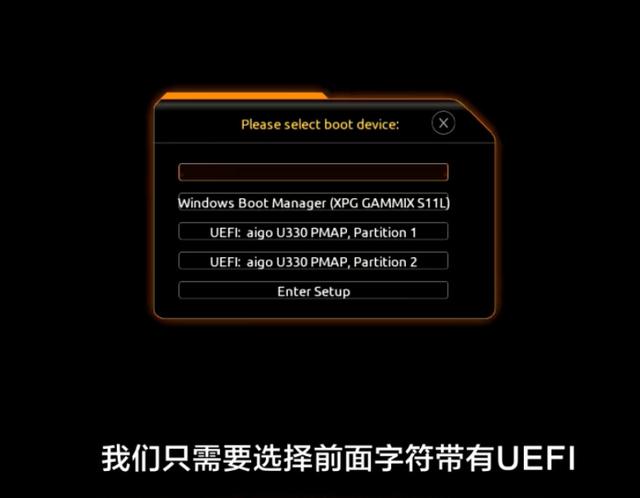
 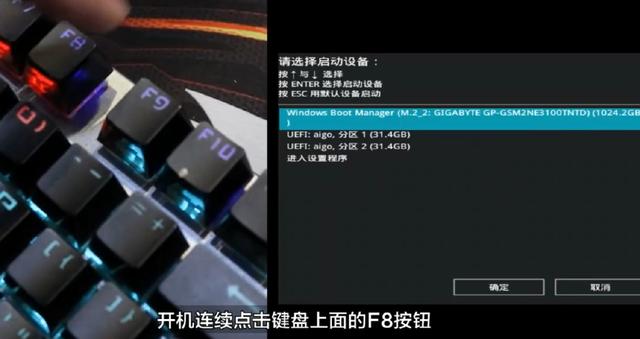 There may be many choices. We only need to select the characters in the front with u e f i. The letters in the middle represent the brand name of the U disk.
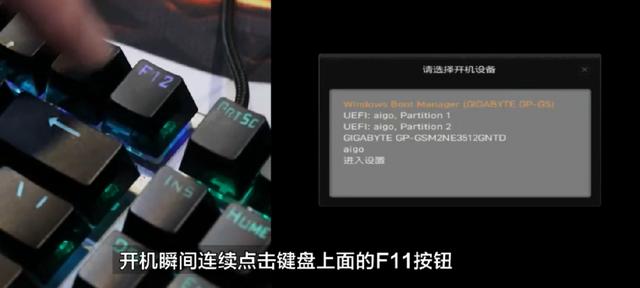
with a number 2 in the suffix is the U disk we need to select. Then click Enter. At this time, we need to wait for the progress. Enter the U disk tool
This process may take 1-2 minutes. There are two things to note after only the U disk. First, if it is a new computer installation For the system, you need to partition the hard disk first
, which is what we often call the c d e f disk, and then you can install the system. Secondly, if you install the system on an old computer, partitioning is generally not required.
If you want Partitions will be used only after deleting all the things in the hard disk, so students in some districts can skip this step
Partition Open the desktop low-level hard disk partition tool, select the hard disk that needs to be partitioned, open the quick partition Here you need to pay attention
winten system partition list type is selected as g u id format. The number of installments below is allocated according to your own hard disk size and preferences. Select the partition and set the system disk size.
Generally set to about 100-150g and then the following Select 4096 for the partition and confirm
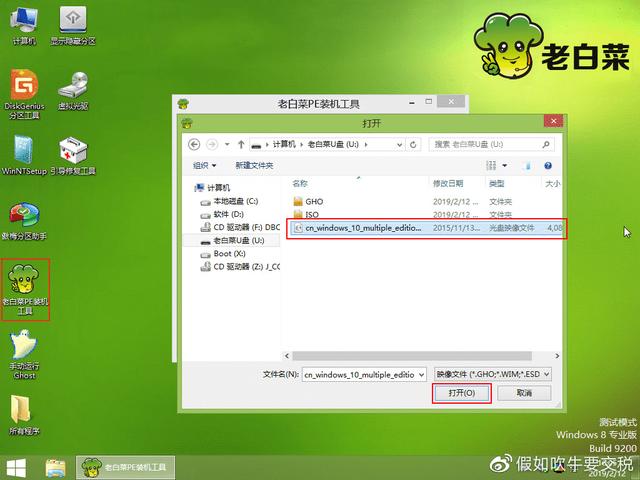
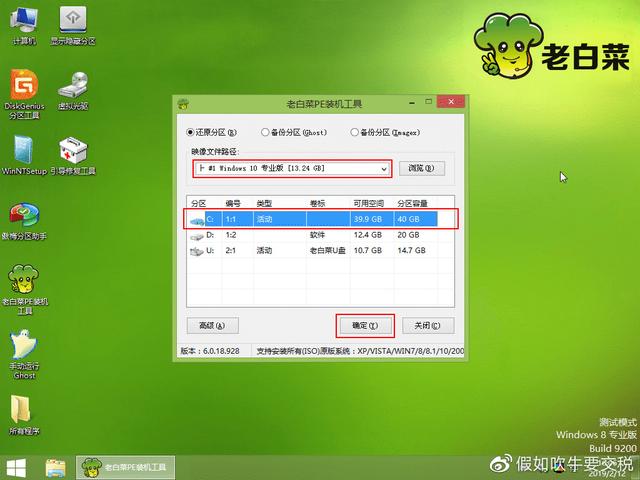
Close the software in the blocked area and start installing the system. Open the red icon on the desktop e Uncheck the option to call the universal driver and click OK
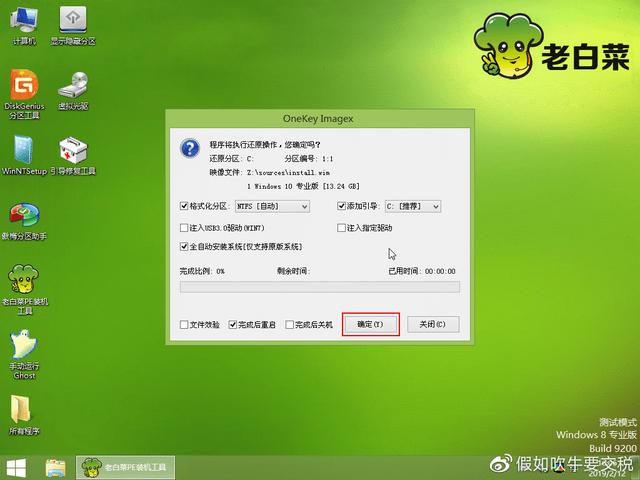
Wait for 1-3 minutes and then click Restart the computer after the recovery is complete. When the computer screen goes black, remove the USB disk from the computer
The above is the detailed content of How to set the first driver for Gigabyte motherboard USB disk. For more information, please follow other related articles on the PHP Chinese website!

Hot AI Tools

Undresser.AI Undress
AI-powered app for creating realistic nude photos

AI Clothes Remover
Online AI tool for removing clothes from photos.

Undress AI Tool
Undress images for free

Clothoff.io
AI clothes remover

AI Hentai Generator
Generate AI Hentai for free.

Hot Article
Hot Tools

Notepad++7.3.1
Easy-to-use and free code editor

SublimeText3 Chinese version
Chinese version, very easy to use

Zend Studio 13.0.1
Powerful PHP integrated development environment

Dreamweaver CS6
Visual web development tools

SublimeText3 Mac version
God-level code editing software (SublimeText3)
Hot Topics
 1371
1371
 52
52

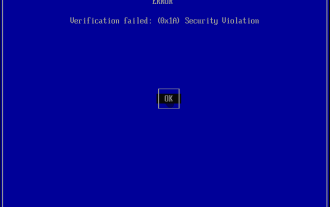 Ventoy secure boot settingsSecure Boot
Jun 18, 2024 pm 09:00 PM
Ventoy secure boot settingsSecure Boot
Jun 18, 2024 pm 09:00 PM
Ventoy is a USB boot tool that can directly boot ISO/WIM/IMG/VHD(x)/EFI and other types of files in the USB flash drive. It is very easy to use. Laptops have secure boot turned on by default. If they are not turned off or cannot be turned off, they cannot be booted from a USB device. Ventoy also supports secure boot. The principle is to inject a GRUB installation certificate into the current computer. As long as your computer After being injected once, any USB disk PE booted based on grub can pass. The official description of Ventoy is a GIF image. The playback speed is too fast and you may not be able to remember it. The editor has divided the GIF image to make it easier to understand. Ventoy secure boot has EnrollKey and Enro
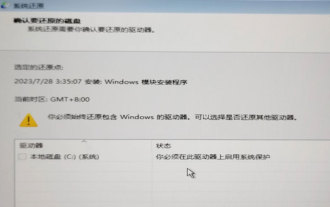 System Restore prompts that you must enable system protection on this drive
Jun 19, 2024 pm 12:23 PM
System Restore prompts that you must enable system protection on this drive
Jun 19, 2024 pm 12:23 PM
The computer has a restore point, and when the system is restored, it prompts "You must enable system protection on this drive." This usually means that the system protection function is not turned on. System protection is a feature provided by the Windows operating system that can create system restore points to back up system files and settings. That way, if something goes wrong, you can revert to a previous state. When the system fails and you cannot enter the desktop to start it, you can only try the following method: Troubleshooting-Advanced Options-Command Prompt Command 1 netstartvssrstrui.exe/offline:C:\windows=active Command 2 cd%windir%\system32 \configrenSYSTEMsy
 What should I do if win10 does not switch users? Win10 login interface does not have the option to switch users. Solution
Jun 25, 2024 pm 05:21 PM
What should I do if win10 does not switch users? Win10 login interface does not have the option to switch users. Solution
Jun 25, 2024 pm 05:21 PM
A problem that Windows 10 users may encounter is that they cannot find the switch user option on the login interface. So what should I do if there is no switch user option on the win10 login interface? Let this site give users a detailed explanation of the problem of not switching user options in the win10 login interface. Detailed solution to the problem of switching user options on the Win10 login interface: Check user account settings: First, make sure you have multiple user accounts on your computer and that these accounts are enabled. You can check and enable the account by following these steps: a. Press Win+I keys to open Settings and select "Accounts". b. Select "Family & Others" or &ld in the left navigation bar
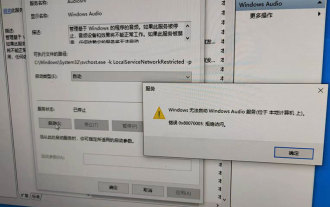 Windows cannot start the Windows Audio service Error 0x80070005
Jun 19, 2024 pm 01:08 PM
Windows cannot start the Windows Audio service Error 0x80070005
Jun 19, 2024 pm 01:08 PM
The guy's computer appears: Windows cannot start the WindowsAudio service (located on the local computer). Error 0x8007005: Access denied. This situation is usually caused by user permissions. You can try the following methods to fix it. Method 1: Modify the registry to add permissions through batch processing, create a new text document on the desktop, save it as .bat, and right-click the administrator to go far. Echo==========================EchoProcessingRegistryPermission.Pleasewait...Echo================== ========subinacl/subkey
 What to do if the Win10 Task Manager crashes? How to fix the Win10 Task Manager crash?
Jun 25, 2024 pm 04:31 PM
What to do if the Win10 Task Manager crashes? How to fix the Win10 Task Manager crash?
Jun 25, 2024 pm 04:31 PM
Hello everyone, have you ever encountered the situation where the Windows 10 Task Manager keeps crashing? This function helps us a lot, allowing us to quickly see all running tasks, which is very convenient to use, right? However, some friends said that they encountered this problem and didn’t know how to solve it, so let me share with you the specific solution! Solution to Win10 Task Manager crash 1. First, press and hold the "Win" + "R" keys on the keyboard to open Run, enter "regedit" and press the Enter key. 2. Expand the folders and find "HKEY_CURRENT_USERSoftwareMicros
 What should I do if my Win10 password does not meet the password policy requirements? What to do if my computer password does not meet the policy requirements?
Jun 25, 2024 pm 04:59 PM
What should I do if my Win10 password does not meet the password policy requirements? What to do if my computer password does not meet the policy requirements?
Jun 25, 2024 pm 04:59 PM
In the Windows 10 system, the password policy is a set of security rules to ensure that the passwords set by users meet certain strength and complexity requirements. If the system prompts that your password does not meet the password policy requirements, it usually means that your password does not meet the requirements set by Microsoft. standards for complexity, length, or character types, so how can this be avoided? Users can directly find the password policy under the local computer policy to perform operations. Let’s take a look below. Solutions that do not comply with password policy specifications: Change the password length: According to the password policy requirements, we can try to increase the length of the password, such as changing the original 6-digit password to 8-digit or longer. Add special characters: Password policies often require special characters such as @, #, $, etc. I
 What should I do if Win10 cannot turn on the mobile hotspot network? What should I do if Win10 cannot turn on the mobile hotspot switch?
Jun 26, 2024 am 12:33 AM
What should I do if Win10 cannot turn on the mobile hotspot network? What should I do if Win10 cannot turn on the mobile hotspot switch?
Jun 26, 2024 am 12:33 AM
Mobile hotspots can help users quickly connect their devices to the Internet, but many users are asking what to do if Win10 cannot turn on the mobile hotspot switch? Let this site carefully introduce to users the solution to the problem that Win10 cannot turn on the mobile hotspot switch. Solution to the problem that Win10 cannot turn on the mobile hotspot switch 1. In the device manager, find the network adapter and display hidden hardware devices. 2. Find the disabled MicrosoftWi-FiDirectVirtualAdapter device and re-enable it. 3. Try turning on the mobile hotspot again and return to normal.
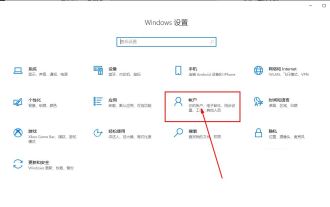
 Where is the win10 user profile? How to set the user profile in Win10
Jun 25, 2024 pm 05:55 PM
Where is the win10 user profile? How to set the user profile in Win10
Jun 25, 2024 pm 05:55 PM
Recently, many Win10 system users want to change the user profile, but they don’t know how to do it. This article will show you how to set the user profile in Win10 system! How to set up user profile in Win10 1. First, press the "Win+I" keys to open the settings interface, and click to enter the "System" settings. 2. Then, in the opened interface, click "About" on the left, then find and click "Advanced System Settings". 3. Then, in the pop-up window, switch to the "" option bar and click "User Configuration" below.
