
php editor Xinyi brings you a tutorial on how to enable wireless screen mirroring in Win11. With the release of Win11, the wireless screen projection function has become one of the functions that users are eagerly awaiting. Through wireless screencasting, users can easily cast content on Win11 devices to other devices for more convenient sharing and display. This tutorial will introduce in detail how to enable the wireless screen mirroring function in Win11, allowing you to quickly get started and enjoy the convenience of wireless screen mirroring. No complicated settings are required, just a few simple steps and you can easily achieve wireless screen mirroring. Let’s take a look!
Tutorial on how to enable wireless screen mirroring in win11
1. Click the four palace icon on the taskbar.

2. Open settings.
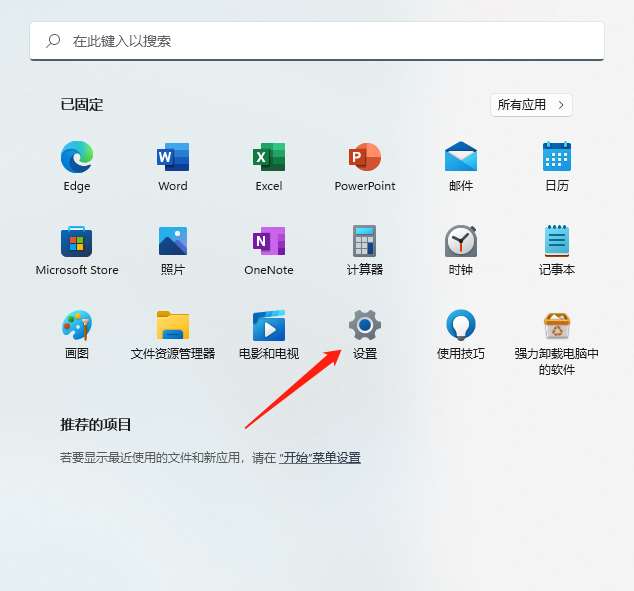
3. Enter the application.
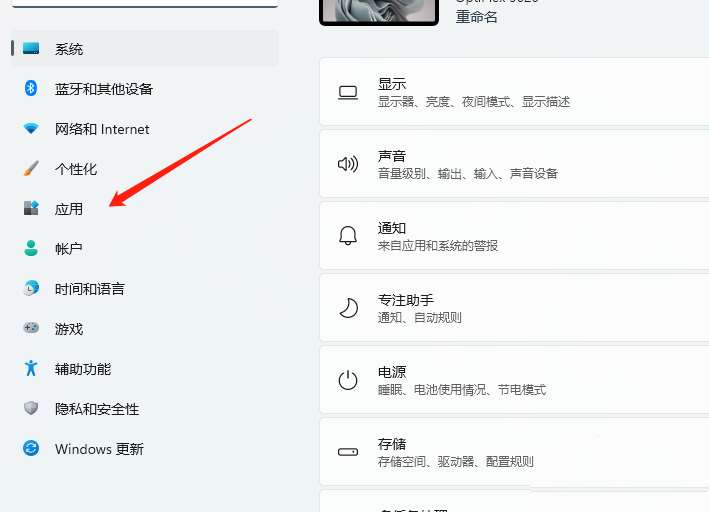
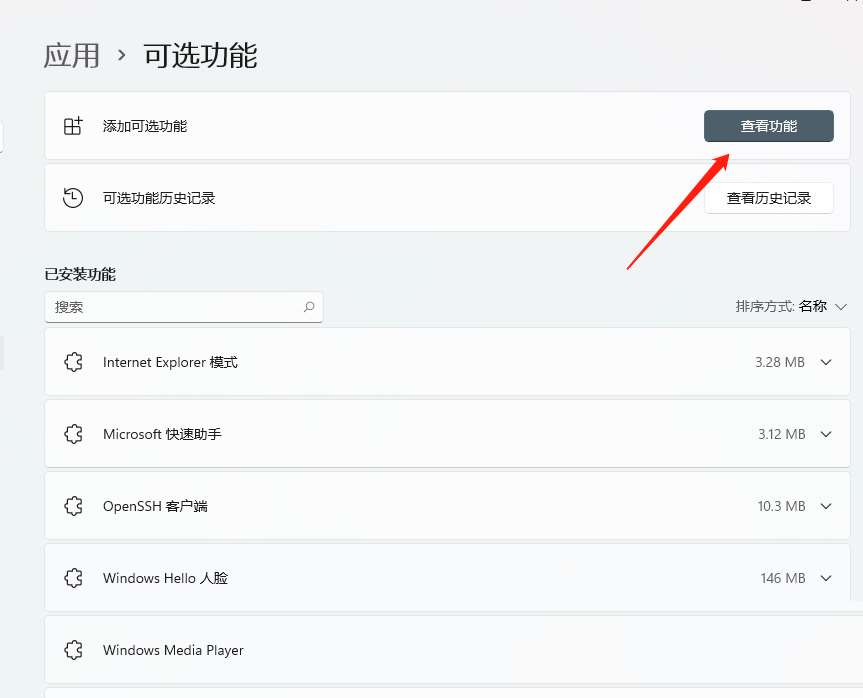
4. Enter optional functions.

5. Enter the viewing function.
6. On the right side of adding optional functions.
7. Search for "wireless display".
8. After searching and checking "Wireless Display", go to the next step.
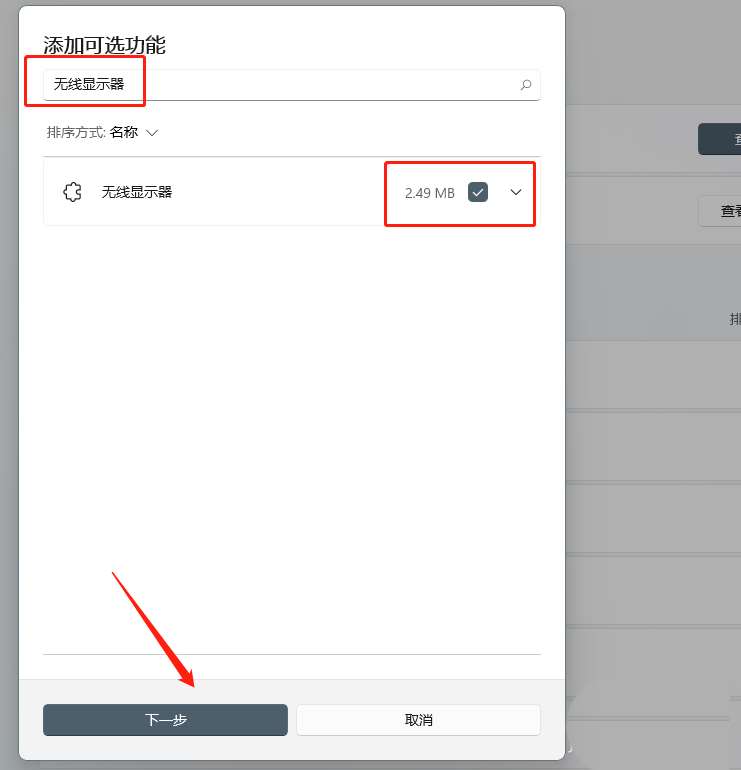
9. Install a wireless display.
10. Click to install.

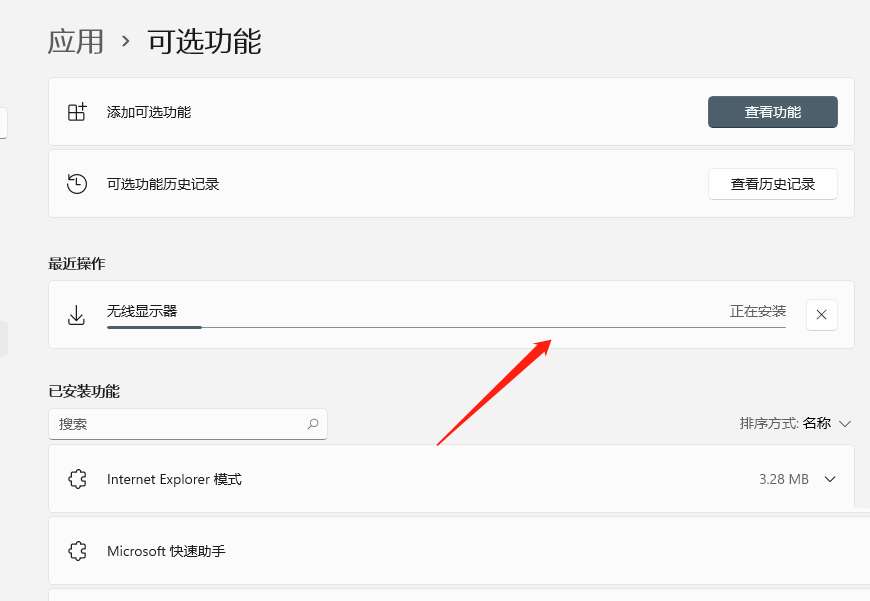
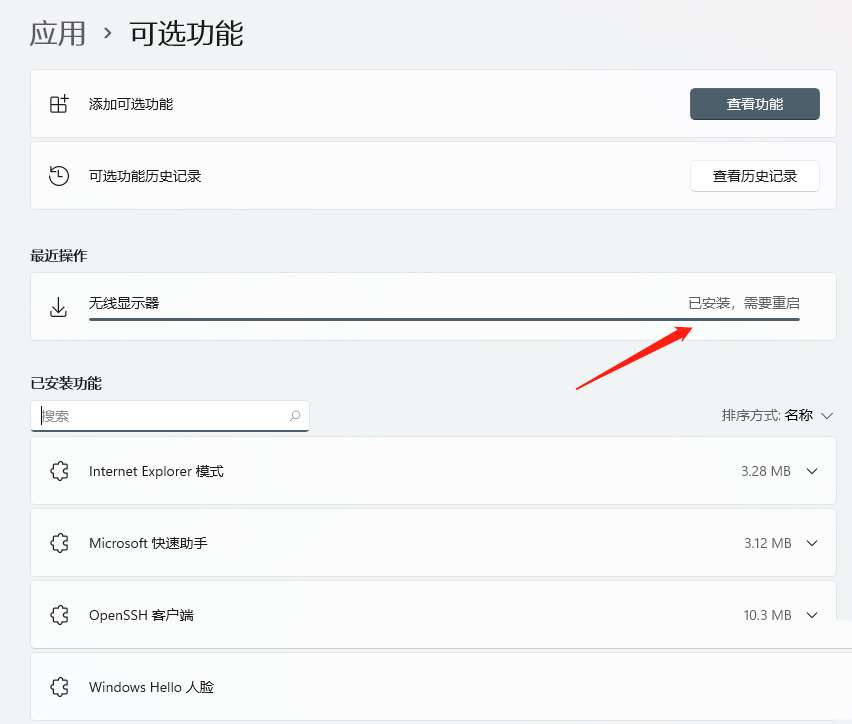
11. Restart the computer
12. After the installation is complete, restart the computer and you can add it.
The above is the detailed content of How to enable wireless screencasting in win11? Tutorial on how to enable wireless screen mirroring in Windows 11. For more information, please follow other related articles on the PHP Chinese website!
 There is no WLAN option in win11
 How to skip online activation in win11
 Win11 skips the tutorial to log in to Microsoft account
 How to open win11 control panel
 Introduction to win11 screenshot shortcut keys
 Windows 11 my computer transfer to the desktop tutorial
 Solution to the problem of downloading software and installing it in win11
 How to skip network connection during win11 installation


