

JQ command usage examples in Linux

JSON is a data representation format used to store and transfer data between different layers of an application; it stores data in key:value pairs. In this article, we will learn to use JQ commands to manipulate and process JSON data in the shell.
How to install JQ command
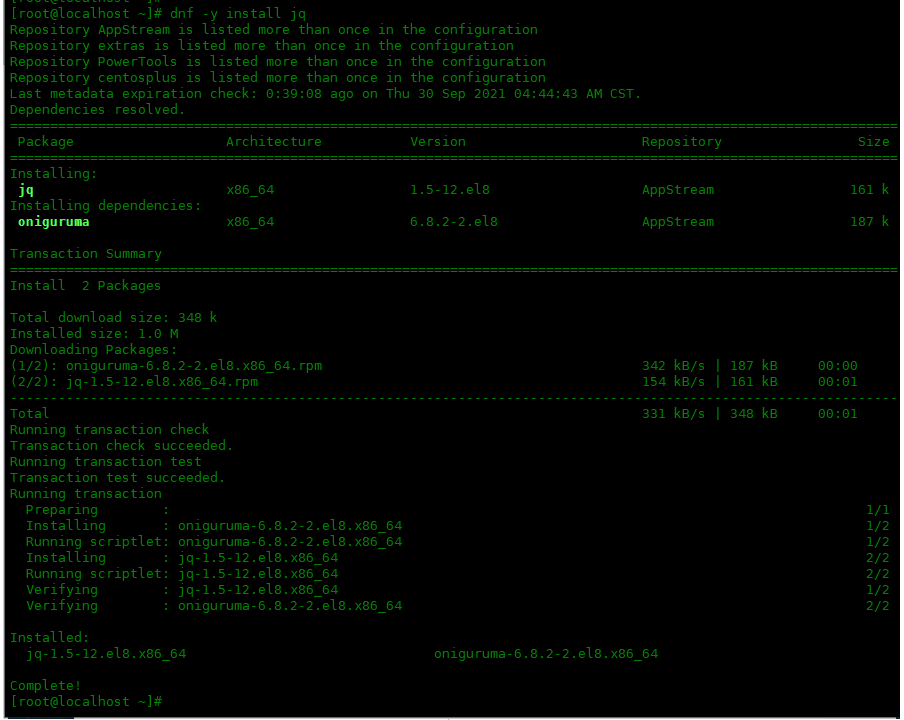
Use the following command to install jq in Centos8:
[root@localhost ~]# dnf -y install jq
grammar
Now we can start using the JQ command since it has been successfully installed on our system, but first, let’s take a look at the syntax of the JQ command:
jq [options]  [file...]

jq [options] --args  [strings...]

jq [options] --jsonargs  [JSON_TEXTS...]
The JQ command can be used in a number of different ways; it can be used directly on JSON files or combined with several other commands to interpret JSON data. JQ commands can be used with different filters such as ".", "|", "," or ".[]" filters to organize JSON data.
The JQ command also takes different options as arguments, such as –tab, –stream, –indent n, –unbuffered and the -L directory option. The syntax of JQ commands may seem complicated at first, but you'll become familiar with it after reading the entire article.
How to use JQ commands to organize JSON data
The simplest and most commonly used feature of JQ command filter. They are used to organize and beautify JSON data when printing it to standard output.
In this example, we have a JSON file named employee.json and we need to output the data to standard output:
{"workers":{"name": "John Brooks","id": "003"}}
We can use the cat command to display data:
[root@localhost ~]# cat employee.json
{"workers":{"name": "John Brooks","id": "003"}}

The data printed to standard output using the cat command is unorganized and confusing. We can use JQ commands and "." to organize this data, and use . to filter:
[root@localhost ~]# jq '.' employee.json
{
  "workers": {
    "name": "John Brooks",
    "id": "003"
  }
}
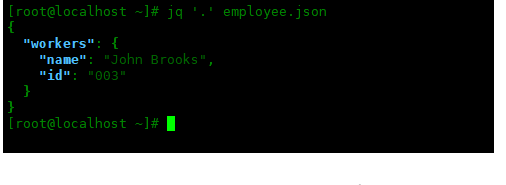
Now the data is more organized, colorful and easier to understand. This filter is especially needed when accessing data from an API; the data stored in the API can be very unorganized and confusing.
How to use JQ commands to access properties
.FieldsFilters and JQ commands can be used to access object properties in the shell.
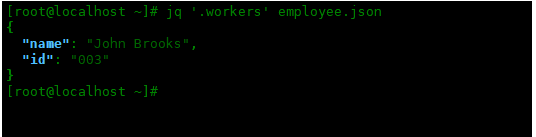
If we only want to access a single property and print it to standard output, then we can use the .field operator. For example, to access a worker's properties we can use the following command:
[root@localhost ~]# jq '.workers' employee.json
{
  "name": "John Brooks",
  "id": "003"
}
We can also access the items present in the attribute using the .field operator. To access the name item in the worker attribute we will use:
[root@localhost ~]# jq '.workers.name' employee.json
"John Brooks"

How to use JQ commands to access array items
We can also access and output the elements present in the array in the JSON file using the .[] operator. For this example, we will modify our JSON file and add the following:
[{"name": "John Brooks","id": "003"},{"name": "Randy Park","id": "053"},{"name": "Todd Gray","id": "009"}]
Check the employee.json file:
[root@localhost ~]# cat employee.json
[{"name": "John Brooks","id": "003"},{"name": "Randy Park","id": "053"},{"name": "Todd Gray","id": "009"}]

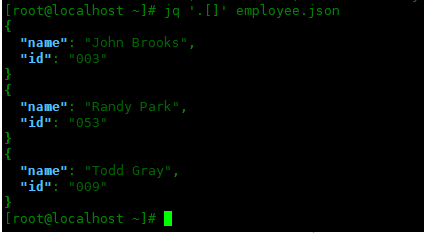
要输出 JSON 文件中存在的所有数组,我们将运行以下命令:
[root@localhost ~]# jq '.[]' employee.json
{
  "name": "John Brooks",
  "id": "003"
}
{
  "name": "Randy Park",
  "id": "053"
}
{
  "name": "Todd Gray",
  "id": "009"
}
要仅输出第二个数组,我们可以通过以下方式修改上述命令:
[root@localhost ~]# jq '.[1]' employee.json
{
  "name": "Randy Park",
  "id": "053"
}
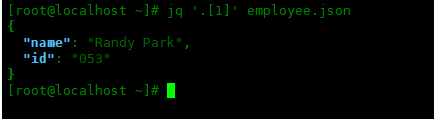
请记住,数组从索引 0 开始的。
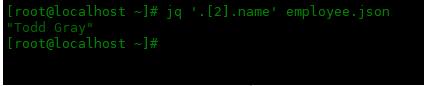
我们还可以使用 .字段 运算符访问数组中存在的属性。例如,如果我们想访问第三个数组中的 name 属性,那么我们将运行以下命令:
[root@localhost ~]# jq '.[2].name' employee.json
"Todd Gray"
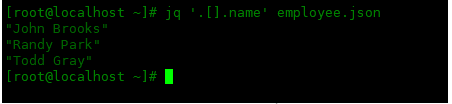
类似地,要访问数组中的所有名称属性,我们可以执行以下命令:
[root@localhost ~]# jq '.[].name' employee.json
"John Brooks"
"Randy Park"
"Todd Gray"
总 结
JQ 命令用于将 JSON 数据转换为更易读的格式并将其打印到 Linux 上的标准输出。JQ 命令是围绕过滤器构建的,过滤器用于从 JSON 文件中仅查找和打印所需的数据。
The above is the detailed content of JQ command usage examples in Linux. For more information, please follow other related articles on the PHP Chinese website!

Hot AI Tools

Undresser.AI Undress
AI-powered app for creating realistic nude photos

AI Clothes Remover
Online AI tool for removing clothes from photos.

Undress AI Tool
Undress images for free

Clothoff.io
AI clothes remover

AI Hentai Generator
Generate AI Hentai for free.

Hot Article
Hot Tools

Notepad++7.3.1
Easy-to-use and free code editor

SublimeText3 Chinese version
Chinese version, very easy to use

Zend Studio 13.0.1
Powerful PHP integrated development environment

Dreamweaver CS6
Visual web development tools

SublimeText3 Mac version
God-level code editing software (SublimeText3)
Hot Topics
 1377
1377
 52
52

 Unable to log in to mysql as root
Apr 08, 2025 pm 04:54 PM
Unable to log in to mysql as root
Apr 08, 2025 pm 04:54 PM
The main reasons why you cannot log in to MySQL as root are permission problems, configuration file errors, password inconsistent, socket file problems, or firewall interception. The solution includes: check whether the bind-address parameter in the configuration file is configured correctly. Check whether the root user permissions have been modified or deleted and reset. Verify that the password is accurate, including case and special characters. Check socket file permission settings and paths. Check that the firewall blocks connections to the MySQL server.
 C language conditional compilation: a detailed guide for beginners to practical applications
Apr 04, 2025 am 10:48 AM
C language conditional compilation: a detailed guide for beginners to practical applications
Apr 04, 2025 am 10:48 AM
C language conditional compilation is a mechanism for selectively compiling code blocks based on compile-time conditions. The introductory methods include: using #if and #else directives to select code blocks based on conditions. Commonly used conditional expressions include STDC, _WIN32 and linux. Practical case: Print different messages according to the operating system. Use different data types according to the number of digits of the system. Different header files are supported according to the compiler. Conditional compilation enhances the portability and flexibility of the code, making it adaptable to compiler, operating system, and CPU architecture changes.
 What are the 5 basic components of Linux?
Apr 06, 2025 am 12:05 AM
What are the 5 basic components of Linux?
Apr 06, 2025 am 12:05 AM
The five basic components of Linux are: 1. The kernel, managing hardware resources; 2. The system library, providing functions and services; 3. Shell, the interface for users to interact with the system; 4. The file system, storing and organizing data; 5. Applications, using system resources to implement functions.
 How to solve mysql cannot be started
Apr 08, 2025 pm 02:21 PM
How to solve mysql cannot be started
Apr 08, 2025 pm 02:21 PM
There are many reasons why MySQL startup fails, and it can be diagnosed by checking the error log. Common causes include port conflicts (check port occupancy and modify configuration), permission issues (check service running user permissions), configuration file errors (check parameter settings), data directory corruption (restore data or rebuild table space), InnoDB table space issues (check ibdata1 files), plug-in loading failure (check error log). When solving problems, you should analyze them based on the error log, find the root cause of the problem, and develop the habit of backing up data regularly to prevent and solve problems.
 Can mysql run on android
Apr 08, 2025 pm 05:03 PM
Can mysql run on android
Apr 08, 2025 pm 05:03 PM
MySQL cannot run directly on Android, but it can be implemented indirectly by using the following methods: using the lightweight database SQLite, which is built on the Android system, does not require a separate server, and has a small resource usage, which is very suitable for mobile device applications. Remotely connect to the MySQL server and connect to the MySQL database on the remote server through the network for data reading and writing, but there are disadvantages such as strong network dependencies, security issues and server costs.
 Solutions to the errors reported by MySQL on a specific system version
Apr 08, 2025 am 11:54 AM
Solutions to the errors reported by MySQL on a specific system version
Apr 08, 2025 am 11:54 AM
The solution to MySQL installation error is: 1. Carefully check the system environment to ensure that the MySQL dependency library requirements are met. Different operating systems and version requirements are different; 2. Carefully read the error message and take corresponding measures according to prompts (such as missing library files or insufficient permissions), such as installing dependencies or using sudo commands; 3. If necessary, try to install the source code and carefully check the compilation log, but this requires a certain amount of Linux knowledge and experience. The key to ultimately solving the problem is to carefully check the system environment and error information, and refer to the official documents.
 MySQL can't be installed after downloading
Apr 08, 2025 am 11:24 AM
MySQL can't be installed after downloading
Apr 08, 2025 am 11:24 AM
The main reasons for MySQL installation failure are: 1. Permission issues, you need to run as an administrator or use the sudo command; 2. Dependencies are missing, and you need to install relevant development packages; 3. Port conflicts, you need to close the program that occupies port 3306 or modify the configuration file; 4. The installation package is corrupt, you need to download and verify the integrity; 5. The environment variable is incorrectly configured, and the environment variables must be correctly configured according to the operating system. Solve these problems and carefully check each step to successfully install MySQL.
 Unable to access mysql from terminal
Apr 08, 2025 pm 04:57 PM
Unable to access mysql from terminal
Apr 08, 2025 pm 04:57 PM
Unable to access MySQL from the terminal may be due to: MySQL service not running; connection command error; insufficient permissions; firewall blocks connection; MySQL configuration file error.
