
 System Tutorial
LINUX
Yocto Getting Started Tutorial: Build Your Customized Linux System on Ubuntu
System Tutorial
LINUX
Yocto Getting Started Tutorial: Build Your Customized Linux System on Ubuntu
Yocto Getting Started Tutorial: Build Your Customized Linux System on Ubuntu

If you are an embedded developer, you may encounter this question: How to create a suitable Linux system for your hardware platform? How to customize the functionality and appearance of a Linux system? How to ensure the security and stability of Linux system? These problems can be solved by using the Yocto project. The Yocto Project is an open source collaborative project that helps you create custom Linux systems regardless of your hardware architecture. The Yocto project provides a flexible set of tools and resources that allow you to build your own Linux distribution from scratch, or modify and optimize based on existing Linux distributions. This article will introduce you to how to use Yocto to create a minimal Linux distribution on Ubuntu, as well as the basic concepts and workflow of Yocto.

Basic conditions for development machine
Minimum 4-6 GB RAM
The latest version of Ubuntu system (this article uses 16.04 LTS)
The remaining disk space is at least 60-80 GB
Install the following packages before creating a Linux distribution
Download the latest Yocto (Poky is its minimum development environment) stable branch
apt-get update
apt-get install wget git-core unzip make gcc g++ build-

essential subversion sed autoconf automake texi2html texinfo coreutils diffstat python-

pysqlite2 docbook-utils libsdl1.2-dev libxml-parser-perl libgl1-mesa-dev libglu1-mesa-

dev xsltproc desktop-file-utils chrpath groff libtool xterm gawk fop
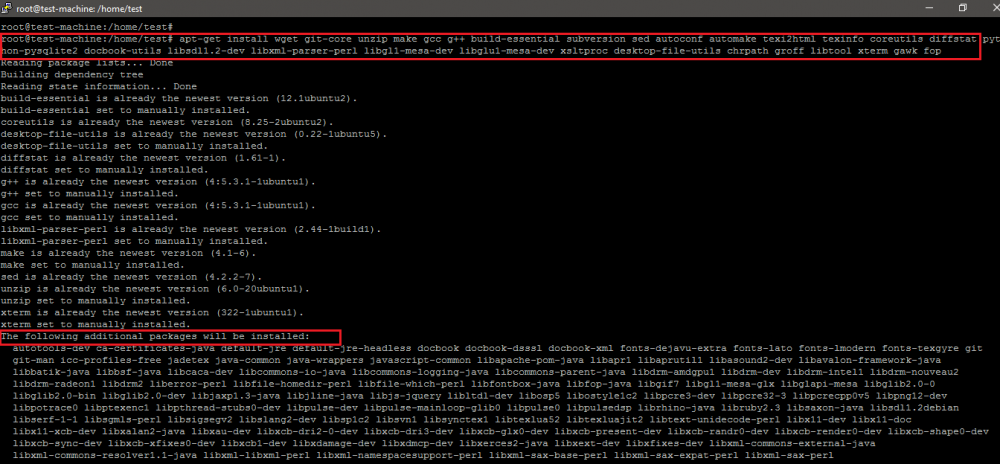
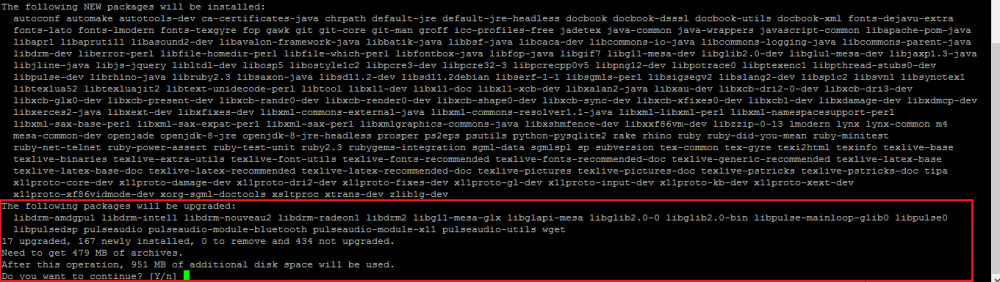
As shown below, the software package to be installed in the development environment is nearly 1GB in size.
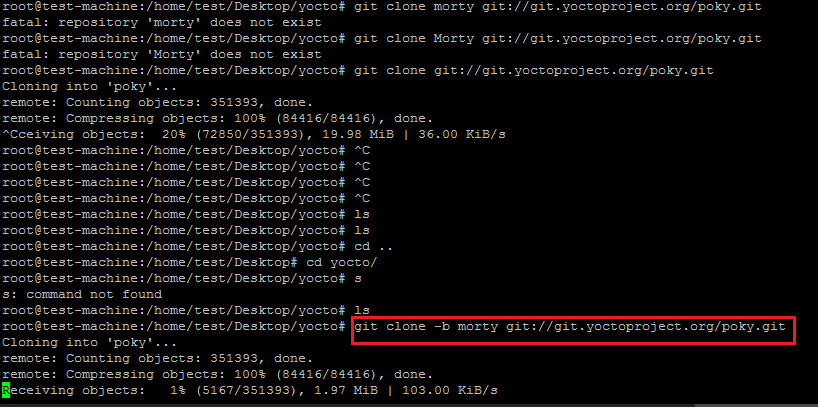
In this tutorial, the morty stable branch of poky is cloned on the system.
git clone -b morty git://git.yoctoproject.org/poky.git
Enter the poky directory, and then run the following command to set (set/export) some environment variables for the Yocto development environment.
source oe-init-build-env
As shown below, after running the open embedded (oe) build environment script, the path in the terminal will automatically switch to the build directory for subsequent configuration and construction of the release version.
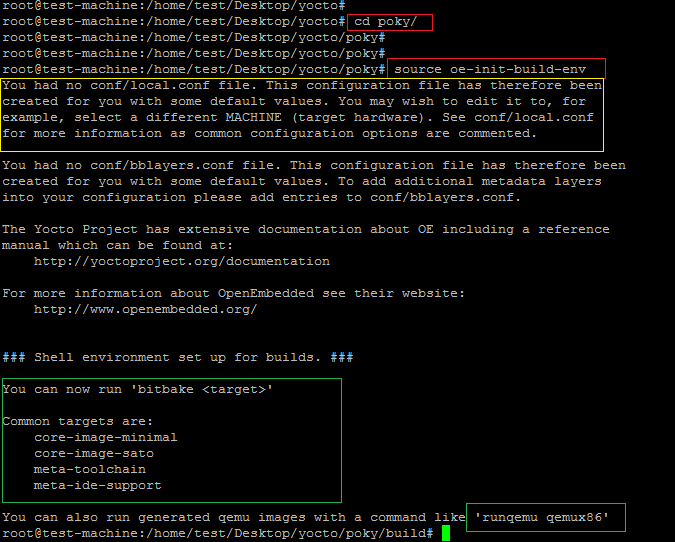
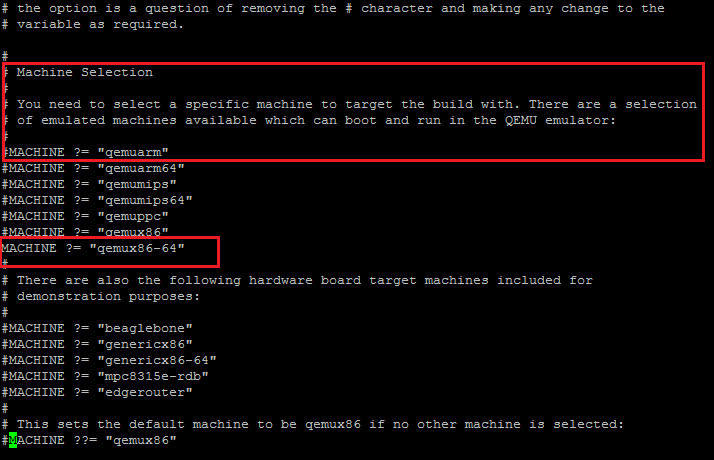
The screenshot above shows the file local.conf created in the conf directory. This is the configuration file used by Yocto to set the target machine details and target architecture of the SDK.
As shown below, the target machine set here is qemux86-64.
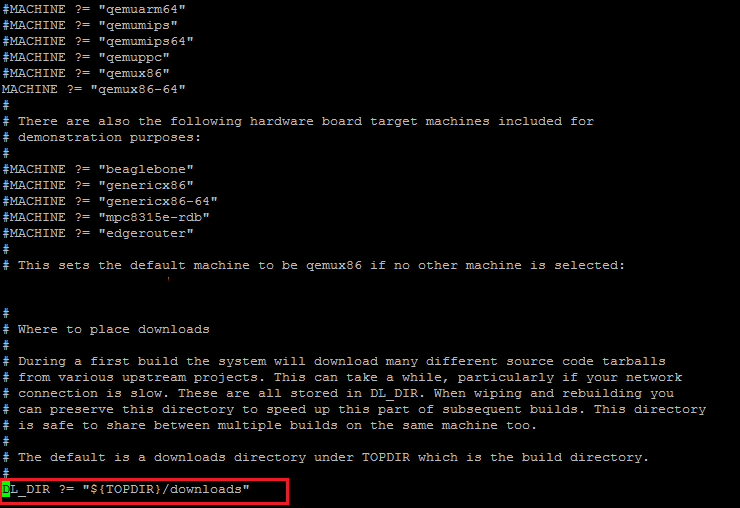
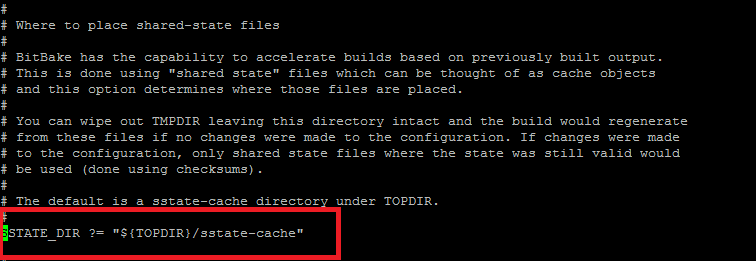
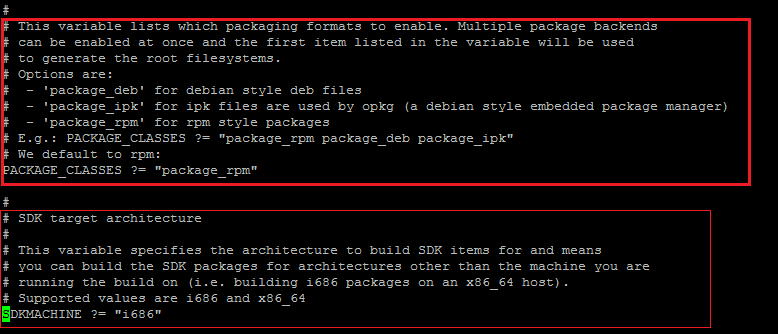
As shown in the screenshot below, uncomment the following parameters in local.conf.
DL_DIR ?= "${TOPDIR}/downloads"
SSTATE_DIR ?= "${TOPDIR}/sstate-cache"
TMPDIR ?= "${TOPDIR}/tmp"

PACKAGE_CLASSES ?= "package_rpm"
SDKMACHINE ?= "i686"
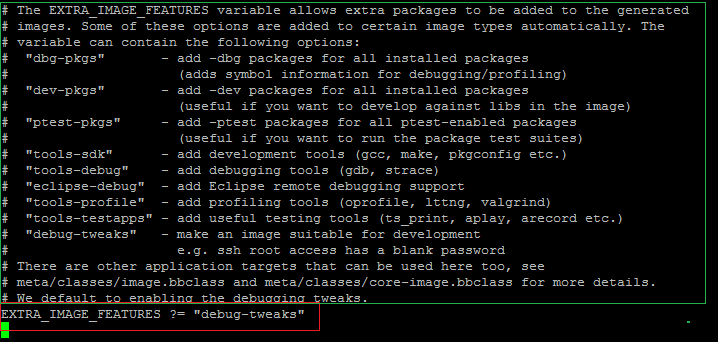
As shown below, set an empty password and some subsequent parameters in local.conf for Yocto-based Linux. Otherwise, users will not be able to log in to the new release.
EXTRA_IMAGE_FEATURES ?= "debug-tweaks"
We are not planning to use any graphical tools to create Linux OS, such as toaster (hob is no longer supported).
Yocto compilation and build process
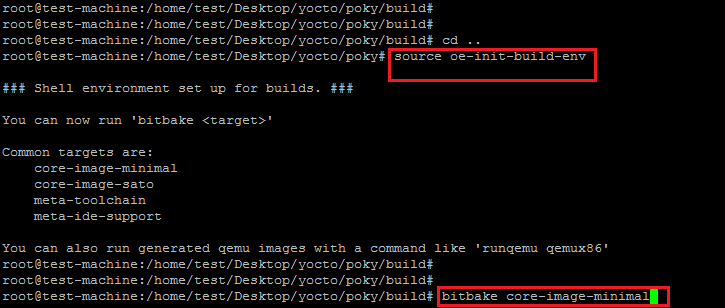
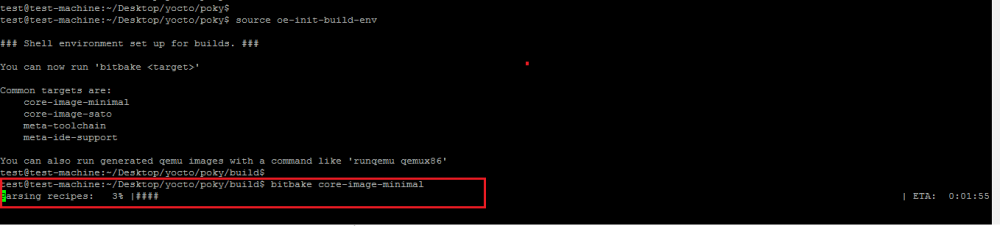
Now run the following bitbake tool command to start downloading and compiling the software package for the selected target machine.
bitbake core-image-minimal
It is very important to run the above command under a normal Linux user and not using the root user. As shown in the screenshot below, when you run the bitbake command under the root user, the error shown below will occur.
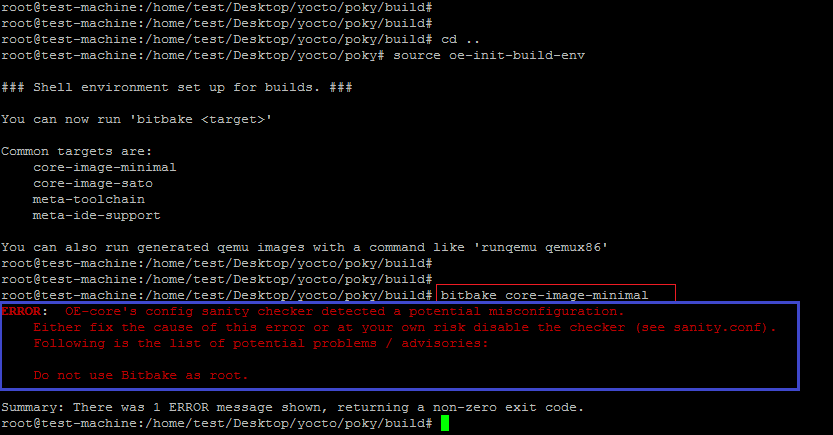
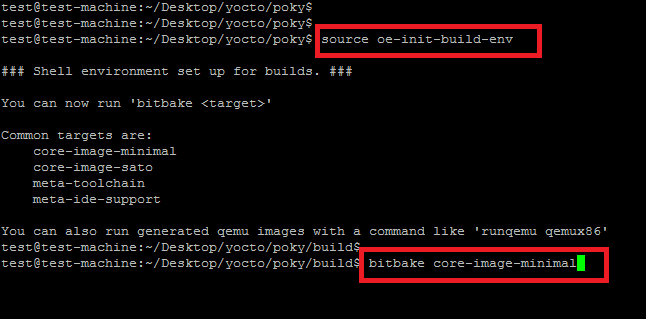
Run the script that exports environment variables (oe-init-build-env) again, and re-execute the same command to start the download and compilation process.
As shown below, the first step in building a script component is to parse the configuration (recipe).
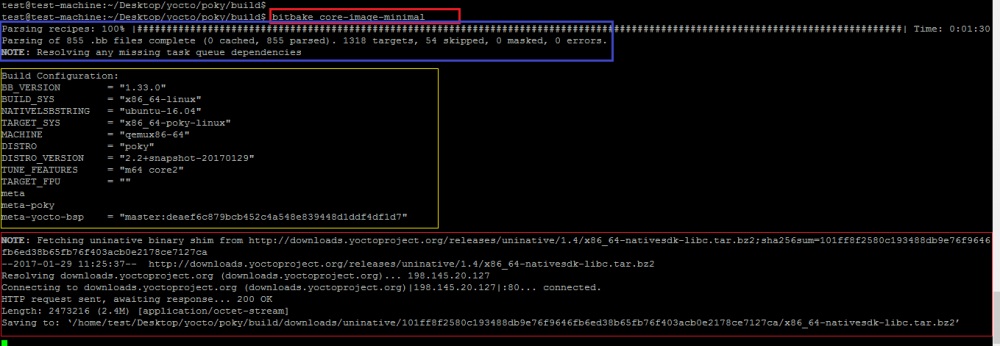
The screenshot below shows the parsing process of the build script. It also shows the details of the build system used to build your new yocto-based distribution.
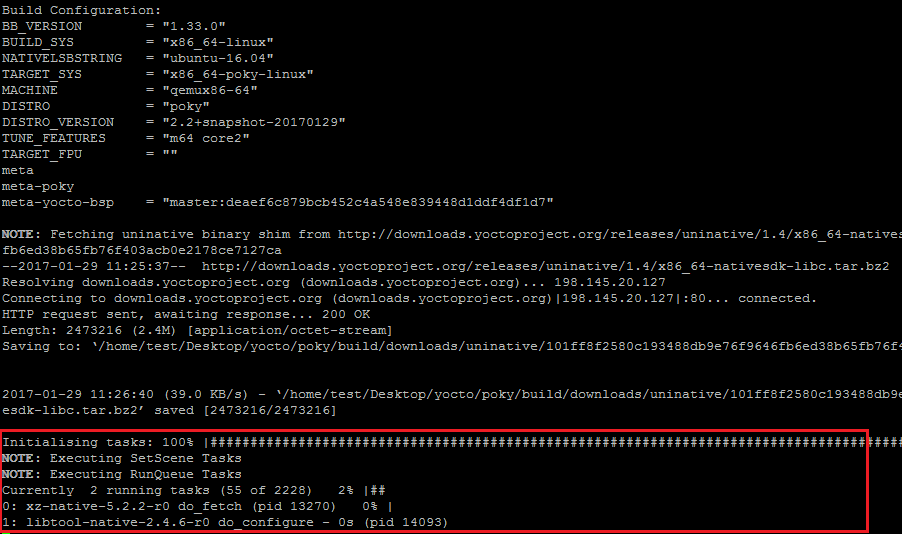
After downloading the SDK and necessary libraries, the next step is to download and compile the software package. The screenshot below shows the tasks performed to build a new distribution. This step will take 2-3 hours as the required packages must first be downloaded and then compiled for the new Linux distribution.
The screenshot below shows the completion of the task list.

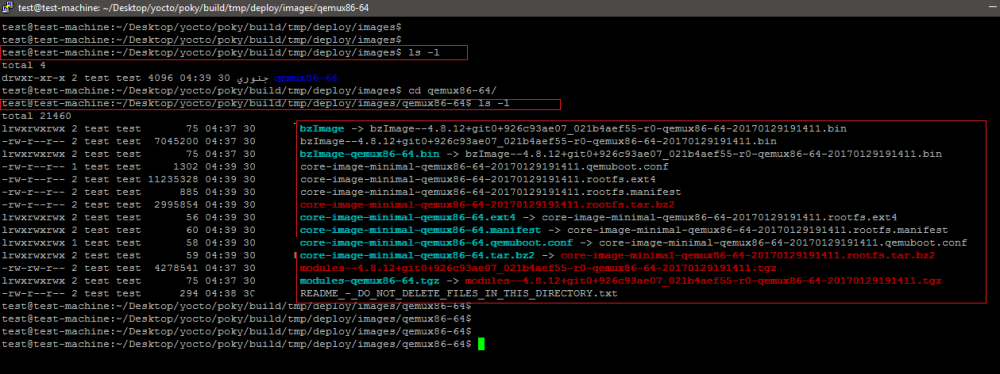
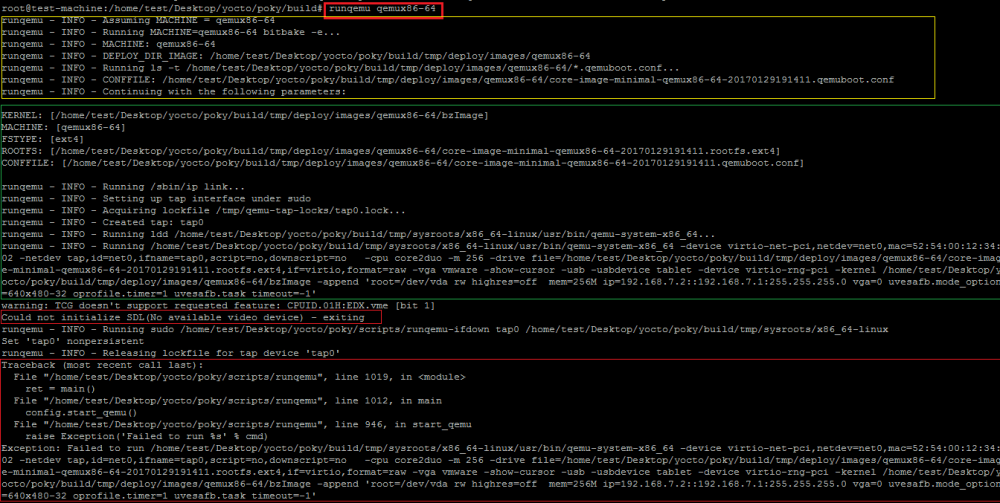
The new image compiled for the target machine type qemux86-64 is located in build/tmp/deploy/images/qemux86-64:
As shown below, the above command will generate an error if run on Putty.
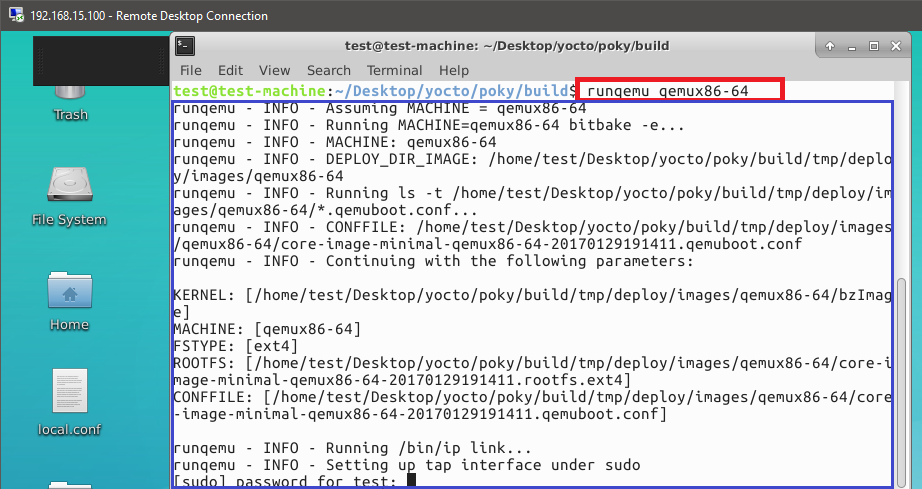
Run the above command again on the Ubuntu platform via rdp.
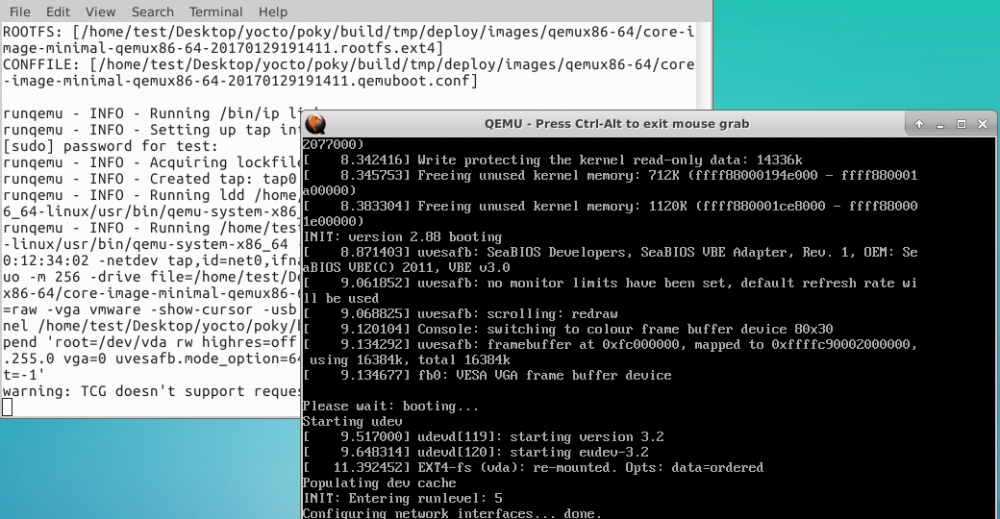
Open a new screen for qemu running the new Yocto-based Linux distribution.
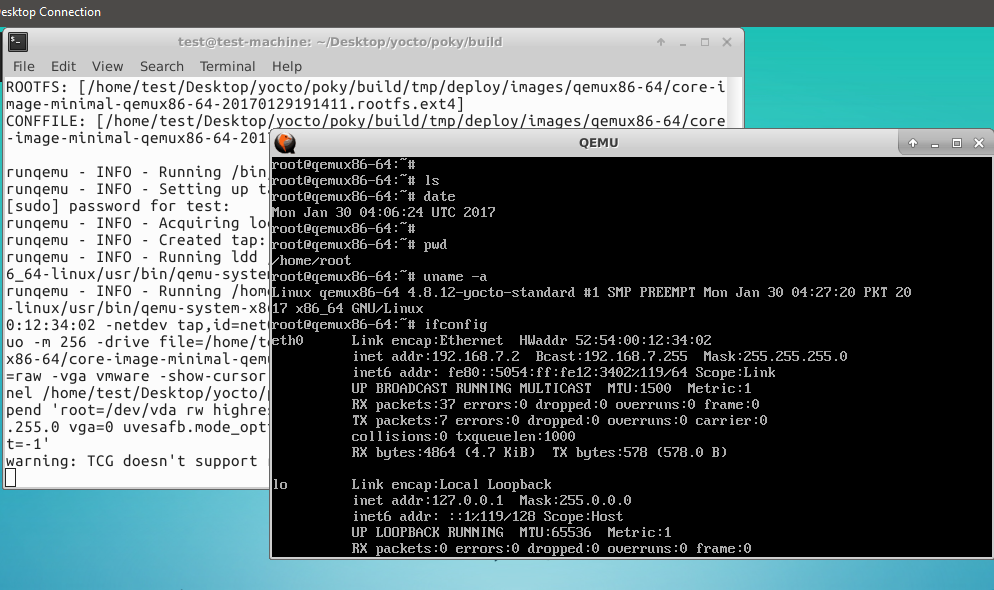
The following shows the login interface of the new release, and also displays the version number of the yocto project used. The default username is root and the password is blank.
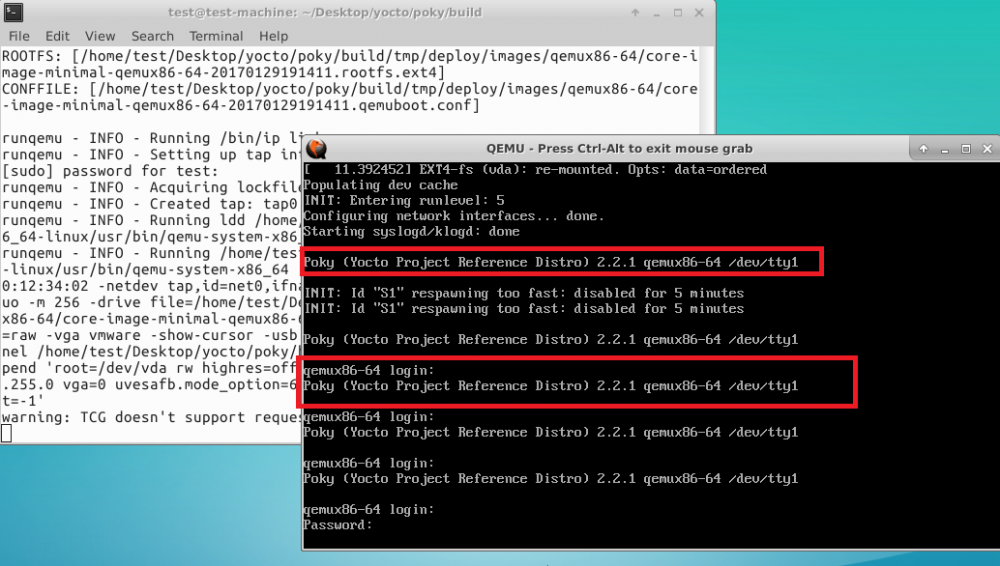
Finally use the root username and empty password to log in to the new release. As shown in the screenshot below, basic commands (data, ifconfig, and uname) are run on this minimal version of Linux.
The goal of this article is to understand the process of creating a new Linux distribution using Yocto.
Through this article, you have learned how to use Yocto to create a minimal Linux distribution on Ubuntu, as well as the basic concepts and workflow of Yocto. You can use Yocto to customize a suitable Linux system for your embedded devices or other scenarios to meet your needs and preferences. Of course, this is only part of the many features and options provided by the Yocto project. If you want to learn more about the Yocto project and embedded Linux development, you still need to continue to explore and practice. I hope this article can be helpful to your study and work. You are also welcome to share other practical Yocto skills you use or discover.
The above is the detailed content of Yocto Getting Started Tutorial: Build Your Customized Linux System on Ubuntu. For more information, please follow other related articles on the PHP Chinese website!

Hot AI Tools

Undresser.AI Undress
AI-powered app for creating realistic nude photos

AI Clothes Remover
Online AI tool for removing clothes from photos.

Undress AI Tool
Undress images for free

Clothoff.io
AI clothes remover

AI Hentai Generator
Generate AI Hentai for free.

Hot Article
Hot Tools

Notepad++7.3.1
Easy-to-use and free code editor

SublimeText3 Chinese version
Chinese version, very easy to use

Zend Studio 13.0.1
Powerful PHP integrated development environment

Dreamweaver CS6
Visual web development tools

SublimeText3 Mac version
God-level code editing software (SublimeText3)
Hot Topics
 1378
1378
 52
52

 What to do if the apache80 port is occupied
Apr 13, 2025 pm 01:24 PM
What to do if the apache80 port is occupied
Apr 13, 2025 pm 01:24 PM
When the Apache 80 port is occupied, the solution is as follows: find out the process that occupies the port and close it. Check the firewall settings to make sure Apache is not blocked. If the above method does not work, please reconfigure Apache to use a different port. Restart the Apache service.
 How to start apache
Apr 13, 2025 pm 01:06 PM
How to start apache
Apr 13, 2025 pm 01:06 PM
The steps to start Apache are as follows: Install Apache (command: sudo apt-get install apache2 or download it from the official website) Start Apache (Linux: sudo systemctl start apache2; Windows: Right-click the "Apache2.4" service and select "Start") Check whether it has been started (Linux: sudo systemctl status apache2; Windows: Check the status of the "Apache2.4" service in the service manager) Enable boot automatically (optional, Linux: sudo systemctl
 How to monitor Nginx SSL performance on Debian
Apr 12, 2025 pm 10:18 PM
How to monitor Nginx SSL performance on Debian
Apr 12, 2025 pm 10:18 PM
This article describes how to effectively monitor the SSL performance of Nginx servers on Debian systems. We will use NginxExporter to export Nginx status data to Prometheus and then visually display it through Grafana. Step 1: Configuring Nginx First, we need to enable the stub_status module in the Nginx configuration file to obtain the status information of Nginx. Add the following snippet in your Nginx configuration file (usually located in /etc/nginx/nginx.conf or its include file): location/nginx_status{stub_status
 How to start monitoring of oracle
Apr 12, 2025 am 06:00 AM
How to start monitoring of oracle
Apr 12, 2025 am 06:00 AM
The steps to start an Oracle listener are as follows: Check the listener status (using the lsnrctl status command) For Windows, start the "TNS Listener" service in Oracle Services Manager For Linux and Unix, use the lsnrctl start command to start the listener run the lsnrctl status command to verify that the listener is started
 How to set up a recycling bin in Debian system
Apr 12, 2025 pm 10:51 PM
How to set up a recycling bin in Debian system
Apr 12, 2025 pm 10:51 PM
This article introduces two methods of configuring a recycling bin in a Debian system: a graphical interface and a command line. Method 1: Use the Nautilus graphical interface to open the file manager: Find and start the Nautilus file manager (usually called "File") in the desktop or application menu. Find the Recycle Bin: Look for the Recycle Bin folder in the left navigation bar. If it is not found, try clicking "Other Location" or "Computer" to search. Configure Recycle Bin properties: Right-click "Recycle Bin" and select "Properties". In the Properties window, you can adjust the following settings: Maximum Size: Limit the disk space available in the Recycle Bin. Retention time: Set the preservation before the file is automatically deleted in the recycling bin
 How to restart the apache server
Apr 13, 2025 pm 01:12 PM
How to restart the apache server
Apr 13, 2025 pm 01:12 PM
To restart the Apache server, follow these steps: Linux/macOS: Run sudo systemctl restart apache2. Windows: Run net stop Apache2.4 and then net start Apache2.4. Run netstat -a | findstr 80 to check the server status.
 How to optimize the performance of debian readdir
Apr 13, 2025 am 08:48 AM
How to optimize the performance of debian readdir
Apr 13, 2025 am 08:48 AM
In Debian systems, readdir system calls are used to read directory contents. If its performance is not good, try the following optimization strategy: Simplify the number of directory files: Split large directories into multiple small directories as much as possible, reducing the number of items processed per readdir call. Enable directory content caching: build a cache mechanism, update the cache regularly or when directory content changes, and reduce frequent calls to readdir. Memory caches (such as Memcached or Redis) or local caches (such as files or databases) can be considered. Adopt efficient data structure: If you implement directory traversal by yourself, select more efficient data structures (such as hash tables instead of linear search) to store and access directory information
 How debian readdir integrates with other tools
Apr 13, 2025 am 09:42 AM
How debian readdir integrates with other tools
Apr 13, 2025 am 09:42 AM
The readdir function in the Debian system is a system call used to read directory contents and is often used in C programming. This article will explain how to integrate readdir with other tools to enhance its functionality. Method 1: Combining C language program and pipeline First, write a C program to call the readdir function and output the result: #include#include#include#includeintmain(intargc,char*argv[]){DIR*dir;structdirent*entry;if(argc!=2){
