

This article introduces the general usage of vim (version 7.4). ****vim is a powerful text editor and an enhanced version of vi.
The most commonly used command to edit a file using vim is:
vim file is a new file or an original file. After executing such a command, the editor will be opened and the contents of the file file will be displayed. as the picture shows:
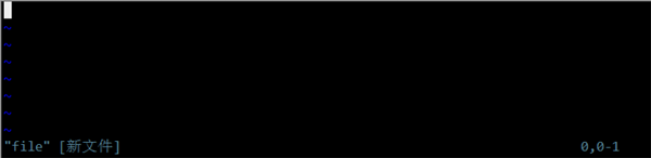
If it is a new file, the word "file" [new file] will be displayed on the left side of the bottom, and 0,0-1 will be displayed on the right to indicate the number of lines and characters where the current cursor is. If an old file is opened, the words "file" 3L, 66C are displayed on the left side of the bottom, indicating the file name, the line number of the current cursor, and the total number of bytes of the file. Places with no characters in the file will begin with the character ~.
It is not possible to edit yet. There are several modes for vim to edit files. The current mode is the normal mode, which allows you to move the cursor, execute copy and paste and other commands; there are also two common modes: insert mode and bottom line mode.
Generally, the normal mode is entered at first. Press the following keys to enter the insert mode:
1. a 在光标所在位置下一个字符开始输入
2. A 在光标所在行尾开始输入
2. i 在光标所在位置开始输入
4. I 在光标所在行首开始输入
5. o 在光标所在行下新增一行,并在新增行行首开始输入
6. O 在光标所在行上新增一行,并在新增行行首开始输入
After entering insert mode, the words – Insert – will appear at the bottom; then you can enter at the cursor position. Press the ESC key to return to normal mode from insert mode.
In normal mode, press the following keys to enter bottom row mode:
1. : 执行命令
2. / 正向搜索
3. ? 反向搜索
To return to the normal mode from the bottom row mode, you need to press the ESC key twice
Bottom line mode execution: q (quit) means to exit the editor. If the file content has been changed, you need to execute: wq (write quit) to save and exit; if you do not save and exit, you need to execute: q! to force exit; Force save and exit as:wq!.

The following are some commands that can be executed in normal mode and their functions:
Text modification:
1. dd  剪切光标所在位置的整行(保存在临时缓冲区)
2. ndd n为数字,表示从当前行开始,从上到下剪切n行
3. p   将缓冲区中的内容放到当前行之下
4. np  n是数字,相当于执行n次p命令
5. P   将缓冲区中的内容放到当前行之上
6. y   从光标处开始复制
6. yy  复制当前行(保存在临时缓冲区)
7. nyy n为数字,表示从当前行开始,从上到下复制n行
8. r   替换光标所在位置的一个字符
9. R   从光标位置开始替换,并进入文本输入模式(ESC退出)
10. u   撤销上一次操作
11. ZZ  保存退出
12. 移动光标:
13. h或左箭头键 光标向左移动一格
14. l或右箭头键 光标向右移动一格
15. j或下箭头键 光标向下移动一格
16. k或上箭头键 光标向上移动一格
17. 0 光标移动到当前行开头
18. ^ 光标移动到当前行非空白字符(如空格、tab键等)的开头
19. $ 光标移动到当前行结尾
20. g_ 光标移动到当前行非空白字符的结尾
21. w  光标移动到下一个单词的开头
22. e  光标移动到下一个单词的结尾
23. *  匹配光标所在单词,移动到下一个相同的单词
24. #  匹配光标所在单词,移动到上一个相同的单词
25. f{ 光标移动到当前行的下一个字符{处,{可以换成其他字符
26. F} 光标移动到当前行的上一个字符}处
27. t, 光标移动到当前行的下一个逗号之前一个字符处
28. T, 光标移动到当前行的上一个逗号之后一个字符处
29. %  移动到成对括号的另一半括号处,包括() {} [].需要先将光标移动到括号上。
30. gg 光标移动到文件第一行行首
31. G  光标移动到文件最后一行行首
32. 回车键 光标移动到下一行行首
Only part of it is listed here. Beginners may find it too much to remember. In fact, as long as you remember a few of them, you can use them; most of the other functions are to make your operation easier and faster.
Most of the various commands in vim can be used in combination:
For example, if you want to delete the current position of the cursor to the end of the line, you can execute d$;
For example, if you want to insert 50 'words' at the current position, just execute 50iword ESC and then the 50 words will be inserted after pressing the ESC key;
For example, if you want to paste the copied content but want to paste it 5 times, execute 5p;
For example, if you want to execute the last command 5 times again, execute 5.;
Proficient use of these commands will greatly increase the speed of writing files.
In insert mode (press a, i, o, etc. in normal mode), enter the beginning of a word, and then press CTRL-P or CTRL-N to complete it automatically.
The bottom line pattern has three starting characters (:, /, ?), of which / and ? are used to match the pattern search:
Such as searching for the string centos in the file:
/centos
After entering this string and pressing Enter, vim will highlight all matching strings. Press the n key and the cursor will jump to the next matching string. Press the N key and the cursor will jump. Go to the previous match. (Think about man query)
Using ? and / have the same effect, but in opposite directions.
: Many commands can be executed, such as the save and exit command introduced earlier: wq.
The following introduces some bottom line mode commands:
1 :set nu   显示行号
2 :set nonu 隐藏行号
3 :r file   读取文件file内容并写入当前编辑的文件中,内容从光标当前位置下一行开始插入。
4 :w file   将当前编辑的内容写入一个新文件file中。
5 :s /pattern/string/ 将匹配pattern的字符串替换成string
6 :x        作用和:wq相同,保存并退出。
7 :! command 暂时离开vim并执行shell命令command。
8 :help     查看帮助
9 :.=       显示当前行号
10 :=        显示总行数
11 :n        移动光标到第n行行首
These commands can also be combined to execute a shell command and write the result to the next line of the current line:
r!ls -l
You can also combine commands in other modes, such as replacing all strings matching the pattern in the current line:
s/pattern/string/g # g means global
To replace all strings matching the pattern in this file:
%s/pattern/string/g # % means all lines
If you replace the matching string in the specified line:
n,ms/pattern/string/g
Here n and m are numbers, representing line numbers. You can use a dot to represent the current line
If you want to delete the content from the current line to the fifth line:
.,5d
When the current line is below the fifth line, there will be a reverse deletion prompt.
When using /pattern and :s/pattern/string, pattern is a regular expression used to match a string pattern.
Regular expressions have some similarities with the previously introduced wildcards (Introduction to Basic Commands 2), but attention should be paid to distinguishing the differences between the two.
Wildcards are mainly used to match file names. Regular expressions can not only be used to match file names, in fact, they can match any string. It is more versatile than wildcards. Most programming languages and some tools (such as vim, grep, awk, sed) have direct support for regular expressions.
The following introduces the concepts and usage of some regular expressions that will be used:
匹配位置:
^ 表示行开头
$ 表示行结尾
 表示单词结尾
匹配字符:
. 表示匹配任意单个字符(相当于通配符中的?)
[...] 表示匹配括号内任意单个字符
[^...] 表示匹配任意一个非列出字符 #参照通配符描述
/a    匹配英文字符,等同于[a-zA-Z]或[[:alpha:]]。
/A    匹配非英文字符,等同于[^a-zA-Z]。
/d    匹配数字,等同于[0-9]或[[:digit:]]。
/D    匹配非数字,等同于[^0-9]。
/x    匹配十六进制数字,等同于[0-9A-Fa-f]或[[:xdigit:]]。
/X    匹配非十六进制数字,等同于[^0-9A-Fa-f]。
/w    匹配单词,等同于[0-9A-Za-z_]。
/W    匹配非单词,等同于[^0-9A-Za-z_]。
/t    匹配TAB字符。
/s    匹配空白字符,等同于[ /t]或[[:blank:]]。
/S    匹配非空白字符,等同于[^ /t]。
/u    匹配大写字母,等同于[A-Z]或[[:upper:]]。
/U    匹配非大写字母。
/n    匹配换行
/r    匹配回车
(...) 匹配并捕获,用/1 /2 /3 ...来引用被捕获的字符串。
|     表示逻辑或
匹配数量:
* 表示匹配前一个字符零到任意多次,相当于{0,}。
+ 表示匹配前一个字符一到任意多次,相当于{1,}。
? 表示匹配前一个字符零到一次,相当于{0,1}。#注意和通配符?的区别
{n,m} 表示匹配前一个字符n到m次。
在使用正则表达式时,有时需要在特殊字符之前加上转义字符”/”来使特殊字符表示它的字面意思而不是它的特殊意义,在特定的工具中使用正则时,也需要这样做来避免特殊字符被工具本身解释。
vim在使用如下正则表达式时需要将特殊字符转义:/、/{n,m}、/(…/)、/?、/+、/|下面结合正则举例说明vim中模式匹配及部分命令用法
匹配字符串world并使光标停留在匹配行后第三行行首:
/world/+3
将第三行到第八行行首添加注释符号//:
3,8s/^//////
注意这里的行首符^和转义符’/’的用法:
%g/^/sxyz/normal dd
此命令作用是全局匹配以空白后接xyz开头的行,并执行普通模式下的命令dd
如匹配6个以上的小写字母:
//a/{6,}
如交换冒号:两侧的字符串:
s//(./):/(./)//2:/1/ #注意这里是如何引用之前匹配的分组的
如将所有tag、tog和tug分别改为hat、hot和hut
%s/t/([aou]/)g/h/1t/g
如匹配hello或world两个单词:
///|/
这里只列出部分vim用到的正则表达式,关于正则的更多内容,以后的文章中还会有描述和举例。
vim编辑器是很强大的,这里只描述了部分初级使用方法。vim还能使用视图模式,编辑多文本,设置键盘映射,多剪贴板,录制宏,使用插件等等。完全可以用vim作为IDE来使用。但相对来说,vim的学习曲线比较陡峭,不同的应用场景,需要记忆的命令和方法数量也是完全不同的。建议在学习中,每次只熟悉几个命令,一段时间后,就能流畅快捷的编辑文本了。
The above is the detailed content of Basic linux commands - text editing vim. For more information, please follow other related articles on the PHP Chinese website!


![[Web front-end] Node.js quick start](https://img.php.cn/upload/course/000/000/067/662b5d34ba7c0227.png)


