

How to install and use HTTPie and HTTP Prompt on Linux

HTTPie is a command line HTTP client built for modern web APIs. It provides intuitive commands and user-friendly interface. In this guide, you'll learn about HTTPie's features and how it compares to cURL. You will also learn how to install and start using HTTPie on your Linux system.
Before you begin
If you have not done so already, please create an account.
Follow our guide to setting up and securing a compute instance to update your system. You may also want to set the time zone, configure the hostname, create a limited user account, and enforce SSH access.
Please note
The steps in this guide are written for non-root users. Commands that require elevated privileges are prefixed with sudo. If you are unfamiliar with the sudo command, see https://www.linuxmi.com/linux-sudo-command.html.
What is HTTPie?
HTTPie is a command-line HTTP client similar to cURL. But unlike cURL, HTTPie is designed to be easier to use with modern web APIs. HTTPie's syntax is web services oriented. Its interface is more readable and user-friendly than cURL. These features make HTTPie a great tool for testing, debugging, or otherwise consuming web services from the command line.
HTTPie vs cURL
This section will explore why you might choose to use HTTPie instead of cURL, especially since cURL is installed by default on many Linux distributions. cURL excels at extending options to meet a wide range of HTTP needs. HTTPie focuses on supporting queries to modern web APIs. When using web APIs, it provides the most relevant details and hides information you are unlikely to need. HTTPie's output allows you to interact with web services more intuitively and clearly.
If you want to use web APIs, especially RESTful APIs that use JSON data, you should consider using HTTPie. Alternatively, if you want an HTTP client for more general needs, consider using cURL, as it provides some options to make it more adaptable.
You can learn more about curlie from our How to Install and Use Curlie Command on Linux, which is a modern command-line HTTP client with the readability of HTTPie and the adaptability of cURL .
How to install HTTPie
HTTPie is available from the package managers of most major Linux distributions. Below are the commands you can use when installing HTTPie through the package managers of different distributions.
On Debian and Ubuntu, use the following command:
sudo apt install httpie
Under AlmaLinux and CentOS operating systems, execute the following command:
sudo yum install httpie
On Fedora, use the following command:
sudo dnf install httpie
After installing HTTPie, you can verify the installation and access it using the http command.
1 2 3 |
|

How to use HTTPie
If you are familiar with other HTTP clients, httppie should be easier to learn. Most of its basic usage is similar to cURL, but it allows you to simplify the commands you need.
The following sections will introduce how to use HTTPie to handle the most common HTTP requests when using web services.
Basic usage
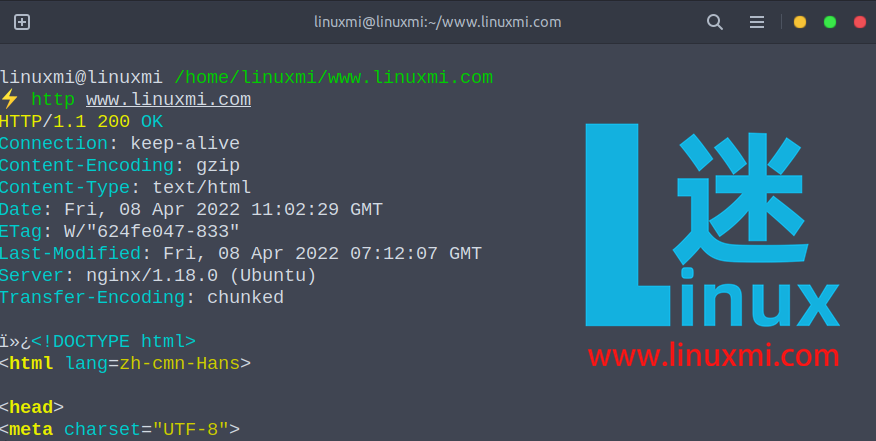
You can see the most basic usage of HTTPie in the GET request. Like cURL, HTTPie does not require you to specify the request method. Just provide the command and request URL.
HTTPie's output includes response header information by default. It uses syntax highlighting to make responses easier to read, as you can see in the screenshot below:
Adding header data to a request in httppie requires appending the data to the URL, as shown in the command below. The following example fetches a random "dad joke" from a web service. You can see that the command also adds the --follow option, which makes HTTPie follow any URL redirects (equivalent to -L in curl). HTTPie includes redirect response header information in the output.
Request method
To specify a request method in httppie, simply include the method name—GET, POST, PUT, DELETE, etc.—as the first part of the http command. This can be seen in the next example, which uses HTTPie's own web service for testing.
# Display request information (including return header 200)
http www.linuxmi.com
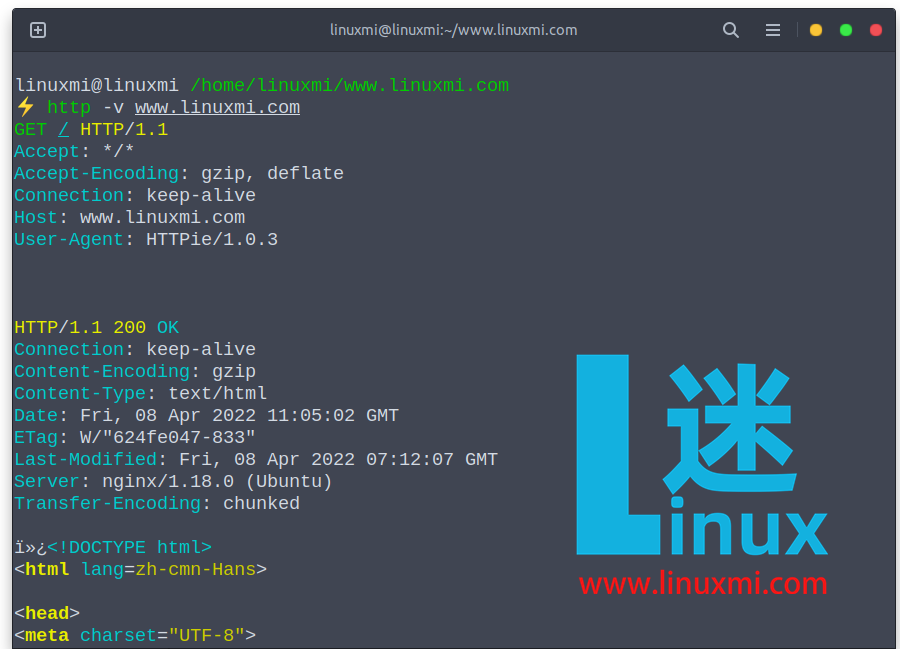
# Display detailed request (including request and return header 200)
http -v www.linuxmi.com
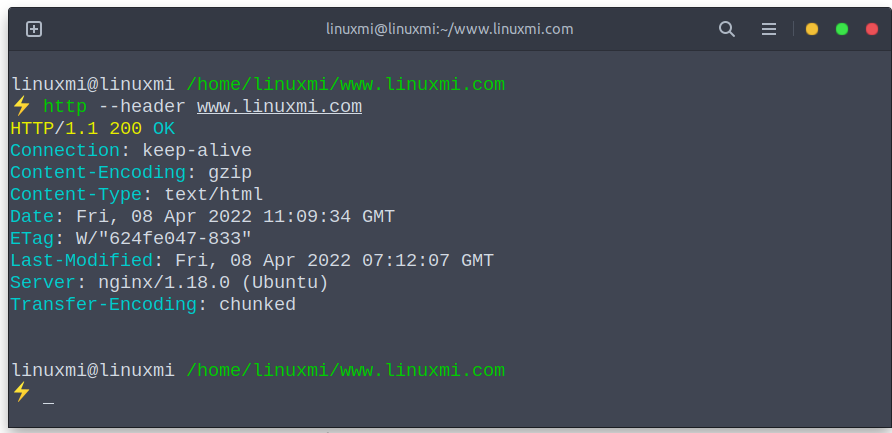
# Show only Header
http -h www.linuxmi.com
http –head www.linuxmi.com
http –header www.linuxmi.com
http –headers www.linuxmi.com
# 只显示Body
http -b www.linuxmi.com
http –body www.linuxmi.com
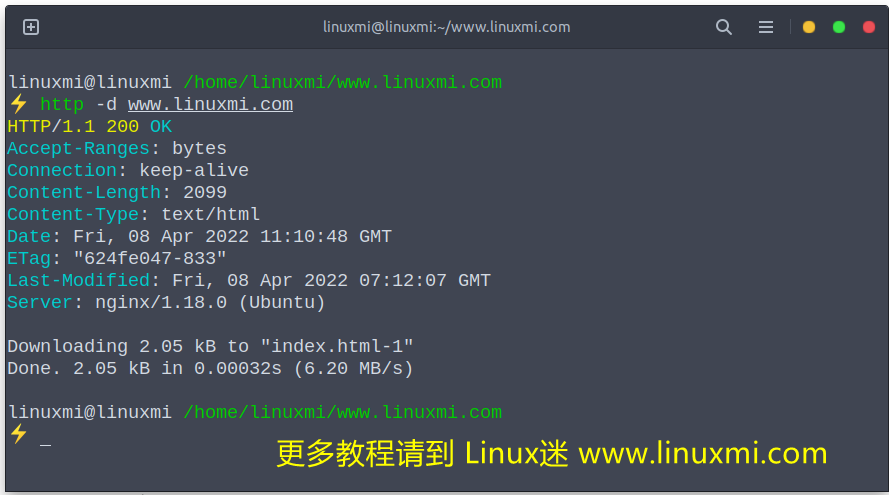
# 下载文件
http -d www.linuxmi.com
# 模拟提交表单
http -f POST www.linuxmi.com username=’linuxmi-user’
# 请求删除的方法
http DELETE www.linuxmi.com
# 传递JSON数据请求(默认就是JSON数据请求)
http PUT www.linuxmi.com username=’linuxmi-user’ password=’linuxmi-pwd’
# 如果JSON数据存在不是字符串则用:=分隔,例如
http PUT www.linuxmi.com username=’linuxmi-user’ password=’linuxmi-pwd’ age:=28 a:=true streets:='[“a”, “b”]’
# 模拟Form的Post请求, Content-Type: application/x-www-form-urlencoded; charset=utf-8
http –form POST www.linuxmi.com username=’linuxmi-user’
# 模拟Form的上传, Content-Type: multipart/form-data
http -f POST www.linuxmi.com/jobs username=’linuxmi-user’ file@~/test.pdf
# 修改请求头, 使用:分隔
http www.linuxmi.com User-Agent:mimvp-agent/1.0 ‘Cookie:a=b;b=c’ Referer:http://www.linuxmi.com/
# 认证
http -a username:password www.linuxmi.com
http –auth-type=digest -a username:password www.linuxmi.com
HTTP Prompt – 交互式命令行HTTP客户端
HTTP Prompt (或HTTP-prompt) 是基于HTTPie和prompt_toolkit构建的交互式命令行HTTP客户端,具有自动完成和语法突出显示功能。 它还支持自动cookie,OpenAPI/Swagger集成以及类Unix管道和输出重定向。 此外,它还提供了20多个可以使用的主题。
我们现在将解释如何在 Linux 中安装和简要使用 HTTP-prompt。
如何在Linux中安装HTTP Prompt
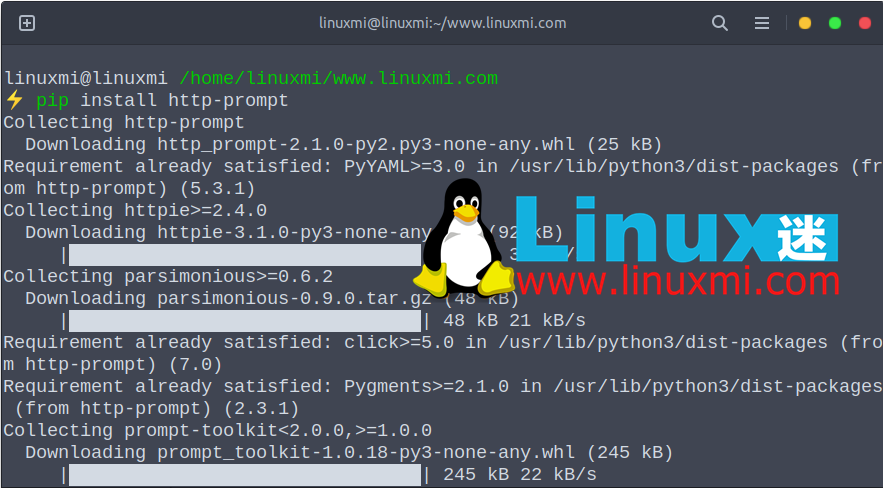
您可以使用PIP命令安装HTTP提示,就像常规Python包一样,如图所示。
1 2 |
|
1 |
|
如果您尝试在系统范围的Python上安装HTTP-prompt,则可能会收到一些权限错误。 不建议这样做,但如果这是您想要做的,只需使用sudo命令获得root权限。
或者,您可以使用–user选项将软件包安装到用户主目录中,如下所示:
1 |
|
要升级HTTP提示符,请执行以下操作:
1 |
|
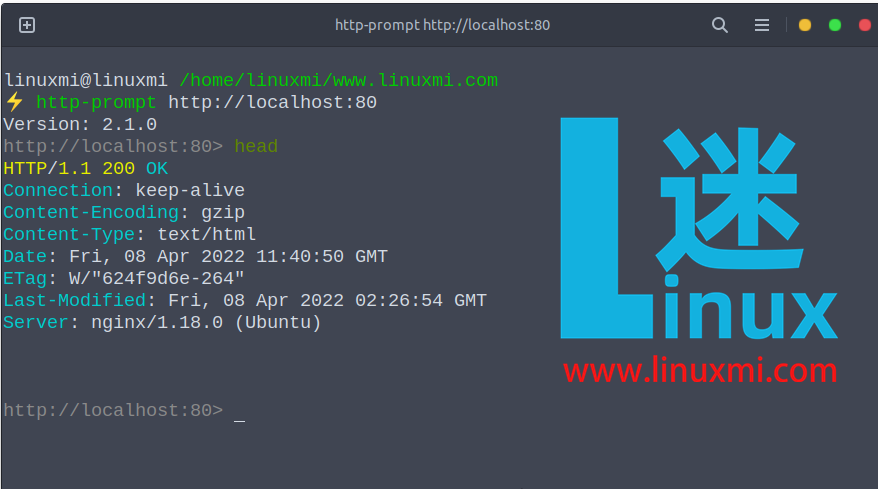
如何在Linux中使用HTTP Prompt
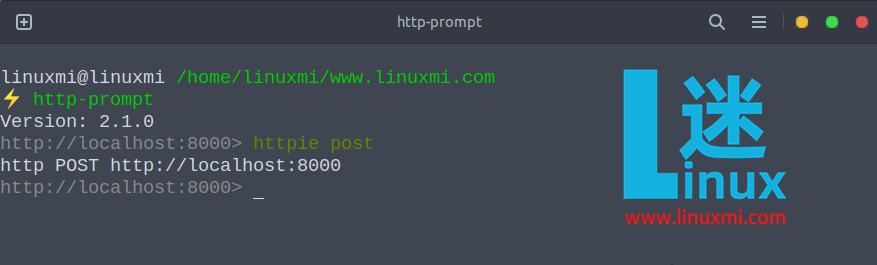
要启动会话,只需运行http-prompt命令,如图所示。
从最后一个会话开始或http://localhost:8000
1 2 3 4 5 6 |
|
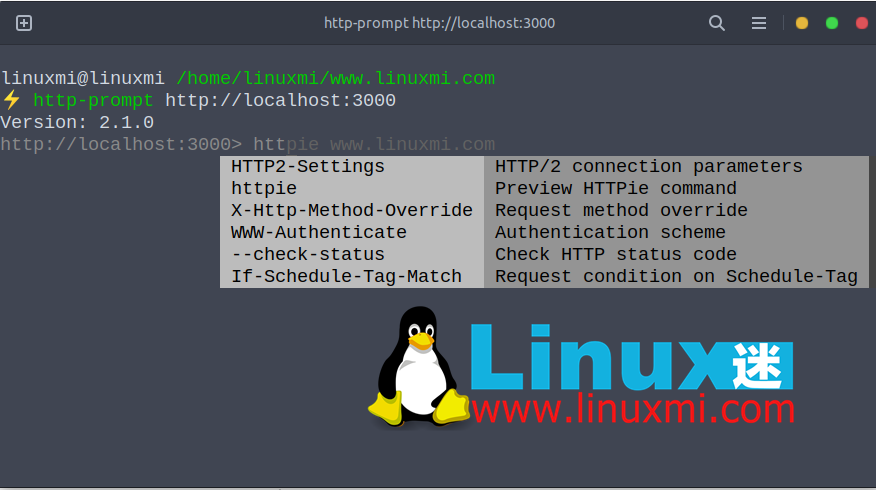
从给定的URL开始
1 2 |
|
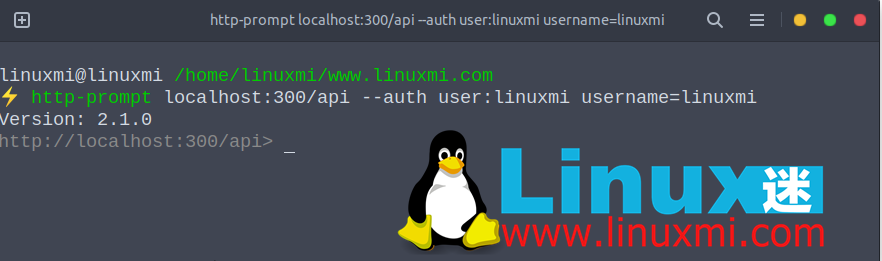
从一些初始选项开始
1 2 |
|
要预览HTTP Prompt将如何调用HTTPie,请运行以下命令。
http://localhost:300/api> httpie post
http –auth=user:linuxmi POST http://localhost:300/api username=linuxmi
启动会话后,您可以交互式键入命令
您可以发送HTTP请求,输入一个HTTP方法,如下所示。
> head
> get
> post
> put
> patch
> delete
可以添加标头,查询字符串或正文参数,使用HTTPie中的语法。 这里有些例子:
# 设置 header
> Content-Type:application/json
# 查询字符串参数
> page==5
# body 参数
> username=linuxmi
> full_name=’www.linuxmi.com’
# 原始JSON中的body参数
> number:=18719
> is_ok:=true
> names:=[“linuxmi”,”com”]
> user:='{“username”: “linuxmi”, “password”: “linuxmi”}’
# 把所有东西都写成一行
> Content-Type:application/json page==5 username=linuxmi
您还可以添加HTTPie选项,如图所示。
> –form –auth user:pass
> –verify=no
或者
> –form –auth user:pass username=linuxidc Content-Type:application/json
要重置会话(清除所有参数和选项)或退出会话,请运行:
> rm * #重置会话
> exit #退出会话
有关更多信息和用法示例,请参阅HTTP-prompt文档:http://http-prompt.com/。
结论
OK, that’s it! HTTP Prompt is the perfect companion to HTTPie.
Now you should be able to start sending requests to the web api using HTTPie. If you find yourself looking for more advanced features, you can find them when digging deeper into HTTPie. Check out httppie's official documentation and refer to the http --help command to start learning more about httppie's features.
We would love to hear from you. Share your thoughts or ask questions about HTTP Prompt vs. HTTPie in the comments below.
The above is the detailed content of How to install and use HTTPie and HTTP Prompt on Linux. For more information, please follow other related articles on the PHP Chinese website!

Hot AI Tools

Undresser.AI Undress
AI-powered app for creating realistic nude photos

AI Clothes Remover
Online AI tool for removing clothes from photos.

Undress AI Tool
Undress images for free

Clothoff.io
AI clothes remover

AI Hentai Generator
Generate AI Hentai for free.
Hot Article
Hot Tools

Notepad++7.3.1
Easy-to-use and free code editor

SublimeText3 Chinese version
Chinese version, very easy to use

Zend Studio 13.0.1
Powerful PHP integrated development environment

Dreamweaver CS6
Visual web development tools

SublimeText3 Mac version
God-level code editing software (SublimeText3)
Hot Topics
 1377
1377
 52
52

 Unable to log in to mysql as root
Apr 08, 2025 pm 04:54 PM
Unable to log in to mysql as root
Apr 08, 2025 pm 04:54 PM
The main reasons why you cannot log in to MySQL as root are permission problems, configuration file errors, password inconsistent, socket file problems, or firewall interception. The solution includes: check whether the bind-address parameter in the configuration file is configured correctly. Check whether the root user permissions have been modified or deleted and reset. Verify that the password is accurate, including case and special characters. Check socket file permission settings and paths. Check that the firewall blocks connections to the MySQL server.
 C language conditional compilation: a detailed guide for beginners to practical applications
Apr 04, 2025 am 10:48 AM
C language conditional compilation: a detailed guide for beginners to practical applications
Apr 04, 2025 am 10:48 AM
C language conditional compilation is a mechanism for selectively compiling code blocks based on compile-time conditions. The introductory methods include: using #if and #else directives to select code blocks based on conditions. Commonly used conditional expressions include STDC, _WIN32 and linux. Practical case: Print different messages according to the operating system. Use different data types according to the number of digits of the system. Different header files are supported according to the compiler. Conditional compilation enhances the portability and flexibility of the code, making it adaptable to compiler, operating system, and CPU architecture changes.
 What are the 5 basic components of Linux?
Apr 06, 2025 am 12:05 AM
What are the 5 basic components of Linux?
Apr 06, 2025 am 12:05 AM
The five basic components of Linux are: 1. The kernel, managing hardware resources; 2. The system library, providing functions and services; 3. Shell, the interface for users to interact with the system; 4. The file system, storing and organizing data; 5. Applications, using system resources to implement functions.
 How to solve mysql cannot be started
Apr 08, 2025 pm 02:21 PM
How to solve mysql cannot be started
Apr 08, 2025 pm 02:21 PM
There are many reasons why MySQL startup fails, and it can be diagnosed by checking the error log. Common causes include port conflicts (check port occupancy and modify configuration), permission issues (check service running user permissions), configuration file errors (check parameter settings), data directory corruption (restore data or rebuild table space), InnoDB table space issues (check ibdata1 files), plug-in loading failure (check error log). When solving problems, you should analyze them based on the error log, find the root cause of the problem, and develop the habit of backing up data regularly to prevent and solve problems.
 Can mysql run on android
Apr 08, 2025 pm 05:03 PM
Can mysql run on android
Apr 08, 2025 pm 05:03 PM
MySQL cannot run directly on Android, but it can be implemented indirectly by using the following methods: using the lightweight database SQLite, which is built on the Android system, does not require a separate server, and has a small resource usage, which is very suitable for mobile device applications. Remotely connect to the MySQL server and connect to the MySQL database on the remote server through the network for data reading and writing, but there are disadvantages such as strong network dependencies, security issues and server costs.
 Solutions to the errors reported by MySQL on a specific system version
Apr 08, 2025 am 11:54 AM
Solutions to the errors reported by MySQL on a specific system version
Apr 08, 2025 am 11:54 AM
The solution to MySQL installation error is: 1. Carefully check the system environment to ensure that the MySQL dependency library requirements are met. Different operating systems and version requirements are different; 2. Carefully read the error message and take corresponding measures according to prompts (such as missing library files or insufficient permissions), such as installing dependencies or using sudo commands; 3. If necessary, try to install the source code and carefully check the compilation log, but this requires a certain amount of Linux knowledge and experience. The key to ultimately solving the problem is to carefully check the system environment and error information, and refer to the official documents.
 MySQL can't be installed after downloading
Apr 08, 2025 am 11:24 AM
MySQL can't be installed after downloading
Apr 08, 2025 am 11:24 AM
The main reasons for MySQL installation failure are: 1. Permission issues, you need to run as an administrator or use the sudo command; 2. Dependencies are missing, and you need to install relevant development packages; 3. Port conflicts, you need to close the program that occupies port 3306 or modify the configuration file; 4. The installation package is corrupt, you need to download and verify the integrity; 5. The environment variable is incorrectly configured, and the environment variables must be correctly configured according to the operating system. Solve these problems and carefully check each step to successfully install MySQL.
 How to solve the problem of missing dependencies when installing MySQL
Apr 08, 2025 pm 12:00 PM
How to solve the problem of missing dependencies when installing MySQL
Apr 08, 2025 pm 12:00 PM
MySQL installation failure is usually caused by the lack of dependencies. Solution: 1. Use system package manager (such as Linux apt, yum or dnf, Windows VisualC Redistributable) to install the missing dependency libraries, such as sudoaptinstalllibmysqlclient-dev; 2. Carefully check the error information and solve complex dependencies one by one; 3. Ensure that the package manager source is configured correctly and can access the network; 4. For Windows, download and install the necessary runtime libraries. Developing the habit of reading official documents and making good use of search engines can effectively solve problems.
