

How to display thumbnails on USB drive

In the process of using U disk, we often encounter a problem, that is, the photos, videos or other files in the U disk cannot be displayed as thumbnails and can only be displayed in the form of icons. This brings some inconvenience to us in finding and previewing files. So, how do we display thumbnails in the USB flash drive? Below, PHP editor Xigua will give you a detailed answer.
The file cannot be copied to the USB flash drive. It may be because the partition format of the USB flash drive is FAT32 instead of NTFS. You can try changing the partition format of the USB flash drive to NTFS so that you can copy large files.
The second type is that the pictures are not displayed as thumbnails, so you have to click on them one by one to find them.
The third type is that the page suddenly becomes larger or smaller.
I don’t know these three situations, they can be solved with a few simple operations.
1. Change the U disk partition to NTFSThe default partition format of a newly purchased U disk is generally FAT32, and there is no problem in using it under normal circumstances. However, when you need to copy files larger than 4G, a prompt that cannot be copied will appear, which brings some trouble to use. In order to solve this problem, the easiest way is to check the format of the new USB flash drive before using it. If it is FAT32, format it directly into NTFS. It should be noted that after formatting, all data in the USB flash drive will be cleared, so please be sure to save important information in advance.
1. Turn on the computer - select the U disk - right click and properties
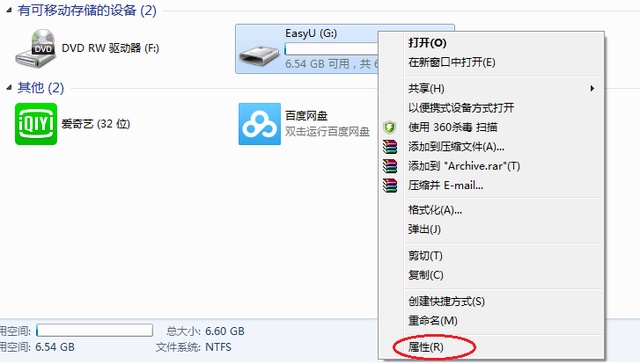
⒉The interface will pop up and you can see what format it is

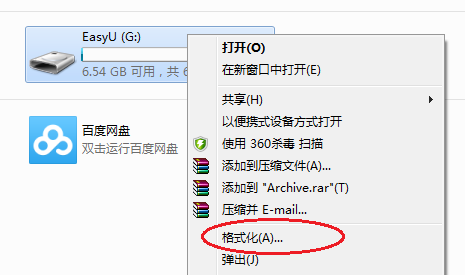
⒊If it is fat32, format it, select the U disk, right-click, format
⒋Select NTFS - Quick Format - Start
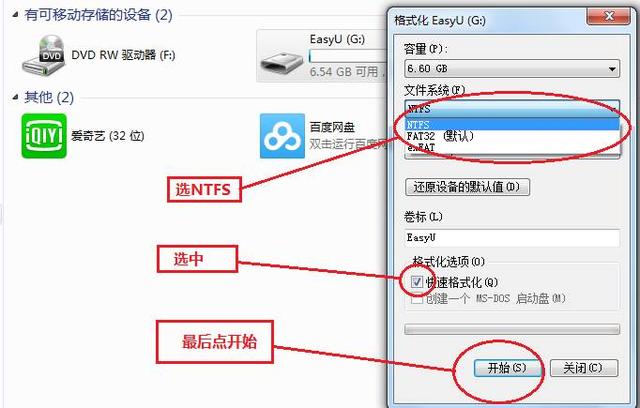
⒌Click OK - Complete
Note: Formatting will clear all data in the USB flash drive, remember to back up the data
Originally, there were commands to convert, but for normal use, forget it.
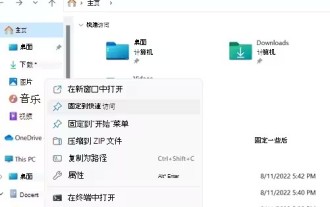
2. Display thumbnails for picturesIf you want to quickly find the photo you want among a large number of pictures if you want to quickly open the thumbnails, it will be troublesome to open the pictures one by one to view them.
Double-click Computer - Click Organization - Folder and Search Options
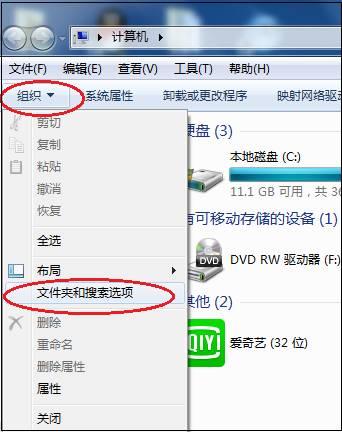
⒉The pop-up interface selects View, always displays icons, and never displays thumbnails √Remove
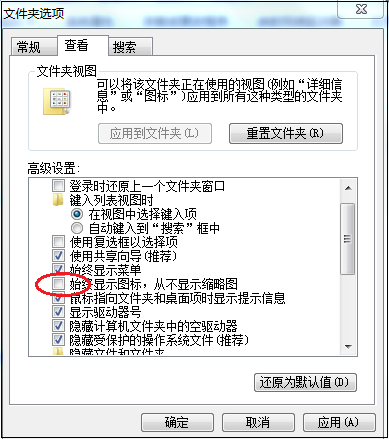
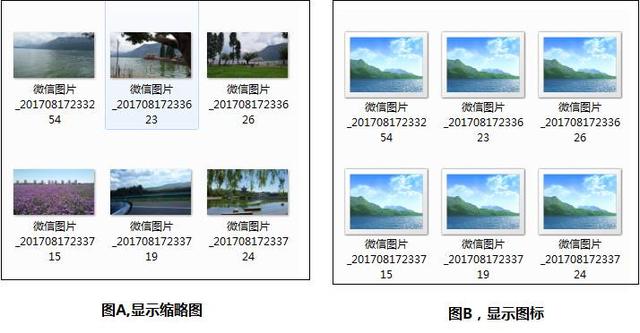
⒊Click OK, and then you can see the picture (Figure A) instead of the icon (Figure B) without opening the picture
Sometimes I don’t know if I pressed the above key, and the page suddenly becomes larger or smaller. Just Ctrl (plus sign or minus sign). There is no need to write this in detail.
Because I have helped customers deal with these problems, I thought I could write them down for reference.
The above is the detailed content of How to display thumbnails on USB drive. For more information, please follow other related articles on the PHP Chinese website!

Hot AI Tools

Undresser.AI Undress
AI-powered app for creating realistic nude photos

AI Clothes Remover
Online AI tool for removing clothes from photos.

Undress AI Tool
Undress images for free

Clothoff.io
AI clothes remover

AI Hentai Generator
Generate AI Hentai for free.

Hot Article
Hot Tools

Notepad++7.3.1
Easy-to-use and free code editor

SublimeText3 Chinese version
Chinese version, very easy to use

Zend Studio 13.0.1
Powerful PHP integrated development environment

Dreamweaver CS6
Visual web development tools

SublimeText3 Mac version
God-level code editing software (SublimeText3)
Hot Topics
 1378
1378
 52
52

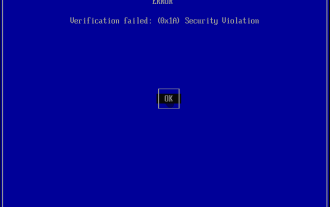 Ventoy secure boot settingsSecure Boot
Jun 18, 2024 pm 09:00 PM
Ventoy secure boot settingsSecure Boot
Jun 18, 2024 pm 09:00 PM
Ventoy is a USB boot tool that can directly boot ISO/WIM/IMG/VHD(x)/EFI and other types of files in the USB flash drive. It is very easy to use. Laptops have secure boot turned on by default. If they are not turned off or cannot be turned off, they cannot be booted from a USB device. Ventoy also supports secure boot. The principle is to inject a GRUB installation certificate into the current computer. As long as your computer After being injected once, any USB disk PE booted based on grub can pass. The official description of Ventoy is a GIF image. The playback speed is too fast and you may not be able to remember it. The editor has divided the GIF image to make it easier to understand. Ventoy secure boot has EnrollKey and Enro
 How to disable taskbar thumbnail preview in Win11? Turn off the taskbar icon display thumbnail technique by moving the mouse
Feb 29, 2024 pm 03:20 PM
How to disable taskbar thumbnail preview in Win11? Turn off the taskbar icon display thumbnail technique by moving the mouse
Feb 29, 2024 pm 03:20 PM
This article will introduce how to turn off the thumbnail function displayed when the mouse moves the taskbar icon in Win11 system. This feature is turned on by default and displays a thumbnail of the application's current window when the user hovers the mouse pointer over an application icon on the taskbar. However, some users may find this feature less useful or disruptive to their experience and want to turn it off. Taskbar thumbnails can be fun, but they can also be distracting or annoying. Considering how often you hover over this area, you may have inadvertently closed important windows a few times. Another drawback is that it uses more system resources, so if you've been looking for a way to be more resource efficient, we'll show you how to disable it. but
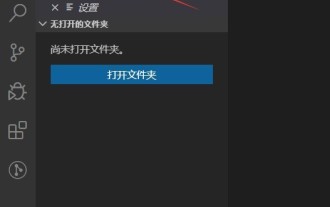 How to display thumbnails in Vscode_How to display thumbnails in Vscode
Apr 02, 2024 pm 02:43 PM
How to display thumbnails in Vscode_How to display thumbnails in Vscode
Apr 02, 2024 pm 02:43 PM
1. First enter Visual Studio Code and click [File] in the upper left corner. 2. Then click [Preferences]. 3. Click the [Settings] item. 4. Then click [Text Editor-Thumbnail]. 5. Finally, in the thumbnail item, turn on [Control whether to display thumbnails].
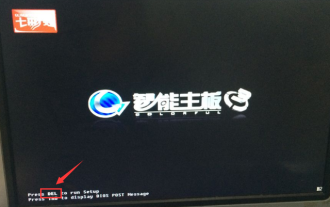 Colorful motherboard boot USB flash drive shortcut key
Mar 19, 2024 pm 12:55 PM
Colorful motherboard boot USB flash drive shortcut key
Mar 19, 2024 pm 12:55 PM
Hello everyone, today I will share a graphic tutorial from Xiaobai System official website (xiaobaixitong.com). Colorful motherboard is a computer motherboard brand with very good performance, and it has certain advantages in all aspects, and its price-performance ratio is also very high. So here comes the question, how to set the USB boot option for Colorful motherboard? Don’t worry, the editor will show you how to set up the USB disk boot option in Colorful. Teach you step by step how to set the U disk boot option for Colorful motherboard: First, insert the U disk into the computer, then turn on the computer and quickly and intermittently press the startup shortcut key to enter the BIOS setting interface (please note: usually it will be displayed below the computer brand logo Start hotkey hints). 2. Enter BIOS settings
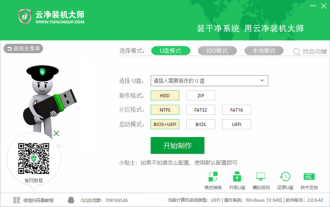 What should I do if the system installation is too slow when reinstalling the system from USB disk in System Home?
Mar 01, 2024 pm 11:30 PM
What should I do if the system installation is too slow when reinstalling the system from USB disk in System Home?
Mar 01, 2024 pm 11:30 PM
When reinstalling the system, many users use the USB flash drive reinstallation system of System Home. However, when they reinstall the USB flash drive, they find that the loading speed is too slow. So how should we deal with it? What should I do if the system installation is too slow when reinstalling the system via USB flash drive in System Home? Reason introduction: 1. The transmission speed of the USB flash drive itself is slow, especially when processing large files, and the operation time is very long. 2. The USB interface of the computer and the extension cord will cause The signal is attenuated, making the USB disk reinstallation system installation too slow. Solution: 1. The U disk can only be used as a PE system disk. Just put the system GHO file into the U disk. 2. When the user starts the U disk and enters the PE system, he directly copies GHO to the D disk. 3. When restoring the system, you can directly quote the GHO file of the D drive
 How to delete USB disk files? What should I do if the USB disk files cannot be deleted?
Mar 14, 2024 pm 08:49 PM
How to delete USB disk files? What should I do if the USB disk files cannot be deleted?
Mar 14, 2024 pm 08:49 PM
There are many important files stored in the USB flash drive, and there are also some useless files. Cleaning the USB flash drive regularly can better manage the USB flash drive resources. However, some users found that some files in the USB disk cannot be deleted. What is going on? This tutorial will bring you the solution, come and take a look. 1. Check whether the file is occupied 1. Open the file explorer and find the path of the U disk. 2. Right-click the file you want to delete and select "Properties". 3. In the "Properties" window, switch to the "Security" tab. 4. Click the "Advanced" button to view the file permissions. 5. Ensure that the current user has
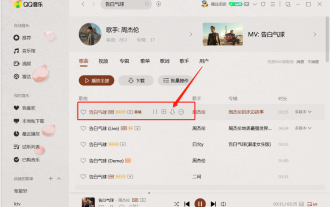 How to download qq music to USB flash drive? -How to download qq music to USB disk
Apr 01, 2024 am 10:11 AM
How to download qq music to USB flash drive? -How to download qq music to USB disk
Apr 01, 2024 am 10:11 AM
1. Open QQ Music software, enter the name of your favorite song in the search bar, and click the download button. 2. Open the folder where the downloaded songs are stored. 3. Copy the downloaded songs to the USB flash drive, and that’s it! Of course, you need to open the U disk first, then open the U disk in "My Computer" and paste it.
 How to download soda music to USB disk
Feb 24, 2024 pm 12:10 PM
How to download soda music to USB disk
Feb 24, 2024 pm 12:10 PM
Soda Music can download music to a USB flash drive, so how do you download it to a USB flash drive? Users need to click on the music, then click on the three dots on the right side of the music, and click on download. This introduction to the method of downloading to a USB disk can tell you how to operate it. The following is a detailed introduction, so take a look! Tutorial on using soda music. How to download soda music to USB flash drive. Answer: Click the three dots on the right side of the music in the music, and click download inside. The specific method: 1. First, click the music button below. 2. After selecting a piece of music, click the three dots on the right. 3. After entering, click the download button inside.
