php editor Strawberry will introduce you to the tutorial on how to draw a timeline in iMindMap. iMindMap is a powerful mind mapping software through which you can easily draw various mind maps. Timeline is a commonly used chart form that displays the sequence of events, which can help us understand the development of events more clearly. Next, we will introduce in detail how to use iMindMap to draw timelines, allowing you to easily create beautiful timeline diagrams.
1. Open the software and click [Timeline Mind Map]

2. Click to set the settings you want to create Timeline range

3. After creation, start editing the content. Double-click the blank part to display three options [Milestone], [Task], and [Swim Lane], corresponding to your needs. The goals completed, the goals completed on the day, and the long-term goals (if you want to use the timeline to organize learning ideas, such as historical time, you can choose "swim lanes")

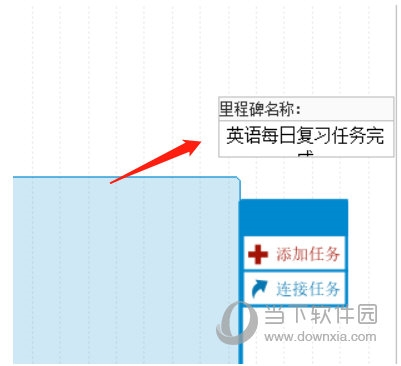
4. Here we are For example, select [Milestone], double-click to enter the name

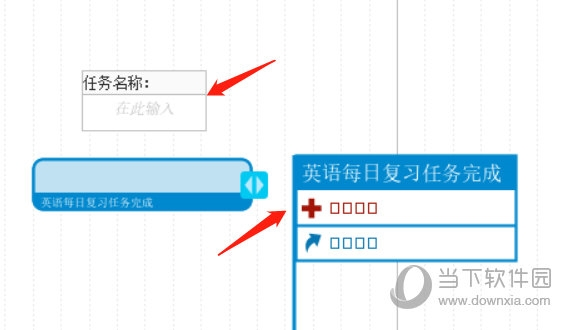
5. Then start adding [Task], click [Red Plus Sign] to add, as shown in the figure


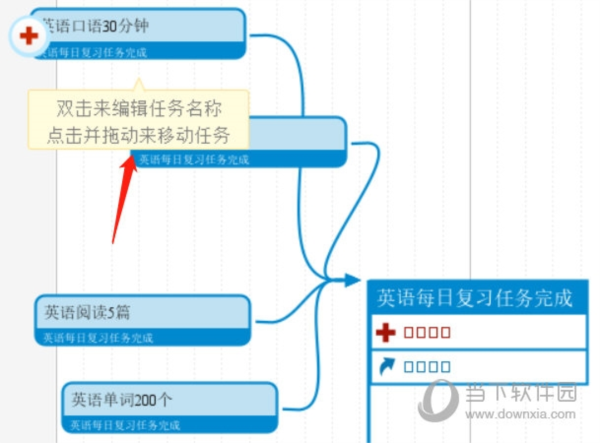
6. After the addition is completed, we can connect [Task] and [Milestone] and click [Blue Arrow] to connect them After the lines

# are completed, the user can also drag and adjust their position to make them look more beautiful. After you learn to establish a timeline, you can make your task planning more organized and review more conveniently. The above is the iMindMap related tutorial I brought to you, I hope it can help you.
The above is the detailed content of How to draw timeline in iMindMap tutorial. For more information, please follow other related articles on the PHP Chinese website!
 How to restore Bluetooth headset to binaural mode
 What browser is edge?
 Win10 does not support the disk layout solution of Uefi firmware
 How to use dict function in Python
 What are the differences between hibernate and mybatis
 What should I do if iis cannot start?
 what does bbs mean
 Advantages and Disadvantages of Free Overseas Website Servers


