

pipx: Let you easily manage Python applications in Linux

If you are a Python enthusiast, you may often use the pip tool to install and manage your favorite Python packages and modules. However, did you know that pip has some drawbacks, such as the possibility of conflicting with your system package manager or the need to create a separate virtual environment for each application? Fortunately, there's a better option, and it's called pipx . pipx is a tool for installing and running Python applications in an isolated virtual environment. It allows you to easily manage Python applications in Linux. In this article, we will show you how to install and use pipx on Ubuntu and other Linux distributions.
However, in recent releases, pip users have encountered external management environment errors.
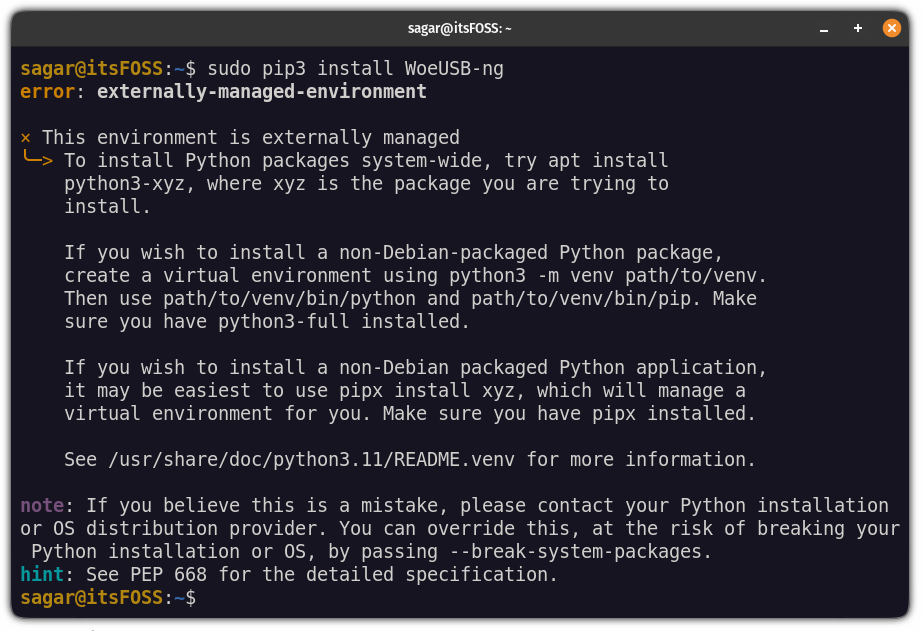
error: externally-managed-environment
This is a "feature" added to avoid conflicts between Python packages installed via pip and the native package manager. Python expects you to use a separate virtual environment rather than installing packages globally via pip.
This is where pipx comes into play. It creates a new virtual environment for each app you install, and then creates links to local binaries in /bin at the global level. It's all automatic. It saves you time and energy.
Let’s see how to install and use pipx on Ubuntu and other Linux distributions.
Installing pipx on Ubuntu and other Linux
Installation is simple and can be installed on Ubuntu and Debian using the following command:
sudo apt update && sudo apt install pipx
For other distributions, please use your package manager and install it.
Once you have finished installing, add it to $PATH so you can access it from anywhere:
pipx ensurepath
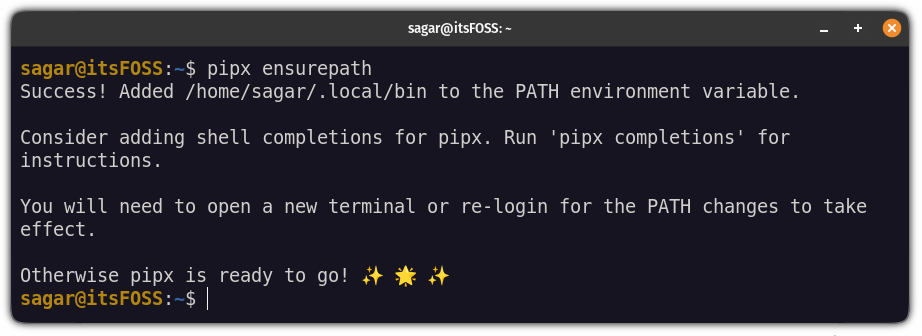
install pipx in ubuntu
Close the terminal and restart it. That's it! Now, let's see how to use it.
Use pipx
What is the main purpose of a package manager? Package installation, update and removal.
Let me show you how to use pipx to do the following:
- Search package
- Package installation
- upgrade
- Package removal
Let’s start with installation.
How to use pipx to install the package
To install a package using pipx you must follow a simple command syntax:
pipx install
For example, here I installed a very useful program Cowsay:
pipx install cowsay
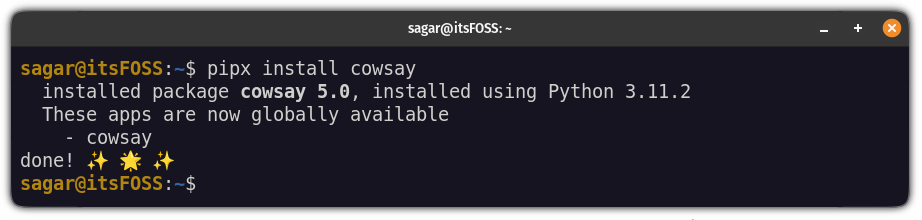
install python packages in isolation using pipx in ubuntu
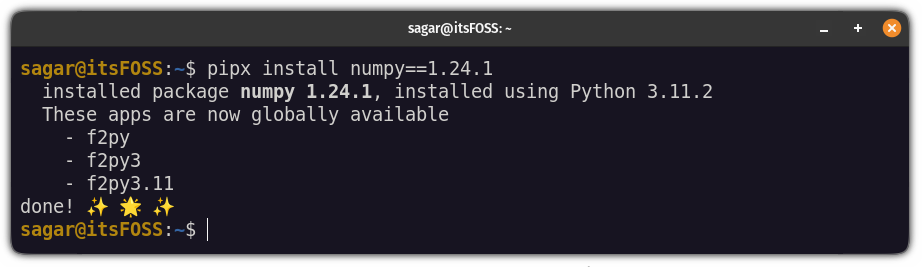
Similarly, if you want to install a specific version of a package, you must == followed by the version number, like this:
pipx install package==version
例如,在这里,我安装了 1.24.1 版本的 numpy:
pipx install numpy==1.24.1
如何搜索包
pipx 程序没有搜索功能(因为 PyPI 的 API 使用限制)但这并不意味着你不能搜索 Python 包。
要搜索包,你需要安装 pypisearch:
pipx install pypisearch
完成后,你可以使用 pypisearch 命令搜索包:
pypisearch python_package_name
在这里,我搜索了 neofetch:
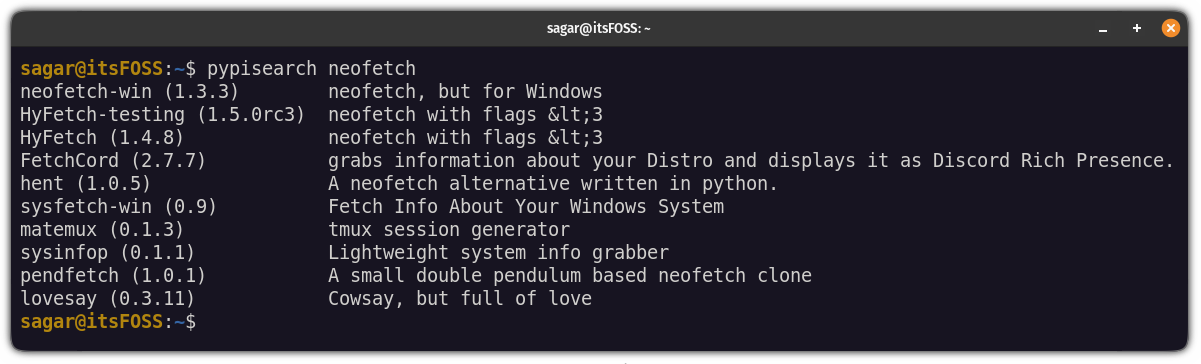
search python packages in Ubuntu
如何使用 pipx 升级包
与任何其他现代包管理器一样,你可以一次升级所有包,也可以一次升级一个包。
要一次升级所有软件包,你只需执行以下命令:
pipx upgrade-all

upgrade all the python packages at once in ubuntu
如你所见,它将 numpy 升级到最新版本。
但是如果你想升级一个特定的包,你可以这样做:
pipx upgrade package-name
假设我想将 cowsay 包升级到最新版本,那么,我将使用以下命令:
pipx upgrade cowsay

upgrade specific python package using pipx in ubuntu
如何使用 pipx 卸载包
要删除包,你必须使用 uninstall 标志,如下所示:
pipx uninstall package_name
为了供你参考,在这里,我从我的系统中删除了 numpy:
pipx uninstall numpy

remove python packages using pipx in ubuntu
pip 还是 pipx?
对 pip 的限制影响了最终用户对它的使用。值得庆幸的是,pipx 提供了急需的替代方案。它符合使用虚拟环境的 Python 准则,同时允许已安装的应用在全局范围内可用。
对于不是 Python 应用开发的最终用户,这提供了使用发行版仓库中不可用的 Python 应用的选项。
The above is the detailed content of pipx: Let you easily manage Python applications in Linux. For more information, please follow other related articles on the PHP Chinese website!

Hot AI Tools

Undresser.AI Undress
AI-powered app for creating realistic nude photos

AI Clothes Remover
Online AI tool for removing clothes from photos.

Undress AI Tool
Undress images for free

Clothoff.io
AI clothes remover

AI Hentai Generator
Generate AI Hentai for free.

Hot Article
Hot Tools

Notepad++7.3.1
Easy-to-use and free code editor

SublimeText3 Chinese version
Chinese version, very easy to use

Zend Studio 13.0.1
Powerful PHP integrated development environment

Dreamweaver CS6
Visual web development tools

SublimeText3 Mac version
God-level code editing software (SublimeText3)
Hot Topics
 1384
1384
 52
52

 Difference between centos and ubuntu
Apr 14, 2025 pm 09:09 PM
Difference between centos and ubuntu
Apr 14, 2025 pm 09:09 PM
The key differences between CentOS and Ubuntu are: origin (CentOS originates from Red Hat, for enterprises; Ubuntu originates from Debian, for individuals), package management (CentOS uses yum, focusing on stability; Ubuntu uses apt, for high update frequency), support cycle (CentOS provides 10 years of support, Ubuntu provides 5 years of LTS support), community support (CentOS focuses on stability, Ubuntu provides a wide range of tutorials and documents), uses (CentOS is biased towards servers, Ubuntu is suitable for servers and desktops), other differences include installation simplicity (CentOS is thin)
 How to install centos
Apr 14, 2025 pm 09:03 PM
How to install centos
Apr 14, 2025 pm 09:03 PM
CentOS installation steps: Download the ISO image and burn bootable media; boot and select the installation source; select the language and keyboard layout; configure the network; partition the hard disk; set the system clock; create the root user; select the software package; start the installation; restart and boot from the hard disk after the installation is completed.
 Centos options after stopping maintenance
Apr 14, 2025 pm 08:51 PM
Centos options after stopping maintenance
Apr 14, 2025 pm 08:51 PM
CentOS has been discontinued, alternatives include: 1. Rocky Linux (best compatibility); 2. AlmaLinux (compatible with CentOS); 3. Ubuntu Server (configuration required); 4. Red Hat Enterprise Linux (commercial version, paid license); 5. Oracle Linux (compatible with CentOS and RHEL). When migrating, considerations are: compatibility, availability, support, cost, and community support.
 How to use docker desktop
Apr 15, 2025 am 11:45 AM
How to use docker desktop
Apr 15, 2025 am 11:45 AM
How to use Docker Desktop? Docker Desktop is a tool for running Docker containers on local machines. The steps to use include: 1. Install Docker Desktop; 2. Start Docker Desktop; 3. Create Docker image (using Dockerfile); 4. Build Docker image (using docker build); 5. Run Docker container (using docker run).
 Detailed explanation of docker principle
Apr 14, 2025 pm 11:57 PM
Detailed explanation of docker principle
Apr 14, 2025 pm 11:57 PM
Docker uses Linux kernel features to provide an efficient and isolated application running environment. Its working principle is as follows: 1. The mirror is used as a read-only template, which contains everything you need to run the application; 2. The Union File System (UnionFS) stacks multiple file systems, only storing the differences, saving space and speeding up; 3. The daemon manages the mirrors and containers, and the client uses them for interaction; 4. Namespaces and cgroups implement container isolation and resource limitations; 5. Multiple network modes support container interconnection. Only by understanding these core concepts can you better utilize Docker.
 What to do after centos stops maintenance
Apr 14, 2025 pm 08:48 PM
What to do after centos stops maintenance
Apr 14, 2025 pm 08:48 PM
After CentOS is stopped, users can take the following measures to deal with it: Select a compatible distribution: such as AlmaLinux, Rocky Linux, and CentOS Stream. Migrate to commercial distributions: such as Red Hat Enterprise Linux, Oracle Linux. Upgrade to CentOS 9 Stream: Rolling distribution, providing the latest technology. Select other Linux distributions: such as Ubuntu, Debian. Evaluate other options such as containers, virtual machines, or cloud platforms.
 What to do if the docker image fails
Apr 15, 2025 am 11:21 AM
What to do if the docker image fails
Apr 15, 2025 am 11:21 AM
Troubleshooting steps for failed Docker image build: Check Dockerfile syntax and dependency version. Check if the build context contains the required source code and dependencies. View the build log for error details. Use the --target option to build a hierarchical phase to identify failure points. Make sure to use the latest version of Docker engine. Build the image with --t [image-name]:debug mode to debug the problem. Check disk space and make sure it is sufficient. Disable SELinux to prevent interference with the build process. Ask community platforms for help, provide Dockerfiles and build log descriptions for more specific suggestions.
 How to view the docker process
Apr 15, 2025 am 11:48 AM
How to view the docker process
Apr 15, 2025 am 11:48 AM
Docker process viewing method: 1. Docker CLI command: docker ps; 2. Systemd CLI command: systemctl status docker; 3. Docker Compose CLI command: docker-compose ps; 4. Process Explorer (Windows); 5. /proc directory (Linux).
