
php editor Strawberry introduces you to the Win10Guid activation tutorial. Win10Guid is a simple and fast activation tool that can help users activate the Windows 10 operating system and make it genuine. Through Win10Guid, users can easily activate the system in just a few steps and enjoy the security and stability brought by genuine authorization. This tutorial will introduce in detail the installation and use of Win10Guid, helping users quickly complete the activation process and make your Windows 10 system more stable and reliable.
UEFI GPT Advantages
1. GPT can use hard disks larger than 2.2T (the maximum volume is 18 EB), but MBR cannot.
2. GPT can support unlimited partitions, MBR can support up to 4 primary partitions, and more than 4 sub-partitions can only be through logical partitions.
3. GPT partition disk has a backup partition table to improve the integrity of the partition data structure.
4. UEFI GPT boots up faster.
5. UEFI GPT supports Secure Boot to resist bootkit attacks.
6. UEFI BIOS can operate the graphical interface with the mouse.
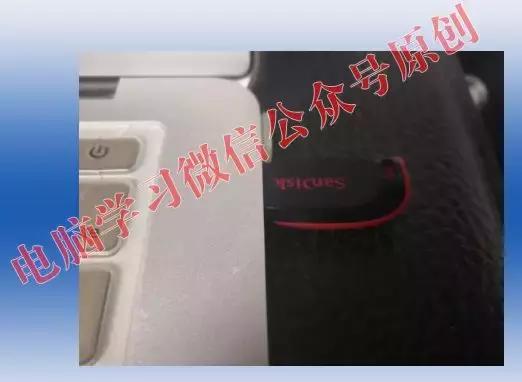
1. Prepare an empty U disk larger than 8G (or Mobile hard disk), make a PE system boot tool (after making it, it will be your computer system maintenance tool).
①The USB disk must be empty. (If there are files in U, you need to back up the data inside, because all the contents will be automatically cleared after a while. When ready, plug it into the USB port of the computer.)
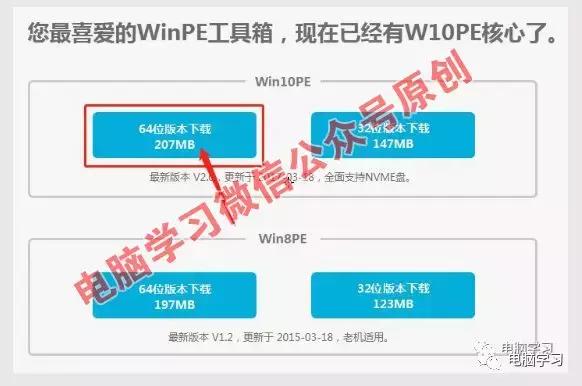
② Use a browser to open the URL http://www.wepe.com.cn/download.html and create a real Your own PE tool. As shown below, click on the 64-bit version in Win10PE to download. (This choice needs to be based on your own computer situation. If you don’t know, just choose the same one as the editor. If you have an old machine, I suggest you choose the 64-bit download under Win8PE)
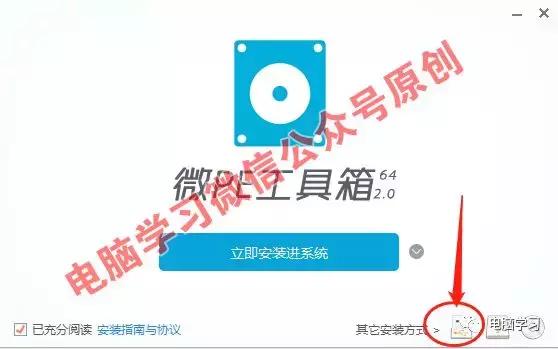
③After downloading, double-click to open WePE_64_V2.0.exe.
The interface is as shown below. Click the first icon in the lower right corner (if you have a mobile hard disk, please select the second icon) to install PE to the USB disk.
④Select the U disk you just inserted behind the U disk to be written Drive letter.
Don’t make the wrong choice. You can identify it according to the size and brand of the U disk, and then click the Install Now button to complete the U disk.
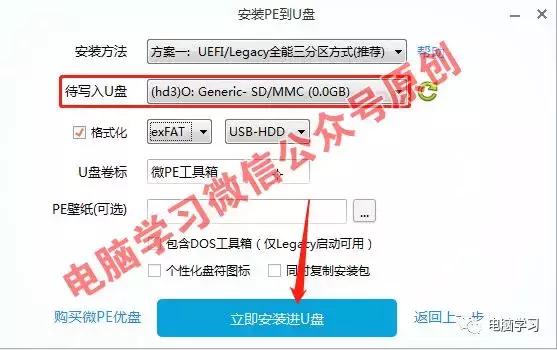
After completion, you will have your own computer repair artifact!
2. Download the win10 Enterprise operating system (2019 latest enterprise version)
Windows 10 Enterprise LTSC 2019 ( x86)
(win10 Enterprise 32-bit version)
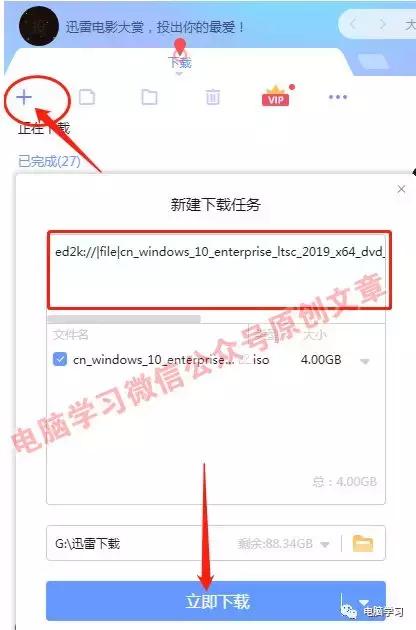
##ed2k://|file|cn_windows_10_enterprise_ltsc_2019_x86_dvd_62156a9a.iso|3095267328|8C81DB85E8D1B0E431CFEB12CDBBF745|/Windows 10 Enterprise LTSC 2019 (x64)(win10 Enterprise 64-bit version)##ed2k://|file|cn_windows_10_enterprise_ltsc_2019_x64_dvd_d17070a8.iso|4290967552|9E80DED85693E8E4E0D76E5 5B1207221|/
Download method: Open Thunder, click the plus sign in the upper left corner, then copy and paste the red address above into the pop-up dialog box, and click download.
#3. Prepare the win10 activation tool
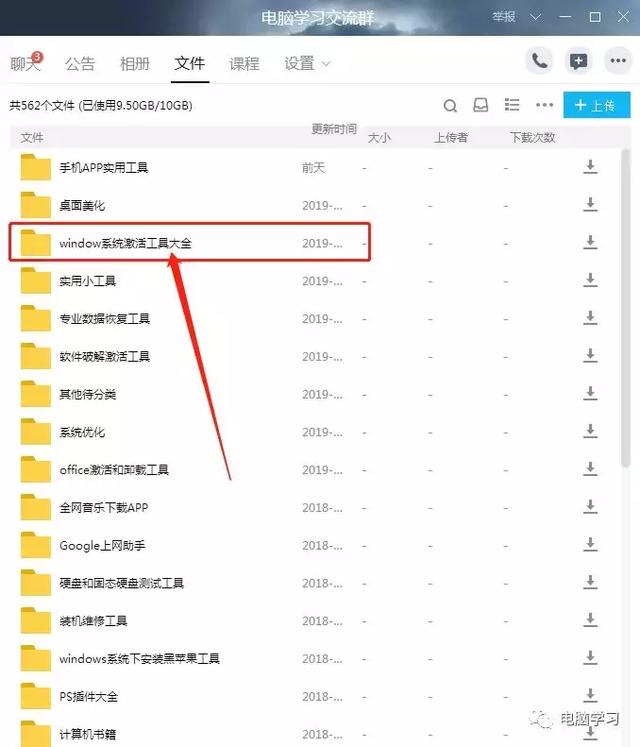
The editor of the win10 activation tool has uploaded it to the QQ group 149953012 file. After joining the group, find the folder Windows System Activation Tools in the group file and double-click to enter.
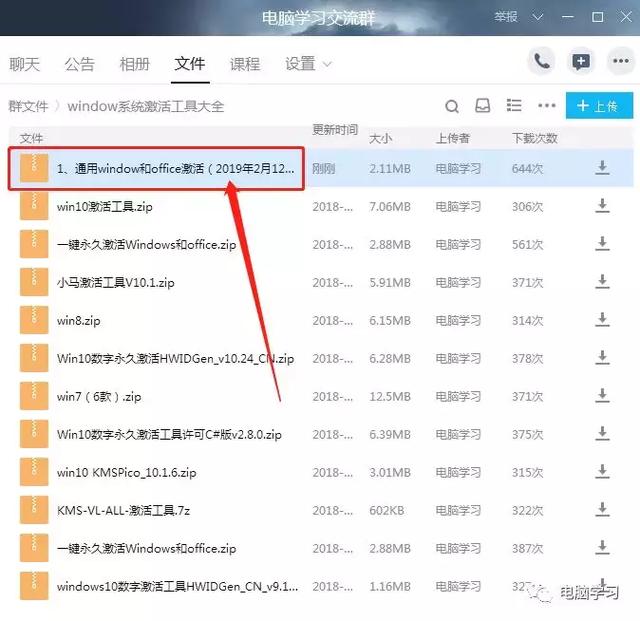
Look for the file named 1, universal (window and office) activated file, download it for later use.
4. Combine the win10 system image file downloaded in step 2 above with Copy the activation tool downloaded in step 3 (after decompression) to the USB flash drive prepared in step 1. Plug the U disk into the USB port of the computer and do not remove it.
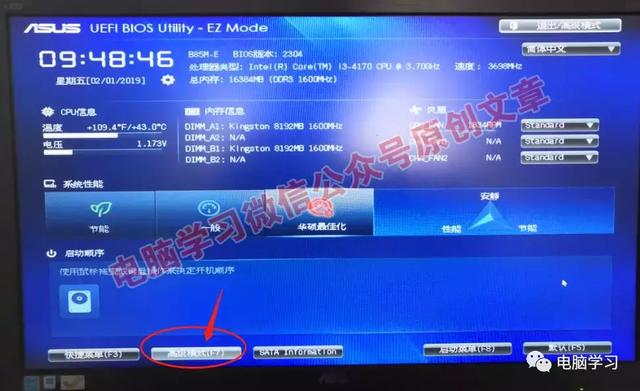
1. Restart the computer and enter the BIOS interface. This is an Asus motherboard. After the boot screen lights up, press F2 to enter the BIOS interface (there will be a prompt at the bottom of the computer just after it is turned on. If it does not enter the startup and enter the BIOS shortcut key query). Then press F7 to enter advanced mode.
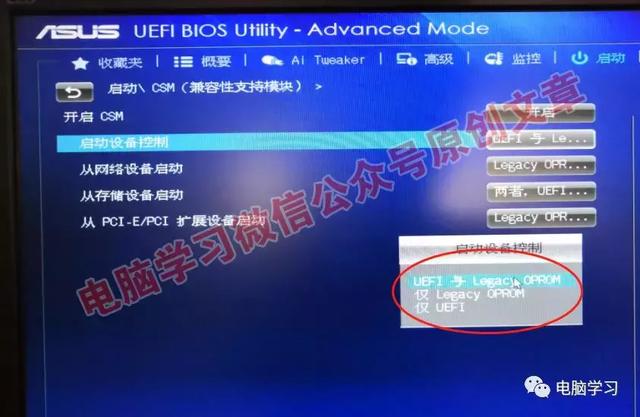
2. Start--CSM--Start Device Control--UEFI With Legacy.
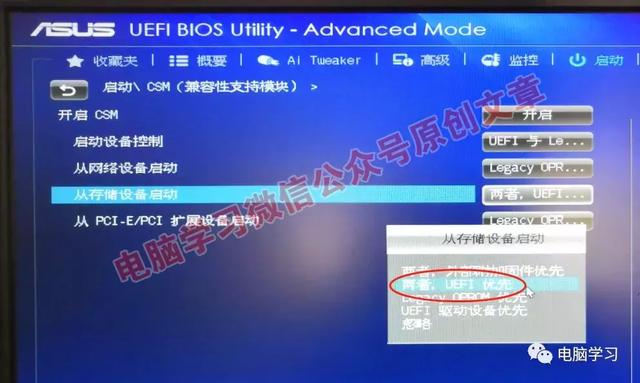
3. Boot from the storage device - both, UEFI takes priority
The above is the detailed content of win10guid activation. For more information, please follow other related articles on the PHP Chinese website!
 What are the office software
 Thunder vip patch
 win10 bluetooth switch is missing
 Why do all the icons in the lower right corner of win10 show up?
 The difference between win10 sleep and hibernation
 Win10 pauses updates
 What to do if the Bluetooth switch is missing in Windows 10
 win10 connect to shared printer


