The Linux terminal command line can also be used to view images
There are a large number of GUI applications available for viewing images in Linux. To be honest, I haven't used any command line application that displays pictures in the terminal itself. Luckily I found 2 command line image viewers to display images in the terminal. These applications may be useful for those who want to use a CLI alternative for GUI applications and spend most of their time in Terminal.
1. Use Viu to display images in the terminal
Viu is a command line application for viewing images from the terminal. It is a free and open source CLI image viewer written in the Rust programming language. Using Viu, we can;
- Display popular image types including .jpg, .png, igif and more.
- Display image in custom size.
Install Viu
Since Viu is written in Rust, we can install it using the Cargo package manager. After installing Rust on your Linux box, run the following command to install Viu.
linuxmi@linuxmi:~/www.linuxmi.com$ cargo install viu
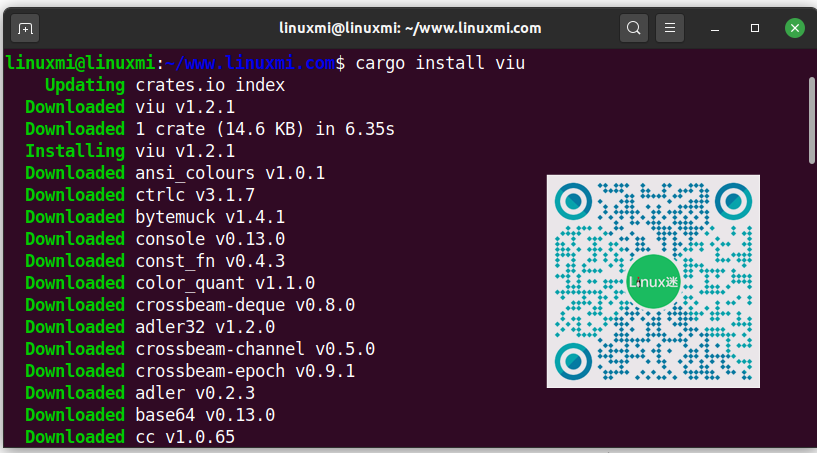
On Arch Linux and its derivatives, it can be installed from the AUR using any AUR helper program (such as Yay).
linuxmi@linuxmi:~/www.linuxmi.com$ yay -S viu
Viu is also available as a compiled binary. Download the latest binaries from the releases page. At the time of writing, the latest version is 1.2.1.
After downloading the Viu binary, make it executable:
linuxmi@linuxmi:~/www.linuxmi.com$ chmod x viu
Then, move it to your path, such as /usr/local/bin/.
linuxmi@linuxmi:~/www.linuxmi.com$ sudo mv viu /usr/local/bin/
Viu usage
Viu usage is very simple. Just type viu followed by the image path and press enter.
linuxmi@linuxmi:~/www.linuxmi.com$ viu linuxmi.com.jpg
Sample output is as follows:
Use Viu to display images in the terminal
You can even display a custom size image using the -h (height) or -w (width) flag as shown below.
linuxmi@linuxmi:~/www.linuxmi.com$ viu linuxmi.com.jpg -w 50
Sample output is as follows:
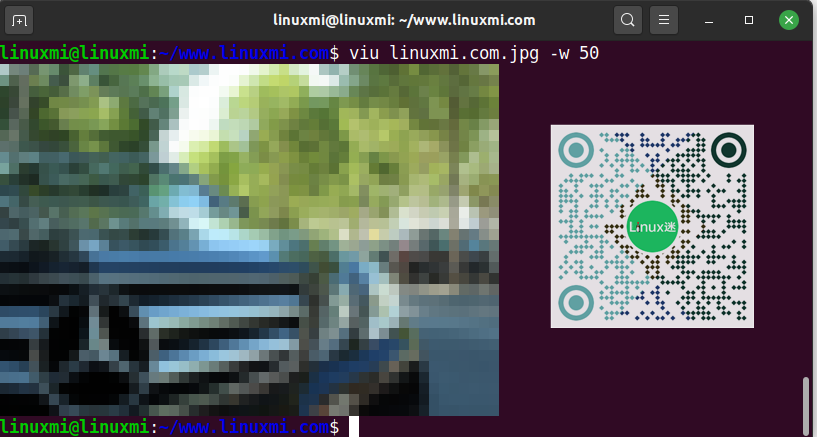
Use Viu to display custom-sized images
To display multiple images one after another in a folder, use wildcard characters like the following.
linuxmi@linuxmi:~/www.linuxmi.com$ viu linuxmi/tuxiang\ *
Like I already mentioned, Viu is capable of displaying images in different formats. For example, the following command will display a gif image using Viu:
linuxmi@linuxmi:~/www.linuxmi.com$ viu linuxmi.com.gif
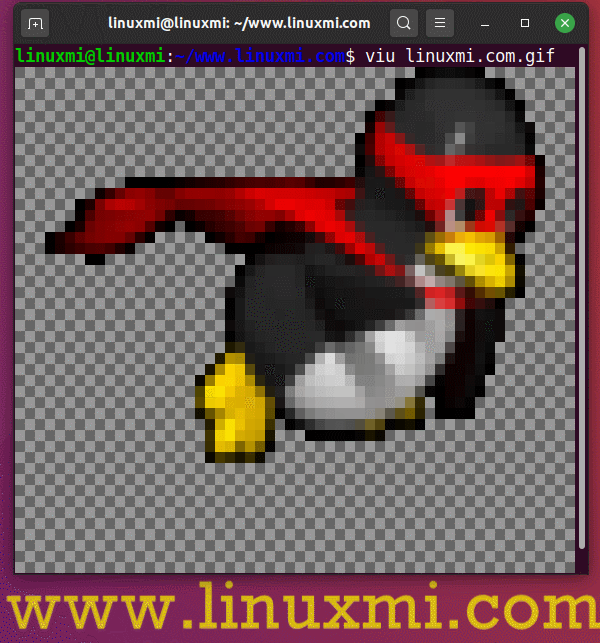
Use viu to display animated images
To exit, just press CTRL C.
For more details about Viu, please refer to the help section by typing the following command:
$ viu-help
2. Use FIM to display images in the terminal
FIM is another command line application for viewing images from the terminal. It is the abbreviation of Fbi IMproved, which means Fbi improved version. For those who don't know, Fbi is short for framebuffer imageviewer. It uses the system's framebuffer to display images directly from the command line. By default it displays bmp, gif, jpeg, PhotoCD, png, ppm, tiff and xwd from the terminal itself. For other formats it will try to use ImageMagick's conversion. The FIM utility caught my attention because it is very lightweight compared to most GUI picture viewer applications.
FIM is based on Fbi, which is a highly customizable and scriptable image viewer for users who prefer to use software such as the Vim text editor or the Mutt mail user agent. It displays the image in full screen, and the image can be controlled using keyboard shortcuts (e.g., resize, flip, zoom). Unlike fbi, the FIM utility is universal. It can open many file formats and display pictures in the following video modes:
- Use Linux framebuffer devices graphically.
- Use the SDL library graphically under X/Xorg.
- Easily use the Imlib2 library graphically under X/Xorg.
- Render as ASCII art in any text console using the Aalib library.
FIM is completely free and open source.
Install FIM
FIM image viewer is available in the default repository on DEB based systems (e.g. Ubuntu, Linux Mint). So you can install fbi using the following command:
linuxmi@linuxmi:~/www.linuxmi.com$ sudo apt-get install fim
If your Linux distribution does not have it in the default repositories, you can download, compile and install it from source, as described in the "Download and Build Instructions" section of the official documentation page.
Use of FIM
After the installation is complete, you can display the image using the "autoscale" option using the following command:
linuxmi@linuxmi:~/www.linuxmi.com$ fim -a linuxmi.com.jpg
Below is my sample output on Ubuntu.
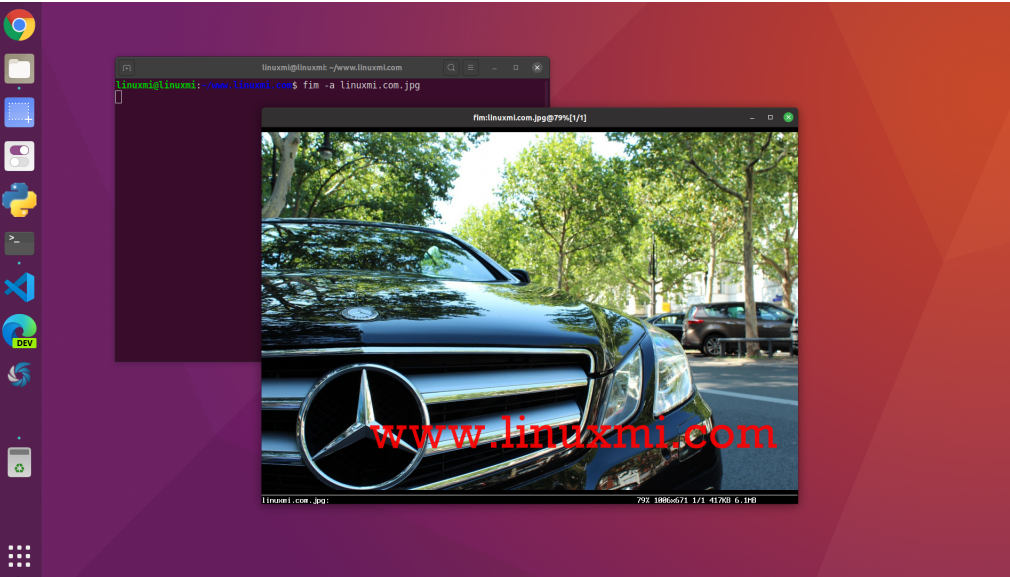
Use Fim to display images in the terminal
As you can see in the screenshot above, FIM does not use any external GUI image viewer. Instead, it uses our system's framebuffer to display the image.
If there are multiple .jpg files in the current directory, you can use wildcards to open them all, as shown below.
linuxmi@linuxmi:~/www.linuxmi.com$ fim -a * .jpg
To open all images in a directory, such as linuxmi, run:
linuxmi@linuxmi:~/www.linuxmi.com$ fim linuxmi/
We can also open images recursively within a folder and its subfolders and then sort the list as shown below.
linuxmi@linuxmi:~/www.linuxmi.com$ fim -R linuxmi/ –sort
To render the image in ASCII format, you can use the -t flag.
linuxmi@linuxmi:~/www.linuxmi.com$ fim -t linuxmi.com.jpg
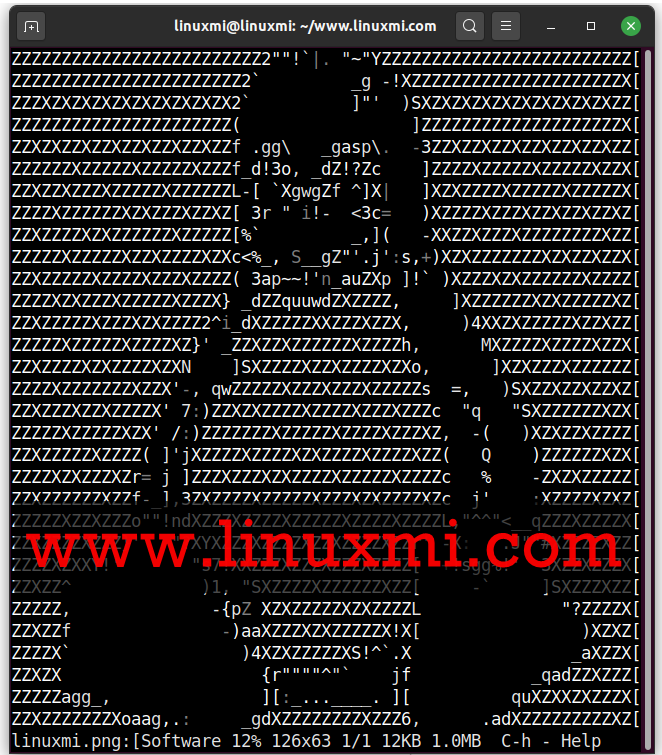
To exit Fim, press ESC or q.
Keyboard shortcuts
You can use various keyboard shortcuts to manage images. For example, to load the next image and the previous image, press the PgUp/PgDown keys. To zoom in or out, use the /- key. This is the universal key used to control images in FIM.
- PageUp/Down: Previous/next picture
- /-: Zoom in/out
- a:Auto scaling
- w: fit width
- h: Suitable height
- j/k: move down/move up
- f/m: flip/mirror
- r/R: Rotation (clockwise and counterclockwise)
- ESC/q: Exit
See the man page for complete details.
$ man fim
OK, it’s that simple and clear. If you use or know of any other command line image viewers, please let us know in the comments section below. Thanks.
The above is the detailed content of The Linux terminal command line can also be used to view images. For more information, please follow other related articles on the PHP Chinese website!

Hot AI Tools

Undresser.AI Undress
AI-powered app for creating realistic nude photos

AI Clothes Remover
Online AI tool for removing clothes from photos.

Undress AI Tool
Undress images for free

Clothoff.io
AI clothes remover

AI Hentai Generator
Generate AI Hentai for free.

Hot Article

Hot Tools

Notepad++7.3.1
Easy-to-use and free code editor

SublimeText3 Chinese version
Chinese version, very easy to use

Zend Studio 13.0.1
Powerful PHP integrated development environment

Dreamweaver CS6
Visual web development tools

SublimeText3 Mac version
God-level code editing software (SublimeText3)

Hot Topics
 1378
1378
 52
52
 How to start nginx in Linux
Apr 14, 2025 pm 12:51 PM
Steps to start Nginx in Linux: Check whether Nginx is installed. Use systemctl start nginx to start the Nginx service. Use systemctl enable nginx to enable automatic startup of Nginx at system startup. Use systemctl status nginx to verify that the startup is successful. Visit http://localhost in a web browser to view the default welcome page.
 How to check whether nginx is started
Apr 14, 2025 pm 01:03 PM
How to confirm whether Nginx is started: 1. Use the command line: systemctl status nginx (Linux/Unix), netstat -ano | findstr 80 (Windows); 2. Check whether port 80 is open; 3. Check the Nginx startup message in the system log; 4. Use third-party tools, such as Nagios, Zabbix, and Icinga.
 How to start nginx server
Apr 14, 2025 pm 12:27 PM
Starting an Nginx server requires different steps according to different operating systems: Linux/Unix system: Install the Nginx package (for example, using apt-get or yum). Use systemctl to start an Nginx service (for example, sudo systemctl start nginx). Windows system: Download and install Windows binary files. Start Nginx using the nginx.exe executable (for example, nginx.exe -c conf\nginx.conf). No matter which operating system you use, you can access the server IP
 How to solve nginx403 error
Apr 14, 2025 pm 12:54 PM
The server does not have permission to access the requested resource, resulting in a nginx 403 error. Solutions include: Check file permissions. Check the .htaccess configuration. Check nginx configuration. Configure SELinux permissions. Check the firewall rules. Troubleshoot other causes such as browser problems, server failures, or other possible errors.
 How to solve nginx304 error
Apr 14, 2025 pm 12:45 PM
Answer to the question: 304 Not Modified error indicates that the browser has cached the latest resource version of the client request. Solution: 1. Clear the browser cache; 2. Disable the browser cache; 3. Configure Nginx to allow client cache; 4. Check file permissions; 5. Check file hash; 6. Disable CDN or reverse proxy cache; 7. Restart Nginx.
 How to check whether nginx is started?
Apr 14, 2025 pm 12:48 PM
In Linux, use the following command to check whether Nginx is started: systemctl status nginx judges based on the command output: If "Active: active (running)" is displayed, Nginx is started. If "Active: inactive (dead)" is displayed, Nginx is stopped.
 How to clean nginx error log
Apr 14, 2025 pm 12:21 PM
The error log is located in /var/log/nginx (Linux) or /usr/local/var/log/nginx (macOS). Use the command line to clean up the steps: 1. Back up the original log; 2. Create an empty file as a new log; 3. Restart the Nginx service. Automatic cleaning can also be used with third-party tools such as logrotate or configured.
 Difference between centos and ubuntu
Apr 14, 2025 pm 09:09 PM
The key differences between CentOS and Ubuntu are: origin (CentOS originates from Red Hat, for enterprises; Ubuntu originates from Debian, for individuals), package management (CentOS uses yum, focusing on stability; Ubuntu uses apt, for high update frequency), support cycle (CentOS provides 10 years of support, Ubuntu provides 5 years of LTS support), community support (CentOS focuses on stability, Ubuntu provides a wide range of tutorials and documents), uses (CentOS is biased towards servers, Ubuntu is suitable for servers and desktops), other differences include installation simplicity (CentOS is thin)


