
php editor Xigua will introduce to you how to change USB write permission in win7 system. In win7 system, sometimes we may encounter the problem of being unable to write files to USB devices. This may be because the system has read-only permissions set by default, which limits our write operations to the USB device. Don't worry, we can change the usb write permissions through simple operations so that we can use the usb device normally. Next, let’s take a look at the specific steps!
Win7 system usb write permission change tutorial
1. First click on the lower left corner, and then open "Run"
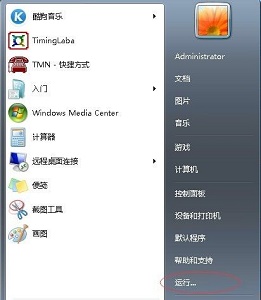
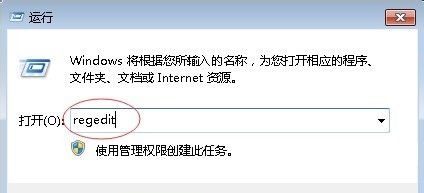
2. Enter "regedit" and press Enter to confirm.
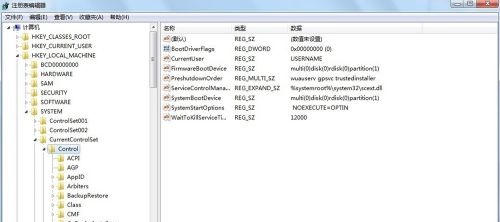
#3. Find the "control" folder according to the path in the picture.
4. Right-click it, select New "Item" and name it "StorageDevicePolicies"
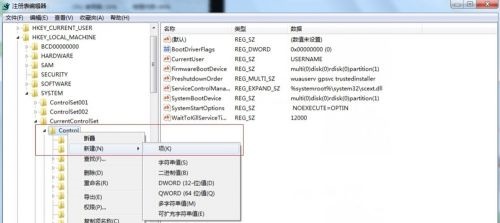
5. Then create a new "DWORD value" in the newly created folder
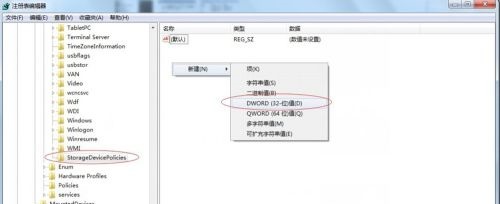
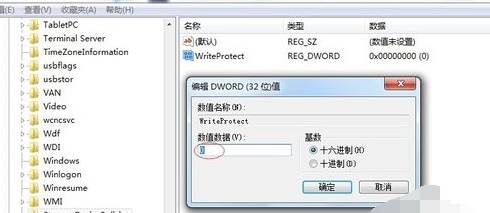
6. Set its value to "0"
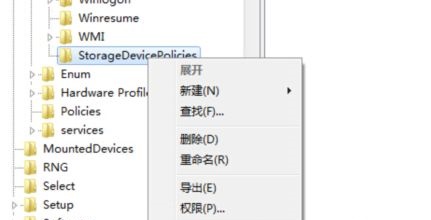
7. Then export the newly created "StorageDevicePolicies".
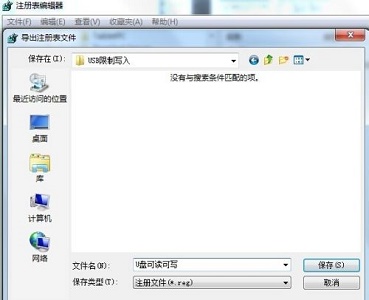
8. Save and name it "U disk readable and writable"
9. Then use the same Method to create a new "StorageDevicePolicies" folder, then create a new "DWORD value" in it, set the value to "1"
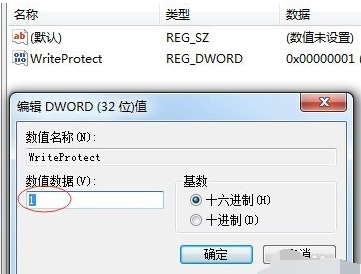
10. Export this folder again, And name it "U disk read-only"
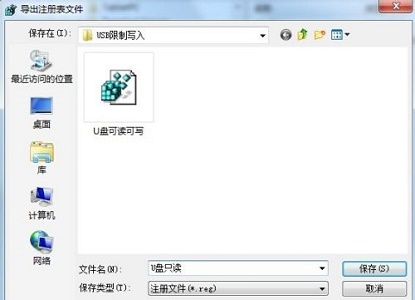
11. Finally, we only need to put these two files into the U disk, and then run the corresponding files according to the required permissions That’s it.

Other solutions:
If none of the above methods can solve the problem, you can consider reinstalling the system.
Recommended image download
Win7 SP1 official flagship version 64-bit
Win7 x64 pure version (64-bit automatic activation)
Win7 pure version activation-free 64-bit (only for notebooks)
System installation method
This site provides you with two system installation methods, local Hard drive installation is the simplest installation method. It is recommended to make a U disk boot tool before using the hard disk installation. If the hard disk installation fails, or your computer cannot be turned on, is stuck at the welcome interface, cannot enter the desktop, or has a blue screen, etc., then you need to choose the U disk to reinstall the system. .
Warm reminder: When reinstalling the system, the current system disk (usually the C drive) will be formatted. Be sure to back up the data on the C drive and desktop in advance.
The above is the detailed content of How to change USB write permission in win7 system? Tutorial on changing USB write permission in win7 system. For more information, please follow other related articles on the PHP Chinese website!
 Introduction to screenshot shortcut keys in Windows 7 system
 Solution to the problem that win7 system cannot start
 How to repair win7 system if it is damaged and cannot be booted
 Solution to no sound in win7 system
 Detailed process of upgrading win7 system to win10 system
 The specific process of connecting to wifi in win7 system
 How to register on Matcha Exchange
 How to implement color fonts in css


