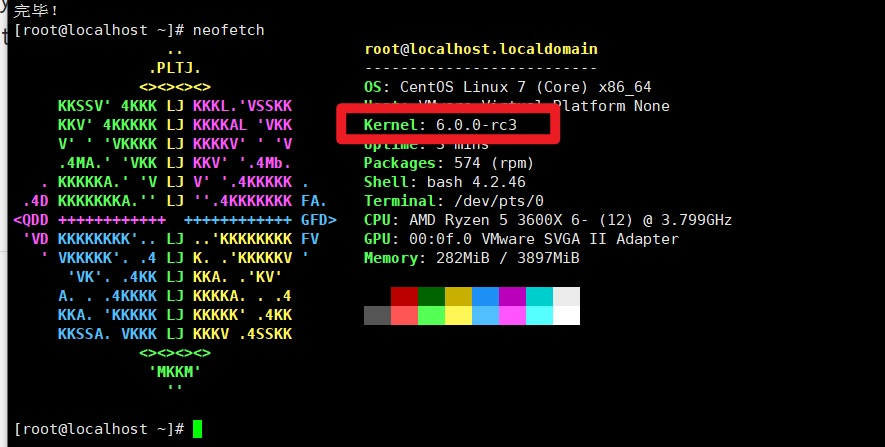
Compile and install the latest Linux Kernel 6.0 rc3 on CentOS7
哪个男孩不想手动编译一份自己的内核呢?

安装编译环境
CentOS7安装必要的包
yum groupinstall "Development Tools" -y &&
yum install openssl-devel -y &&
yum install rpm-build redhat-rpm-config asciidoc hmaccalc perl-ExtUtils-Embed pesign xmlto -y &&
yum install audit-libs-devel binutils-devel elfutils-devel elfutils-libelf-devel -y &&
yum install ncurses-devel newt-devel numactl-devel pciutils-devel python-devel zlib-devel -y
CentOS7更新gcc版本
必须升级gcc版本,centOS7自带的gcc版本是4.8.5,编译内核会出错
 sudo yum install centos-release-scl -y &&
 sudo yum install devtoolset-8-gcc* -y &&
 scl enable devtoolset-8 bash
永久替换旧的gcc( 可选操作 )
mv /usr/bin/gcc /usr/bin/gcc-4.8.5 &&
ln -s /opt/rh/devtoolset-8/root/bin/gcc /usr/bin/gcc &&
mv /usr/bin/g++ /usr/bin/g++-4.8.5 &&
ln -s /opt/rh/devtoolset-8/root/bin/g++ /usr/bin/g++
下载最新的Linux Kernel6.0 rc3
从kernel.org下载6.0 rc3 的压缩包有203MB,由于国内网络的特殊情况下载会非常的慢,请自备加速手段或者耐心。
 wget https://git.kernel.org/torvalds/t/linux-6.0-rc3.tar.gz
tar zxvf linux-6.0-rc3.tar.gz
cd linux-6.0-rc3
配置config
以下配置config文件的操作二选一,如果拿不准就选择第一个,有图形配置界面的。编辑config文件可以选定编译过中需要的内核模块或者组件。不懂不知道就全程默认。
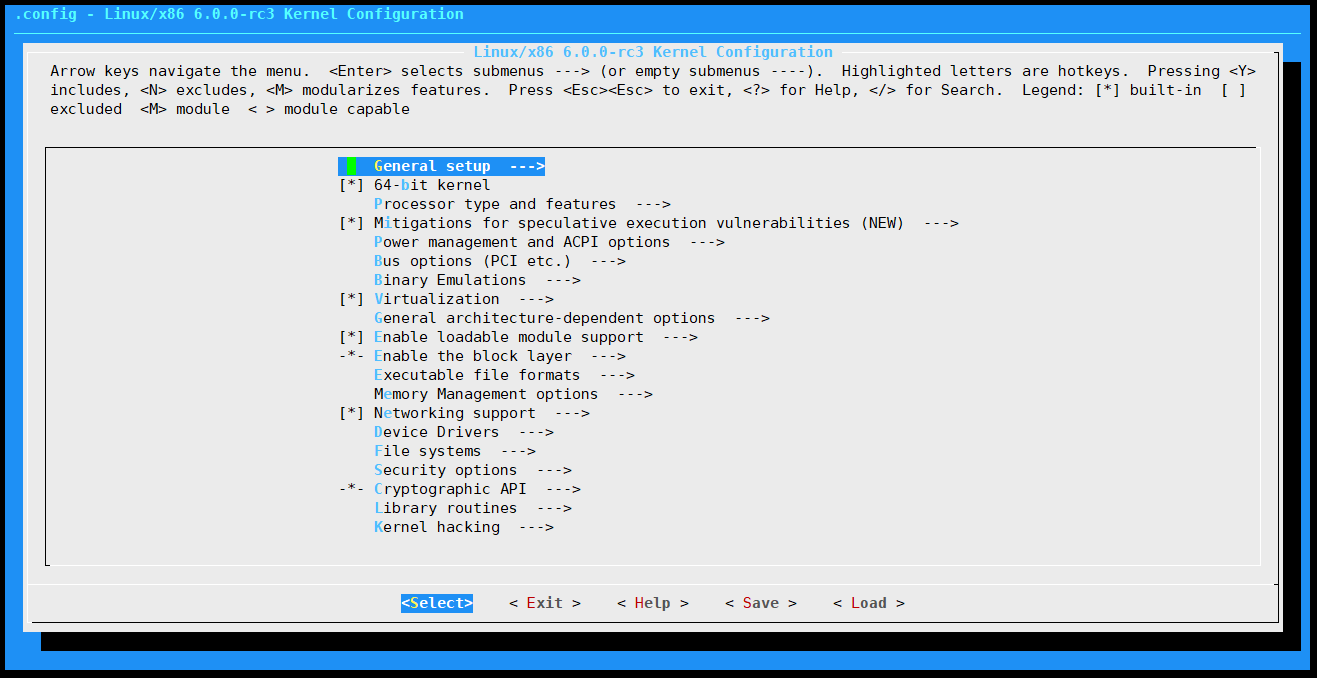
通过menuconfig
make menuconfig
在linux-6.0-rc3目录下敲这个命令,会进去一个配置界面,如果看不懂就保持默认配置,就按右方向键选定 save 然后回车,根据提示保存.config文件,
cat .config //查看有没有正确保存
根据现有内核拷贝生成config
也可通过现有内核参数去生成新的配置参数文件.config 。要注意 /boot/config-3.10.0-957.el7.x86_64,就是/boot/目录下面这个相似的目录。或许不同CentOS7的路径名不同。要根据实际机器的目录改动。
cp /boot/config-3.10.0-957.el7.x86_64 ./.config
make oldconfig //操作这里要一路回车
cat  .config
执行编译
我要再提醒你一次,金箍戴上以后,你再也不是一个凡人,执行以下命令,你将是一个编译Linux内核的人。-j12参数是因为我给虚拟机分配了12核,让这12核别闲着。根据自己机器的情况改成 -j6、 -j8甚至 -j100都行。自行测试胡改的后果。编译过程费时费力,看编译机器的性能。假如是1C1G的云服务器执行编译,可以先去睡一觉。
make -j12 all
上面命令跑完后,内核模块如果没有特殊需求,可以把内核模块的debug信息给去掉,节约点硬盘空间。
make INSTALL_MOD_STRIP=1 modules_install > /dev/null &&
make modules_install &&
make install
设置默认新的kernel启动
sudo awk -F\' '$1=="menuentry " {print i++ " : " $2}' /etc/grub2.cfg &&
sudo grub2-set-default 0 &&
sudo grub2-mkconfig -o /boot/grub2/grub.cfg
编译成rpm包
编译出单独的通用RPM包可以在其他的CentOS 7机器上直接安装,免去了以上繁琐的手动编译的过程。
在当前目录linux-6.0-rc3下执行 :
yum -y install rpm-build && make rpm-pkg -j32
如果需要压缩体积,可以将make rpm-pkg -j32 换成 make INSTALL_MOD_STRIP=1 rpm-pkg 。
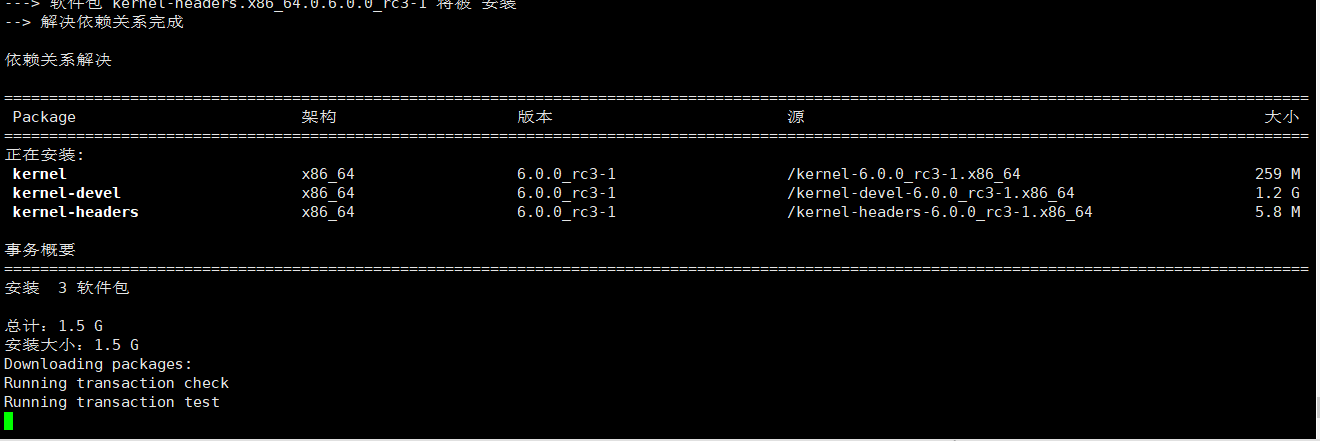
这条命令又会执行一会。执行完不出意外,会在系统的~/rpmbuild/RPMS/x86_64/ 目录下出现三个rpm安装包。
-rw-r--r--. 1 root root  69354600 8月  31 19:46 kernel-6.0.0_rc3-1.x86_64.rpm
-rw-r--r--. 1 root root 179586568 8月  31 19:48 kernel-devel-6.0.0_rc3-1.x86_64.rpm
-rw-r--r--. 1 root root   1545516 8月  31 19:47 kernel-headers-6.0.0_rc3-1.x86_64.rpm
在其他机器CentOS7上安装(yum localinstall kern* -y)这三个rpm包就行可以更新内核了。三个包装完还要更新一下启动项。
sudo awk -F\' '$1=="menuentry " {print i++ " : " $2}' /etc/grub2.cfg &&
sudo grub2-set-default 0 &&
sudo grub2-mkconfig -o /boot/grub2/grub.cfg
这是我打包好的三个rpm包,有兴趣的朋友可以下载安装试试。不做任何可靠保证,请避免在生产环境上直接使用。
The above is the detailed content of Compile and install the latest Linux Kernel 6.0 rc3 on CentOS7. For more information, please follow other related articles on the PHP Chinese website!

Hot AI Tools

Undresser.AI Undress
AI-powered app for creating realistic nude photos

AI Clothes Remover
Online AI tool for removing clothes from photos.

Undress AI Tool
Undress images for free

Clothoff.io
AI clothes remover

AI Hentai Generator
Generate AI Hentai for free.

Hot Article

Hot Tools

Notepad++7.3.1
Easy-to-use and free code editor

SublimeText3 Chinese version
Chinese version, very easy to use

Zend Studio 13.0.1
Powerful PHP integrated development environment

Dreamweaver CS6
Visual web development tools

SublimeText3 Mac version
God-level code editing software (SublimeText3)

Hot Topics
 1378
1378
 52
52
 Difference between centos and ubuntu
Apr 14, 2025 pm 09:09 PM
The key differences between CentOS and Ubuntu are: origin (CentOS originates from Red Hat, for enterprises; Ubuntu originates from Debian, for individuals), package management (CentOS uses yum, focusing on stability; Ubuntu uses apt, for high update frequency), support cycle (CentOS provides 10 years of support, Ubuntu provides 5 years of LTS support), community support (CentOS focuses on stability, Ubuntu provides a wide range of tutorials and documents), uses (CentOS is biased towards servers, Ubuntu is suitable for servers and desktops), other differences include installation simplicity (CentOS is thin)
 Centos stops maintenance 2024
Apr 14, 2025 pm 08:39 PM
CentOS will be shut down in 2024 because its upstream distribution, RHEL 8, has been shut down. This shutdown will affect the CentOS 8 system, preventing it from continuing to receive updates. Users should plan for migration, and recommended options include CentOS Stream, AlmaLinux, and Rocky Linux to keep the system safe and stable.
 Detailed explanation of docker principle
Apr 14, 2025 pm 11:57 PM
Docker uses Linux kernel features to provide an efficient and isolated application running environment. Its working principle is as follows: 1. The mirror is used as a read-only template, which contains everything you need to run the application; 2. The Union File System (UnionFS) stacks multiple file systems, only storing the differences, saving space and speeding up; 3. The daemon manages the mirrors and containers, and the client uses them for interaction; 4. Namespaces and cgroups implement container isolation and resource limitations; 5. Multiple network modes support container interconnection. Only by understanding these core concepts can you better utilize Docker.
 How to install centos
Apr 14, 2025 pm 09:03 PM
CentOS installation steps: Download the ISO image and burn bootable media; boot and select the installation source; select the language and keyboard layout; configure the network; partition the hard disk; set the system clock; create the root user; select the software package; start the installation; restart and boot from the hard disk after the installation is completed.
 How to use docker desktop
Apr 15, 2025 am 11:45 AM
How to use Docker Desktop? Docker Desktop is a tool for running Docker containers on local machines. The steps to use include: 1. Install Docker Desktop; 2. Start Docker Desktop; 3. Create Docker image (using Dockerfile); 4. Build Docker image (using docker build); 5. Run Docker container (using docker run).
 What are the backup methods for GitLab on CentOS
Apr 14, 2025 pm 05:33 PM
Backup and Recovery Policy of GitLab under CentOS System In order to ensure data security and recoverability, GitLab on CentOS provides a variety of backup methods. This article will introduce several common backup methods, configuration parameters and recovery processes in detail to help you establish a complete GitLab backup and recovery strategy. 1. Manual backup Use the gitlab-rakegitlab:backup:create command to execute manual backup. This command backs up key information such as GitLab repository, database, users, user groups, keys, and permissions. The default backup file is stored in the /var/opt/gitlab/backups directory. You can modify /etc/gitlab
 How to mount hard disk in centos
Apr 14, 2025 pm 08:15 PM
CentOS hard disk mount is divided into the following steps: determine the hard disk device name (/dev/sdX); create a mount point (it is recommended to use /mnt/newdisk); execute the mount command (mount /dev/sdX1 /mnt/newdisk); edit the /etc/fstab file to add a permanent mount configuration; use the umount command to uninstall the device to ensure that no process uses the device.
 What to do after centos stops maintenance
Apr 14, 2025 pm 08:48 PM
After CentOS is stopped, users can take the following measures to deal with it: Select a compatible distribution: such as AlmaLinux, Rocky Linux, and CentOS Stream. Migrate to commercial distributions: such as Red Hat Enterprise Linux, Oracle Linux. Upgrade to CentOS 9 Stream: Rolling distribution, providing the latest technology. Select other Linux distributions: such as Ubuntu, Debian. Evaluate other options such as containers, virtual machines, or cloud platforms.


