
 System Tutorial
LINUX
Installing VMware Tools on CentOS: Improving virtual machine performance and experience
System Tutorial
LINUX
Installing VMware Tools on CentOS: Improving virtual machine performance and experience
Installing VMware Tools on CentOS: Improving virtual machine performance and experience

php editor Xiaoxin brings you a tutorial on installing VMware Tools on CentOS. VMware Tools is a tool used to improve the performance and experience of virtual machines. It can enhance communication and collaboration between virtual machines and hosts, while providing many practical functions. In this tutorial, we will introduce in detail how to install VMware Tools on CentOS so that you can make full use of the performance and functions of the virtual machine and improve work efficiency and user experience. Let’s get started!

#1. Start the CentOS virtual machine and make sure you have administrator or root privileges.
2. In the VMware menu, select "Virtual Machine" > "Install VMware Tools", which will mount the VMware Tools installation disk in the virtual machine's optical drive.
3. In CentOS, open a terminal or console.
4. Switch to the CD-ROM drive mount point, it will be mounted in the `/media/cdrom` directory, use the following command:
```bash
cd /media/cdrom
```
5. Unzip the VMware Tools installation program and run the following command:
tar -zxvf VMwareTools-*.tar.gz
6. Enter the decompressed directory and run the following command:
cd vmware-tools-distrib
7. Run the installation script and run the following command:
./vmware-install.pl
8. The installation script will begin to execute and prompt you to confirm some settings during the process. In most cases, the default settings will meet your needs. When prompted, press Enter key to accept the default settings.
9. After the installation is complete, restart the CentOS virtual machine.
After installing VMware Tools, you will notice that the mouse pointer moves more smoothly between the virtual machine and the host, file sharing becomes more convenient, and the time synchronization between the virtual machine and the host is improved.
LINUX Tips:
Linux is an open source operating system. Due to its flexibility and security, it is widely used in servers, embedded systems, supercomputers and other fields. An interesting Linux trivia is that Linus Torvalds, the founder of the Linux kernel, originally started developing Linux to create a Unix-like operating system on his personal computer. Linux has become the most popular open source One of the operating systems, widely used in various fields.
The above is the detailed content of Installing VMware Tools on CentOS: Improving virtual machine performance and experience. For more information, please follow other related articles on the PHP Chinese website!

Hot AI Tools

Undresser.AI Undress
AI-powered app for creating realistic nude photos

AI Clothes Remover
Online AI tool for removing clothes from photos.

Undress AI Tool
Undress images for free

Clothoff.io
AI clothes remover

AI Hentai Generator
Generate AI Hentai for free.

Hot Article
Hot Tools

Notepad++7.3.1
Easy-to-use and free code editor

SublimeText3 Chinese version
Chinese version, very easy to use

Zend Studio 13.0.1
Powerful PHP integrated development environment

Dreamweaver CS6
Visual web development tools

SublimeText3 Mac version
God-level code editing software (SublimeText3)
Hot Topics
 1358
1358
 52
52

 Mastering Text Manipulation With the Sed Command
Mar 16, 2025 am 09:48 AM
Mastering Text Manipulation With the Sed Command
Mar 16, 2025 am 09:48 AM
The Linux command line interface provides a wealth of text processing tools, one of the most powerful tools is the sed command. sed is the abbreviation of Stream EDitor, a multi-functional tool that allows complex processing of text files and streams. What is Sed? sed is a non-interactive text editor that operates on pipeline inputs or text files. By providing directives, you can let it modify and process text in a file or stream. The most common use cases of sed include selecting text, replacing text, modifying original files, adding lines to text, or removing lines from text. It can be used from the command line in Bash and other command line shells. Sed command syntax sed
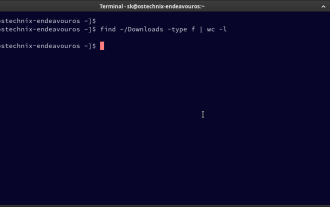 How To Count Files And Directories In Linux: A Beginner's Guide
Mar 19, 2025 am 10:48 AM
How To Count Files And Directories In Linux: A Beginner's Guide
Mar 19, 2025 am 10:48 AM
Efficiently Counting Files and Folders in Linux: A Comprehensive Guide Knowing how to quickly count files and directories in Linux is crucial for system administrators and anyone managing large datasets. This guide demonstrates using simple command-l
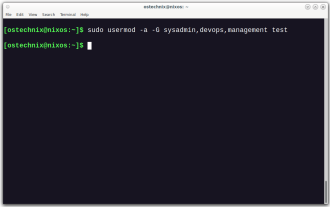 How To Add A User To Multiple Groups In Linux
Mar 18, 2025 am 11:44 AM
How To Add A User To Multiple Groups In Linux
Mar 18, 2025 am 11:44 AM
Efficiently managing user accounts and group memberships is crucial for Linux/Unix system administration. This ensures proper resource and data access control. This tutorial details how to add a user to multiple groups in Linux and Unix systems. We
 The Secret Weapon to Supercharge Your Linux System With Liquorix Kernel
Mar 08, 2025 pm 12:12 PM
The Secret Weapon to Supercharge Your Linux System With Liquorix Kernel
Mar 08, 2025 pm 12:12 PM
Liquorix kernel: a powerful tool to improve Linux system performance Linux is known for its flexibility, security and high performance, becoming the operating system of choice for developers, system administrators, and advanced users. However, the universal Linux kernel is not always meeting the needs of users seeking maximum performance and responsiveness. This is where the Liquorix kernel comes into play—a performance-optimized alternative that promises to enhance your Linux system. This article will explore what the Liquorix kernel is, why you might want to use it, and how to install and configure it to get the most out of your system. Liquorix kernel detailed explanation Liquorix kernel is a precompiled Linux kernel designed for
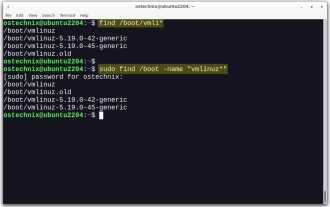 How To List Or Check All Installed Linux Kernels From Commandline
Mar 23, 2025 am 10:43 AM
How To List Or Check All Installed Linux Kernels From Commandline
Mar 23, 2025 am 10:43 AM
Linux Kernel is the core component of a GNU/Linux operating system. Developed by Linus Torvalds in 1991, it is a free, open-source, monolithic, modular, and multitasking Unix-like kernel. In Linux, it is possible to install multiple kernels on a sing
 How To Type Indian Rupee Symbol In Ubuntu Linux
Mar 22, 2025 am 10:39 AM
How To Type Indian Rupee Symbol In Ubuntu Linux
Mar 22, 2025 am 10:39 AM
This brief guide explains how to type Indian Rupee symbol in Linux operating systems. The other day, I wanted to type "Indian Rupee Symbol (₹)" in a word document. My keyboard has a rupee symbol on it, but I don't know how to type it. After
 Locating Leviathan Files in Linux
Mar 13, 2025 pm 12:11 PM
Locating Leviathan Files in Linux
Mar 13, 2025 pm 12:11 PM
Introduction In the realm of Linux, where the command line is often the compass by which we navigate, the efficient management of disk space is crucial. Whether you’re sailing through personal projects or steering the ship o
![Install Fedora Linux 41 Workstation [Step-by-Step Guide]](https://img.php.cn/upload/article/001/242/473/174149047084567.png?x-oss-process=image/resize,m_fill,h_207,w_330) Install Fedora Linux 41 Workstation [Step-by-Step Guide]
Mar 09, 2025 am 11:21 AM
Install Fedora Linux 41 Workstation [Step-by-Step Guide]
Mar 09, 2025 am 11:21 AM
This guide provides a comprehensive walkthrough for installing Fedora Linux 41 Workstation Edition. Let's get started! Table of Contents - Step 1: Prepare Your Fedora 41 Installation Media Step 2: Boot from the Fedora 41 Installation Media Step 3:
