

USB disk system ghostxp

php editor Zimo introduces you to a practical U disk system-GhostXP. GhostXP is a removable USB disk system based on the Windows XP operating system. It is highly portable, easy to operate, and fully functional. It can be used directly on any computer without installation and configuration. GhostXP not only contains the basic functions of Windows XP, but also integrates some excellent software and tools, such as office software, network tools, anti-virus software, etc., making it convenient for users to work and entertain anywhere. For people who often need to use multiple computers, GhostXP is a very practical tool that is very convenient and fast to use.
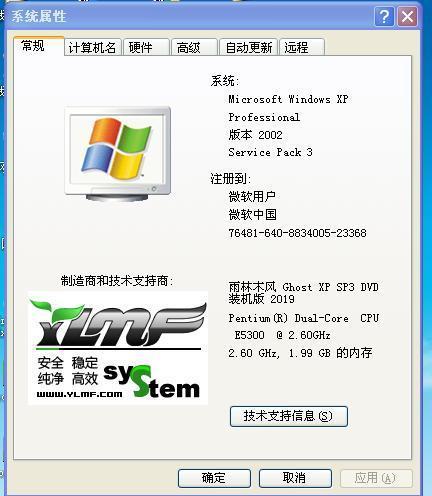
Because my computer only has 1.99GB, I prepared an XP system boot disk.

There are only three steps to prepare a USB system boot disk: one judge, two copies and three copies.
The first step is to judge: Determine which system your computer is suitable for.
How to judge? Only use one indicator, that is the computer's memory.
1. If the computer memory is less than 2GB, it is suitable for XP system;
2. If the computer memory is between GB-3GB, it is recommended to choose Windows 7 32-bit
3. If the computer memory is greater than 4GB, it is recommended to choose Win7 64-bit, which is currently the best and most mainstream Windows system and has good game compatibility.
Win8 is a Microsoft operating system designed to better adapt to tablets and touch screen devices. The computer configuration requirements for Windows 8 32-bit and 64-bit systems are basically the same as those for Win7 32-bit and 64-bit systems, and may even be slightly lower than those required for Win7 systems.
First understand whether your computer is suitable for the system you want to install before proceeding to avoid blue screens, black screens, lags, etc.
How do I know the memory of my computer?
On the desktop, place the mouse on the My Computer icon, right-click, and click Properties in the drop-down menu. After opening it, you can see the memory of your computer. As shown in the picture, it is my computer memory view.
Step 2 Production: Make a USB XP system boot disk.
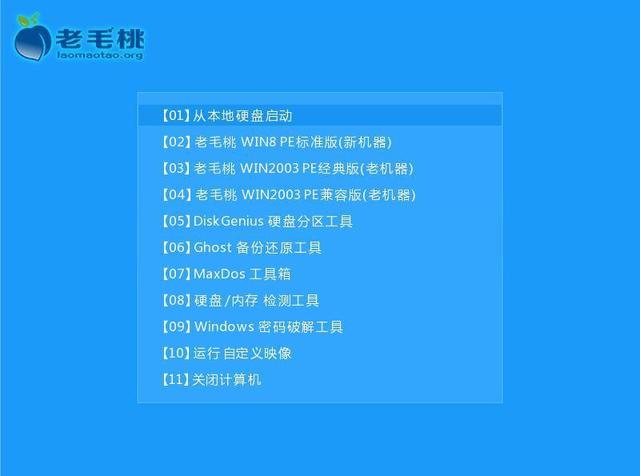
Let me explain here, I am using Laomaotao. I will not cover the text in the picture, so I can only do this. Please take care of me.
Preparations for making the installed version of the USB boot disk:
①Download the Laomaotao v9.3 installed version of the USB boot disk creation tool from the homepage of the Laomaotao official website and install it on the computer;
② Prepare a USB flash drive with a capacity of more than 4G and that can be used normally.
The specific steps are as follows:
1. Go to the Laomaotao official website to download the Laomaotao v9.3 installation package to the system desktop, as shown in the picture is the downloaded Laomaotao installation package:

2. Double-click the left mouse button to run the installation package, and then select the program storage path in "Installation Location" (recommendation: default Set up and install into the system disk), then click "Start Installation", as shown in the following figure:

3 . Then install the program, just wait patiently for the automatic installation operation to complete, as shown in the figure below:


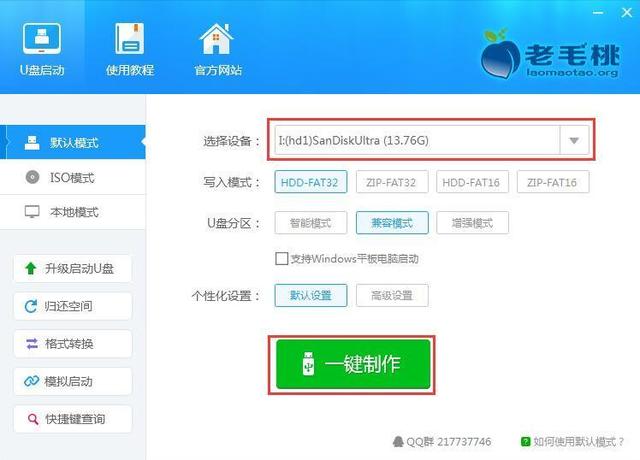

## 7. Next, the program starts to create a USB boot disk. The whole process may take a few minutes. Do not perform other operations during this period, as shown in the following figure:

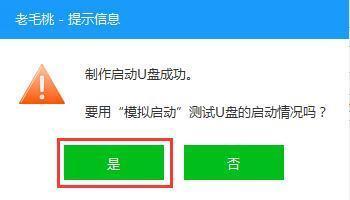
8. After the U disk boot disk is created, a window will pop up indicating that the boot U disk was successfully created. Do you want to use "simulated boot" to test the boot status of the USB flash drive? Click "Yes" as shown below:
9. After starting the "Computer Simulator", you can see the normal startup interface of the USB boot disk in the simulation environment. Press the "Ctrl Alt" key combination on the keyboard to release the mouse, and finally click on the upper right corner The close icon exits the simulation startup interface, as shown in the following figure:
So far, Laomaotao installed version USB disk The boot disk creation is mostly completed.
Don’t forget the next step. If you forget it, your USB system startup disk will not be usable.
Step 3 Copy: Download a ghost xp system image file and copy it to the USB boot disk.
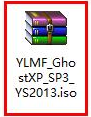
1. Copy "Download a ghost xp system image file" and search on Baidu to find what you like Ghost xp system image file, download to the desktop.
2. Copy to the USB boot disk.
OK. All done, it takes about 26 minutes.
With this spare U disk system boot disk, you have a beloved little weapon. When needed, it is handy and extremely comfortable. You can even help others.
Wish you happy!
I am the creator of history: Yue Fei's flying.
Pay attention to each other and make progress together!
Comment on each other and grow together!
The above is the detailed content of USB disk system ghostxp. For more information, please follow other related articles on the PHP Chinese website!

Hot AI Tools

Undresser.AI Undress
AI-powered app for creating realistic nude photos

AI Clothes Remover
Online AI tool for removing clothes from photos.

Undress AI Tool
Undress images for free

Clothoff.io
AI clothes remover

Video Face Swap
Swap faces in any video effortlessly with our completely free AI face swap tool!
Hot Article
Hot Tools

Notepad++7.3.1
Easy-to-use and free code editor

SublimeText3 Chinese version
Chinese version, very easy to use

Zend Studio 13.0.1
Powerful PHP integrated development environment

Dreamweaver CS6
Visual web development tools

SublimeText3 Mac version
God-level code editing software (SublimeText3)
Hot Topics
 1386
1386
 52
52

 Introduction to how to use the joiplay simulator
May 04, 2024 pm 06:40 PM
Introduction to how to use the joiplay simulator
May 04, 2024 pm 06:40 PM
The jojplay simulator is a very easy-to-use mobile phone simulator. It supports computer games to run on mobile phones and has very good compatibility. Some players don’t know how to use it. The editor below will introduce how to use it. How to use joiplay simulator 1. First, you need to download the Joiplay body and RPGM plug-in. It is best to install them in the order of body-plug-in. The apk package can be obtained in the Joiplay bar (click to get >>>). 2. After Android is completed, you can add games in the lower left corner. 3. Fill in the name casually, and press CHOOSE on executablefile to select the game.exe file of the game. 4. Icon can be left blank or you can choose your favorite picture.
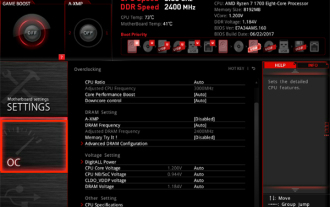 How to enable vt on MSI motherboard
May 01, 2024 am 09:28 AM
How to enable vt on MSI motherboard
May 01, 2024 am 09:28 AM
How to enable VT on MSI motherboard? What are the methods? This website has carefully compiled the MSI motherboard VT enable methods for the majority of users. Welcome to read and share! The first step is to restart the computer and enter the BIOS. What should I do if the startup speed is too fast and I cannot enter the BIOS? After the screen lights up, keep pressing "Del" to enter the BIOS page. The second step is to find the VT option in the menu and turn it on. Different models of computers have different BIOS interfaces and different names for VT. Situation 1: 1. Enter After entering the BIOS page, find the "OC (or overclocking)" - "CPU Features" - "SVMMode (or Intel Virtualization Technology)" option and change the "Disabled"
 How to install WinNTSetup into Win11 system_How to install WinNTSetup into Win11 system
May 08, 2024 am 11:19 AM
How to install WinNTSetup into Win11 system_How to install WinNTSetup into Win11 system
May 08, 2024 am 11:19 AM
First download the latest Win11 system ISO image, and then in Win10 system, you can directly right-click on the downloaded ISO image file and select [Load]; if it is under WinPE, WinXP, or Win7 system, you need to use the virtual optical drive tool to load the ISO Image; or you can directly decompress the ISO image file without using a virtual optical drive. Then run WinNTSetup. The software interface is as shown in the figure: First locate the location of the install.wim file. You can find the install.wim file in the sources directory of the Win11 ISO image loaded or decompressed by the virtual optical drive. Then set the location of the boot disk and installation disk. Generally, you are going to put W
 How to enable vt on ASRock motherboard
May 01, 2024 am 08:49 AM
How to enable vt on ASRock motherboard
May 01, 2024 am 08:49 AM
How to enable VT on ASRock motherboard, what are the methods and how to operate it. This website has compiled the ASRock motherboard vt enable method for users to read and share! The first step is to restart the computer. After the screen lights up, keep pressing the "F2" key to enter the BIOS page. What should I do if the startup speed is too fast and I cannot enter the BIOS? The second step is to find the VT option in the menu and turn it on. Different models of motherboards have different BIOS interfaces and different names for VT. 1. After entering the BIOS page, find "Advanced" - "CPU Configuration (CPU) Configuration)" - "SVMMOD (virtualization technology)" option, change "Disabled" to "Enabled"
 How to install Windows system on tablet computer
May 03, 2024 pm 01:04 PM
How to install Windows system on tablet computer
May 03, 2024 pm 01:04 PM
How to flash the Windows system on BBK tablet? The first way is to install the system on the hard disk. As long as the computer system does not crash, you can enter the system and download things, you can use the computer hard drive to install the system. The method is as follows: Depending on your computer configuration, you can install the WIN7 operating system. We choose to download Xiaobai's one-click reinstallation system in vivopad to install it. First, select the system version suitable for your computer, and click "Install this system" to next step. Then we wait patiently for the installation resources to be downloaded, and then wait for the environment to be deployed and restarted. The steps to install win11 on vivopad are: first use the software to check whether win11 can be installed. After passing the system detection, enter the system settings. Select the Update & Security option there. Click
 How to check the graphics card of your laptop
May 07, 2024 pm 03:40 PM
How to check the graphics card of your laptop
May 07, 2024 pm 03:40 PM
Where to find the laptop graphics card? The laptop graphics card can be viewed in my "My Computer". After opening My Computer, click Properties and select Display. Click Advanced Options on the display page to see the graphics card information. Enter "dxdiag" in run. If a DirectX Diagnostic Tool dialog box pops up, prompting us if we want to check, click OK. Check the computer configuration information through the DirectX diagnostic tool interface that pops up: a. The red box in the picture below shows the cpu and memory information. Question 2: How to quickly check whether the laptop graphics card is a discrete graphics card? The easiest way: right-click "My Computer" and select "Manage", then select "Device Manager" and open the "Display Card" branch on the right. Here you can
 Life Restart Simulator Guide
May 07, 2024 pm 05:28 PM
Life Restart Simulator Guide
May 07, 2024 pm 05:28 PM
Life Restart Simulator is a very interesting simulation game. This game has become very popular recently. There are many ways to play in the game. Below, the editor has brought you a complete guide to Life Restart Simulator. Come and take a look. What strategies are there? Life Restart Simulator Guide Guide Features of Life Restart Simulator This is a very creative game in which players can play according to their own ideas. There are many tasks to complete every day, and you can enjoy a new life in this virtual world. There are many songs in the game, and all kinds of different lives are waiting for you to experience. Life Restart Simulator Game Contents Talent Card Drawing: Talent: You must choose the mysterious small box to become an immortal. A variety of small capsules are available to avoid dying midway. Cthulhu may choose
 Introduction to joiplay simulator font setting method
May 09, 2024 am 08:31 AM
Introduction to joiplay simulator font setting method
May 09, 2024 am 08:31 AM
The jojplay simulator can actually customize the game fonts, and can solve the problem of missing characters and boxed characters in the text. I guess many players still don’t know how to operate it. The following editor will bring you the method of setting the font of the jojplay simulator. introduce. How to set the joiplay simulator font 1. First open the joiplay simulator, click on the settings (three dots) in the upper right corner, and find it. 2. In the RPGMSettings column, click to select the CustomFont custom font in the third row. 3. Select the font file and click OK. Be careful not to click the "Save" icon in the lower right corner, otherwise the default settings will be restored. 4. Recommended Founder and Quasi-Yuan Simplified Chinese (already in the folders of the games Fuxing and Rebirth). joi
